How can I help you?
GettingStarted
This section discloses the details on how to render and configure DateTimePicker component in a ReactJS application.
Create a DateTimePicker
Create an HTML page and refer the neccessary script and CSS dependency files in your application with the help of given getting started documentation.
With ReactJS, the components can be initialized in two ways.
- Using jsx Template
- Without using jsx Template
Using jsx Template
You can render EJ components by using JSX template, wherein this JSX file will be converted to its equivalent JS file.
- Create a div element in the HTML file and give it an ID.
<body>
        <div id="datetimepicker"></div>
</body>- Create a JSX file and initialize DateTimepicker component by using the below code snippet.
ReactDOM.render(
        <EJ.DateTimePicker id="datetimepicker" value={new Date()}>
        </EJ.DateTimePicker>,
        document.getElementById('datetimepicker')
);- Refer the JSX file created in last step in the HTML file as given below.
<body>
            <div id="datetimepicker"></div>

            <!-- Datetimepicker.jsx created in previous step-->
            <script type="text/babel" src="Datetimepicker.jsx">
            </script>
        </body>
Now the jsx file will be compiled into its equivalent Javascript file by means of Babel.
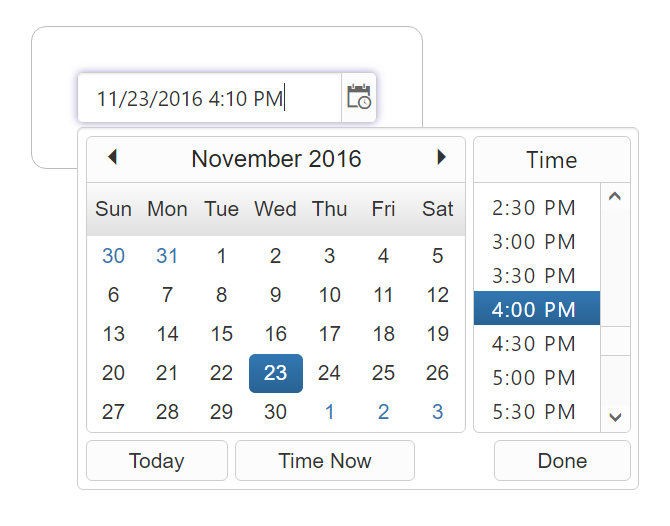
Execute the above code to render Datetimepicker component.
Configuring DateTimePicker
Set minDateTime and maxDateTime
EJ DateTimePicker provides API through which you can set the maximum and minimum allowed date and time values. Min and Max date and time values can be set at initialization as show below.
ReactDOM.render(
        <EJ.DateTimePicker id="datetimepicker" minDateTime={new Date("11/1/2016 10:00 AM")} maxDateTime={new Date("11/27/2016 10:00 PM")}>
        </EJ.DateTimePicker>,
        document.getElementById('datetimepicker')
    );
The following screenshot illustrates the output of above code.
Note: You need to refer browser.min.js file in the script section and specify the type attribute of script tag to text/babel for compiling the JSX template.
Note: You can find the DateTimePicker properties from the API reference document.
Without using jsx Template
The DateTimepicker component can be initialized without using JSX template.
- Create an HTML page and render a <div> element with an ID set to it.
<div id="datetimepicker"></div>- Render the DateTimePicker component by using the below mentioned code snippet.
ReactDOM.render(
React.createElement(EJ.DateTimePicker, {
id: "datetimepicker-0",
value: new Date()
}
),
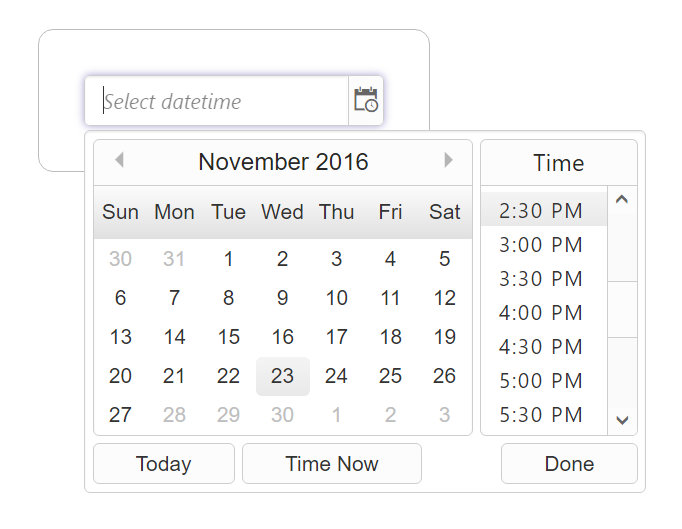
document.getElementById('datetimepicker')Run the above code snippet to get the following output.
Configuring DateTimePicker
Set minDateTime and maxDateTime
EJ DateTimePicker provides API through which you can set the maximum and minimum allowed date and time values. Min and Max date and time values can be set at initialization as show below.
ReactDOM.render(
                React.createElement(EJ.DateTimePicker, {
                    id: "datetimepicker-0",
                    minDateTime: new Date("11/1/2016 10:00 AM"),
                    maxDateTime: new Date("11/27/2016 10:00 PM")
                }
            ),
            document.getElementById('datetimepicker')
            );
The following screenshot illustrates the output of above code.