Sub Gauges
12 May 20176 minutes to read
A Circular Gauge containing another circular gauge is said to be Sub Gauges. In order to make a sample like watch that has second gauge, minute gauge and hour gauge, sub gauges are used.
Adding SubGauges
Sub gauge collection is directly added to the scale object. Refer the following code example to add custom sub gauge collection in a Gauge control.
<div id="CircularGauge1"></div>var scales: [{ showSubGauges: true,
subGauges:[{
gaugeID: "Gauge1"
}]
}];
ReactDOM.render(
<EJ.CircularGauge id="default" scales={scales}
>
</EJ.CircularGauge>,
document.getElementById('CircularGauge1')
);Basic Customization
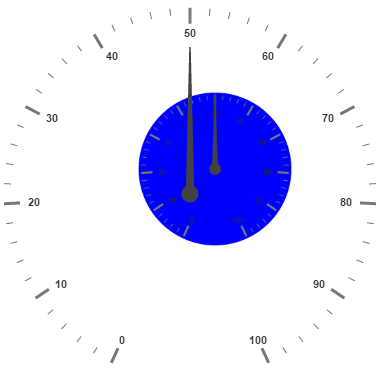
Basic attributes such as height and width property are used to set height and width of the sub gauge. You can easily position the gauge in another gauge using the position object and by giving the X and Y Coordinates value. controlID attribute is used to specify the sub gauge ID.
<div id=" SubGauge1"></div>
<div id="CircularGauge1"> </div>"use strict";
var scales= [{radius:190,
subGauges:[{
//For setting sub gauge control ID
controlID: "SubGauge1",
//For setting sub gauge height
height:250,
//For setting sub gauge width
width: 250,
//For setting sub gauge position
position: { x: 150, y: 100 }
}]
}]
var scales1=[{
radius: 110,
}]
ReactDOM.render(
<EJ.CircularGauge id="default" radius={100} value={55} backgroundColor="transparent" scales={scales}
>
</EJ.CircularGauge>,
document.getElementById('CircularGauge1')
);
ReactDOM.render(
<EJ.CircularGauge id="default2" scales={scales1} backgroundColor="Blue" value={50} radius={110}
>
</EJ.CircularGauge>,
document.getElementById('SubGauge1')
);Execute the above code to render the following output.

Multiple SubGauges
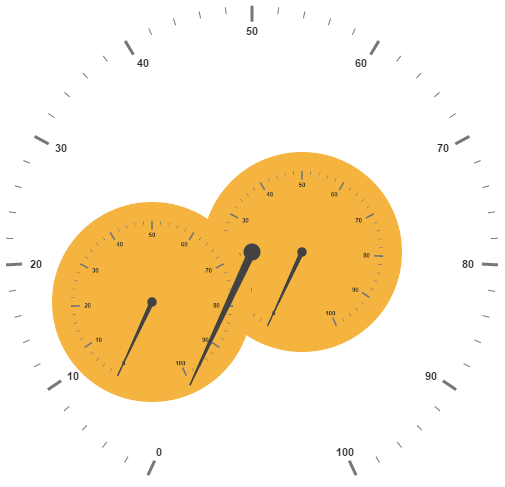
You can set multiple sub gauges in a single Circular Gauge by adding an array of sub gauge objects. Refer the following code example for multiple sub gauges functionality.
<div id="CircularGauge1"></div>
<div id=" SubGauge1"> </div>
<div id=" SubGauge2"> </div>"use strict";
var scales= [{
radius:250,
subGauges:[
//Sub gauge1
{
controlID: "SubGauge1",
height:200,
width: 200,
position: { x: 200, y: 150 }
},
//Sub gauge2
{
controlID: "SubGauge2",
height: 200,
width: 200,
position: { x: 50, y: 200 }
}]
}]
var scales1=[{
radius: 150
}]
var scales2=[{
radius: 150
}]
ReactDOM.render(
<EJ.CircularGauge id="default" radius={100} value={55} backgroundColor="transparent" scales={scales}
>
</EJ.CircularGauge>,
document.getElementById('CircularGauge1')
);
ReactDOM.render(
<EJ.CircularGauge id="default2" scales={scales1} backgroundColor="#f5b43f"
>
</EJ.CircularGauge>,
document.getElementById('SubGauge1')
);
ReactDOM.render(
<EJ.CircularGauge id="default3" scales={scales3} backgroundColor="#f5b43f"
>
</EJ.CircularGauge>,
document.getElementById('SubGauge2')
);Execute the above code to render the following output.
