Getting started
6 Jun 20237 minutes to read
Preparing HTML document
The Tooltip control has the following list of external JavaScript dependencies.
-
jQuery 1.7.1 and later versions
-
jQuery.easing - to support animation effects in the components
Refer to the internal dependencies in the following table.
| File | Description/Usage |
|---|---|
| ej.core.min.js | It is referred always before using all the JS controls. |
| ej.tooltip.min.js | The Tooltip's main file. |
To get started, you can use the ej.web.all.min.js file that encapsulates all the ej controls and frameworks in one single file.
You can create a PHP Project and add necessary scripts and styles with the help of the given PHP Getting Started Documentation.
Create a first PHP file in Xampp and name it appropriately with .php extension and also place it under the newly created sample folder. For example, say Index.php with the initial code as shown below -
Refer the required scripts and CSS files in your PHP page as mentioned below in order to render the Tooltip control -
<!DOCTYPE html>
    <html>
        <head>
                <title>Getting Started - Tooltip</title>
                <link href="http://cdn.syncfusion.com/32.1.19/js/web/flat-azure/ej.web.all.min.css" rel="stylesheet" />
                <link href="http://cdn.syncfusion.com/32.1.19/js/web/responsive-css/ej.responsive.css" rel="stylesheet" />
                <script src="http://cdn.syncfusion.com/js/assets/external/jquery-3.0.0.min.js"></script>
                <script src="http://cdn.syncfusion.com/js/assets/external/jsrender.min.js"></script>
                <script src="http://cdn.syncfusion.com/32.1.19/js/web/ej.web.all.min.js"></script>
        </head>
        <body>
           <?php require_once 'EJ\AutoLoad.php'; ?>
        </body>
    </html>
For themes, you can use the ej.web.all.min.css CDN link from the code example given. To add the themes in your application, please refer to this link.
Create a Tooltip
The Tooltip can be created from any HTML element with the HTML id attribute and pre-defined options set to it. To create the Tooltip, you should call the ejTooltip jQuery plug-in function with the options as parameter. Refer to the following code example.
<div class="img" id="sample">
        <img class='ctrImg' src='http://js.syncfusion.com/demos/web/images/tooltip/template-05.png' />
        <div class='desc'>Delphi Succinctly</div>
    </div>
    <?php
    $tooltip1 =new EJ\Tooltip('sample');
    $pos1 = new EJ\Tooltip\Position();
    $tar1 = new EJ\Tooltip\Target();
    $stem1 = new EJ\Tooltip\Stem();
    $tar1->horizontal('top')->vertical('top');
    $stem1->horizontal('top')->vertical('top');
    $pos1->target($tar1)->stem($stem1);
    echo $tooltip1->content('Learn the fundamentals of Delphi to build a variety of solutions for many devices and platforms.')->render();
    ?>
Apply the following style sheet
<style>
      div.img {
        border: 1px solid #ccc;
        width: 159px;
        height: 213px;
        left: 35%;
        position: relative;
        top: 20%;
      }
      div.img img {
        width: 159px;
        height: 179px;
      }
      div.desc {
        padding: 8px;
        text-align: center;
      }
    </style>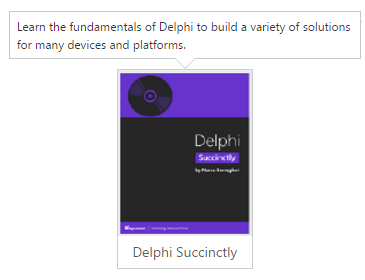
Setting Dimensions
Tooltip dimensions can be set using width and height API.
<div class="img" id="sample">
        <img class='ctrImg' src='http://js.syncfusion.com/demos/web/images/tooltip/template-05.png' />
        <div class='desc'>Delphi Succinctly</div>
     </div>
     <?php
       $tooltip1 =new EJ\Tooltip('sample');
       $pos1 = new EJ\Tooltip\Position();
       $tar1 = new EJ\Tooltip\Target();
       $stem1 = new EJ\Tooltip\Stem();
       $tar1->horizontal('top')->vertical('top');
       $stem1->horizontal('top')->vertical('top');
       $pos1->target($tar1)->stem($stem1);
      echo $tooltip1->width('200px')->height('100px')->content('Learn the fundamentals of Delphi to build a variety of solutions for many devices and platforms.')->render();
    ?>
Tooltip Appearance
You can configure the appearance of the Tooltip with the title, close button and call out as your application requires.
<div class="img" id="sample">
        <img class='ctrImg' src='http://js.syncfusion.com/demos/web/images/tooltip/template-05.png' />
        <div class='desc'>Delphi Succinctly</div>
     </div>
     <?php
      $tooltip1 =new EJ\Tooltip('sample');
      $pos1 = new EJ\Tooltip\Position();
      $tar1 = new EJ\Tooltip\Target();
      $stem1 = new EJ\Tooltip\Stem();
      $tar1->horizontal('top')->vertical('top');
      $stem1->horizontal('top')->vertical('top');
      $pos1->target($tar1)->stem($stem1);
      echo $tooltip1->width('200px')->height('100px')->content('Learn the fundamentals of Delphi to build a variety of solutions for many devices and platforms.')->title('Delphi Succintly')->closeMode('sticky')->isBalloon(false)->render();
    ?>
Apply the following styles to show the Tooltip.
<style>
      div.img {
        border: 1px solid #ccc;
        float: left;
        box-sizing: border-box;
        height: 200px;
        width: 146px;
      }
     div.img img{
        width: 100%;
        height: 166px;
     }
     div.desc {
        padding: 6px;
        text-align: center;
     }
    </style>