How can I help you?
Getting started with PHP SpreadSheet
This section explains you the steps required to populate the Spreadsheet with data, format, and export it as excel file. This section covers only the minimal features that you need to know to get started with the Spreadsheet.
Create a PHP Project and add necessary scripts and styles with the help of the given PHP Getting Started Documentation.
Create Spreadsheet
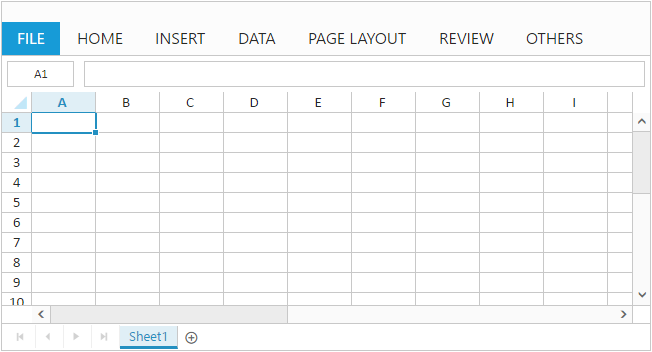
Create a Spreadsheet control by instantiating the PHP wrapper class available in EJ namespace as shown below.
<?php
        $spreadsheet = new EJ\Spreadsheet("Spreadsheet");
        echo $spreadsheet ->render();
    ?>
The following screenshot illustrates the output of above code.
Configuring Spreadsheet
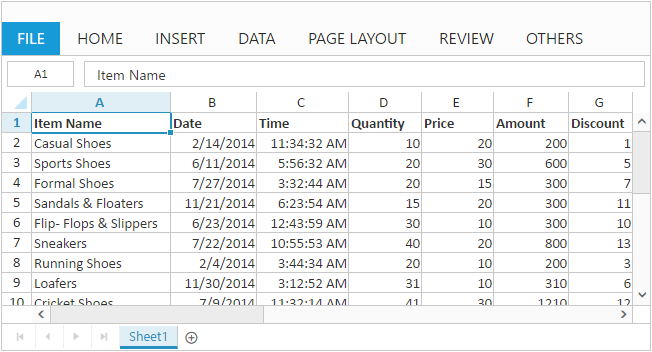
Populate Spreadsheet with data
Now, this section explains how to populate JSON data to the Spreadsheet. Refer the below code snippet.
//   "the datasource "Data.json" is referred from 'http://php.syncfusion.com/Spreadsheet/Data.json'"
    <?php
      $Json = json_decode(file_get_contents("Data.json"), true);
      $rangeSetting = new EJ\Spreadsheet\RangeSetting();
      $rangeSetting->dataSource($Json);
      $rangeSettings = array($rangeSetting);
      $sheet = new EJ\Spreadsheet\Sheet();
      $sheet->rangeSettings($rangeSettings);
      $sheets = array($sheet);
      $spreadsheet =  new EJ\Spreadsheet('Spreadsheet');

      echo $spreadsheet -> sheets($sheets)->render();
    ?>
NOTE
For more details about
data bindingrefer followinglink
Apply Conditional Formatting
Conditional formatting helps you to apply formats to a cell or range with certain color based on the cells values. You can use allowConditionalFormats property to enable/disable Conditional formats.
To apply conditional formats for a range use setCFRule method. The following code example illustrates this,
<?php
      $Json = json_decode(file_get_contents("Data.json"), true);
      $rangeSetting = new EJ\Spreadsheet\RangeSetting();
      $rangeSetting->dataSource($Json);
      $rangeSettings = array($rangeSetting);
      $sheet = new EJ\Spreadsheet\Sheet();
      $sheet->rangeSettings($rangeSettings);
      $sheets = array($sheet);
      $spreadsheet =  new EJ\Spreadsheet('Spreadsheet');

      echo $spreadsheet -> sheets($sheets)->loadComplete('loadComplete')->render();
    ?>
    <script>
    function loadComplete() {
       this.XLCFormat.setCFRule({ "action": "greaterthan", "inputs": ["10"], "color": "redft", "range": "D3:D8" });
    }
    </script>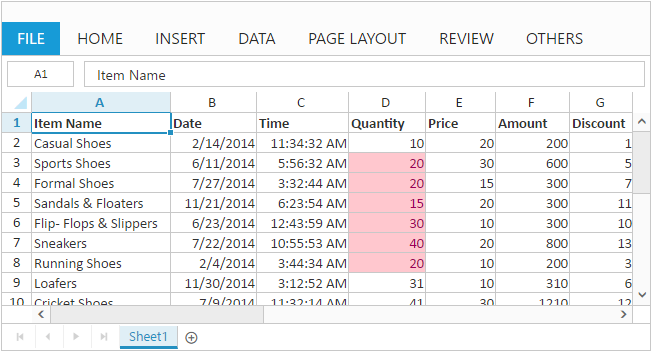
NOTE
For more details about
Conditional Formattingrefer followinglink
Export Spreadsheet as Excel File
The Spreadsheet can save its data, style, format into an excel file. To enable save option in Spreadsheet set allowExporting option in exportSettings as true. Since Spreadsheet uses server side helper to save documents set excelUrl in exportSettings option. The following code example illustrates this,
<?php
      $Json = json_decode(file_get_contents("Data.json"), true);
      $rangeSetting = new EJ\Spreadsheet\RangeSetting();
      $rangeSetting->dataSource($Json);
      $rangeSettings = array($rangeSetting);
      $sheet = new EJ\Spreadsheet\Sheet();
      $sheet->rangeSettings($rangeSettings);
      $sheets = array($sheet);
      $spreadsheet =  new EJ\Spreadsheet('Spreadsheet');
      $exportSetting = new EJ\Spreadsheet\ExportSetting();
	  $exportSetting->excelUrl('http://js.syncfusion.com/demos/ejservices/api/JSXLExport/ExportToExcel')->csvUrl('http://js.syncfusion.com/demos/ejservices/api/JSXLExport/ExportToCsv')->pdfUrl('http://js.syncfusion.com/demos/ejservices/api/JSXLExport/ExportToPdf');

      echo $spreadsheet -> sheets($sheets)->exportSettings($exportSetting)->render();
    ?>
Use shortcut Ctrl + S to save Spreadsheet as excel file.
NOTE