Getting Started
26 Oct 20167 minutes to read
This section helps to get started of the Splitter control in a PHP application.
Create a Splitter
The following steps guide you to add a Splitter control.
Refer the common PHP Getting Started Documentation to create a PHP application and add necessary scripts and styles for rendering Essential PHP controls.
Create a simple Splitter object by referring the below code, EJ\Splitter object is created by using ‘new’ keyword. Define its properties and use render() method for rendering the control. We need to call the rendering element in echo statement. Here templateStart() is used to add content in the splitter panes and templateEnd() is act as closing method of templateStart. The content given in between these will be taken as pane content.
<div class="cols-sample-area">
        <?php
        require_once '../EJ\AutoLoad.php';
        $split=new \EJ\Splitter("outtersplitter");
        $pane1=new \EJ\Splitter\SplitPane();
        $pane1->paneSize("150")->templateStart();
        ?>
        <div>
            <div class="cont">
            <h3 class="h3">PHP</h3>
            </div>
            <!-- Add treeview elements here-->
        </div>
        <?php
        $pane1->templateEnd();

        $pane2=new \EJ\Splitter\SplitPane();
        $pane2->templateStart();
        ?>
        <div>
        <div class="cont">
            <div class="_content">
                Select any product from the tree to show the description.
            </div>
            <div class="mobile spe">
                <h3>Mobile</h3>
                <img src="content/images/splitter/mobile.jpeg" />
            </div>
            <div class="harddisk spe">
                <h3>Harddisk</h3>
                <img src="content/images/splitter/harddisk.jpg" />
            </div>
            <div class="logo spe">
                <h3>Logo</h3>
                <img src="content/images/splitter/logo.png" />
            </div>
        </div>
        </div>
        <?php
        $pane2->templateEnd();
        $pane3=new \EJ\Splitter\SplitPane();
        $split->addItem($pane1,$pane2);
        $prop=array(array("paneSize"=>"250"),array ("collapsible"=>false));
        echo $split->height("300px")->width("500px")->properties($prop)->render();
        ?>
    </div>
Add the following styles to show the Splitter control in horizontal order.
.cont #treeView_Container {
                    margin-bottom: 0;
                    border: none;
                }

        .h3 {
                font-size: 14px;
                margin: 0;
            }

        .spe {
                display: none;
            }
Configure Treeview
For adding Fields in Treeview control, create an object for EJ\TreeView\Field(). Add the following code in PHP file to configure Tree View.
<?php
    $localData = array(
            array("id"=>1, "name"=>"Mobile", "hasChild"=>true ),
            array("id"=>"mobile", "pid"=>1, "name"=>"Galaxy" ),
            array("id"=>7, "name"=>"Harddisk", "hasChild"=>true),
            array("id"=>"harddisk", "pid"=>7, "name"=>"Segate"),
            array("id"=>9, "name"=>"Logo", "hasChild"=>true),
            array("id"=>"logo", "pid"=>9, "name"=>"Amazon"));
    $fields = new EJ\TreeView\Field();
    $fields->id("id")->text("name")->parentId("pid")->hasChild("hasChild")->dataSource($localData);
    $tree =new EJ\TreeView("tree");
    echo $tree->fields($fields)->nodeSelect("treeClicked")->render();
    ?>
Set Actions
Add the following code example in the view page to set the action to view the image.
function treeClicked(sender, args) {
if (sender.currentElement.has("ul").length<=0) {
var content = $('.' + sender.currentElement[0].id).html();
$('._content').html(content);
}
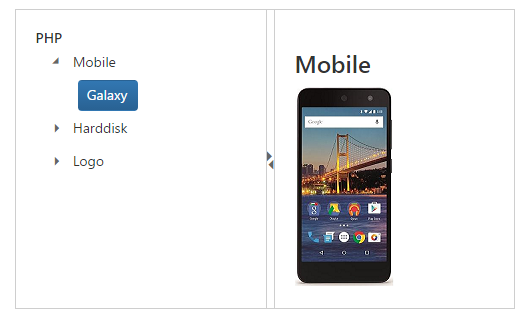
}Run the above code and you will get output like this.

Note: You can find the Splitter properties from the API reference document