Getting Started
18 Oct 20165 minutes to read
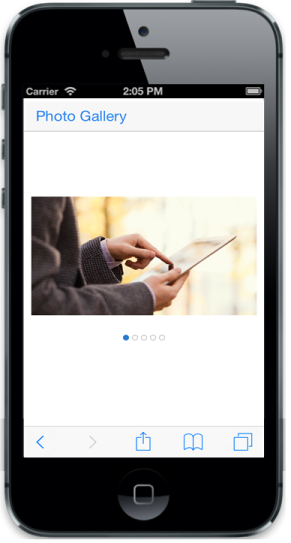
In this section, you can learn how to create Rotator for your mobile app.

Create the required layout
Rotator control is rendered based on the default values for all the properties. You can easily customize Rotator control by changing its properties according to your application requirement. The following steps guide you to creating a Photo Gallery App using Rotator.
Create an HTML file and paste the following template to it for Photo Gallery App creation.
<!DOCTYPE html>
<html>
<head>
    <title>Rotator</title>
<link href="http://cdn.syncfusion.com/25.1.35/js/mobile/ej.mobile.all.min.css" rel="stylesheet"/>
<script src="http://cdn.syncfusion.com/js/assets/external/jquery-1.10.2.min.js"></script>
<script src="http://cdn.syncfusion.com/js/assets/external/jsrender.min.js"></script>
<script src="http://cdn.syncfusion.com/js/assets/external/jquery.globalize.min.js"></script>
<script src="http://cdn.syncfusion.com/25.1.35/js/mobile/ej.mobile.all.min.js"></script>
</head>
<body>
    <div id="page">
        <!-- header control -->
       <div id="header" data-role="ejmnavigationbar" data-ej-title="Photo Gallery" data-ej-isrelative="true">
    </div>
<div id="content">
            <div>
                <!--Add Rotator Element here-->
            </div>
        </div>
    </div>
</body>
</html>
Create the Rotator control
To render the Rotator control, set “data-role” attribute to “ejmrotator” to a div element. Also set “data-ej-targetid” attribute with the id of the target element that contains the HTML template for each item. Each first level child div element of the target element acts as an item of Rotator.
<div id="rotator" data-role="ejmrotator" data-ej-targetid="rotatorcontent">
 </div>

<div id="rotatorcontent">
        <div><!—  child 1 -->
            <div class="photo photo1">
            </div>
        </div><div><!—  child 2 -->
            <div class="photo photo2">
            </div>
        </div><div><!—  child 3 -->
            <div class="photo photo3">
            </div>
        </div><div><!—  child 4 -->
            <div class="photo photo4">
            </div>
        </div><div><!—  child 5 -->
            <div class="photo photo5">
            </div>
        </div>
    </div>
Use the following styles to style the Rotator items.
.photo {
            background-position: center center;
            background-repeat: no-repeat;
            height: 100%;
            width: 100%;
            background-size:contain;
        }

        .photo1 {
            background-image: url(http://js.syncfusion.com/UG/Mobile/Content/rotator/tablet.jpg);
        }

        .photo2 {
            background-image: url(http://js.syncfusion.com/UG/Mobile/Content/rotator/rose.jpg);
        }

        .photo3 {
            background-image: url(http://js.syncfusion.com/UG/Mobile/Content/rotator/green.jpg);
        }

        .photo4 {
            background-image: url(http://js.syncfusion.com/UG/Mobile/Content/rotator/nature.jpg);
        }

        .photo5 {
            background-image: url(http://js.syncfusion.com/UG/Mobile/Content/rotator/snowfall.jpg);
        }
     #content{
       height:500px;
       width:300px;
       margin:auto;
        }