How can I help you?
Getting Started with JavaScript Button Control
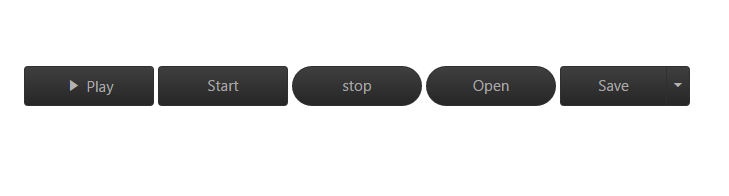
This section explains you briefly on how to create a Button in your application with JavaScript. Essential JavaScript Button helps to display a Button widget within a web page and allows you to Click, Toggle Click, Reset, and Submit. The following example illustrates how to customize Button control in a Media Player and Office Ribbon Application.
The following screenshot illustrates the functionality of a Button control in Media Player and Office Ribbon Application.
Create Button Widget
Essential JavaScript Button control has different functionalities such as Display as Only Image Content or Image Content with Text.
Create an HTML file and add the following code template to the HTML file.
<!DOCTYPE html>
<html>
   <head>
      <meta name="viewport" content="width=device-width, initial-scale=1.0" charset="utf-8" />
      <!-- Style sheet for default theme (flat azure) -->
      <link href="http://cdn.syncfusion.com/33.1.44/js/web/gradient-saffron-dark/ej.web.all.min.css" rel="stylesheet" />
      <!--Scripts-->
      <script src="http://cdn.syncfusion.com/js/assets/external/jquery-1.10.2.min.js"></script>
      <script src="http://cdn.syncfusion.com/33.1.44/js/web/ej.web.all.min.js"></script>
      <!--Add custom scripts here -->
   </head>
   <body>
      <!--- Add button element Here  --->
   </body>
</html>
Add <Button> element to create a Button control.
<div class="case1">
    <table>
        <tr>
            <td>
                <input type="checkbox" id="play" />
            </td>
            <td>
                <button id="start">Start</button>
            </td>
            <td>
                <button id="stop">stop</button>
            </td>
            <td>
                <button id="open">Open</button>
            </td>
            <td>
                <button id="save">Save</button>
                <ul id="menu1">
                    <li><span>Open...</span></li>
                    <li><span>Save</span></li>
                    <li><span>Delete</span></li>
                </ul>
            </td>
        </tr>
    </table>
</div>
Initialize Button in the script with properties.
$(function () {

        $("#play").ejToggleButton({
            showRoundedCorner: true,
            defaultText: "Play",
            activeText: "Pause",
            size: "large",
            click: "playpause",
            contentType: "textandimage",
            defaultPrefixIcon: "e-icon e-mediaplay",
            activePrefixIcon: "e-icon e-mediapause",
        });


        $("#start").ejButton({
            size: "large",
            showRoundedCorner: true,
            click: "start",

        });

        $("#stop").ejButton({
            showRoundedCorner: true,
            size: "large",
            click: "stop",
        });

        $("#open").ejButton({
            showRoundedCorner: true,
            size: "large",

        });
        $("#save").ejSplitButton({
            size: "large",
            showRoundedCorner: true,
            targetID: "menu1",
            create: "spltbtnLoad",

        });
    });
Add the following styles to show the Button control in the center of a webpage.
<style>
    #play, #pause, #stop, #open, #bold, #italic, #underline {
        border-radius: 100px; /* for rounded corners*/
    }

    ul li span {
        color: white;
    }

    .case1 {
        margin: 100px;
    }

    .officeribben {
        margin: 100px;
    }

    .sample {
        margin: 100px;
    }

    .audiodiv {
        margin: 100px;
    }
</style>
Create Multimedia Player
Add the following code inside the <body> tag.
<div class="audiodiv">
    <audio controls id="demo">
        <source src="song.ogg" type="audio/ogg"/>
        <source src="song.mp3" type="audio/mpeg"/>
    </audio>
</div>
<div class="case1">
    <table>
        <tr>
            <td>
                <input type="checkbox" id="play" />
            </td>
            <td>
                <button id="start">Start</button>
            </td>
            <td>
                <button id="stop">stop</button>
            </td>
            <td>
                <button id="open">Open</button>
            </td>
            <td>
                <button id="save">Save</button>
                <ul id="menu1">
                    <li><span>Open...</span></li>
                    <li><span>Save</span></li>
                    <li><span>Delete</span></li>
                </ul>
            </td>
        </tr>
    </table>
</div>
Add the following code in the <script> tag.
var v = document.getElementsByTagName("audio")[0];
    v.pause();
    $(function () {

        $("#play").ejToggleButton({
            showRoundedCorner: true,
            defaultText: "Play",
            activeText: "Pause",
            size: "large",
            click: "playpause",
            contentType: "textandimage",
            defaultPrefixIcon: "e-icon e-mediaplay",
            activePrefixIcon: "e-icon e-mediapause",
        });


        $("#start").ejButton({
            size: "large",
            showRoundedCorner: true,
            click: "start",

        });

        $("#stop").ejButton({
            showRoundedCorner: true,
            size: "large",
            click: "stop",
        });

        $("#open").ejButton({
            showRoundedCorner: true,
            size: "large",

        });
        $("#save").ejSplitButton({
            size: "large",
            showRoundedCorner: true,
            targetID: "menu1",
            create: "spltbtnLoad",
        });
    });
Add the following function in <script> tag.
function start(e) {
v.play();// play the current song
}
function stop(e) {
v.pause();// pause the current song
}
function playpause(e) {
if (e.isChecked) {
v.play();
}
else {
v.pause();
}
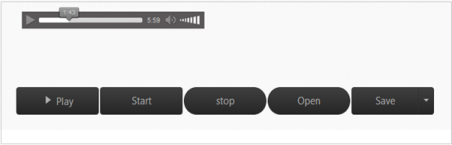
}The following screenshot displays the output.
Create Office Ribbon Control
In a real-time scenario, MS Office Bold and Italic options work as Toggle Button and Underline option works as a Split Button. Here, you can learn how to use Button control feature using Office Ribbon options.
Add <Button> element using the following code example.
<div class="case1">
        <table>
            <tr>
                <td>
                    <input type="checkbox" id="bold" />
                </td>
                <td>
                    <button id="italic">italic</button>
                </td>
                <td>
                    <button id="Underline"> Underline</button>
                    <ul id="menu11">
                        <li><span>Dotted Line</span></li>
                        <li><span>solid</span></li>
                        <li><span>dashed</span></li>
                    </ul>
                </td>
            </tr>
        </table>
    </div>
Initialize <Button> script with required properties.
$(function () {
        $("#bold").ejToggleButton({
            defaultText: "Bold",
            activeText: "Bold",
            showRoundedCorner: true,
            size: "small",
            click: "boldsetunset",
        });

        $("#italic").ejButton({
            showRoundedCorner: true,
            size: "small",
            click: "italicsetunset",
        });

        $("#Underline").ejSplitButton({
            size: "small",
            showRoundedCorner: true,
            targetID: "menu11",
            create: "spltbtnLoad",
            click: "underlinesetunset",
        });
    });
Add Function Definition from click event to Button function.
function boldsetunset(e) {
if (e.isChecked) {
$(".sample span").wrap("<b></b>");// add the bold tag to span
}
else {
$(".sample span").unwrap("<b></b>");// remove the bold tag to span
}
}
function italicsetunset(e) {
if ($(".sample span").parents().is("i")) {
$(".sample span").unwrap("<i></i>");// remove the italic tag to span
}
else {
$(".sample span").wrap("<i></i>");// remove the italic tag to span
}
}
function underlinesetunset(e) {
if ($(".sample span").parents().is("u")) {
$(".sample span").unwrap("<u></u>");// remove the italic tag to span
} else {
$(".sample span").wrap("<u></u>");// remove the italic tag to span
}
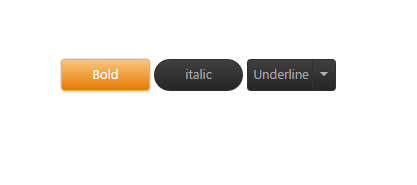
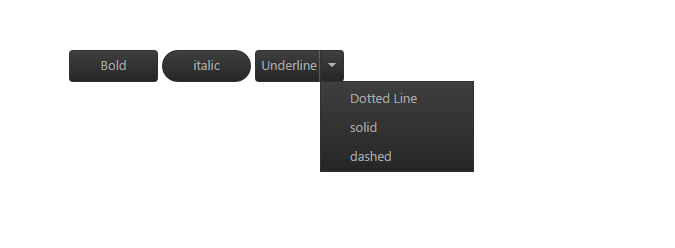
}The following screenshot displays Office Ribbon Application.
The following screenshot displays Office Ribbon Bold Option.