How can I help you?
Perform OCR in Blazor
31 Mar 202622 minutes to read
The Syncfusion® .NET OCR library is used to extract text from scanned PDFs and images in the Blazor application with the help of Google’s Tesseract Optical Character Recognition engine.
Steps to perform OCR on the entire PDF document in the Blazor application
Prerequisites:
- Install .NET SDK: Ensure that you have the .NET SDK installed on your system. You can download it from the .NET Downloads page.
- Install Visual Studio: Download and install Visual Studio Code from the official website.
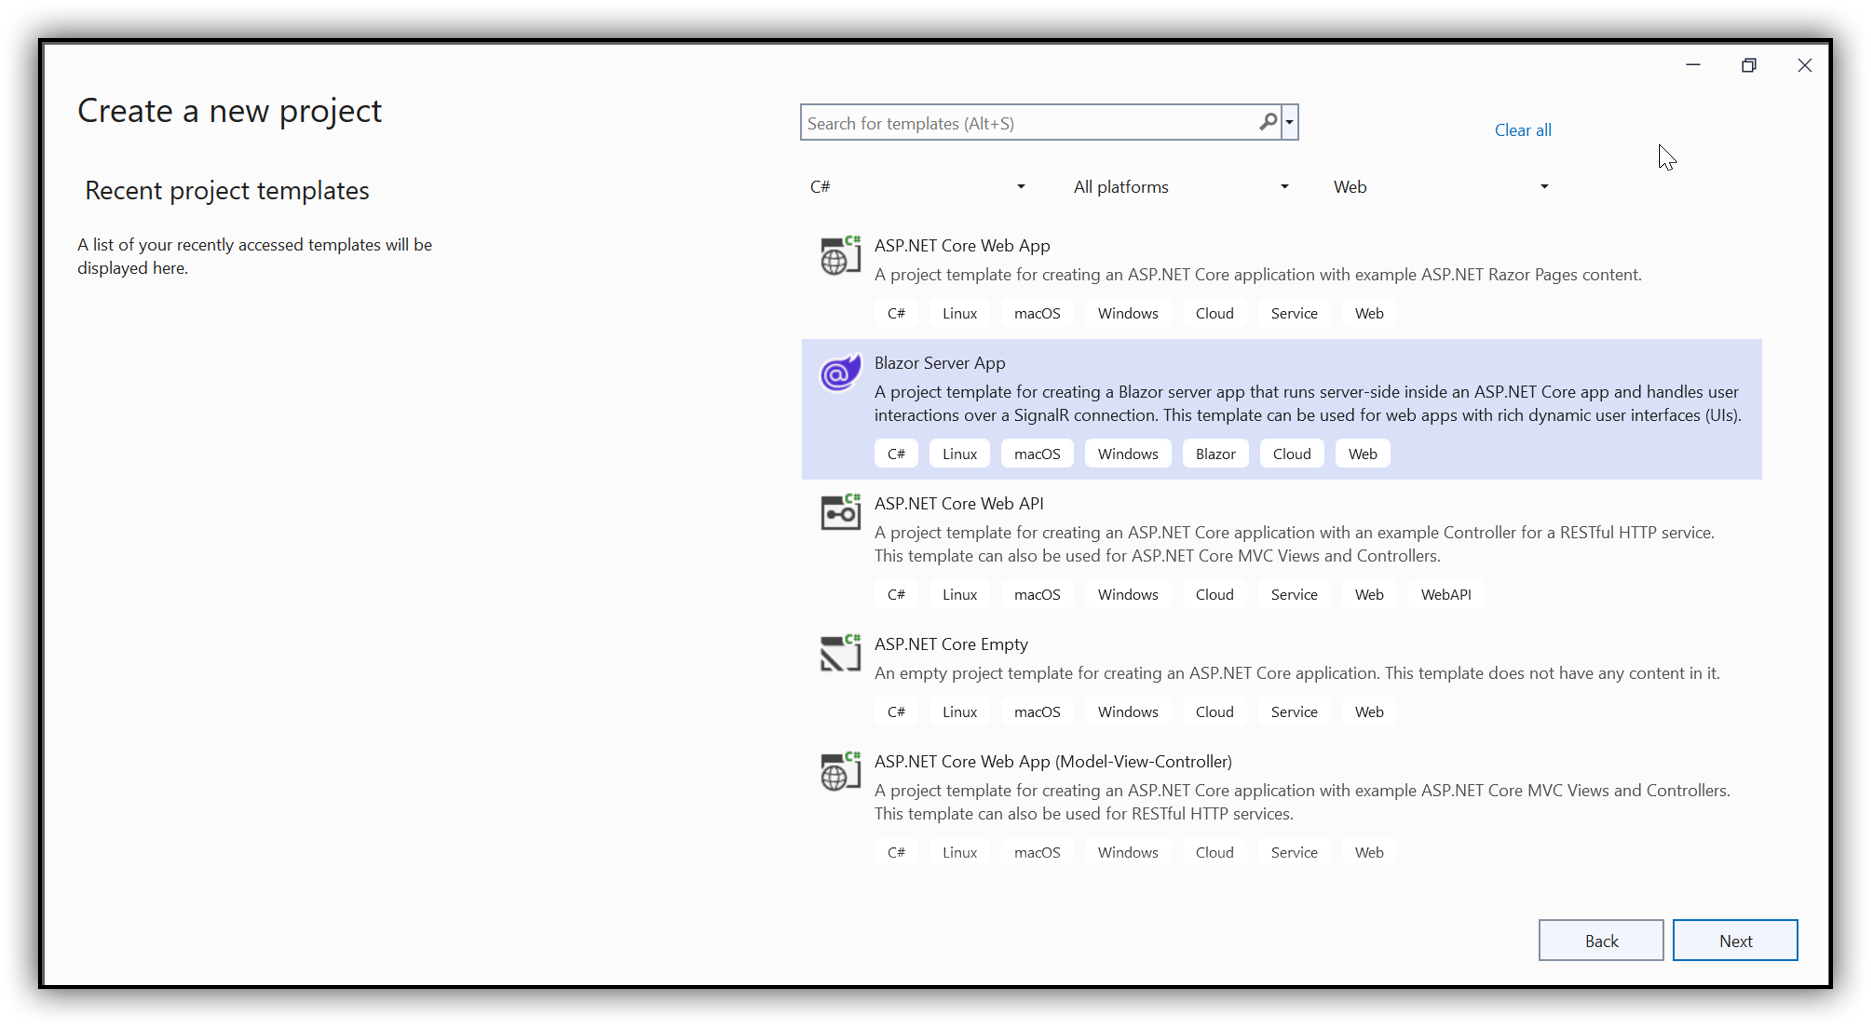
Step 1: Create a new C# Blazor Server application project. Select Blazor App from the template and click Next.
Step 2: In the project configuration window, name your project and click Create.

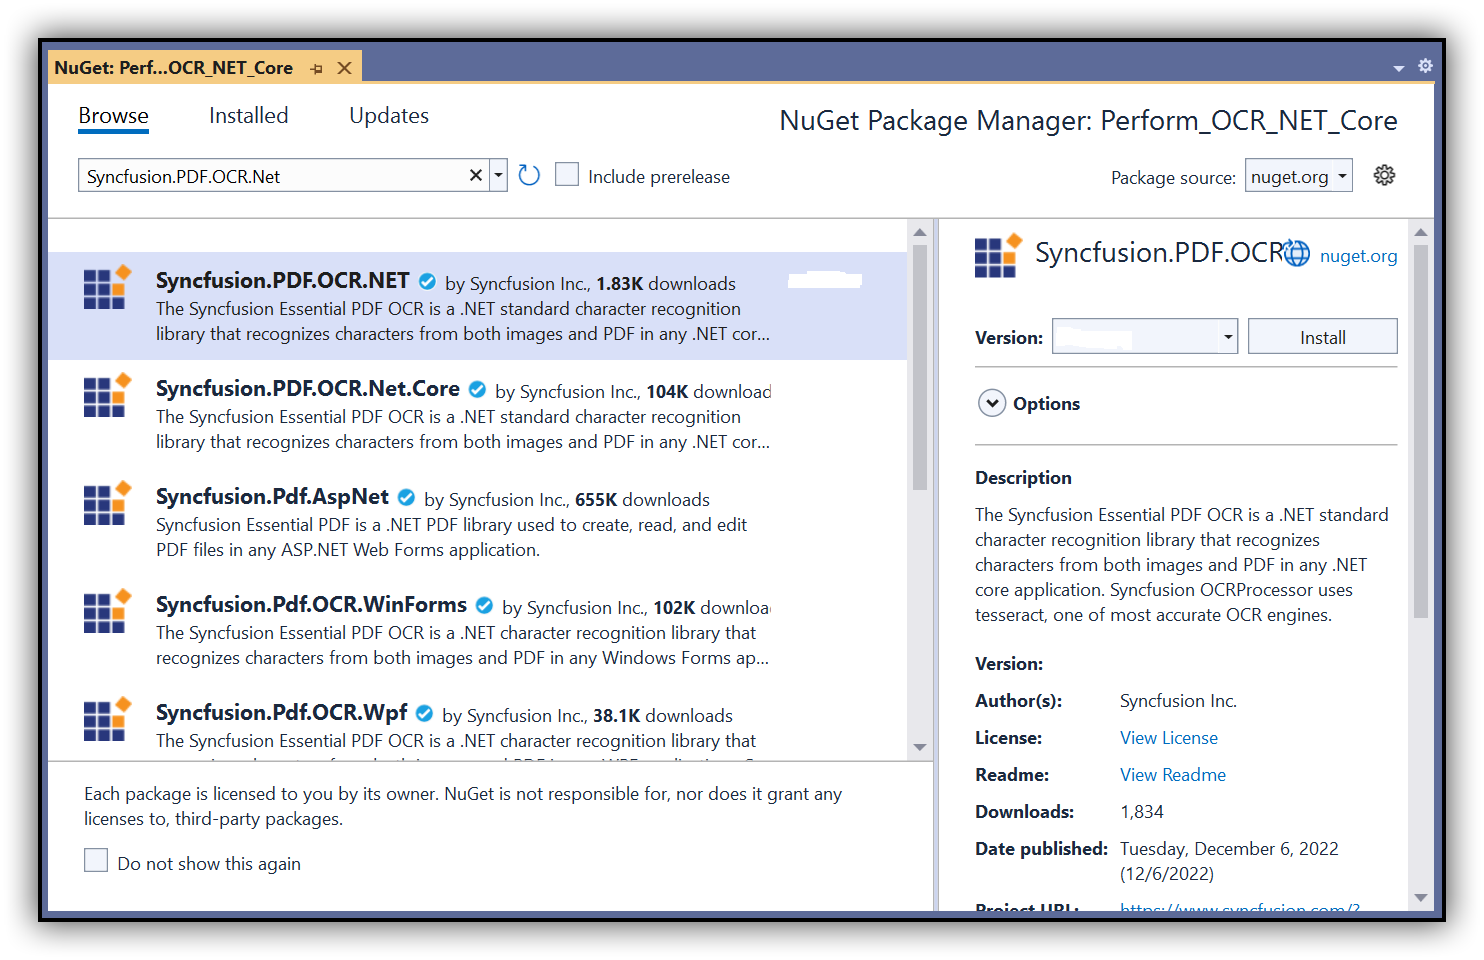
Step 3: Install the Syncfusion.PDF.OCR.Net.Core NuGet package as a reference to your .NET Standard applications from NuGet.org.
NOTE
- Beginning from version 21.1.x, the default configuration includes the addition of the TesseractBinaries and Tesseract language data folder paths, eliminating the requirement to explicitly provide these paths.
- Starting with v16.2.0.x, if you reference Syncfusion® assemblies from trial setup or from the NuGet feed, you also have to add “Syncfusion.Licensing” assembly reference and include a license key in your projects. Please refer to this link to know about registering Syncfusion® license key in your application to use our components.
Step 4: Create a new class file named ExportService under the Data folder and include the following namespaces in the file.
using Syncfusion.OCRProcessor;
using Syncfusion.Pdf.Parsing;
using System.IO;
Step 5: Use the following code sample to perform OCR on the entire PDF document using PerformOCR method of the OCRProcessor class in the ExportService file.
public MemoryStream CreatePdf()
{
    //Initialize the OCR processor.
    using (OCRProcessor processor = new OCRProcessor("Tesseractbinaries/Windows"))
    {
        FileStream fileStream = new FileStream("Input.pdf", FileMode.Open, FileAccess.Read);
        //Load a PDF document.
        PdfLoadedDocument lDoc = new PdfLoadedDocument(fileStream);
        //Set OCR language to process.
        processor.Settings.Language = Languages.English;
        //Process OCR by providing the PDF document.
        processor.PerformOCR(lDoc, "tessdata/");
        //Create memory stream.
        MemoryStream stream = new MemoryStream();
        //Save the document to memory stream.
        lDoc.Save(stream);
        return stream;
    }
}
Step 6: Register your service in the ConfigureServices method available in the Startup.cs class as follows.
public void ConfigureServices(IServiceCollection services)
{
    services.AddRazorPages();
    services.AddServerSideBlazor();
    services.AddSingleton<WeatherForecastService>();
    services.AddSingleton<ExportService>();
}
Step 7: Inject ExportService into FetchData.razor using the following code.
@inject ExportService exportService
@inject Microsoft.JSInterop.IJSRuntime JS
@using  System.IO;
Step 8: Create a button in the FetchData.razor using the following code.
<button class="btn btn-primary" @onclick="@PerformOCR">Perform OCR</button>Step 9: Add the PerformOCR method in FetchData.razor page to call the export service.
@functions
{
   protected async Task PerformOCR()
   {
       ExportService exportService = new ExportService();
       using (MemoryStream excelStream = exportService.CreatePdf())
       {
           await JS.SaveAs("Output.pdf", excelStream.ToArray());
       }
   }
}
Step 10: Create a class file with the FileUtil name and add the following code to invoke the JavaScript action to download the file in the browser.
public static class FileUtil
{
    public static ValueTask<object> SaveAs(this IJSRuntime js, string filename, byte[] data)
     => js.InvokeAsync<object>(
         "saveAsFile",
         filename,
         Convert.ToBase64String(data));
}
Step 11: Add the following JavaScript function in the _Host.cshtml available under the Pages folder.
<script type="text/javascript">
    function saveAsFile(filename, bytesBase64) {
        if (navigator.msSaveBlob) {
            //Download document in Edge browser
            var data = window.atob(bytesBase64);
            var bytes = new Uint8Array(data.length);
            for (var i = 0; i < data.length; i++) {
                bytes[i] = data.charCodeAt(i);
            }
            var blob = new Blob([bytes.buffer], { type: "application/octet-stream" });
            navigator.msSaveBlob(blob, filename);
        }
        else {
            var link = document.createElement('a');
            link.download = filename;
            link.href = "data:application/octet-stream;base64," + bytesBase64;
            document.body.appendChild(link); // Needed for Firefox
            link.click();
            document.body.removeChild(link);
        }
    }
</script>
Step 12: Build the project.
Click on Build > Build Solution or press Ctrl + Shift + B to build the project.
Step 13: Run the project.
Click the Start button (green arrow) or press F5 to run the app.
Prerequisites:
- Install .NET SDK: Ensure that you have the .NET SDK installed on your system. You can download it from the .NET Downloads page.
- Install Visual Studio Code: Download and install Visual Studio Code from the official website.
- Install C# Extension for VS Code: Open Visual Studio Code, go to the Extensions view (Ctrl+Shift+X), and search for ‘C#’. Install the official C# extension provided by Microsoft.
Step 1: Open the terminal (Ctrl+` ) and run the following command to create a new Blazor Server application
dotnet new blazorserver -n CreatePdfBlazorServerApp
Step 2: Replace **CreatePdfBlazorServerApp with your desired project name.
Step 3: Navigate to the project directory using the following command
cd CreatePdfBlazorServerApp
Step 4: Use the following command in the terminal to add the Syncfusion.PDF.OCR.Net.Core package to your project.
dotnet add package Syncfusion.PDF.OCR.Net.Core
NOTE
- Beginning from version 21.1.x, the default configuration includes the addition of the TesseractBinaries and Tesseract language data folder paths, eliminating the requirement to explicitly provide these paths.
- Starting with v16.2.0.x, if you reference Syncfusion® assemblies from trial setup or from the NuGet feed, you also have to add “Syncfusion.Licensing” assembly reference and include a license key in your projects. Please refer to this link to know about registering Syncfusion® license key in your application to use our components.
Step 5: Create a new class file named ExportService under the Data folder and include the following namespaces in the file.
using Syncfusion.OCRProcessor;
using Syncfusion.Pdf.Parsing;
using System.IO;
Step 6: Use the following code sample to perform OCR on the entire PDF document using PerformOCR method of the OCRProcessor class in the ExportService file.
public MemoryStream CreatePdf()
{
    //Initialize the OCR processor.
    using (OCRProcessor processor = new OCRProcessor("Tesseractbinaries/Windows"))
    {
        FileStream fileStream = new FileStream("Input.pdf", FileMode.Open, FileAccess.Read);
        //Load a PDF document.
        PdfLoadedDocument lDoc = new PdfLoadedDocument(fileStream);
        //Set OCR language to process.
        processor.Settings.Language = Languages.English;
        //Process OCR by providing the PDF document.
        processor.PerformOCR(lDoc, "tessdata/");
        //Create memory stream.
        MemoryStream stream = new MemoryStream();
        //Save the document to memory stream.
        lDoc.Save(stream);
        return stream;
    }
}
Step 7: Register your service in the ConfigureServices method available in the Startup.cs class as follows.
public void ConfigureServices(IServiceCollection services)
{
    services.AddRazorPages();
    services.AddServerSideBlazor();
    services.AddSingleton<WeatherForecastService>();
    services.AddSingleton<ExportService>();
}
Step 8: Inject ExportService into FetchData.razor using the following code.
@inject ExportService exportService
@inject Microsoft.JSInterop.IJSRuntime JS
@using  System.IO;
Step 9: Create a button in the FetchData.razor using the following code.
<button class="btn btn-primary" @onclick="@PerformOCR">Perform OCR</button>Step 10: Add the PerformOCR method in FetchData.razor page to call the export service.
@functions
{
   protected async Task PerformOCR()
   {
       ExportService exportService = new ExportService();
       using (MemoryStream excelStream = exportService.CreatePdf())
       {
           await JS.SaveAs("Output.pdf", excelStream.ToArray());
       }
   }
}
Step 11: Create a class file with the FileUtil name and add the following code to invoke the JavaScript action to download the file in the browser.
public static class FileUtil
{
    public static ValueTask<object> SaveAs(this IJSRuntime js, string filename, byte[] data)
     => js.InvokeAsync<object>(
         "saveAsFile",
         filename,
         Convert.ToBase64String(data));
}
Step 12: Add the following JavaScript function in the _Host.cshtml available under the Pages folder.
<script type="text/javascript">
    function saveAsFile(filename, bytesBase64) {
        if (navigator.msSaveBlob) {
            //Download document in Edge browser
            var data = window.atob(bytesBase64);
            var bytes = new Uint8Array(data.length);
            for (var i = 0; i < data.length; i++) {
                bytes[i] = data.charCodeAt(i);
            }
            var blob = new Blob([bytes.buffer], { type: "application/octet-stream" });
            navigator.msSaveBlob(blob, filename);
        }
        else {
            var link = document.createElement('a');
            link.download = filename;
            link.href = "data:application/octet-stream;base64," + bytesBase64;
            document.body.appendChild(link); // Needed for Firefox
            link.click();
            document.body.removeChild(link);
        }
    }
</script>
Step 13: Build the project.
Run the following command in terminal to build the project.
dotnet build
Step 14: Run the project.
Run the following command in terminal to build the project.
dotnet run
Prerequisites:
- JetBrains Rider.
- Install .NET 8 SDK or later.
Step 1. Open JetBrains Rider and create a new Blazor server-side app project.
- Launch JetBrains Rider.
- Click new solution on the welcome screen.

- In the new Solution dialog, select Project Type as Web.
- Enter a project name and specify the location.
- Choose template as Blazor Server App.
- Select the target framework (e.g., .NET 8.0, .NET 9.0).
- Click create.

Step 2: Install the NuGet package from NuGet.org.
- Click the NuGet icon in the Rider toolbar and type Syncfusion.PDF.OCR.Net.Core in the search bar.
- Ensure that “nuget.org” is selected as the package source.
- Select the latest Syncfusion.HtmlToPdfConverter.Net.Windows NuGet package from the list.
- Click the + (Add) button to add the package.

- Click the Install button to complete the installation.

NOTE
- Beginning from version 21.1.x, the default configuration includes the addition of the TesseractBinaries and Tesseract language data folder paths, eliminating the requirement to explicitly provide these paths.
- Starting with v16.2.0.x, if you reference Syncfusion® assemblies from trial setup or from the NuGet feed, you also have to add “Syncfusion.Licensing” assembly reference and include a license key in your projects. Please refer to this link to know about registering Syncfusion® license key in your application to use our components.
Step 4: Create a new class file named ExportService under the Data folder and include the following namespaces in the file.
using Syncfusion.OCRProcessor;
using Syncfusion.Pdf.Parsing;
using System.IO;
Step 5: Use the following code sample to perform OCR on the entire PDF document using PerformOCR method of the OCRProcessor class in the ExportService file.
public MemoryStream CreatePdf()
{
    //Initialize the OCR processor.
    using (OCRProcessor processor = new OCRProcessor("Tesseractbinaries/Windows"))
    {
        FileStream fileStream = new FileStream("Input.pdf", FileMode.Open, FileAccess.Read);
        //Load a PDF document.
        PdfLoadedDocument lDoc = new PdfLoadedDocument(fileStream);
        //Set OCR language to process.
        processor.Settings.Language = Languages.English;
        //Process OCR by providing the PDF document.
        processor.PerformOCR(lDoc, "tessdata/");
        //Create memory stream.
        MemoryStream stream = new MemoryStream();
        //Save the document to memory stream.
        lDoc.Save(stream);
        return stream;
    }
}
Step 6: Register your service in the ConfigureServices method available in the Startup.cs class as follows.
public void ConfigureServices(IServiceCollection services)
{
    services.AddRazorPages();
    services.AddServerSideBlazor();
    services.AddSingleton<WeatherForecastService>();
    services.AddSingleton<ExportService>();
}
Step 7: Inject ExportService into FetchData.razor using the following code.
@inject ExportService exportService
@inject Microsoft.JSInterop.IJSRuntime JS
@using  System.IO;
Step 8: Create a button in the FetchData.razor using the following code.
<button class="btn btn-primary" @onclick="@PerformOCR">Perform OCR</button>Step 9: Add the PerformOCR method in FetchData.razor page to call the export service.
@functions
{
   protected async Task PerformOCR()
   {
       ExportService exportService = new ExportService();
       using (MemoryStream excelStream = exportService.CreatePdf())
       {
           await JS.SaveAs("Output.pdf", excelStream.ToArray());
       }
   }
}
Step 10: Create a class file with the FileUtil name and add the following code to invoke the JavaScript action to download the file in the browser.
public static class FileUtil
{
    public static ValueTask<object> SaveAs(this IJSRuntime js, string filename, byte[] data)
     => js.InvokeAsync<object>(
         "saveAsFile",
         filename,
         Convert.ToBase64String(data));
}
Step 11: Add the following JavaScript function in the _Host.cshtml available under the Pages folder.
<script type="text/javascript">
    function saveAsFile(filename, bytesBase64) {
        if (navigator.msSaveBlob) {
            //Download document in Edge browser
            var data = window.atob(bytesBase64);
            var bytes = new Uint8Array(data.length);
            for (var i = 0; i < data.length; i++) {
                bytes[i] = data.charCodeAt(i);
            }
            var blob = new Blob([bytes.buffer], { type: "application/octet-stream" });
            navigator.msSaveBlob(blob, filename);
        }
        else {
            var link = document.createElement('a');
            link.download = filename;
            link.href = "data:application/octet-stream;base64," + bytesBase64;
            document.body.appendChild(link); // Needed for Firefox
            link.click();
            document.body.removeChild(link);
        }
    }
</script>
Step 12: Build the project.
Click the Build button in the toolbar or press Ctrl+Shift+B to build the project.
Step 13: Run the project.
Click the Run button (green arrow) in the toolbar or press F5 to run the app.
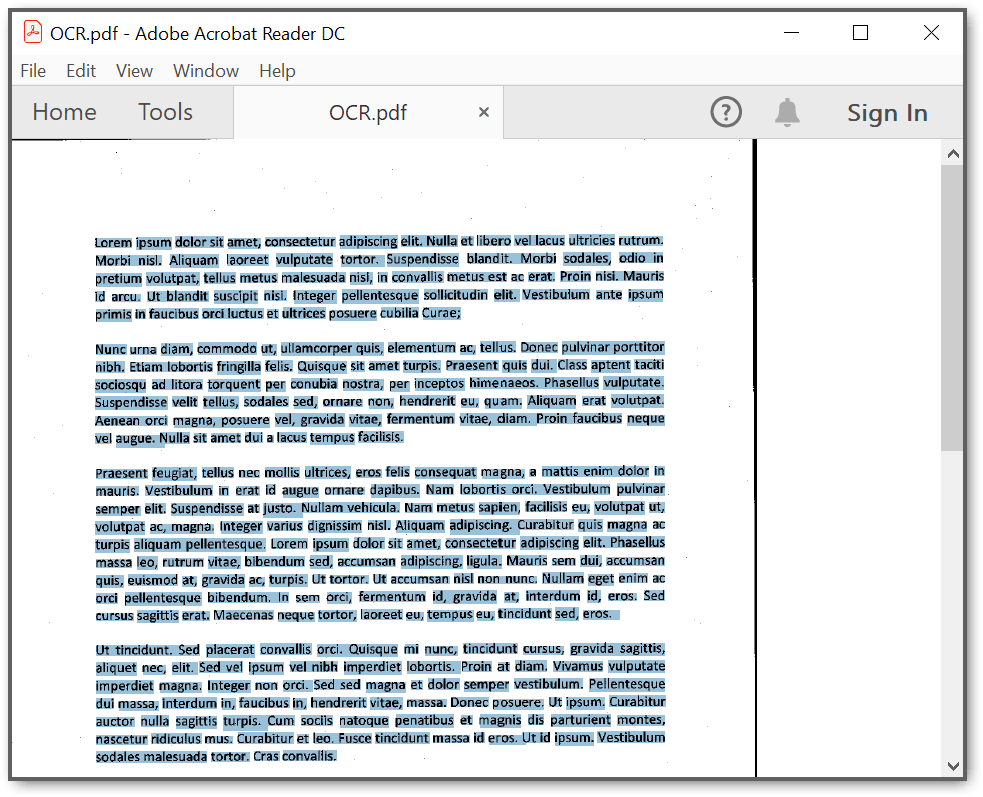
You will get the following output in the browser by executing the program.

Click the button and get a PDF document with the following output.
A complete working sample can be downloaded from Github.
Click here to explore the rich set of Syncfusion® PDF library features.