Creating a Syncfusion® Document SDK application
11 Mar 20267 minutes to read
Syncfusion® provides the Document SDK Template Studio in Visual Studio Code, which allows you to create a Syncfusion® Blazor application with Syncfusion® Document SDK components (PDF, Word, Excel and PowerPoint). The Syncfusion® Blazor app is created with the required component Syncfusion® NuGet references, namespaces, styles, and component render code. The Template Studio provides an easy-to-use project wizard that walks you through the process of creating an application with Syncfusion® Document SDK components.
NOTE
Document SDK project templates from
v33.1.44are supported by the Syncfusion® Visual Studio Code project template.
The instructions below assist you in creating Syncfusion Document SDK Applications using Visual Studio Code:
-
To create a Syncfusion® Document SDK application in Visual Studio Code, open the command palette by pressing Ctrl+Shift+P. Search for the word Syncfusion in the Visual Studio Code palette to get the templates provided by Syncfusion®.

-
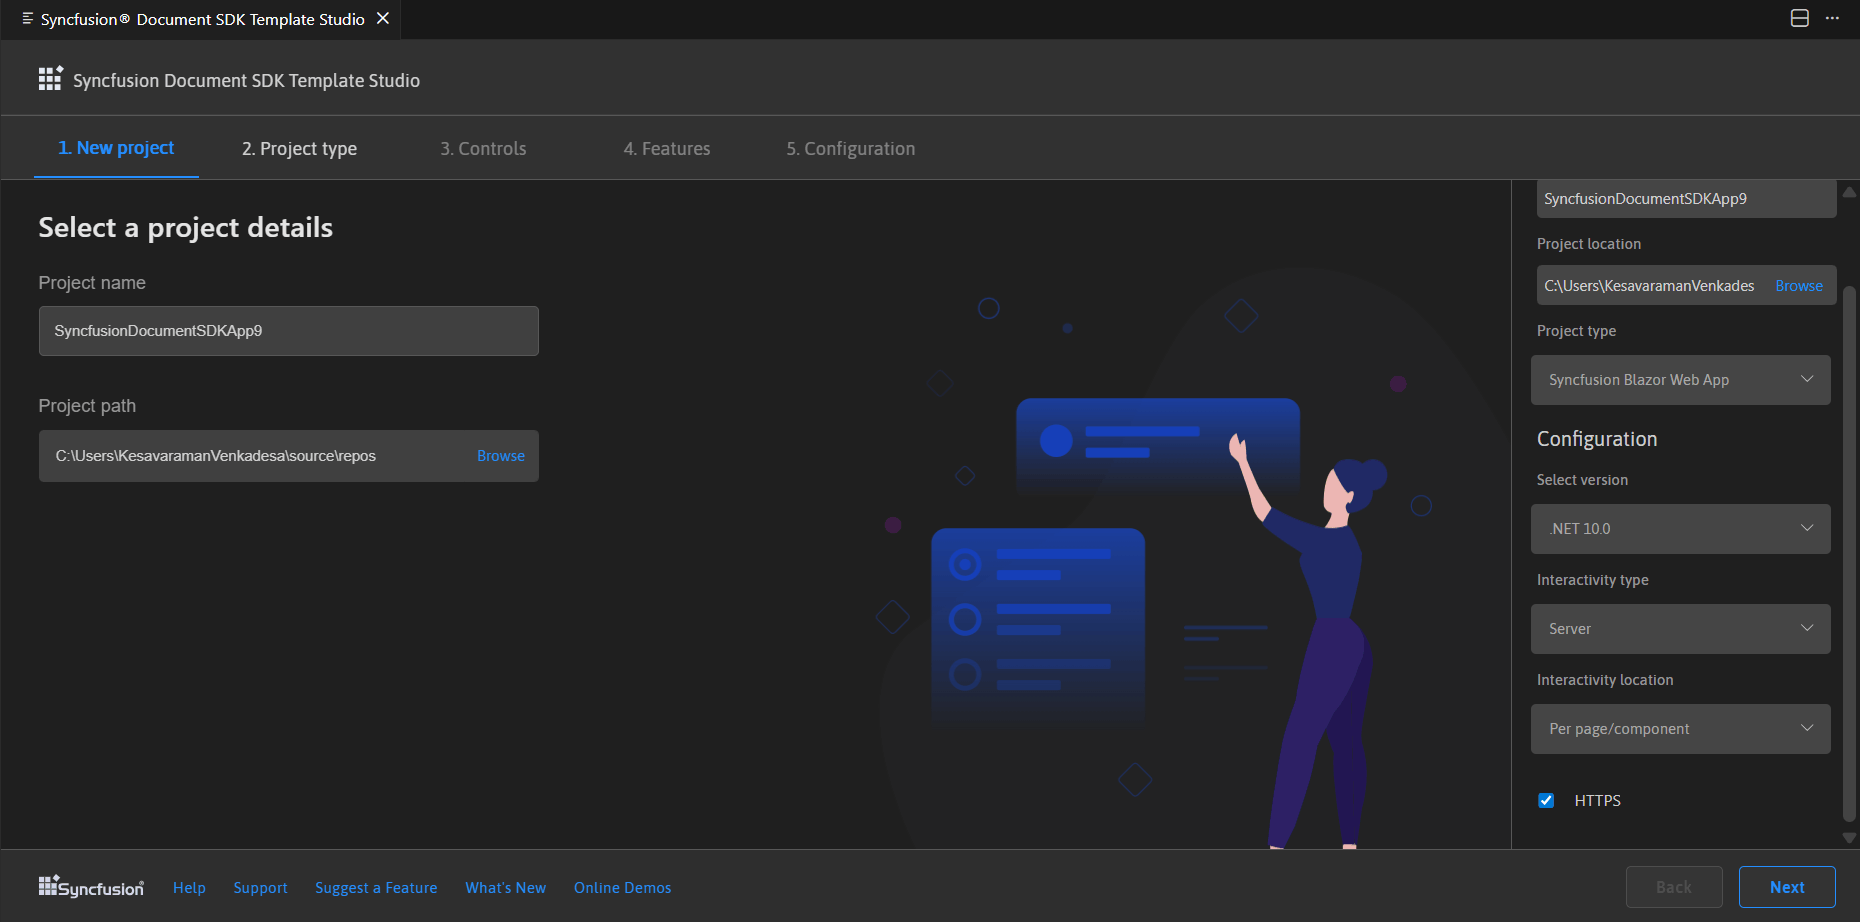
Select Syncfusion Document SDK Template Studio: Launch, then press Enter key. The Template Studio wizard for configuring the Syncfusion® Document SDK app will be launched. Provide the Project name and Project path.
NOTE
Refer to the .NET SDK support for Syncfusion® Document SDK Components here.
-
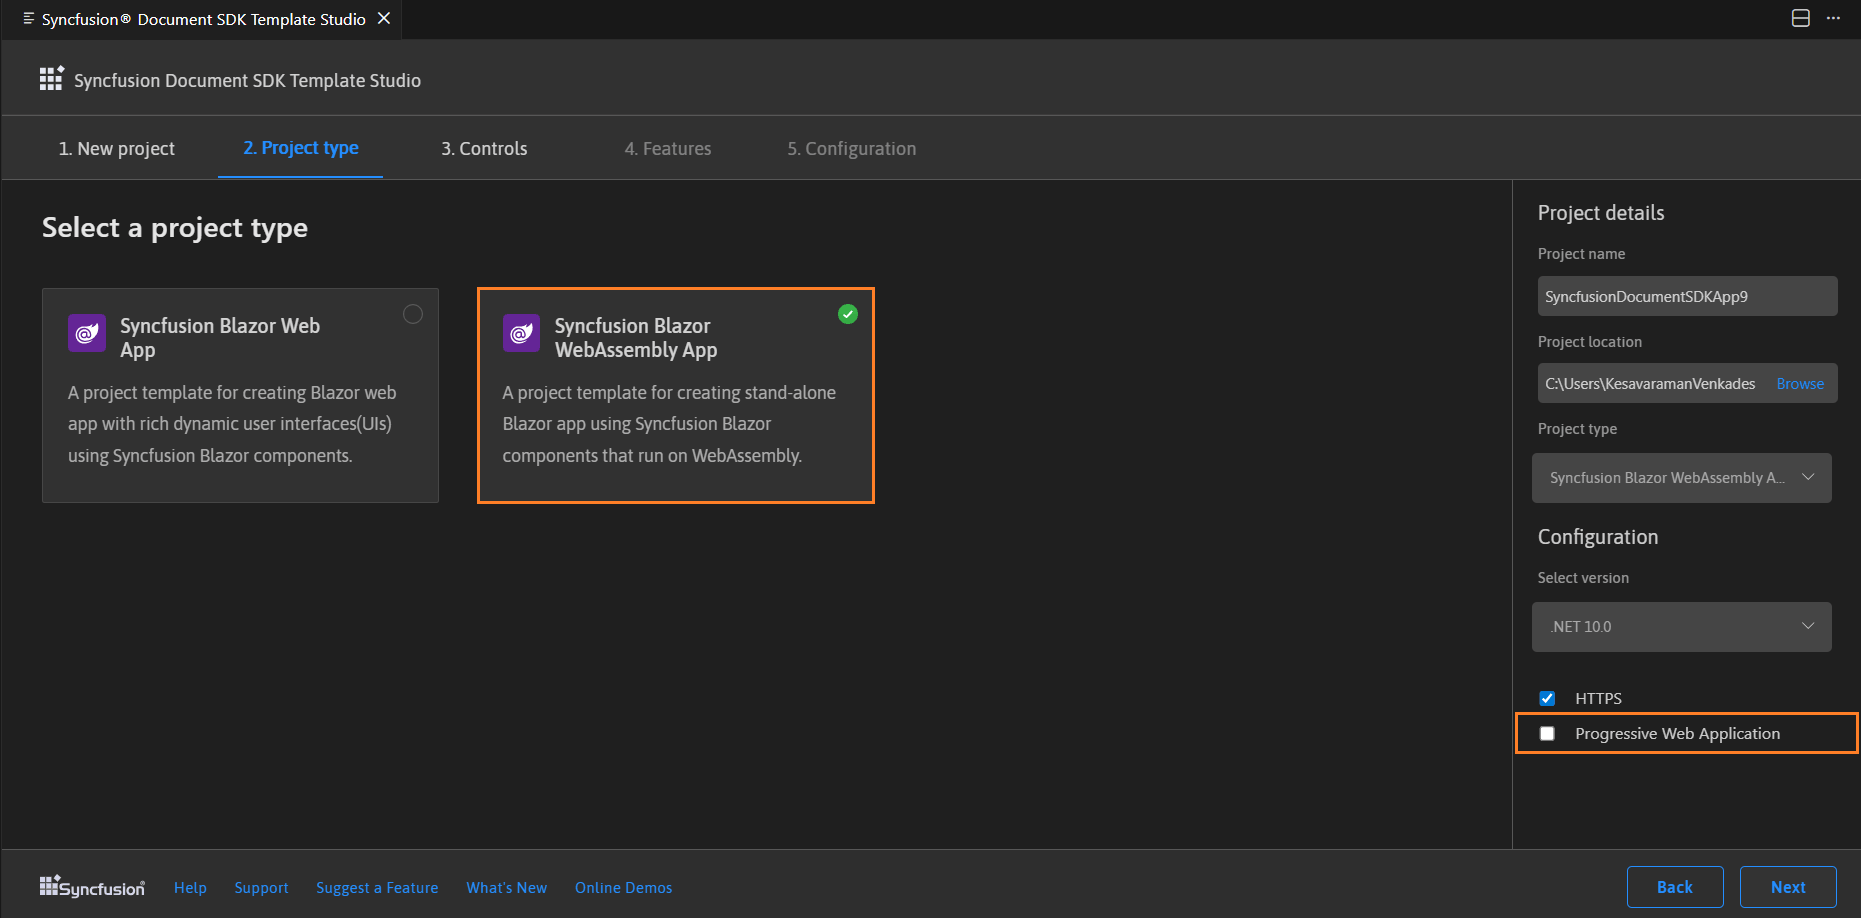
Select either Next or the Project type tab. Syncfusion® Blazor project types will be displayed. Choose one of the following Syncfusion® Blazor project types based on the version of the .NET SDK you are using.
.NET SDK version Supported Syncfusion Blazor Application Type .NET 10.0, .NET 9.0, .NET 8.0 Syncfusion Blazor Web App .NET 10.0, .NET 9.0, .NET 8.0 Syncfusion Blazor WebAssembly App In the Syncfusion Blazor Web App application type, you can configure the following options:
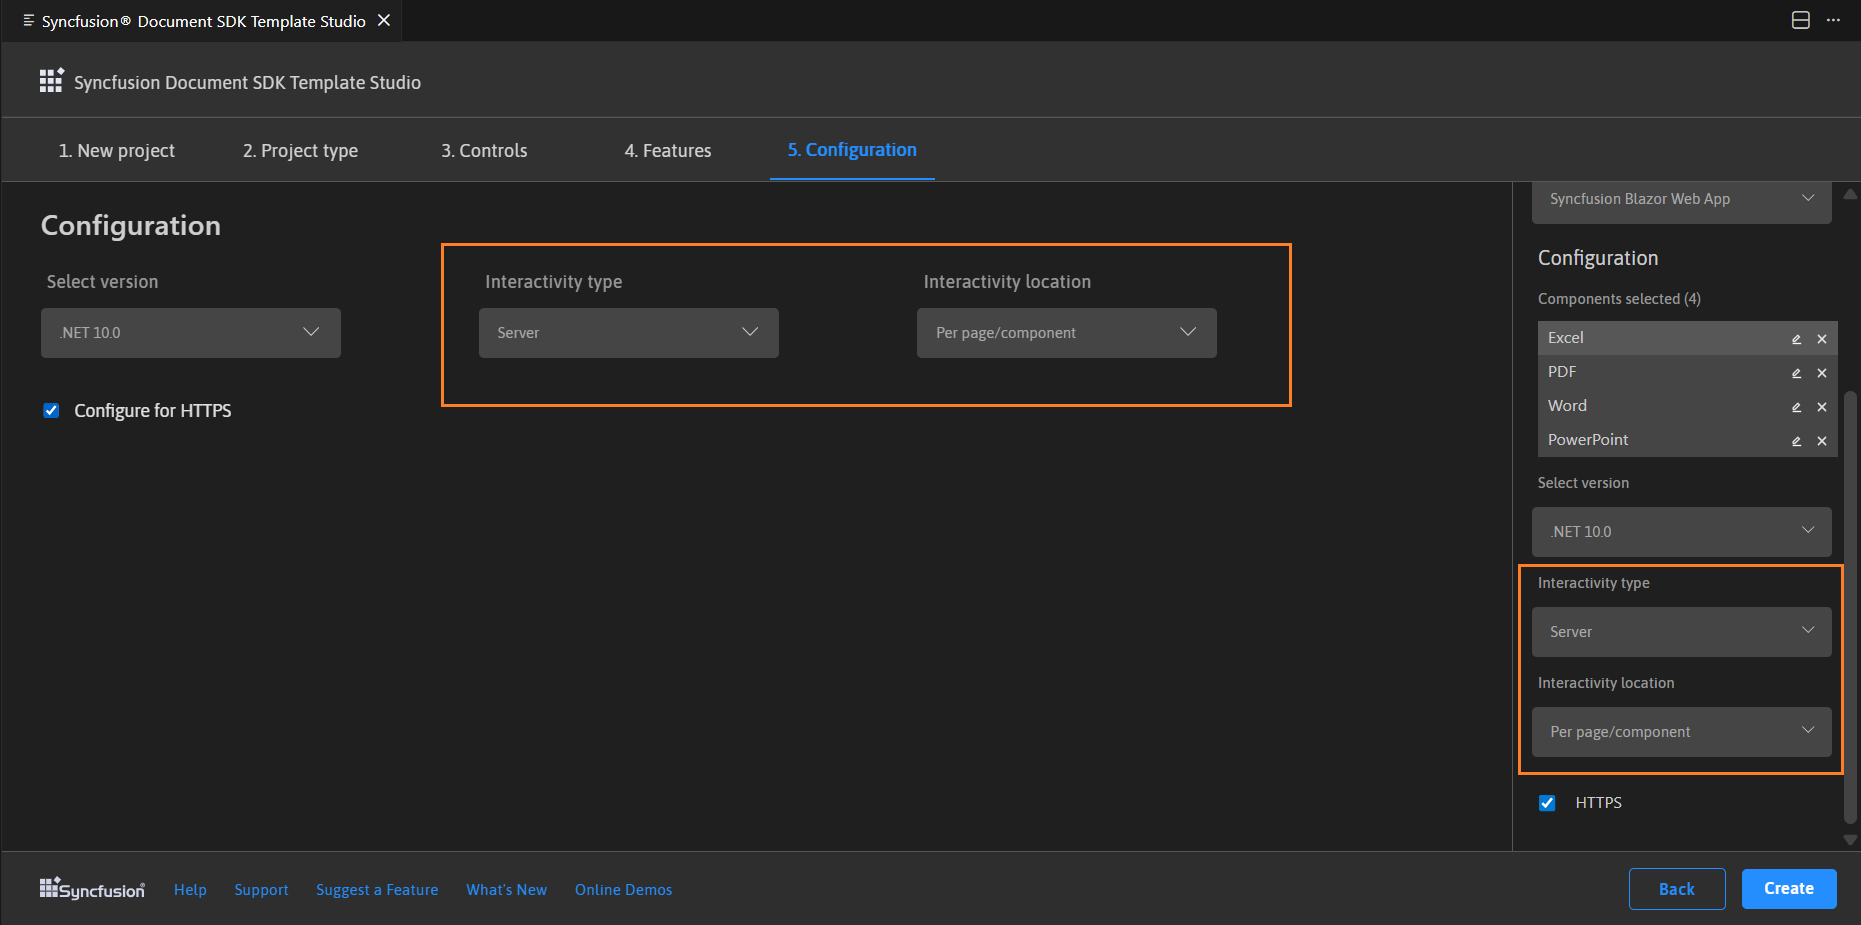
Interactivity type Server, WebAssembly, Auto (Server and WebAssembly) Interactivity location Global, Per page/component 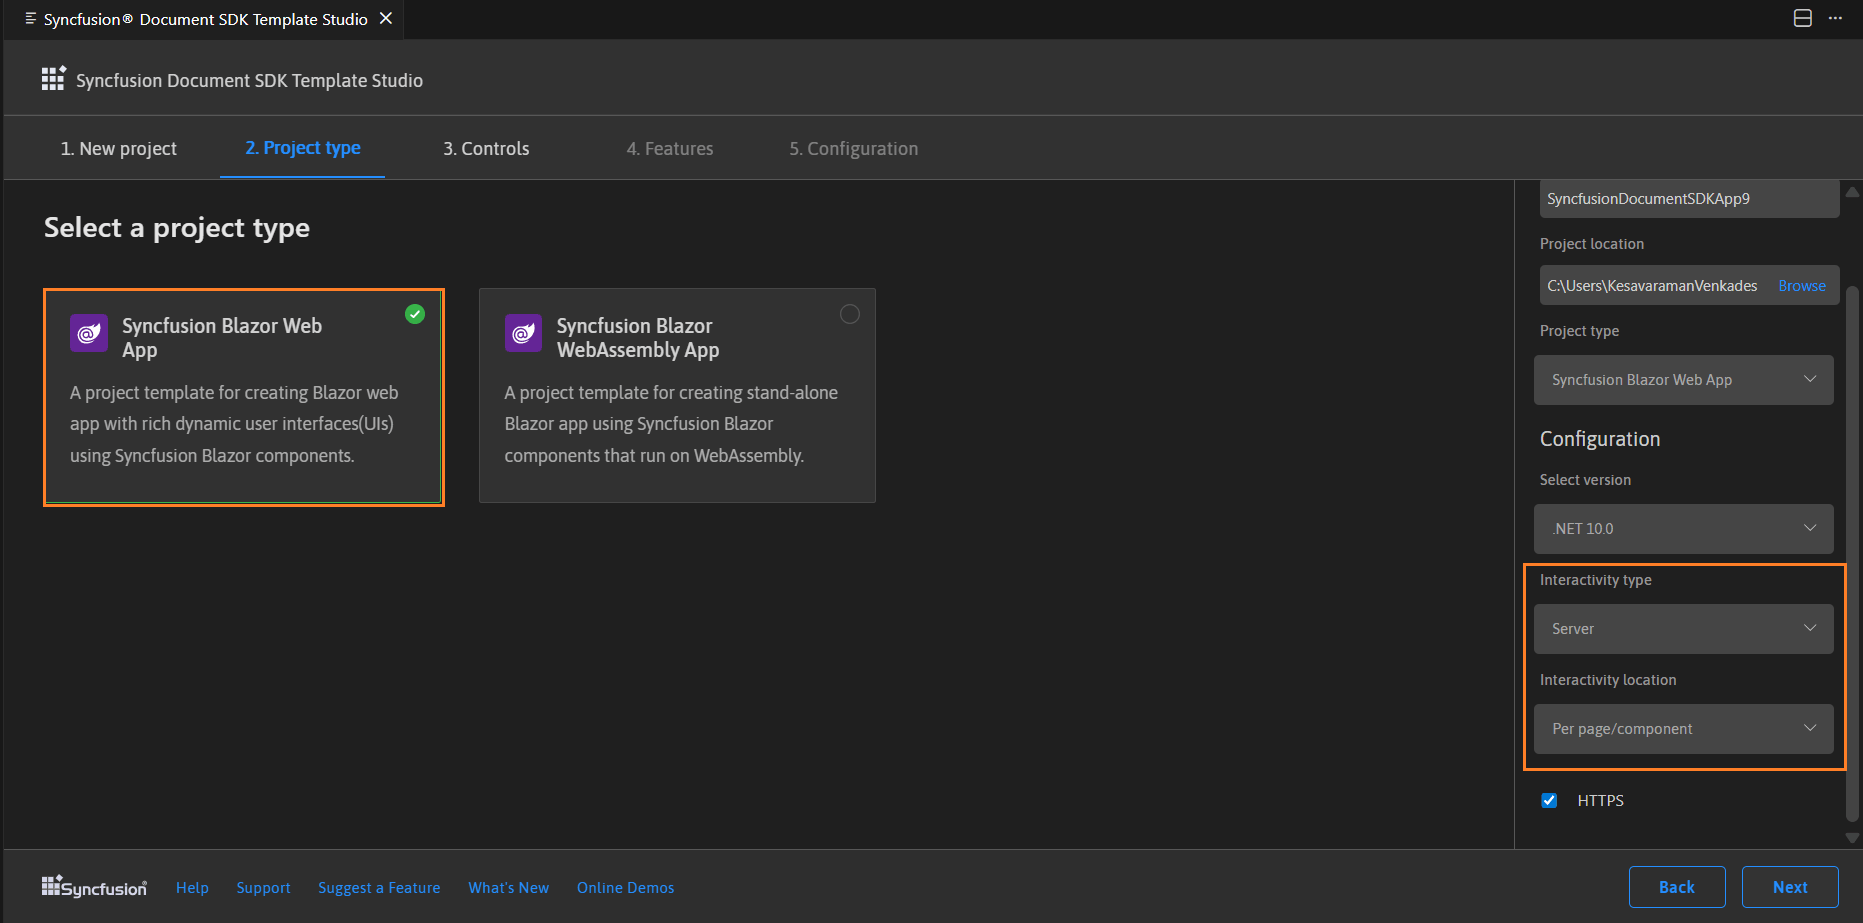
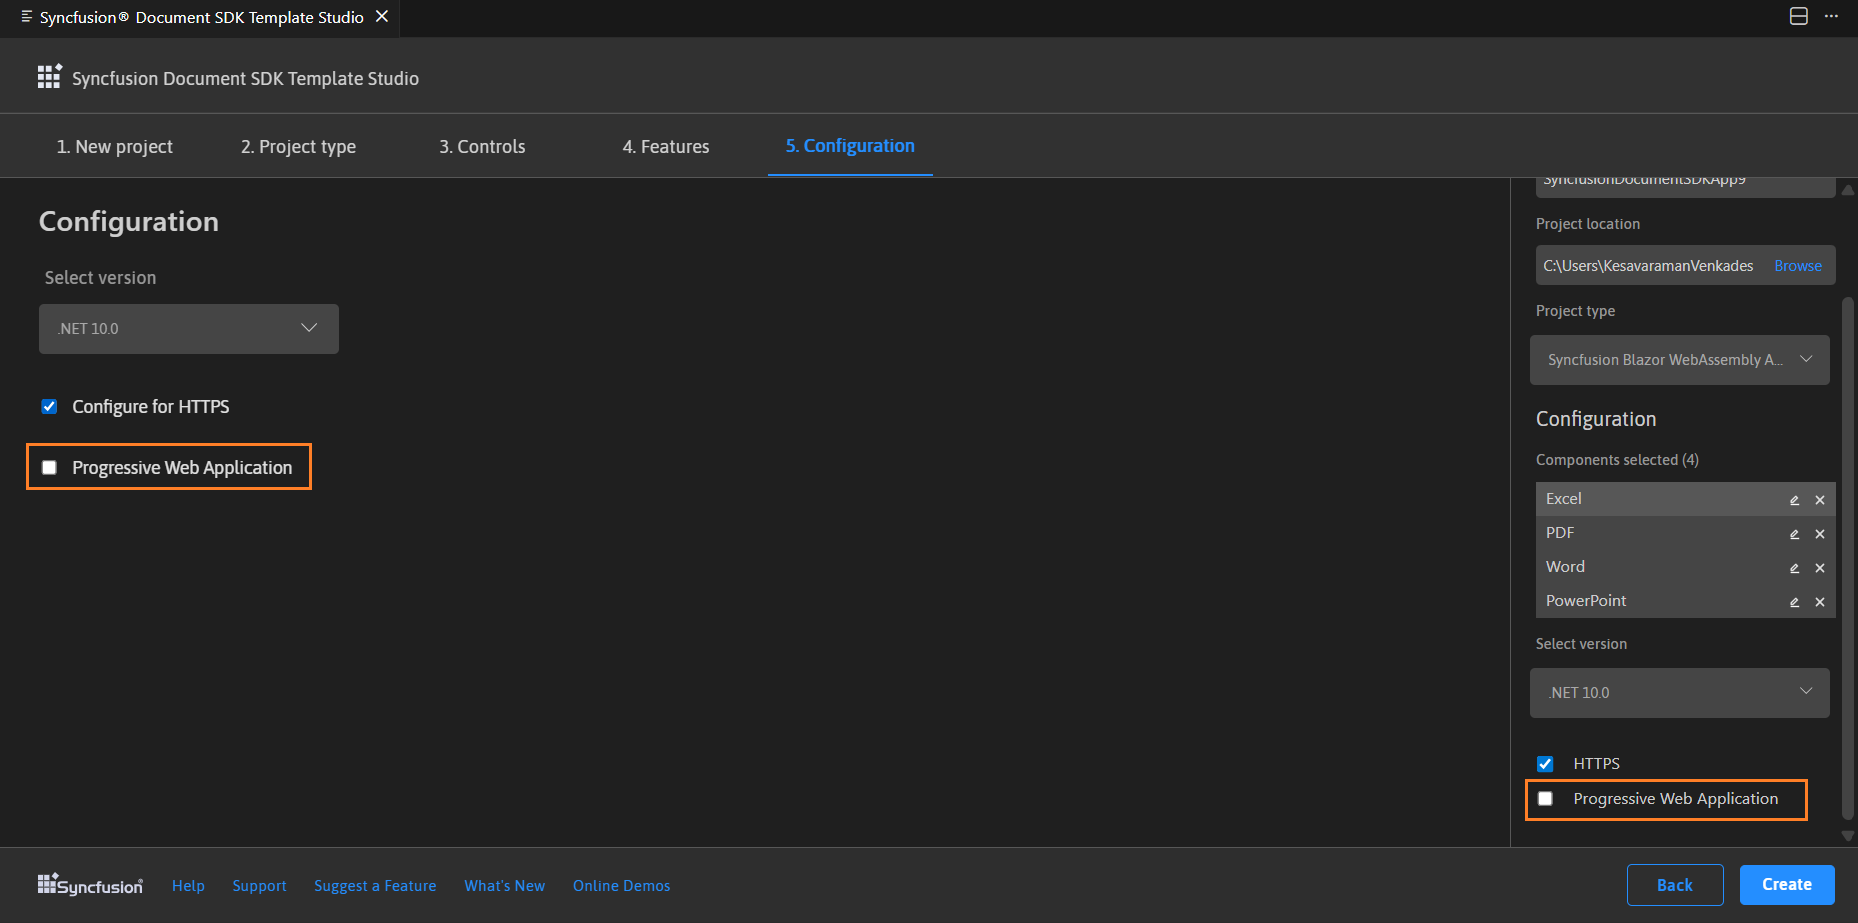
In the Syncfusion Blazor WebAssembly App application type, you can choose Progressive Web Application.
-
Click either Next or the Controls tab and select the Syncfusion Document SDK components (PDF, Word, Excel Or PowerPoint) you want to add to your application.
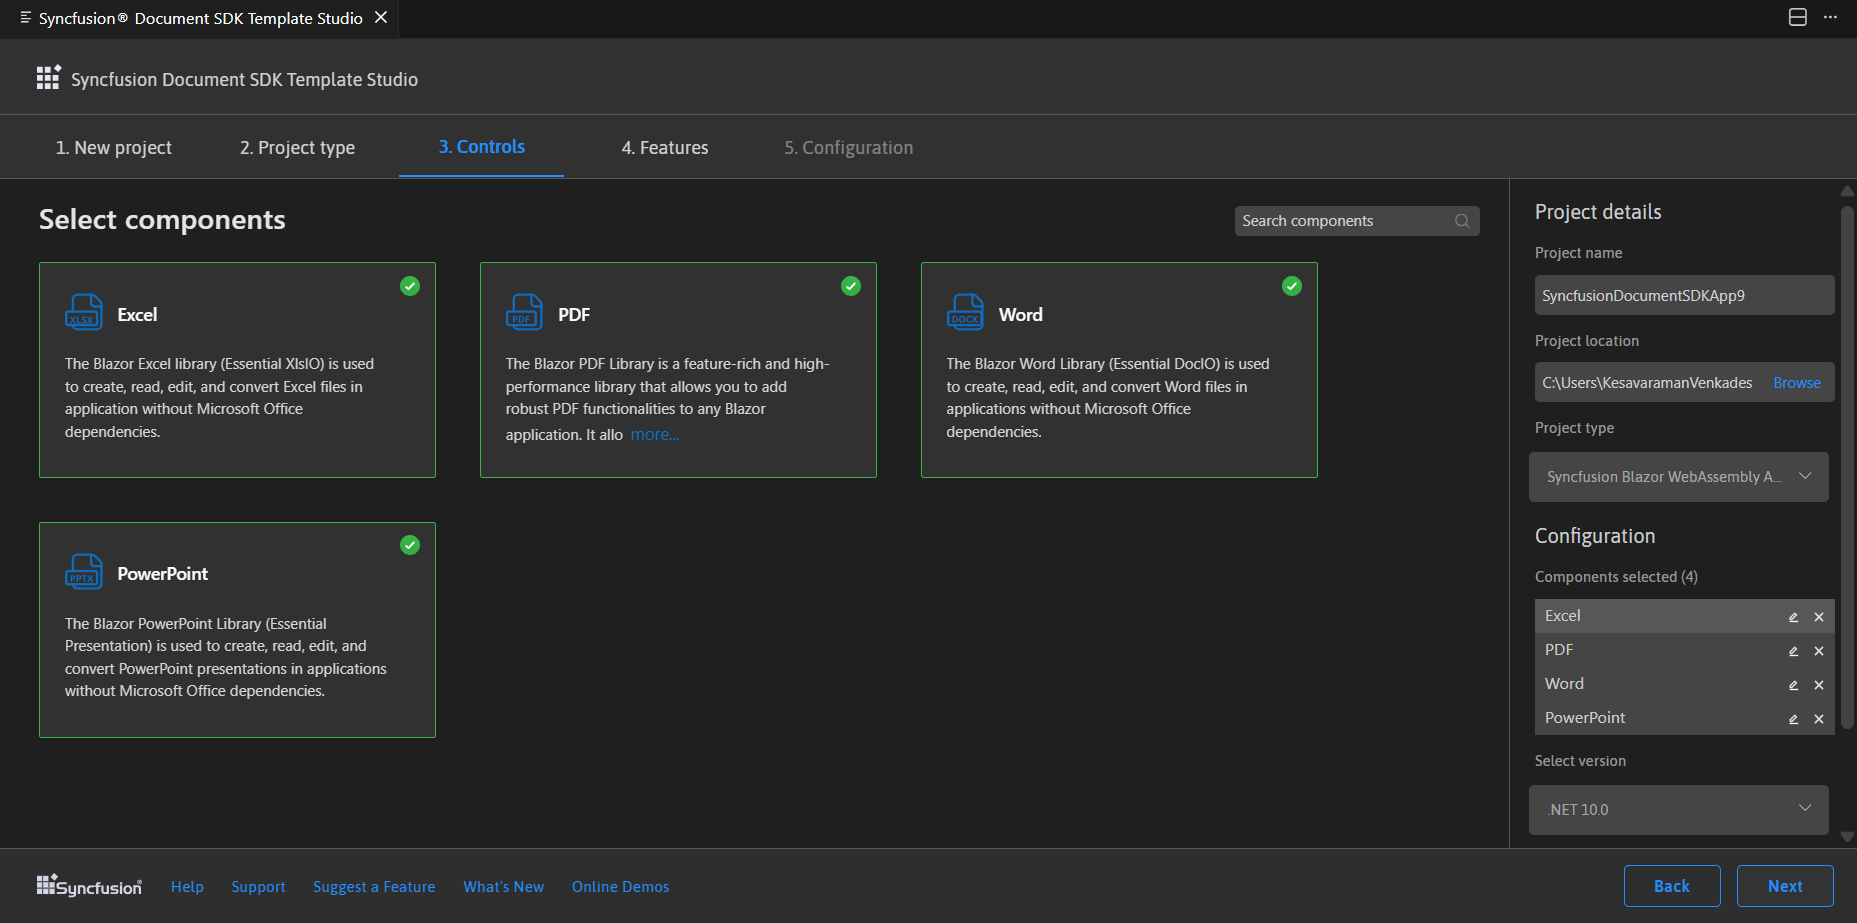
Choose the required control(s) by clicking the corresponding control box.
To unselect the added control(s), use either one of the following options:
Option 1: Click the corresponding selected control box.
Option 2: Click ‘x’ button for corresponding control in the control list from Project Details.
NOTE
Note: Choose at least one control to enable the Features and Configuration tab.
-
Click Next or the Configuration tab to load the Configuration section. You can choose the required (.NET10.0, .NET 9.0 and .NET 8.0), themes, https configuration, localization option, authentication type, Blazor Web App, and Blazor Web Assembly application types.
Depending on your Syncfusion Blazor Application Type, refer to the table below for supported authentication types.
Syncfusion Blazor Application Type Supported Authentication Types Syncfusion Blazor Web App None and Individual Accounts Syncfusion Blazor WebAssembly App None, Individual Accounts and Microsoft Identity Platform If you choose the Blazor Web App application type, you can customize the Interactivity type and Interactivity location options.
If you choose the Blazor Web Assembly App application type, you can customize the Progressive Web Application option.
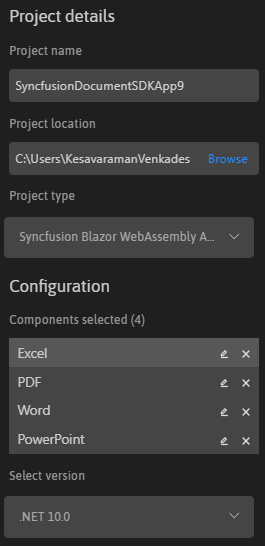
Project details section
You can change the configuration details below in the Project Details section to change the application type, remove control(s) from the selected controls, or change the configurations.
-
Click Create button. The Syncfusion® Document SDK application has been created. The created Syncfusion® Blazor Document SDK app has the Syncfusion NuGet packages, styles, and the render code for the selected Syncfusion® component.
-
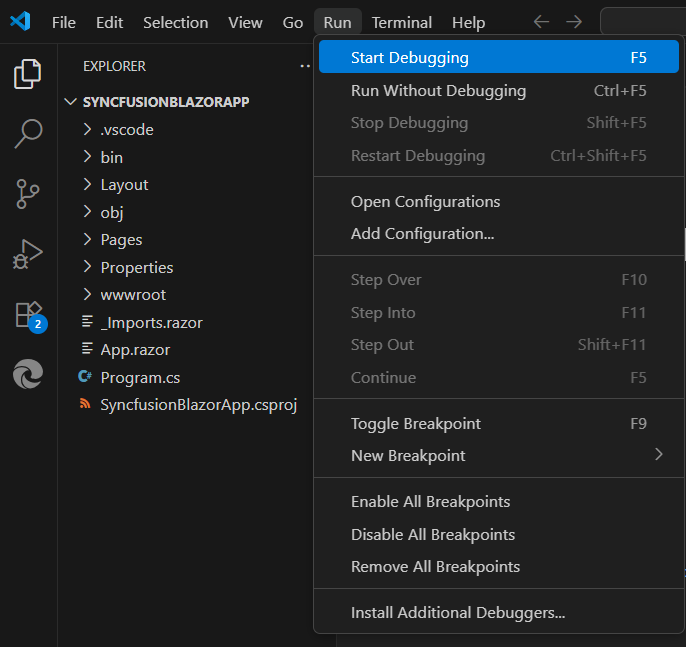
You can run the application to see the Syncfusion® components. Click F5 or go to Run>Start Debugging.
-
The Syncfusion® Blazor Document SDK application configures with most recent Syncfusion® Blazor NuGet packages version, selected style, namespaces, selected authentication, and component render code for Syncfusion® components.
-
If you installed the trial setup or NuGet packages from nuget.org you must register the Syncfusion® license key to your application since Syncfusion® introduced the licensing system from 2018 Volume 2 (v16.2.0.41) Essential Studio® release. Navigate to the help topic to generate and register the Syncfusion® license key to your application. Refer to this UG topic for understanding the licensing details in Essential Studio® for Document SDK.
Syncfusion® integration
The Syncfusion® Blazor Document SDK application configures with latest Syncfusion® Blazor NuGet packages, styles, namespaces, and component render code for Syncfusion® components are added in the created application.
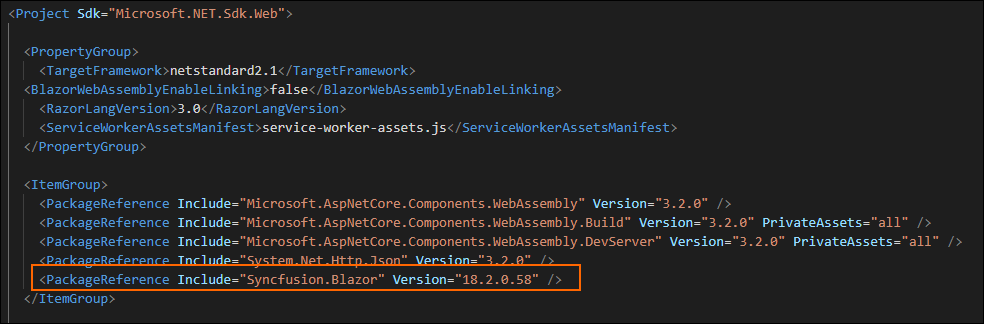
NuGet Packages
The Syncfusion.Blazor NuGet package will be added as NuGet references for all application types.
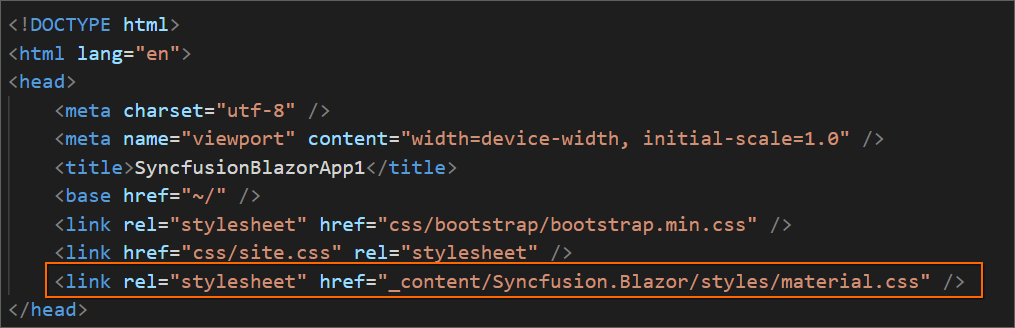
Style
The selected theme is added from Syncfusion® NuGet and its reference at these applications locations in Blazor.
| Application type | File location |
|---|---|
| Syncfusion Blazor Web App | ~/Components/App.razor |
| Syncfusion Blazor WebAssembly App (ASPNET Core hosted) Syncfusion Blazor WebAssembly App (Progressive Web Application) |
{Client Project location}/wwwroot/index.html |
| Syncfusion Blazor WebAssembly App | {Project location}/wwwroot/index.html |
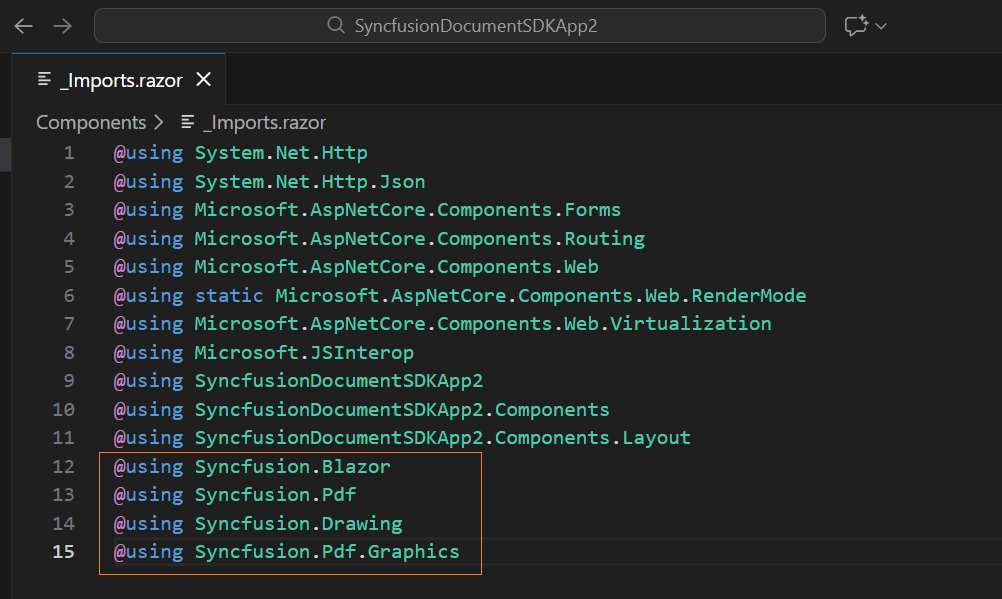
Namespaces
The Syncfusion® Blazor namespaces are added in the _imports.razor file.
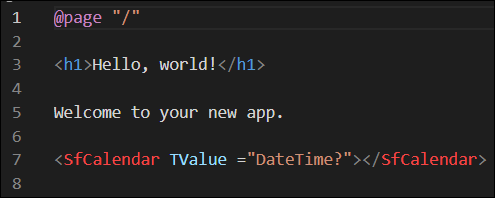
Component render code
The Syncfusion® Document SDK PDF, Word, Excel and PowerPoint component render code is in the Razor files in the pages folder. The render code is updated in these Razor files.
| File name | Code snippet added |
|---|---|
~/Pages/Home.razor or Index.razor |
 |
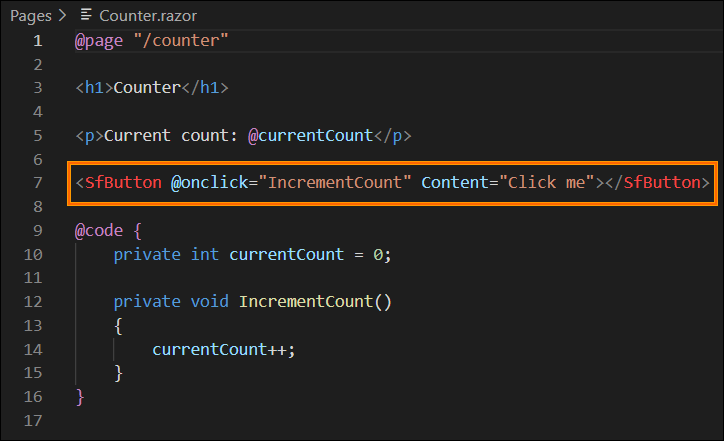
~/Pages/Counter.razor |
 |
~/Pages/FetchData.razor |
 |