How can I help you?
Getting Started
This section gives step-by-step procedure to render Radial Menu control. Please refer general getting started with syncfusion emberjs controls.
Before going to getting started with RadialMenu widget please refer Getting Started with Syncfusion EmberJS application to know how to create simple Essential EmberJS application.
If you want to know individual script reference to create RadialMenu Please Refer under Requires
Create your first Radial Menu control in EmberJS
In RadialMenu Control Items should be rendered as list. The complete rendering output of RadialMenu will be shown as like ne below.
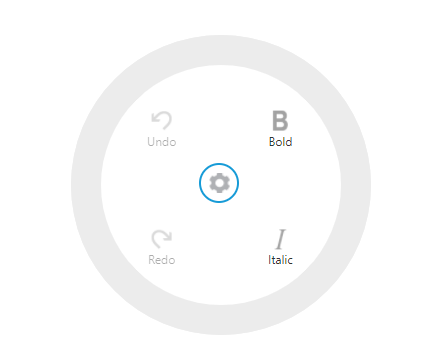
Create a simple Radial Menu
Create a Radial Menu by using the below code. You can also set the images for each item by giving the image url with the data-ej-imageUrl attribute in the inner list element and text with data-ej-text attribute. Refer to the following code example.
<div id="content">

            {{#ej-radialmenu id="defaultradialmenu" e-autoOpen=model.autoOpen }}
            <ul>
                <li data-ej-imageurl="http://js.syncfusion.com/demos/web/content/images/RadialMenu/font.png" data-ej-text="Bold"></li>
                <li data-ej-imageurl="http://js.syncfusion.com/demos/web/content/images/RadialMenu/f1.png" data-ej-text="Italic"></li>
                <li data-ej-imageurl="http://js.syncfusion.com/demos/web/content/images/RadialMenu/redo.png" data-ej-text="Redo"  data-ej-enabled="false"></li>
                <li data-ej-imageurl="http://js.syncfusion.com/demos/web/content/images/RadialMenu/undo.png" data-ej-text="Undo" data-ej-enabled="false"></li>
            </ul>
      {{/ej-radialmenu}}


    </div>
You can also display the Radial Menu by performing the desired action on the target content while clicking anywhere inside the target. Therefore, call the e-show method in the select action of the content.
export default Ember.Route.extend({
    model(){
        return {
            position:{x:50,y:100},
            autoOpen:true
            }
        }
    });
Run the above code and click any where inside the target. The settings icon is displayed. Click that icon to render the following output.