Getting Started
28 Nov 20176 minutes to read
This section helps to understand the getting started of the ListBox widget with the step-by-step instructions.Before going to getting started with ListBox widget please refer Getting Started with Syncfusion EmberJS application to know how to create simple Essential EmberJS application.
If you want to know individual script reference to create ListBox Please Refer under Requires
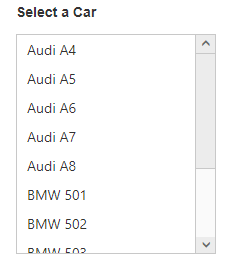
Create ListBox
Initialize the ListBox widget as below.
<div class="e-container-listbox">
			 <div class="ctrllabel">Select a Car</div>

               {{#ej-listbox id="defaultlistbox" }}
                        <li>Audi A4</li>
                        <li>Audi A5</li>
                        <li>Audi A6</li>
                        <li>Audi A7</li>
                        <li>Audi A8</li>
                        <li>BMW 501</li>
                        <li>BMW 502</li>
                        <li>BMW 503</li>
                        <li>Batch</li>
                        <li>BMW 507</li>
                        <li>BMW 3200</li>
                        <li>Cut</li>
               {{/ej-listbox}}


            </div>
Add the below code in corresponding script file.
export default Ember.Route.extend({
        model(){
        return {     }
            }
        });
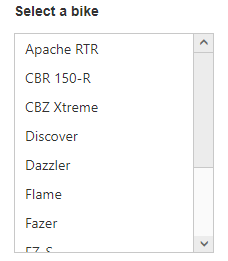
Data binding
We can populate data in the ListBox widget using “e-datasource” and “e-fields” properties.
<div class="e-container-listbox">
			   <div class="ctrllabel">Select a bike</div>

      {{ej-listbox id="defaultlistbox" e-dataSource=model.BikeList e-fields=model.fields}}


            </div>
Add the below code in corresponding script file.
export default Ember.Route.extend({
        model(){
     return {
        BikeList:[
            { bikeId: "bk1", bikeName: "Apache RTR" },
            { bikeId: "bk2", bikeName: "CBR 150-R" },
            { bikeId: "bk3", bikeName: "CBZ Xtreme" },
            { bikeId: "bk4", bikeName: "Discover" },
            { bikeId: "bk5", bikeName: "Dazzler" },
            { bikeId: "bk6", bikeName: "Flame" },
            { bikeId: "bk7", bikeName: "Fazer" },
            { bikeId: "bk8", bikeName: "FZ-S" },
            { bikeId: "bk9", bikeName: "Pulsar" },
            { bikeId: "bk10", bikeName: "Shine" },
            { bikeId: "bk11", bikeName: "R15" },
            { bikeId: "bk12", bikeName: "Unicorn" }
        ],
        fields: {
            id: "bikeId",
            text: "bikeName"
        }   }
          }
      });
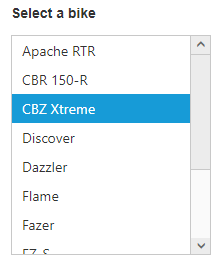
Selection
The ListBox widget supports item selection. To achieve this please use “e-selectedIndex” property.
<div class="e-container-listbox">
			   <div class="ctrllabel">Select a bike</div>

               {{ej-listbox id="defaultlistbox" e-dataSource=model.BikeList e-fields=model.fields e-selectedIndex=2}}

            </div>