Getting Started with UWP DOCX Editor
30 Aug 20265 minutes to read
Syncfusion® UWP DOCX Editor (SfRichTextBoxAdv) enables you to create, edit, view, and print Word documents in UWP applications. This section guides you through the steps to get started and create a UWP DOCX Editor in a UWP application.
Create a New UWP Project
- Open Visual Studio.
- Click Create a new project.
- In the Create a new project window, search for UWP, and select UWP Blank App.
- Click Next, and enter the following details:
-
Project name:
DocumentEditor - Location: Choose your preferred location
-
Solution name:
DocumentEditor
-
Project name:
The project name is used as the default namespace (for example, in
x:Class). It is recommended to use DocumentEditor to match the code examples provided.
- Select the target version and minimum version of Windows as required. See Syncfusion® UWP system requirements for tooling and supported Windows versions.
- Click Create.
Add SfRichTextBoxAdv dependencies
Using NuGet Package Manager (UI):
- In Solution Explorer, right-click the project and choose Manage NuGet Packages.
- Search for Syncfusion.SfRichTextBoxAdv.UWP and install the latest version.
- Verify that all required dependencies are installed and the project is successfully restored.
Using Package Manager Console:
Install-Package Syncfusion.SfRichTextBoxAdv.UWPThe following assembly references are required to use the SfRichTextBoxAdv control in your application.
- Syncfusion.SfRichTextBoxAdv.UWP
- Syncfusion.DocIO.UWP
- Syncfusion.OfficeChart.UWP
- Syncfusion.SfRadialMenu.UWP
- Syncfusion.SfShared.UWP
- A valid Syncfusion® license key is required from v16.2.0.41 (2018 Vol 2) onwards.
- The required
Syncfusion.Licensingassembly is installed automatically as a NuGet dependency — no separate reference is needed.- If you are using the Assemblies installation, you must add a reference to
Syncfusion.Licensing.dllin your project.- Register the license key in the
Appconstructor ofApp.xaml.csbefore any Syncfusion control is initialized. For the exactRegisterLicensecode, refer to Register Syncfusion® License key in a UWP application.
Add SfRichTextBoxAdv control
Open the Toolbox window and drag the SfRichTextBoxAdv control onto the Design view of the UWP application to add it to the user interface.
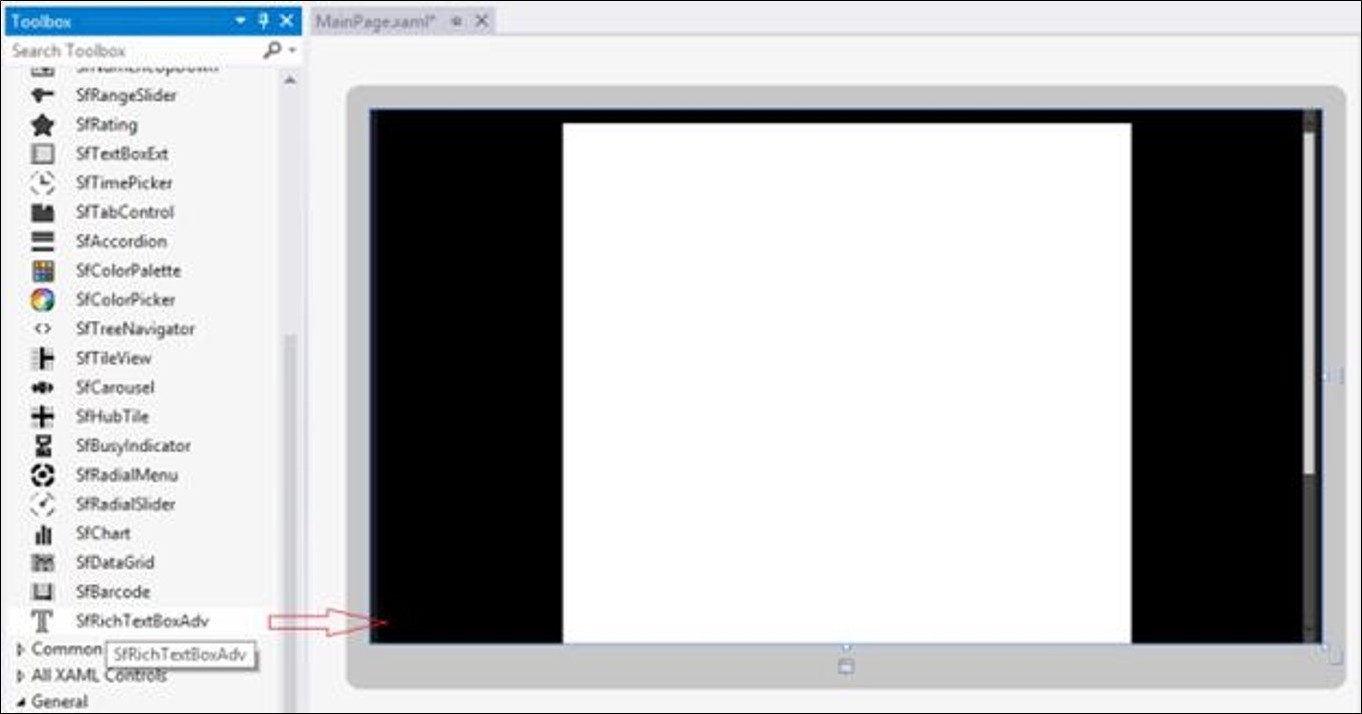
To add the control manually in XAML, follow these steps:
-
Import the SfRichTextBoxAdv control namespace
Syncfusion.UI.Xaml.RichTextBoxAdvin the XAML page. -
Declare the SfRichTextBoxAdv control in the XAML page.
<Page
    x:Class="DocumentEditor.MainPage"
    xmlns="http://schemas.microsoft.com/winfx/2006/xaml/presentation"
    xmlns:x="http://schemas.microsoft.com/winfx/2006/xaml"
    xmlns:local="using:DocumentEditor"
    xmlns:RichTextBoxAdv="using:Syncfusion.UI.Xaml.RichTextBoxAdv"
    xmlns:d="http://schemas.microsoft.com/expression/blend/2008"
    xmlns:mc="http://schemas.openxmlformats.org/markup-compatibility/2006"
    mc:Ignorable="d"
    Background="{ThemeResource ApplicationPageBackgroundThemeBrush}">
    <Grid>
        <RichTextBoxAdv:SfRichTextBoxAdv x:Name="richTextBoxAdv" ManipulationMode="All"/>
    </Grid>
</Page>
To add the control manually in C#, add the following code in MainPage.xaml.cs
using Syncfusion.UI.Xaml.RichTextBoxAdv;
using Windows.UI.Xaml.Controls;

namespace DocumentEditor
{
    public sealed partial class MainPage : Page
    {
        public MainPage()
        {
            this.InitializeComponent();

            // Create a Grid layout container
            Grid rootGrid = new Grid();

            // Create an instance of the SfRichTextBoxAdv control
            SfRichTextBoxAdv richTextBoxAdv = new SfRichTextBoxAdv();

            // Add the SfRichTextBoxAdv control to the Grid
            rootGrid.Children.Add(richTextBoxAdv);

            // Set the Grid as the content of the Page
            this.Content = rootGrid;
        }
    }
}
Run the Application
- Press F5 or click Debug > Start Debugging in Visual Studio.
- The UWP application is deployed and launched on the selected target device and displays the SfRichTextBoxAdv control.
- Press Ctrl+O to open an existing document. The selected document will be displayed within the SfRichTextBoxAdv control, as shown below.