Getting started with React DOCX Editor in Next.js
21 Jul 20264 minutes to read
This section provides a step-by-step guide for setting up a Next.js application and integrating the React DOCX Editor (Document Editor) component.
Prerequisites
- Node.js 18.17.0 or later (LTS recommended).
- System requirements
- Browser Compatibility
Create a Next.js application
Step 1: To create a new Next.js application, use one of the commands that are specific to either NPM or Yarn.
npx create-next-app@latestyarn create next-appUsing one of the above commands will prompt you to configure additional settings for the project:
Step 2: Specify the name of the project directly.
√ What is your project named? » ej2-nextjs-documenteditorStep 3: Choose the following configuration options:
? Would you like to use the recommended Next.js defaults?
>   Yes, use recommended defaults - TypeScript, ESLint, Tailwind CSS, App Router
    No, reuse previous settings
    No, customize settings
Step 4: Once the above steps are complete, navigate to the project directory using the following command:
cd ej2-nextjs-documenteditorThe application is ready to run with default settings. The next steps will add the Syncfusion DOCX Editor component to the project.
Install DOCX Editor packages
The DOCX Editor package is available at npmjs.com.
To install the DOCX Editor component, use the following command:
npm install @syncfusion/ej2-react-documenteditor --saveyarn add @syncfusion/ej2-react-documenteditorRegister a Syncfusion License Key
Before initializing the React DOCX Editor control in Next.js, generate a Syncfusion license key and register it in your application.
Import the required CSS styles
Add the DOCX Editor component and its dependent component styles available in the node_modules/@syncfusion package folder. Reference these styles in the app/globals.css file.
@import '../node_modules/@syncfusion/ej2-base/styles/tailwind3.css';
@import '../node_modules/@syncfusion/ej2-buttons/styles/tailwind3.css';
@import '../node_modules/@syncfusion/ej2-inputs/styles/tailwind3.css';
@import '../node_modules/@syncfusion/ej2-popups/styles/tailwind3.css';
@import '../node_modules/@syncfusion/ej2-lists/styles/tailwind3.css';
@import '../node_modules/@syncfusion/ej2-navigations/styles/tailwind3.css';
@import '../node_modules/@syncfusion/ej2-splitbuttons/styles/tailwind3.css';
@import '../node_modules/@syncfusion/ej2-dropdowns/styles/tailwind3.css';
@import '../node_modules/@syncfusion/ej2-react-documenteditor/styles/tailwind3.css';
NOTE
To learn more about built-in themes and CSS reference for individual components, refer to the themes section.
Initialize the DOCX Editor
Add the DOCX Editor component to your application. In the app/page.tsx file, add the following code to initialize the component:
'use client'
import { DocumentEditorContainerComponent, Toolbar } from '@syncfusion/ej2-react-documenteditor';

DocumentEditorContainerComponent.Inject(Toolbar);

export default function Home() {
  return (
      <DocumentEditorContainerComponent
        id="container"
        height="590px"
        // Use the following service URL only for demo purposes
        serviceUrl="https://document.syncfusion.com/web-services/docx-editor/api/documenteditor/"
        enableToolbar={true}>
      </DocumentEditorContainerComponent>
  )
}
NOTE
The hosted Web API URL is for demo and evaluation purposes only. For production, host your own web service using the GitHub Web Service example or the Docker image.
Run the application
Run the application using the following command:
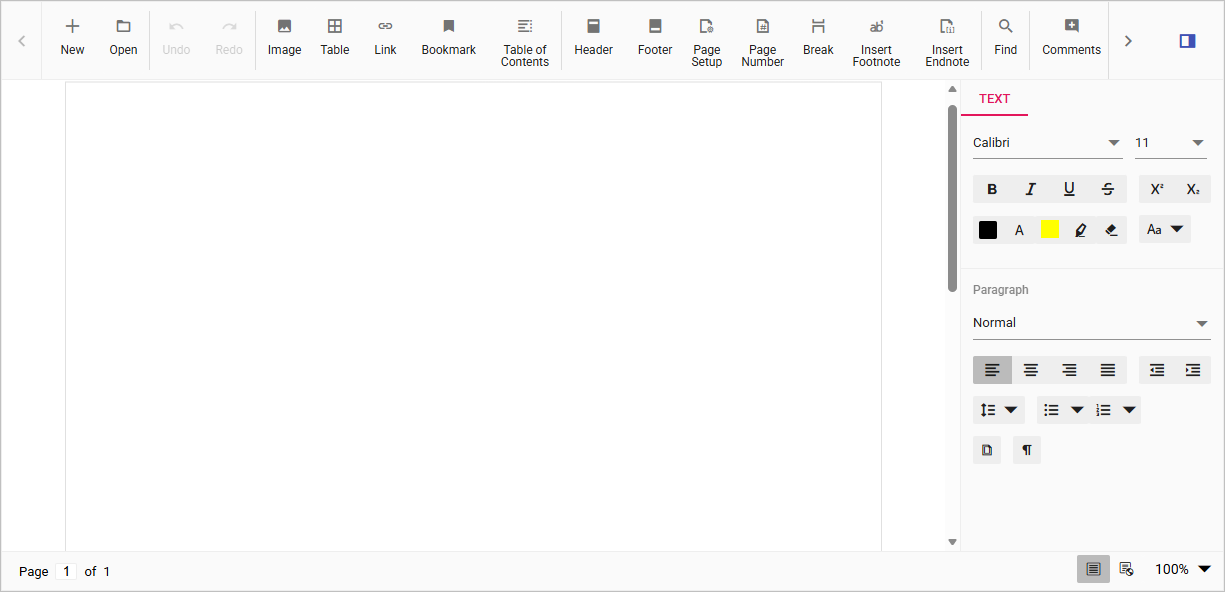
npm run devyarn run devAfter the application starts, open the localhost URL shown in the terminal. The DOCX Editor is rendered in the browser with a toolbar and an editable document area, as shown below.
NOTE
Server-side dependencies
The DOCX Editor component requires server-side interactions for the following operations:
- Open file formats other than SFDT
- Paste with formatting
- Restrict editing
- Spell check
- Save as file formats other than SFDT and DOCX
NOTE
If you don’t require the above functionalities, you can deploy the component as a pure client-side solution without any server-side interactions.
For detailed information about server-side dependencies, refer to the Web Services Overview page.