Getting Started with TypeScript DOCX Editor
1 Jul 20264 minutes to read
TypeScript DOCX Editor (Document Editor) enables you to create, edit, view, and print Word documents in web applications. This section guides you through the steps to get started and create a DOCX Editor in a TypeScript application.
Steps to create a DOCX Editor using TypeScript
Prerequisites
Ensure the following tools are installed on your machine:
Set up development environment
Create a simple TypeScript application using the Essential® JS 2 quickstart seed repository.
NOTE
This application is integrated with the
webpack.config.jsconfiguration and uses the latest version of the webpack-cli. For more information about webpack and its features, refer to the webpack documentation.
Step 1: Open the command prompt from the required directory and clone the quickstart project from GitHub.
git clone https://github.com/SyncfusionExamples/ej2-quickstart-webpack- ej2-quickstartStep 2: Navigate to the ej2-quickstart folder.
cd ej2-quickstartInstall the Syncfusion® Document Editor packages
By default, the ej2‑quickstart repository is preconfigured with the @syncfusion/ej2 package in ~/package.json. This package installs all Syncfusion Essential JS 2 component packages, including the Document Editor and other EJ2 controls.
To install only the Document Editor component, replace the dependency with @syncfusion/ej2-documenteditor, as shown below:
"dependencies": {
  "@syncfusion/ej2-documenteditor": "*"
}
Install the dependent npm packages using the following command.
npm installAdd CSS reference
Add the following Document Editor and dependent component style references to ~/src/styles/styles.css:
@import '../../node_modules/@syncfusion/ej2-base/styles/tailwind3.css';
@import '../../node_modules/@syncfusion/ej2-buttons/styles/tailwind3.css';
@import '../../node_modules/@syncfusion/ej2-inputs/styles/tailwind3.css';
@import '../../node_modules/@syncfusion/ej2-popups/styles/tailwind3.css';
@import '../../node_modules/@syncfusion/ej2-lists/styles/tailwind3.css';
@import '../../node_modules/@syncfusion/ej2-navigations/styles/tailwind3.css';
@import '../../node_modules/@syncfusion/ej2-splitbuttons/styles/tailwind3.css';
@import '../../node_modules/@syncfusion/ej2-dropdowns/styles/tailwind3.css';
@import '../../node_modules/@syncfusion/ej2-documenteditor/styles/tailwind3.css';
Add the Document Editor component
Add an HTML div element to act as the Document Editor element in the index.html file:
<!DOCTYPE html>
<html lang="en">
<head>
    <title>Syncfusion TypeScript Document Editor</title>
    <meta charset="utf-8" />
    <meta name="viewport" content="width=device-width, initial-scale=1.0, user-scalable=no" />
    <meta name="description" content="Syncfusion TypeScript Document Editor" />
    <meta name="author" content="Syncfusion" />
    <link rel="shortcut icon" href="resources/favicon.ico" />
    <link href="https://maxcdn.bootstrapcdn.com/bootstrap/3.3.7/css/bootstrap.min.css" rel="stylesheet" />
</head>
<body>
    <!-- Element which will render as Document Editor -->
    <div id="DocumentEditor"></div>
</body>
</html>
Add a container element for the Document Editor control in the app.ts file using the following code.
import { DocumentEditorContainer, Toolbar } from '@syncfusion/ej2-documenteditor';

DocumentEditorContainer.Inject(Toolbar);

let documenteditor: DocumentEditorContainer = new DocumentEditorContainer({
    enableToolbar: true,
    height: '590px',
    // Use the following service URL only for demo purposes
    serviceUrl: 'https://document.syncfusion.com/web-services/docx-editor/api/documenteditor/'
});
documenteditor.appendTo('#DocumentEditor');
NOTE
The hosted Web API URL is for demo and evaluation purposes only. For production, host your own web service using the GitHub Web Service example or the Docker image.
Run the application
Run the application using the following command:
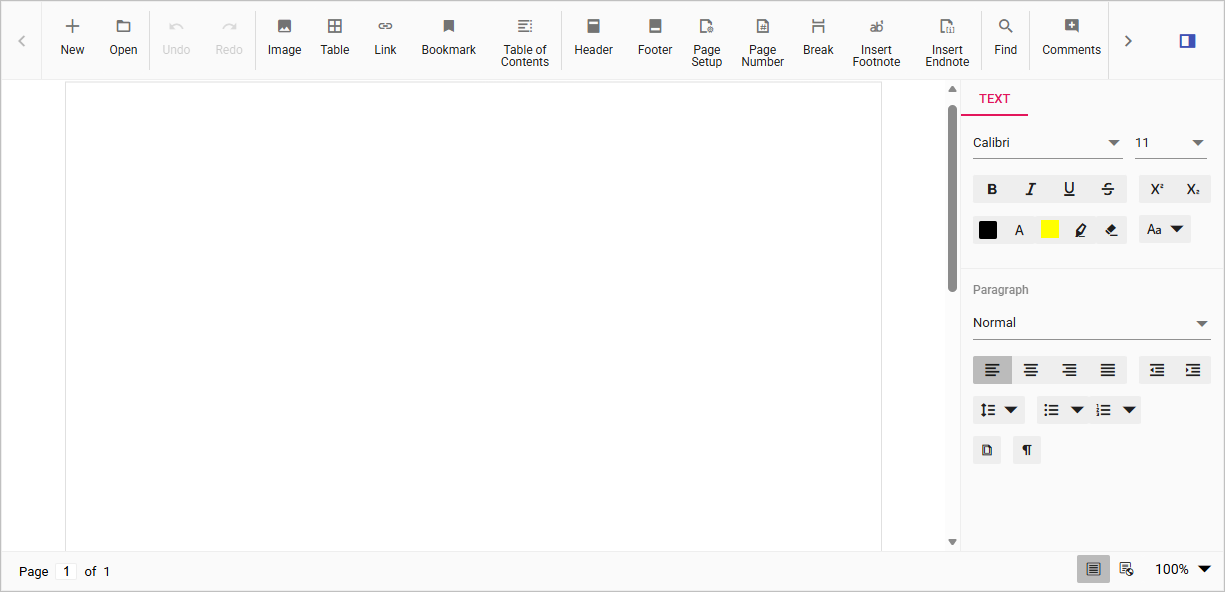
npm startAfter the application starts, open the localhost URL shown in the terminal. The TypeScript Document Editor is rendered in the browser with a toolbar and an editable document area, as shown below.
You can also explore the Document Editor interactively using the live sample below.
NOTE
Online Demo
Explore how to create, edit, and print Word documents using the JavaScript Document Editor in this live demo here.
Server-side dependencies
The Document Editor component requires server-side interactions for the following operations:
- Open file formats other than SFDT
- Paste with formatting
- Restrict editing
- Spell check
- Save as file formats other than SFDT and DOCX
NOTE
If you don’t require the above functionalities, you can deploy the component as a pure client-side solution without any server-side interactions.
For detailed information about server-side dependencies, refer to the Web Services Overview page.