How to Publish JavaScript DOCX Editor Web API to Azure App
28 Aug 20261 minute to read
Prerequisites
- Visual Studio 2017, 2019, or 2022.
- An
Azure subscription. - The DOCX Editor Web API controller application from
here.
Make sure you build the project using the Build > Build Solution menu command before following the deployment steps.
Publish to Azure App Service
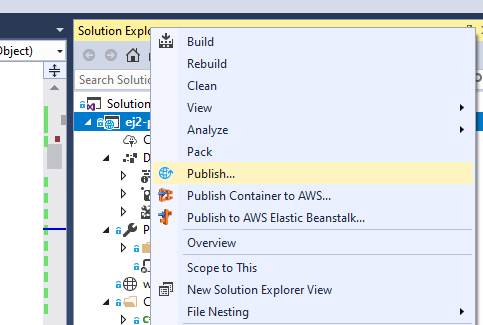
Step 1: In Solution Explorer, right-click the project and click Publish (or use the Build > Publish menu item).
Step 2: If you have previously configured any publishing profiles, the Publish pane appears; in that case, select Create a new profile.
Step 3: In the Pick a publish target dialog box, select App Service.
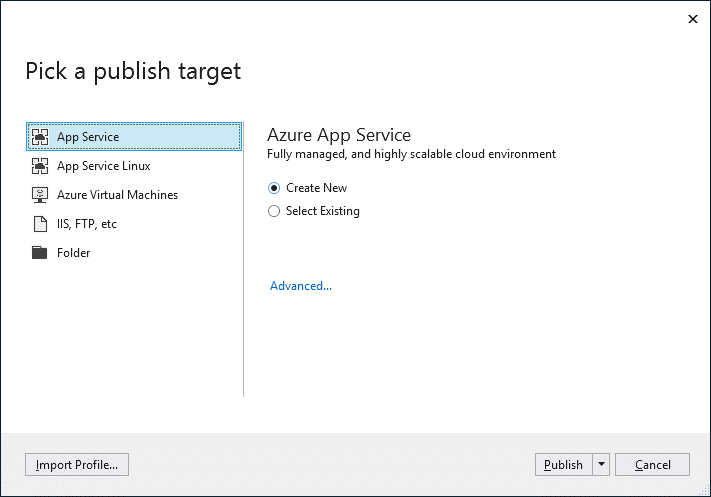
Step 4: Select Publish. The Create App Service dialog box appears. Sign in with your Azure account, if necessary, and then the default App Service settings populate the fields.
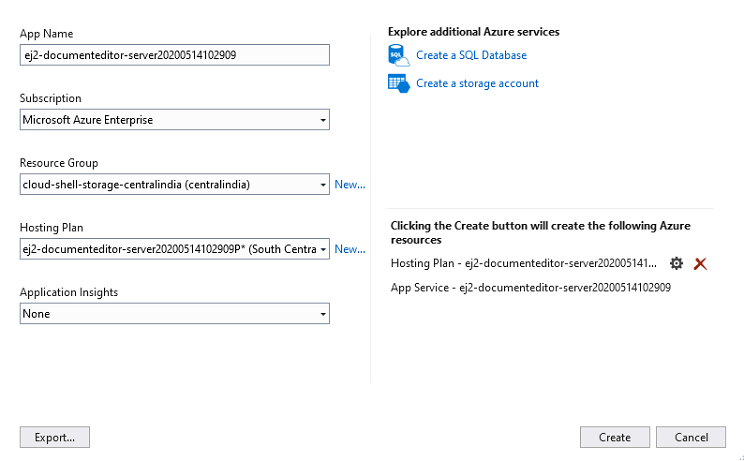
Step 5: Select Create. Visual Studio deploys the app to your Azure App Service, and the web app loads in your browser at http://<app_name>.azurewebsites.net (for example, http://ej2-documenteditor-server20200514102909.azurewebsites.net).
Step 6: Navigate to the DOCX Editor Web API at http://<app_name>.azurewebsites.net/api/documenteditor/. It returns the default GET-method response.
Append the running App Service URL http://<app_name>.azurewebsites.net/api/documenteditor/ to the serviceUrl in the client-side DOCX Editor control. For more information about how to get started with the DOCX Editor control, refer to the Getting Started page.
For more information about a production-ready setup, see the Microsoft Azure App Service documentation.