Getting Started with ASP.NET Core DOCX Editor
14 Aug 20264 minutes to read
ASP.NET Core DOCX Editor (Document Editor) enables you to create, edit, view, and print Word documents in web applications. This section guides you through the steps to get started and create a DOCX Editor in an ASP.NET Core application.
Prerequisites
Create a new ASP.NET Core Web App in Visual Studio
Create an ASP.NET Core Web App using Visual Studio 2022 by following the instructions here.
Install ASP.NET Core DOCX Editor NuGet package
To add the ASP.NET Core DOCX Editor component, open the NuGet package manager in Visual Studio (Tools → NuGet Package Manager → Manage NuGet Packages for Solution), then search for and install:
Alternatively, you can utilize the following package manager command to achieve the same.
Install-Package Syncfusion.EJ2.AspNet.CoreThis package includes dependencies such as Newtonsoft.Json for JSON serialization and Syncfusion.Licensing for license validation.
Create a new ASP.NET Core Web App in Visual Studio Code
Create an ASP.NET Core Web App in Visual Studio Code using the following commands:
dotnet new webapp -o WebApp
cd WebApp
Install ASP.NET Core DOCX Editor NuGet package
Install the Syncfusion® ASP.NET Core component NuGet package within the project.
- Press Ctrl+` to open the integrated terminal in Visual Studio Code.
- Ensure you’re in the project root directory where your
.csprojfile is located. - Run the following command to install the Syncfusion.EJ2.AspNet.Core NuGet package.
dotnet add package Syncfusion.EJ2.AspNet.Core -v 35.1.37
dotnet restore
This package includes dependencies such as Newtonsoft.Json for JSON serialization and Syncfusion.Licensing for license validation.
Add Syncfusion® ASP.NET Core Tag Helper
Open ~/Pages/_ViewImports.cshtml file and import the Syncfusion.EJ2 TagHelper.
@addTagHelper *, Syncfusion.EJ2Register a Syncfusion License Key
Before initializing the ASP.NET Core DOCX Editor control, generate a Syncfusion license key and register it in your application.
Add stylesheet and script resources
Reference the Syncfusion theme and JavaScript library using the CDN inside the <head> of ~/Pages/Shared/_Layout.cshtml. The stylesheet provides styling for all Syncfusion components including the DOCX Editor, and the script provides the client-side functionality.
<!-- Syncfusion ASP.NET Core controls styles -->
<link rel="stylesheet" href="https://cdn.syncfusion.com/ej2/35.1.37/fluent.css" />
<!-- Syncfusion ASP.NET Core controls scripts -->
<script src="https://cdn.syncfusion.com/ej2/35.1.37/dist/ej2.min.js"></script>
To use a different theme, replace fluent.css with the theme of your choice (for example, tailwind3.css, bootstrap5.css, etc.) in the above code.
Refer the Themes topic to learn the different ways to include Syncfusion styles (using CDN, NPM package, or CRG) and ensure the expected appearance of Syncfusion® ASP.NET Core controls, and check the Adding Script Reference documentation to understand the various approaches for adding required script references in your ASP.NET Core application.
Register Syncfusion® script manager
Also, register the script manager <ejs-scripts> at the end of <body> in the ~/Pages/Shared/_Layout.cshtml file as follows.
<!-- Syncfusion ASP.NET Core Script Manager -->
<ejs-scripts></ejs-scripts>
Add the DOCX Editor component
Add the DOCX Editor component in ~/Pages/Index.cshtml page.
<ejs-documenteditorcontainer id="container" height="620px"></ejs-documenteditorcontainer>Run the application
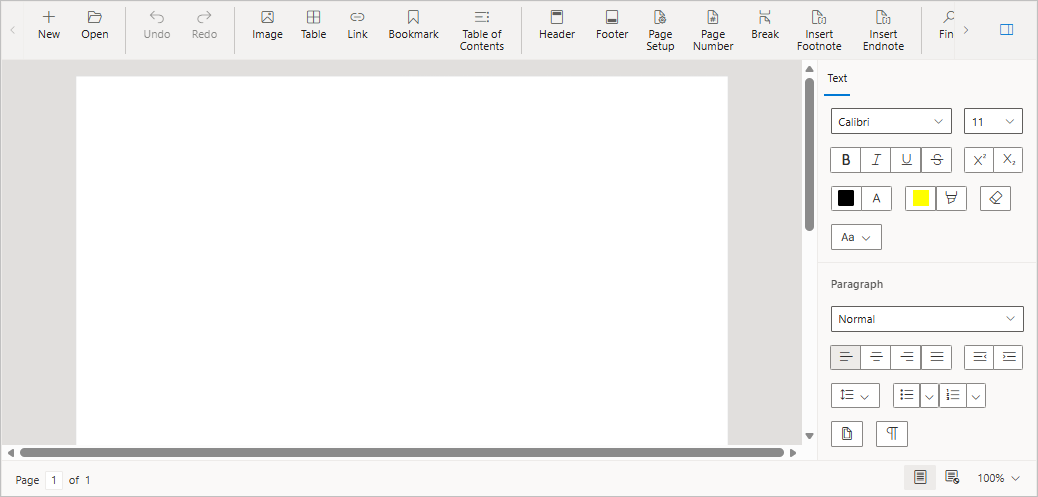
Press Ctrl+F5 (Windows) or ⌘+F5 (macOS) to run the app. The DOCX Editor component will be rendered in the default web browser as shown below.
Online Demo
Explore the live demo here to see how to create, edit, and print Word documents using the ASP.NET Core DOCX Editor.
Looking for the full ASP.NET Core DOCX Editor component overview, features, pricing, and documentation? Visit the ASP.NET Core DOCX Editor page.
Troubleshooting
If the DOCX Editor control does not render as expected, use the following checklist to resolve the most common setup and configuration issues.
1. Control not rendering (blank area where the DOCX Editor should appear)
- Ensure the
<ejs-scripts>tag is included at the end of<body>section in~/Pages/Shared/_Layout.cshtmlto initialize client-side scripts.
2. Tag helper not recognized
- Ensure
@addTagHelper *, Syncfusion.EJ2is included in~/Pages/_ViewImports.cshtml. - Rebuild the project after installing the
Syncfusion.EJ2.AspNet.CoreNuGet package.