How to Publish Angular DOCX Editor Web API to Azure App
27 Aug 20261 minute to read
Prerequisites
- Visual Studio 2017 or 2019.
- An
Azure subscription. - The DOCX Editor Web API controller application from
here.
Make sure you build the project using the Build > Build Solution menu command before following the deployment steps.
Publish to Azure App Service
Step 1: In Solution Explorer, right-click the project and click Publish (or use the Build > Publish menu item).
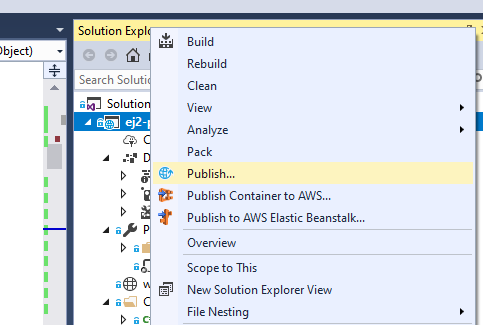
Step 2: If you have previously configured any publishing profiles, the Publish pane appears, in which case select Create new profile.
Step 3: In the Pick a publish target dialog box, select App Service.
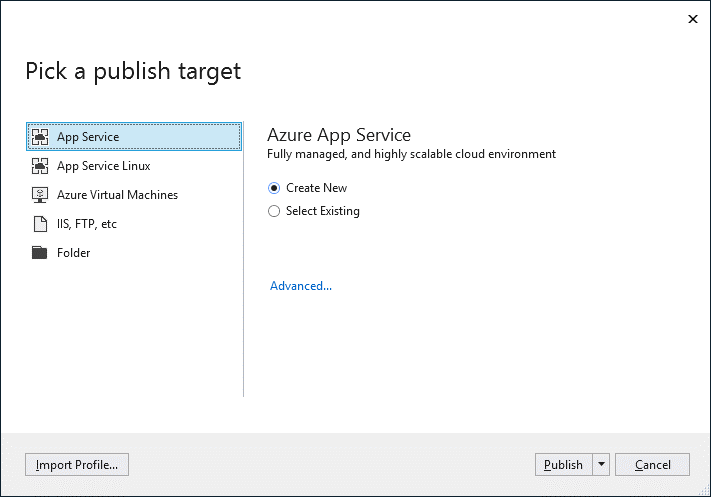
Step 4: Select Publish. The Create App Service dialog box appears. Sign in with your Azure account, if necessary, and then the default app service settings populate the fields.
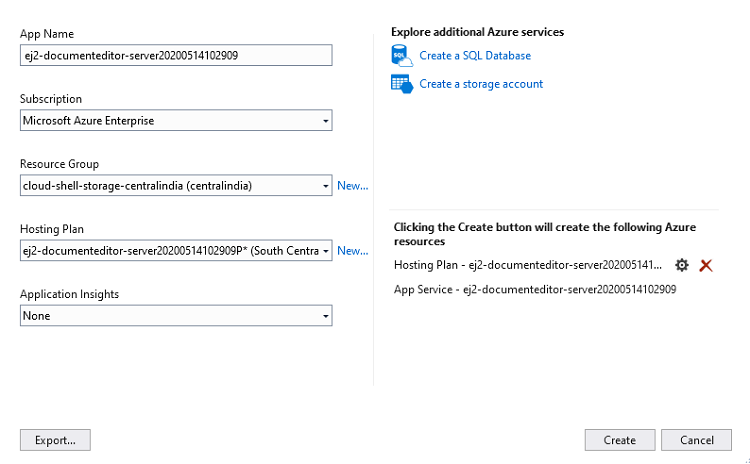
Step 5: Select Create. Visual Studio deploys the app to your Azure App Service, and the web app loads in your browser with the app name at http://<app_name>.azurewebsites.net (i.e., http://ej2-documenteditor-server20200514102909.azurewebsites.net).
Step 6: Navigate to DOCX Editor Web API control http://ej2-documenteditor-server20200514102909.azurewebsites.net/api/documenteditor. It returns the default GET method response.
Append the app service running URL http://ej2-documenteditor-server20200514102909.azurewebsites.net/api/documenteditor to the service URL in the client-side DOCX Editor control. For more information about how to get started with the DOCX Editor control, refer to this getting started page.
For more information about the app container service, refer to the Azure App Service for a production-ready setup.