How can I help you?
Convert Word Document to Image in AWS Lambda
17 Dec 20258 minutes to read
Syncfusion® DocIO is a .NET Core Word library used to create, read, edit and convert Word documents programmatically without Microsoft Word or interop dependencies. Using this library, you can convert a Word document to image in AWS Lambda.
Steps to convert Word document to Image in AWS Lambda
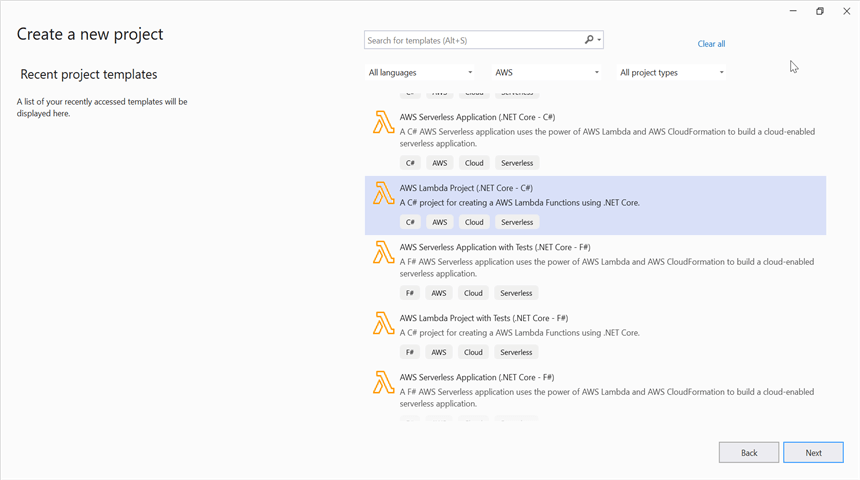
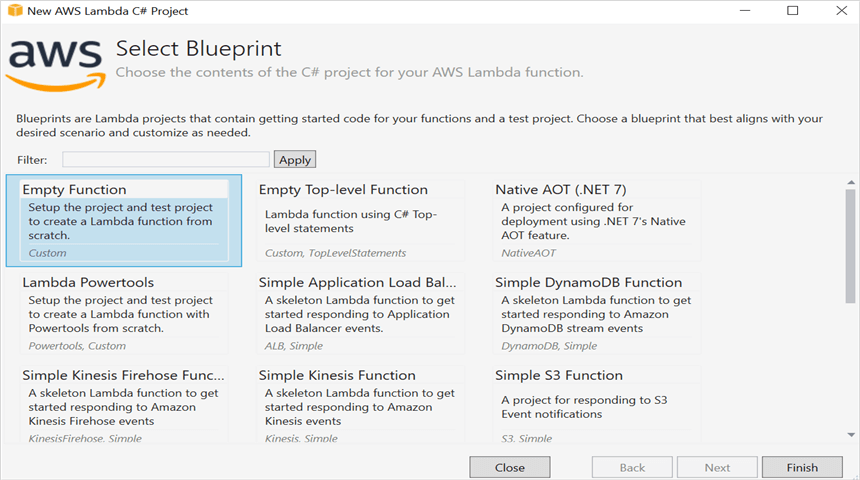
Step 1: Create a new AWS Lambda project as follows.
Step 2: Select Blueprint as Empty Function and click Finish.
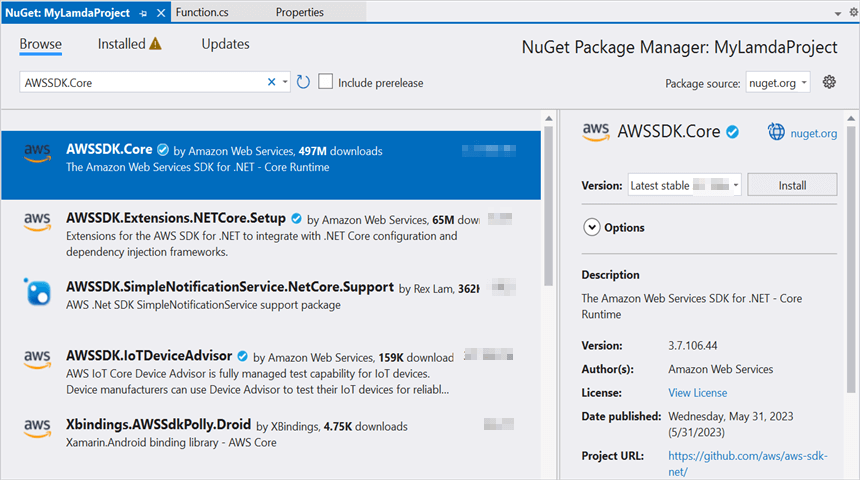
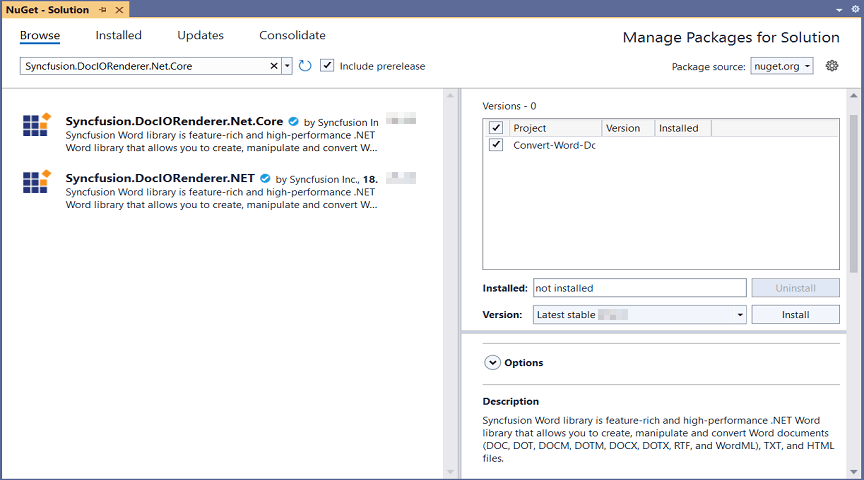
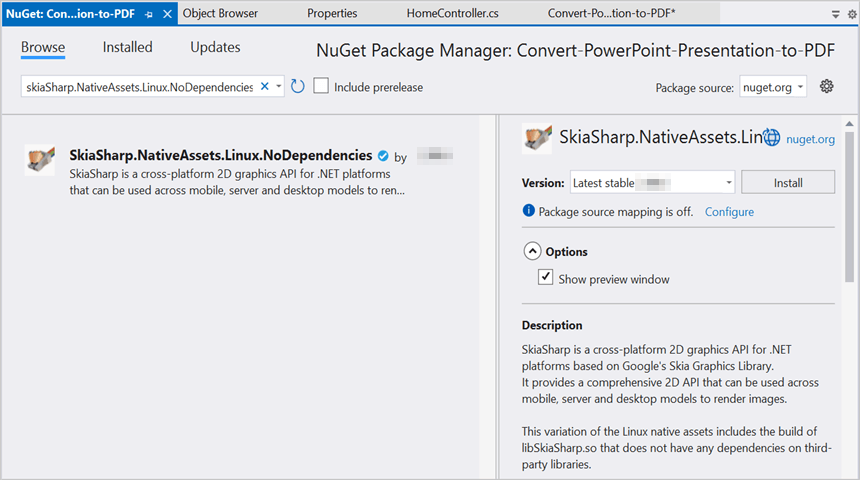
Step 3: Install the following Nuget packages in your application from Nuget.org.
NOTE
Starting with v16.2.0.x, if you reference Syncfusion® assemblies from trial setup or from the NuGet feed, you also have to add “Syncfusion.Licensing” assembly reference and include a license key in your projects. Please refer to this link to know about registering Syncfusion® license key in your application to use our components.
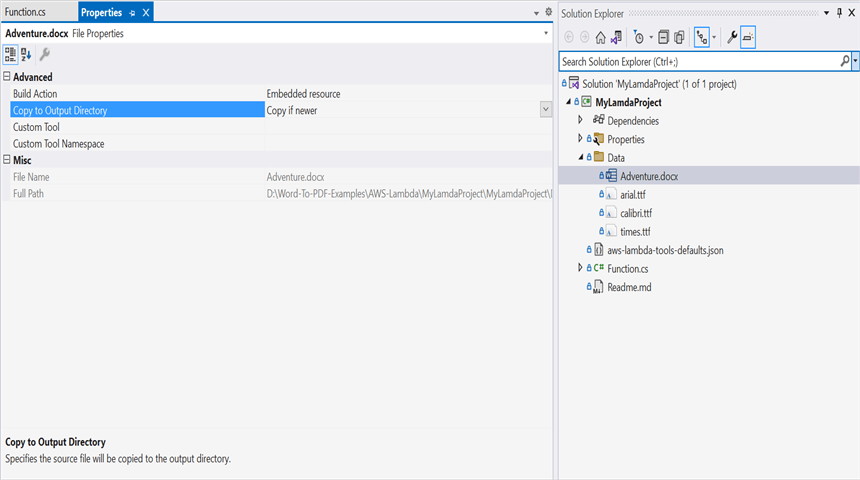
Step 4: Create a folder and copy the required data files and include the files to the project.
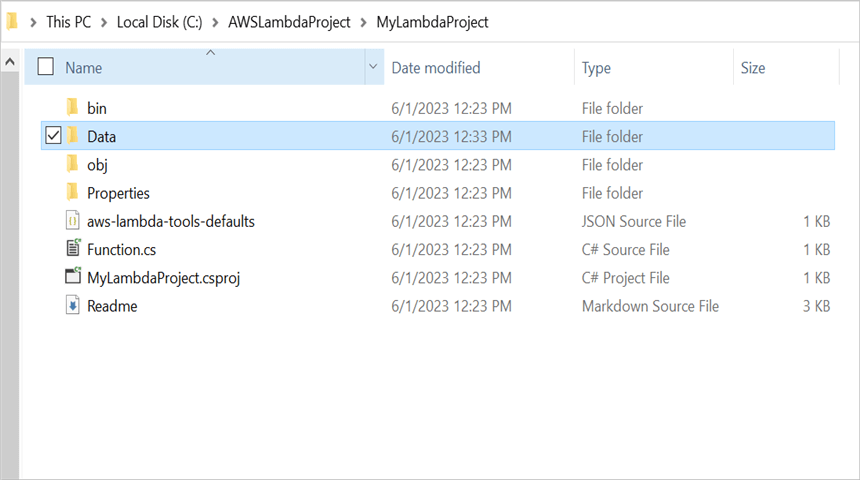
Step 5: Set the copy to output directory to Copy if newer to all the data files.
Step 6: Add the following environment variable in the aws-lambda-tools-defaults.json file to specify the library search paths for the AWS Lambda function. This configuration sets the LD_LIBRARY_PATH, allowing the application to locate the required native libraries at runtime.
"environment-variables": "\"LD_LIBRARY_PATH\"=\"/var/task:/tmp:/lib64:/usr/lib64\""Step 7: Include the following namespaces in Function.cs file.
using Syncfusion.DocIO;
using Syncfusion.DocIO.DLS;
using Syncfusion.DocIORenderer;
using Syncfusion.Drawing;
step 8: Add the following code snippet in Function.cs to convert a Word document to image.
/// <summary>
/// A simple function that takes a string and does a ToUpper
/// </summary>
/// <param name="input"></param>
/// <param name="context"></param>
/// <returns></returns>
public string FunctionHandler(string input, ILambdaContext context)
{
    string filePath = Path.GetFullPath(@"Data/Input.docx");
    //Open the file as Stream.
    using (FileStream docStream = new FileStream(filePath, FileMode.Open, FileAccess.Read))
    {
        //Loads file stream into Word document.
        using (WordDocument wordDocument = new WordDocument(docStream, FormatType.Docx))
        {
            //Hooks the font substitution event.
            wordDocument.FontSettings.SubstituteFont += FontSettings_SubstituteFont;
            //Instantiation of DocIORenderer.
            using (DocIORenderer render = new DocIORenderer())
            {
                //Convert the first page of the Word document into an image.
                Stream imageStream = wordDocument.RenderAsImages(0, ExportImageFormat.Jpeg);
                //Unhooks the font substitution event after converting to image.
                wordDocument.FontSettings.SubstituteFont -= FontSettings_SubstituteFont;
                //Reset the stream position.
                imageStream.Position = 0;
                //Save the document into stream
                MemoryStream stream = new MemoryStream();
                imageStream.CopyTo(stream);
                return Convert.ToBase64String(stream.ToArray());
            }
        }
    }
}

//Set the alternate font when a specified font is not installed in the production environment.
private void FontSettings_SubstituteFont(object sender, SubstituteFontEventArgs args)
{
    if (args.OriginalFontName == "Calibri" && args.FontStyle == FontStyle.Regular)
        args.AlternateFontStream = new FileStream(Path.GetFullPath(@"Data/calibri.ttf"), FileMode.Open, FileAccess.Read, FileShare.ReadWrite);
    else if (args.OriginalFontName == "Calibri" && args.FontStyle == FontStyle.Bold)
        args.AlternateFontStream = new FileStream(Path.GetFullPath(@"Data/calibrib.ttf"), FileMode.Open, FileAccess.Read, FileShare.ReadWrite);
    else
        args.AlternateFontStream = new FileStream(Path.GetFullPath(@"Data/times.ttf"), FileMode.Open, FileAccess.Read, FileShare.ReadWrite);
}
NOTE
If using an older version of Syncfusion and Skiasharp NuGet as v2.88.8, there is a chance of encountering a libSkiaSharp not found exception during the conversion process.
To resolve this, refer to the code snippet provided in the documentation here.
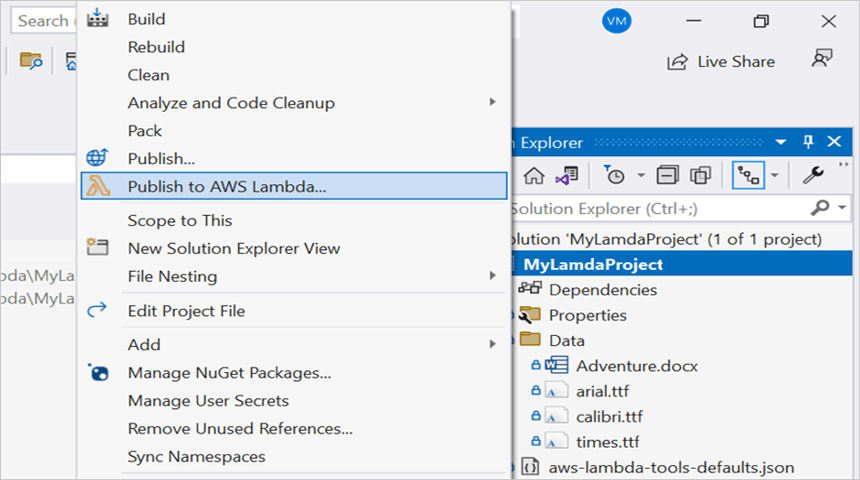
Step 9: Right-click the project and select Publish to AWS Lambda.
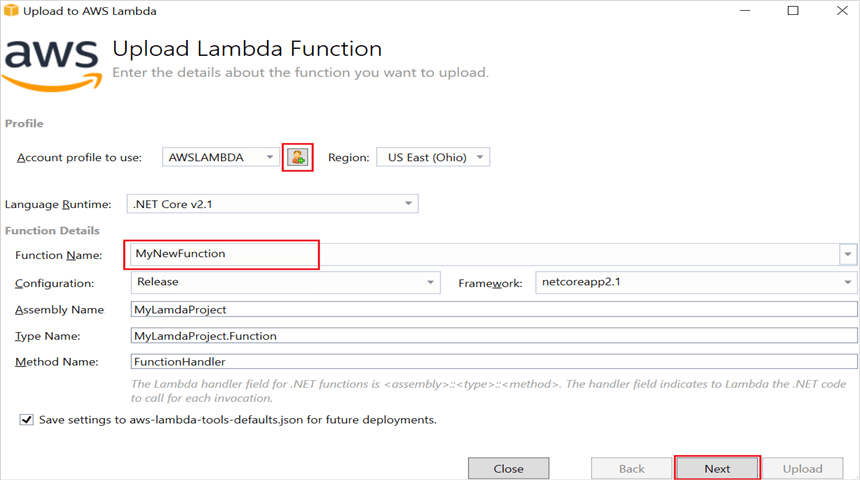
Step 10: Create a new AWS profile in the Upload Lambda Function Window. After creating the profile, add a name for the Lambda function to publish. Then, click Next.
Step 11: In the Advanced Function Details window, specify the Role Name as based on AWS Managed policy. After selecting the role, click the Upload button to deploy your application.

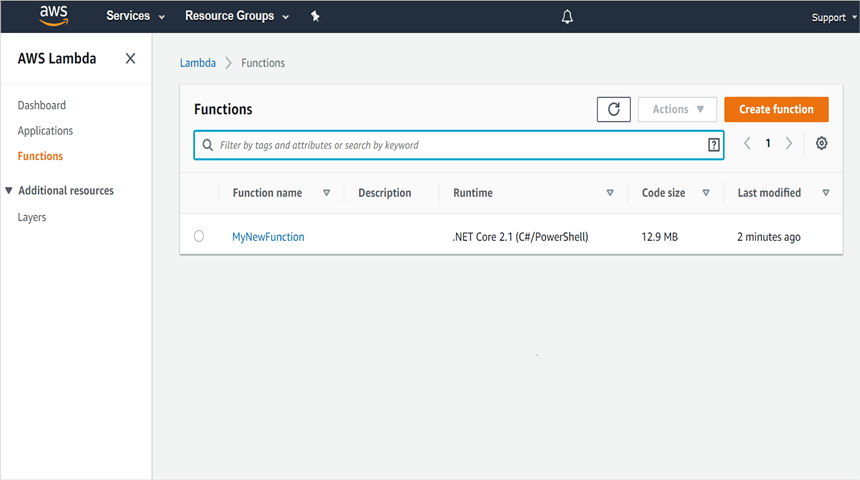
Step 12: After deploying the application, you can see the published Lambda function in AWS console.
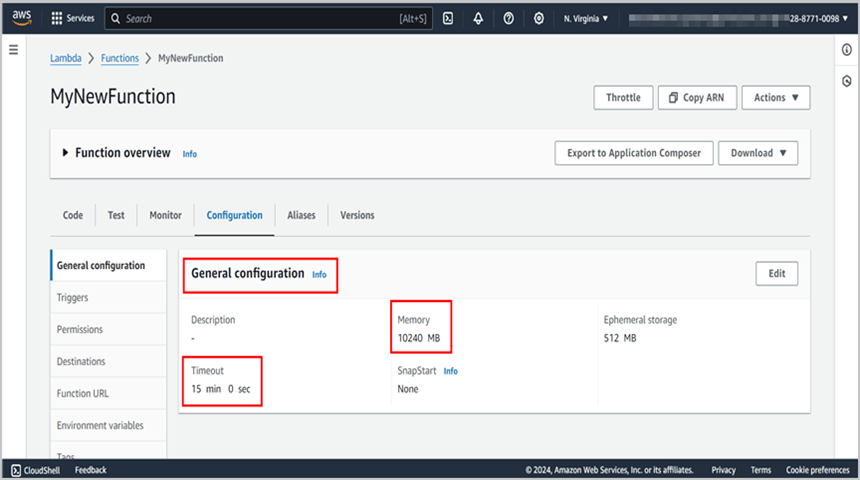
Step 13: Edit Memory size and Timeout as maximum in General configuration of the AWS Lambda function.
Steps to post the request to AWS Lambda
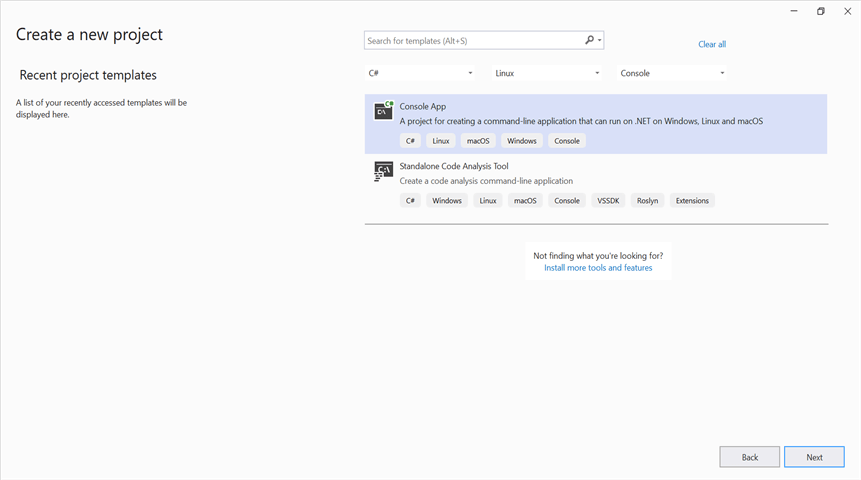
Step 1: Create a new console project.
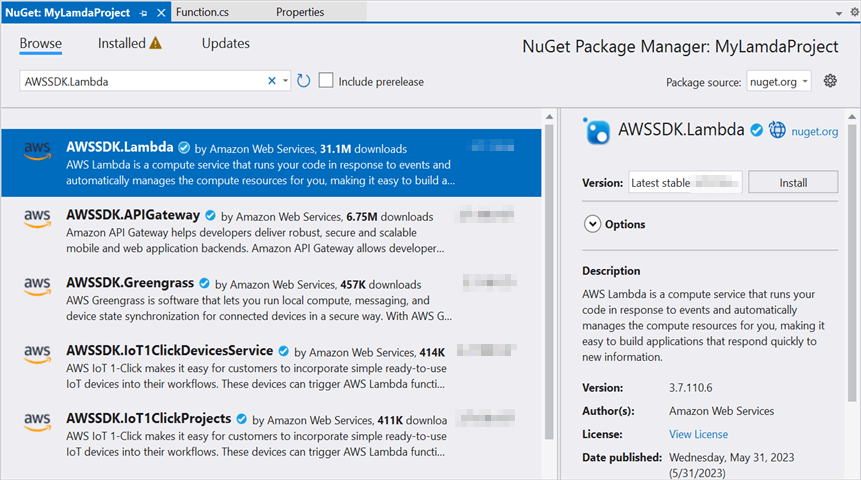
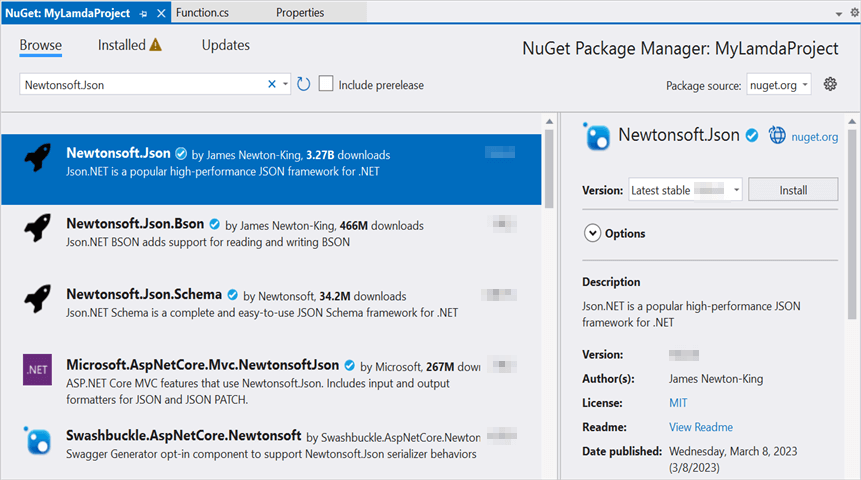
step 2: Install the following Nuget packages in your application from Nuget.org.
Step 3: Include the following namespaces in Program.cs file.
using Amazon;
using Amazon.Lambda;
using Amazon.Lambda.Model;
using Newtonsoft.Json;
Step 4: Add the following code snippet in Program.cs to invoke the published AWS Lambda function using the function name and access keys.
//Create a new AmazonLambdaClient
AmazonLambdaClient client = new AmazonLambdaClient("awsaccessKeyID", "awsSecreteAccessKey", RegionEndpoint.USEast2);
//Create new InvokeRequest with published function name.
InvokeRequest invoke = new InvokeRequest
{
    FunctionName = "MyNewFunction",
    InvocationType = InvocationType.RequestResponse,
    Payload = "\"Test\""
};
//Get the InvokeResponse from client InvokeRequest.
InvokeResponse response = client.Invoke(invoke);
//Get the InvokeResponse from client InvokeRequest.
InvokeResponse response = client.Invoke(invoke);
//Read the response stream
var stream = new StreamReader(response.Payload);
JsonReader reader = new JsonTextReader(stream);
var serilizer = new JsonSerializer();
var responseText = serilizer.Deserialize(reader);
//Convert Base64String into image file.
byte[] bytes = Convert.FromBase64String(responseText.ToString());
FileStream fileStream = new FileStream("WordtoImage.Jpeg", FileMode.Create);
BinaryWriter writer = new BinaryWriter(fileStream);
writer.Write(bytes, 0, bytes.Length);
writer.Close();
System.Diagnostics.Process.Start("WordtoImage.Jpeg");
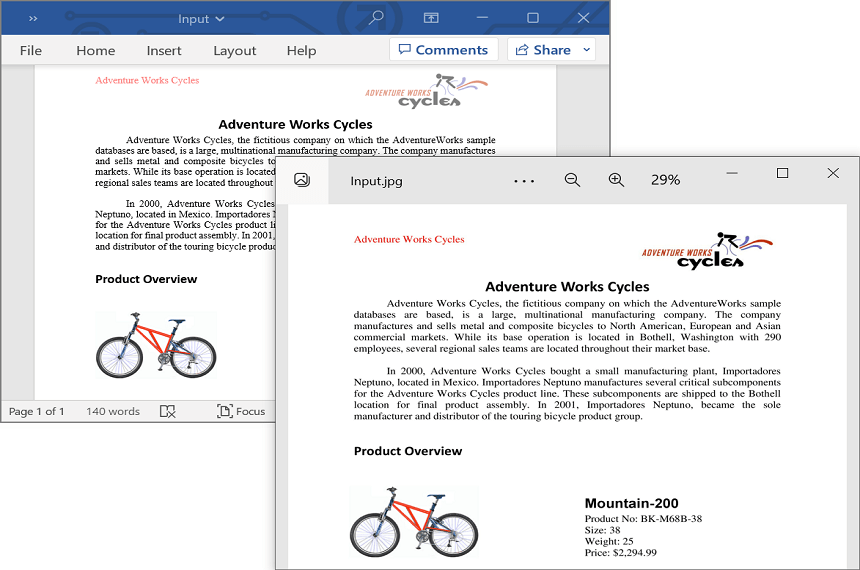
By executing the program, you will get the image as follows.
From GitHub, you can download the console application and AWS Lambda project.
Click here to explore the rich set of Syncfusion® Word library (DocIO) features.
An online sample link to convert Word document to image in ASP.NET Core.
