Convert PowerPoint Presentation to PDF in Azure App Service on Linux
29 Jun 202611 minutes to read
Syncfusion® PowerPoint is a .NET Core PowerPoint library used to create, read, edit and convert PowerPoint documents programmatically without Microsoft PowerPoint or interop dependencies. Using this library, you can convert a PowerPoint Presentation to PDF in Azure App Service on Linux.
Steps to convert PowerPoint Presentation to PDF in Azure App Service on Linux
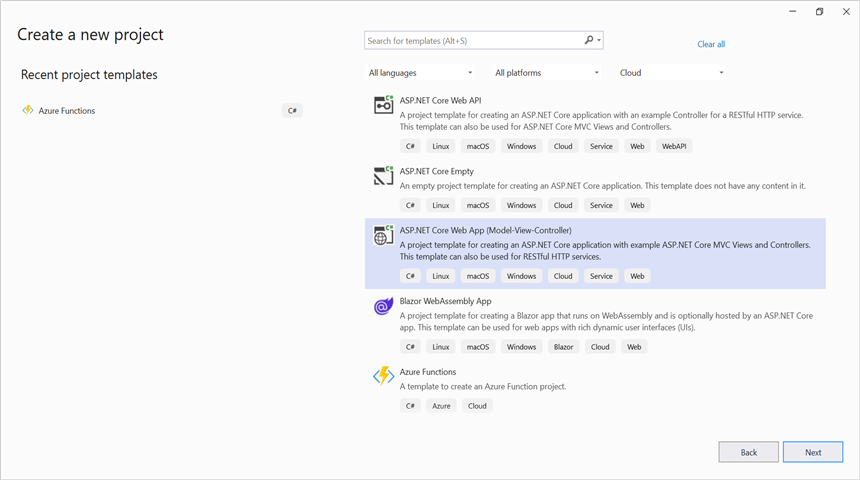
Step 1: Create a new ASP.NET Core Web App (Model-View-Controller).
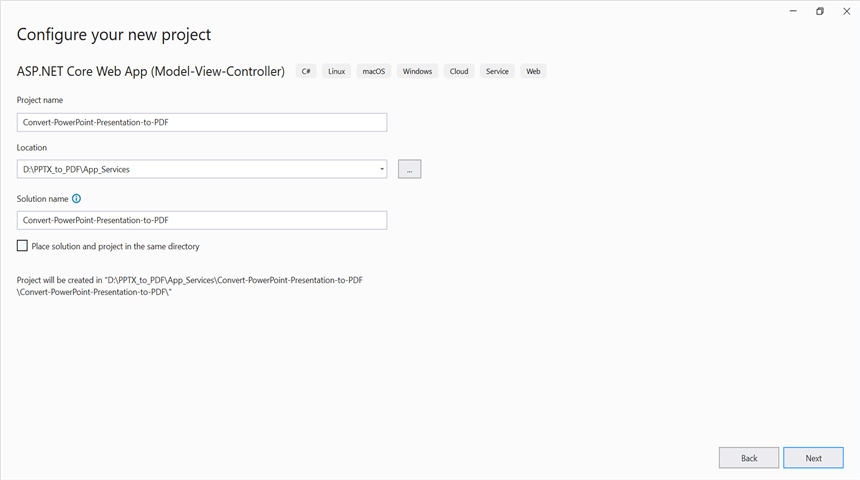
Step 2: Create a project name and select the location.
Step 3: Click Create button.

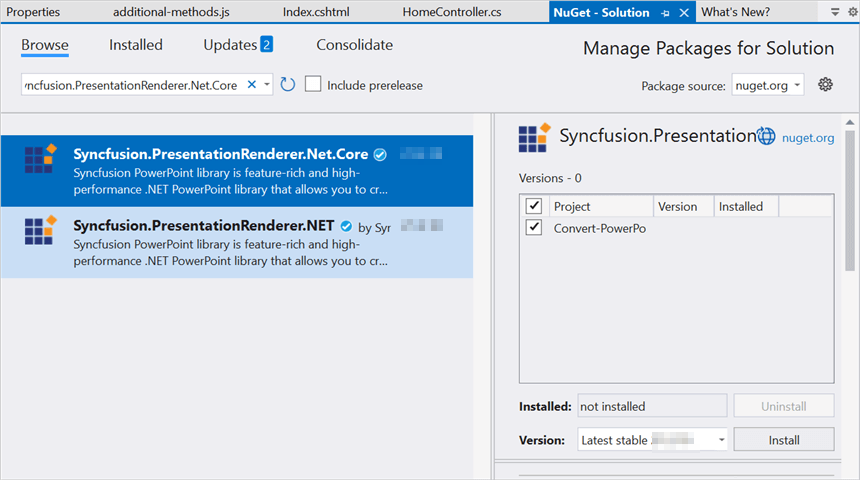
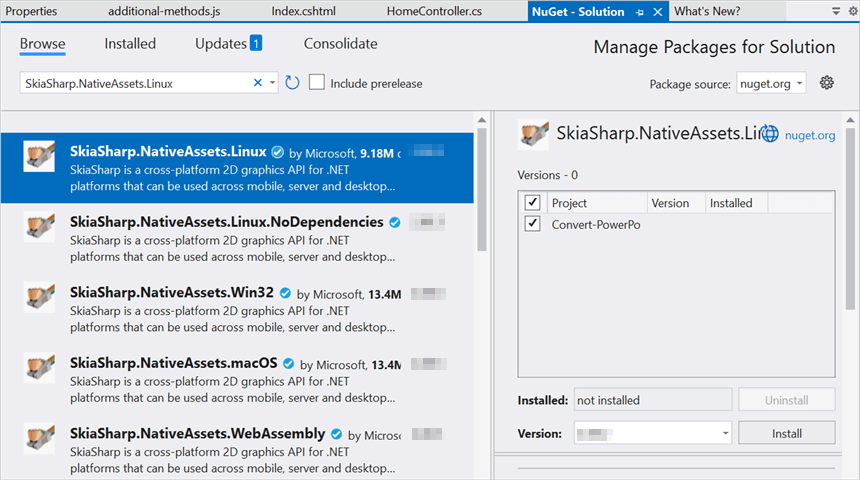
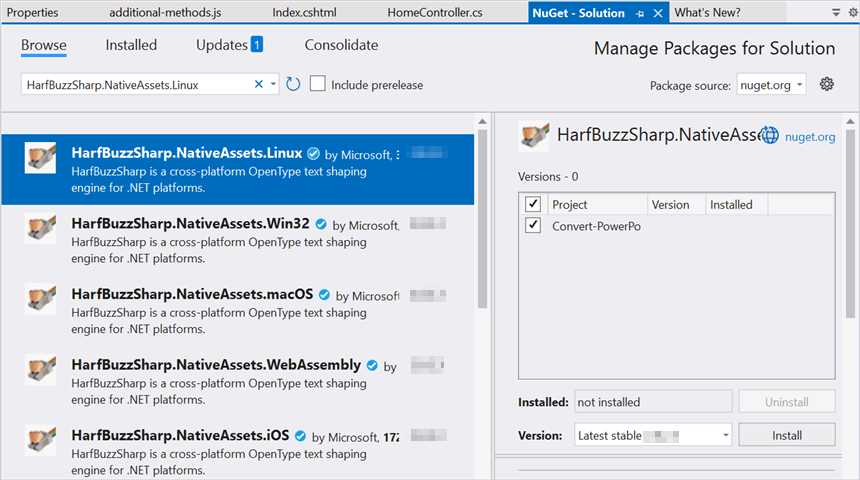
Step 4: Install the following Nuget packages in your application from Nuget.org.
- Syncfusion.PresentationRenderer.Net.Core
- SkiaSharp.NativeAssets.Linux v3.119.1
- HarfBuzzSharp.NativeAssets.Linux v8.3.1.2
NOTE
Starting with v16.2.0.x, if you reference Syncfusion® assemblies from trial setup or from the NuGet feed, you also have to add “Syncfusion.Licensing” assembly reference and include a license key in your projects. Please refer to this link to know about registering Syncfusion® license key in your application to use our components.
Step 5: Add a new button in the Index.cshtml as shown below.
@{
Html.BeginForm("ConvertPPTXtoPDF", "Home", FormMethod.Post, new { enctype = "multipart/form-data" });
{
<div class="Common">
<div class="tablediv">
<div class="rowdiv">
This sample illustrates how to convert PowerPoint document to PDF using PowerPoint library.
</div>
<div class="rowdiv" style="border-width: 0.5px;border-style:solid; border-color: lightgray; padding: 1px 5px 7px 5px">
Click the button to view the resultant PDF document being converted from PowerPoint document.
<div class="rowdiv" style="margin-top: 10px">
<div class="celldiv">
Select Document :
@Html.TextBox("file", "", new { type = "file", accept = ".pptx" }) <br />
</div>
<div class="rowdiv" style="margin-top: 8px">
<input class="buttonStyle" type="submit" value="Convert to PDF" name="button" style="width:150px;height:27px" />
<br />
<div class="text-danger">
@ViewBag.Message
</div>
</div>
</div>
</div>
<br />
</div>
</div>
Html.EndForm();
}
}Step 6: Include the following namespaces in HomeController.cs.
using Syncfusion.Presentation;
using Syncfusion.PresentationRenderer;
using Syncfusion.Pdf;
Step 9: Include the below code snippet in HomeController.cs for convert a PowerPoint Presentation to PDF.
private Microsoft.AspNetCore.Hosting.IHostingEnvironment _env;
public HomeController(Microsoft.AspNetCore.Hosting.IHostingEnvironment env)
{
    _env = env;
}

/// <summary>
/// Convert Presentation to PDF
/// </summary>
/// <param name="button"></param>
/// <returns></returns>
public ActionResult ConvertPPTXtoPDF(string button)
{
    if (button == null)
        return View("Index");
    if (Request.Form.Files != null)
    {
        if (Request.Form.Files.Count == 0)
        {
            ViewBag.Message = string.Format("Browse a PowerPoint Presentation and then click the button to convert as a PDF document");
            return View("Index");
        }
        // Gets the extension from file.
        string extension = Path.GetExtension(Request.Form.Files[0].FileName).ToLower();
        // Compares extension with supported extensions.
        if (extension == ".pptx")
        {
            MemoryStream stream = new MemoryStream();
            Request.Form.Files[0].CopyTo(stream);
            try
            {
                //Open the existing PowerPoint presentation with loaded stream.
                using (IPresentation pptxDoc = Presentation.Open(stream))
                {
                    //Convert the PowerPoint document to PDF document.
                    using (PdfDocument pdfDocument = PresentationToPdfConverter.Convert(pptxDoc))
                    {
                        //Create the MemoryStream to save the converted PDF.
                        MemoryStream pdfStream = new MemoryStream();
                        //Save the converted PDF document to MemoryStream.
                        pdfDocument.Save(pdfStream);
                        pdfStream.Position = 0;

                        //Download PDF document in the browser.
                        return File(pdfStream, "application/pdf", "Sample.pdf");
                    }
                }
            }
            catch (Exception ex)
            {
                ViewBag.Message = ex.ToString();
            }
        }
        else
        {
            ViewBag.Message = string.Format("Please choose PowerPoint document to convert to PDF");
        }
    }
    else
    {
        ViewBag.Message = string.Format("Browse a PowerPoint document and then click the button to convert as a PDF document");
    }
    return View("Index");
}
Steps to publish as Azure App Service on Linux
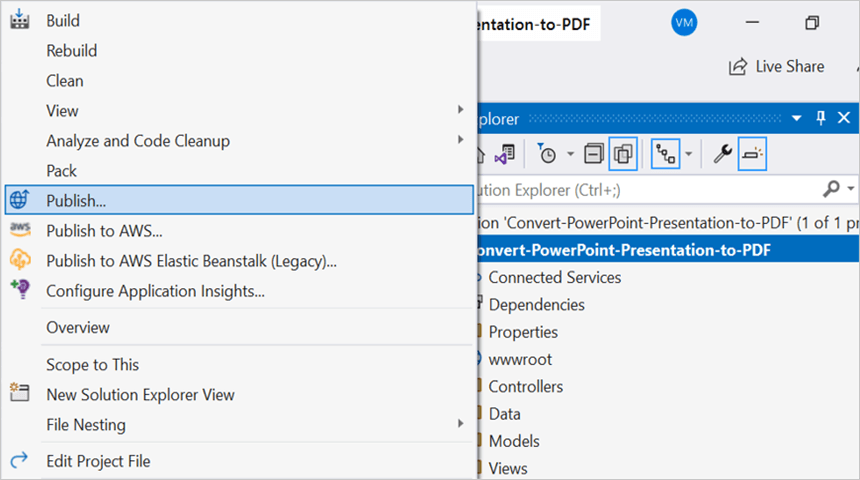
Step 1: Right-click the project and select Publish option.
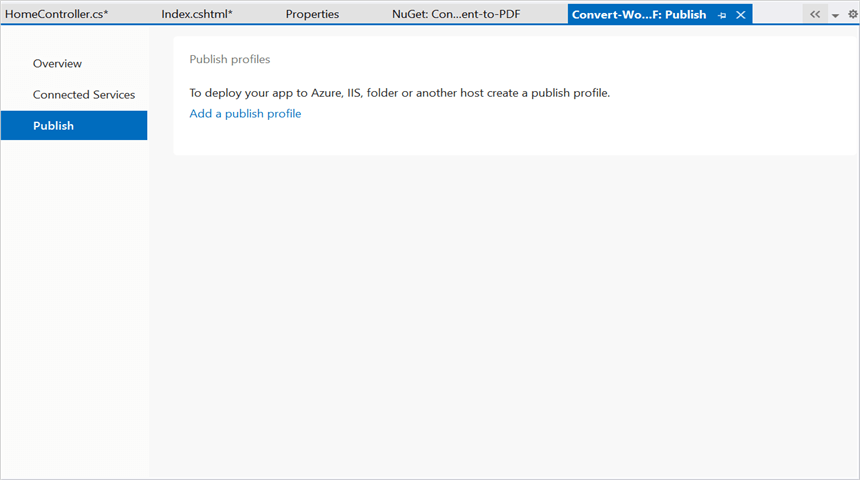
Step 2: Click the Add a Publish Profile button.
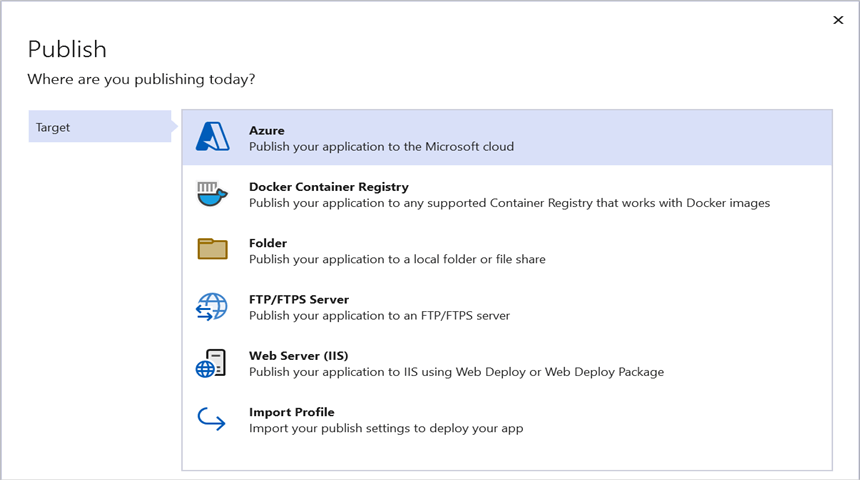
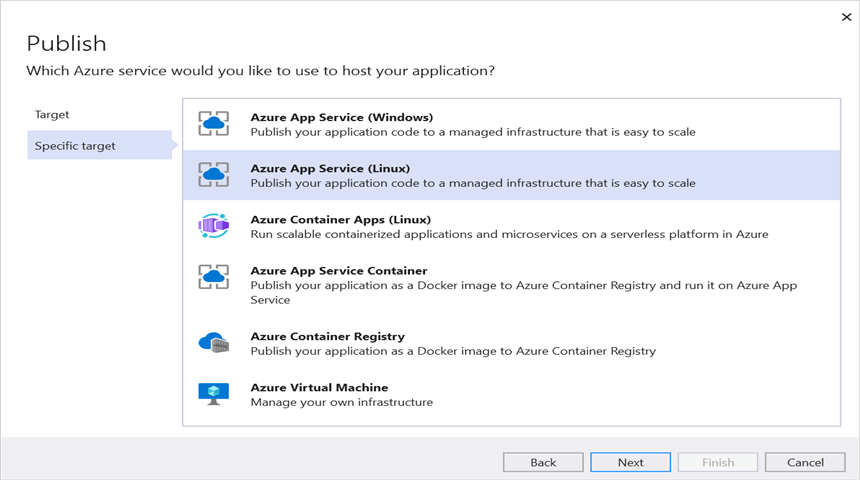
Step 3: Select the publish target as Azure.
Step 4: Select the Specific target as Azure App Service (Linux).
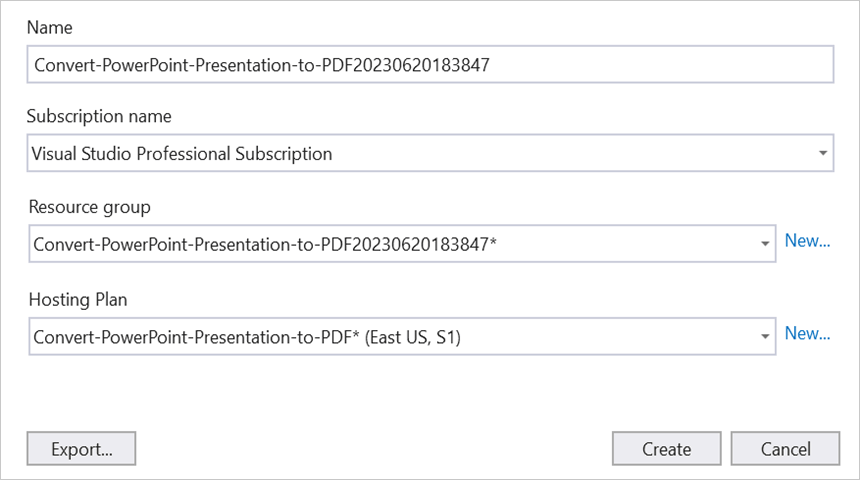
Step 5: To create a new app service, click Create new option.

Step 6: Click the Create button to proceed with App Service creation.
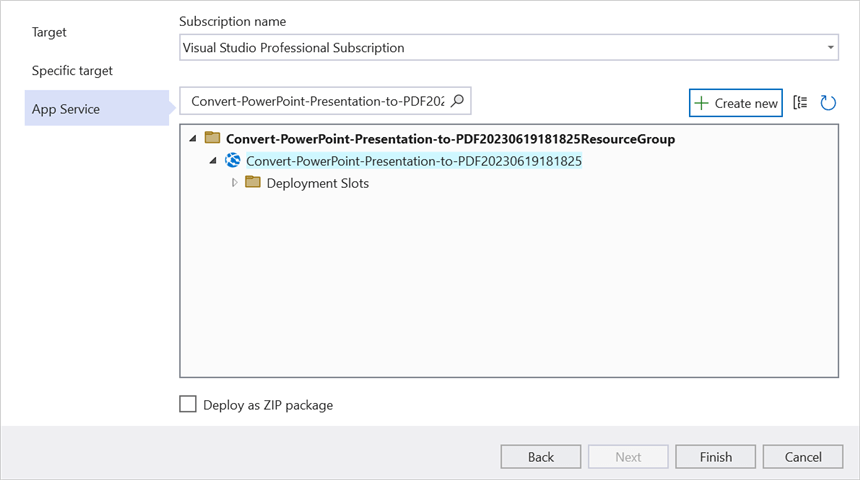
Step 7: Click the Finish button to finalize the App Service creation.
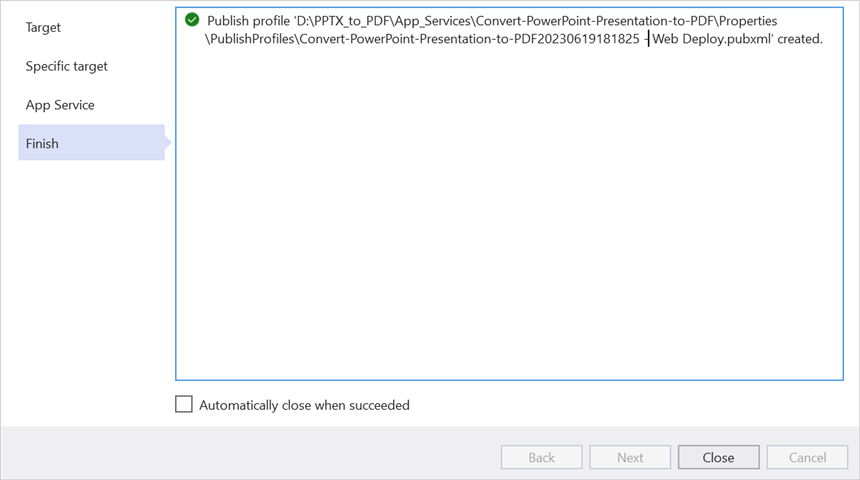
Step 8: Click Close button.
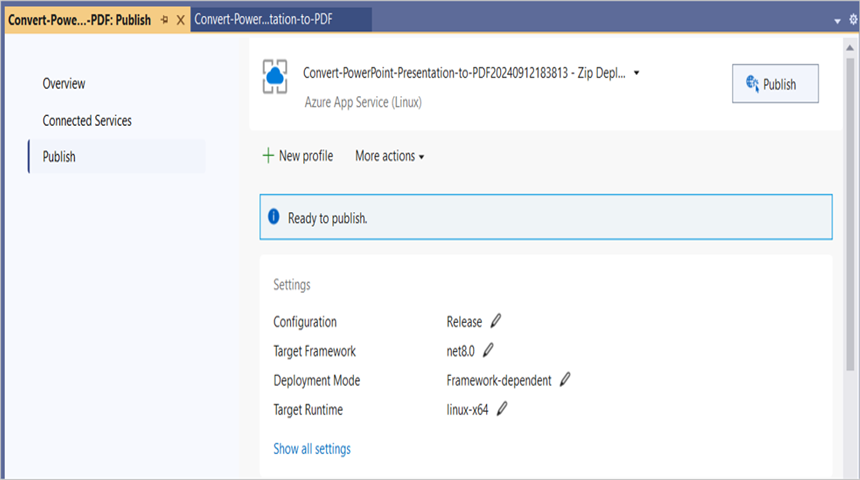
Step 9: Click the Publish button.
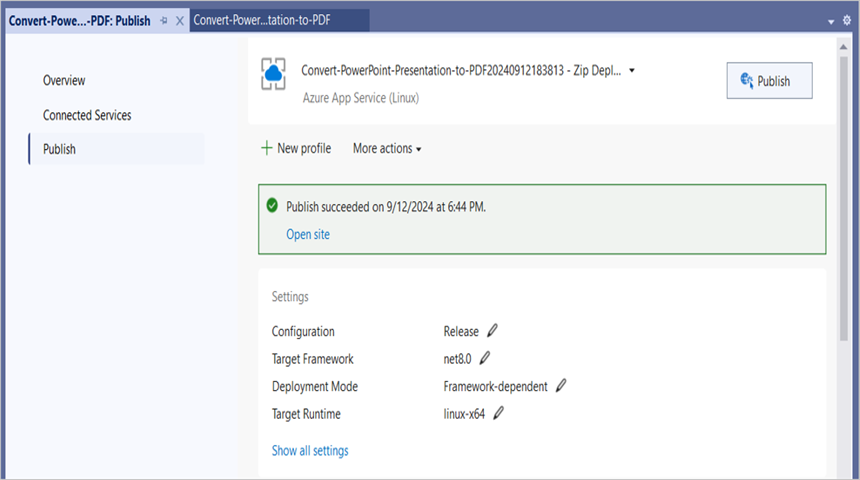
Step 10: Now, Publish has been succeeded.
Step 11: Now, the published webpage will open in the browser.
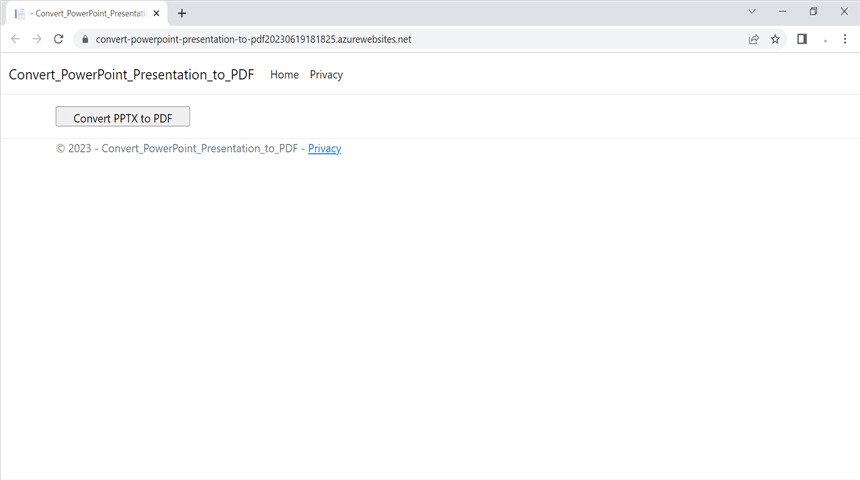
Step 12: Select the PowerPoint Presentation and Click Convert to PDF to convert the given PowerPoint Presentation to PDF.You will get the output PDF document as follows.

You can download a complete working sample from GitHub.
Looking for the full .NET PowerPoint Library component overview, features, pricing, and documentation? Visit the .NET PowerPoint Library page.
An online sample link to convert PowerPoint Presentation to PDF in ASP.NET Core.