Prerequires:
Step 1: Install .NET SDK:
- Ensure that you have the .NET SDK installed on your system. You can download it from the .NET Downloads page.
Step 2: Install Visual Studio: - Download and install Visual Studio Code from the official website.
Steps to create PDF document in Blazor WASM application
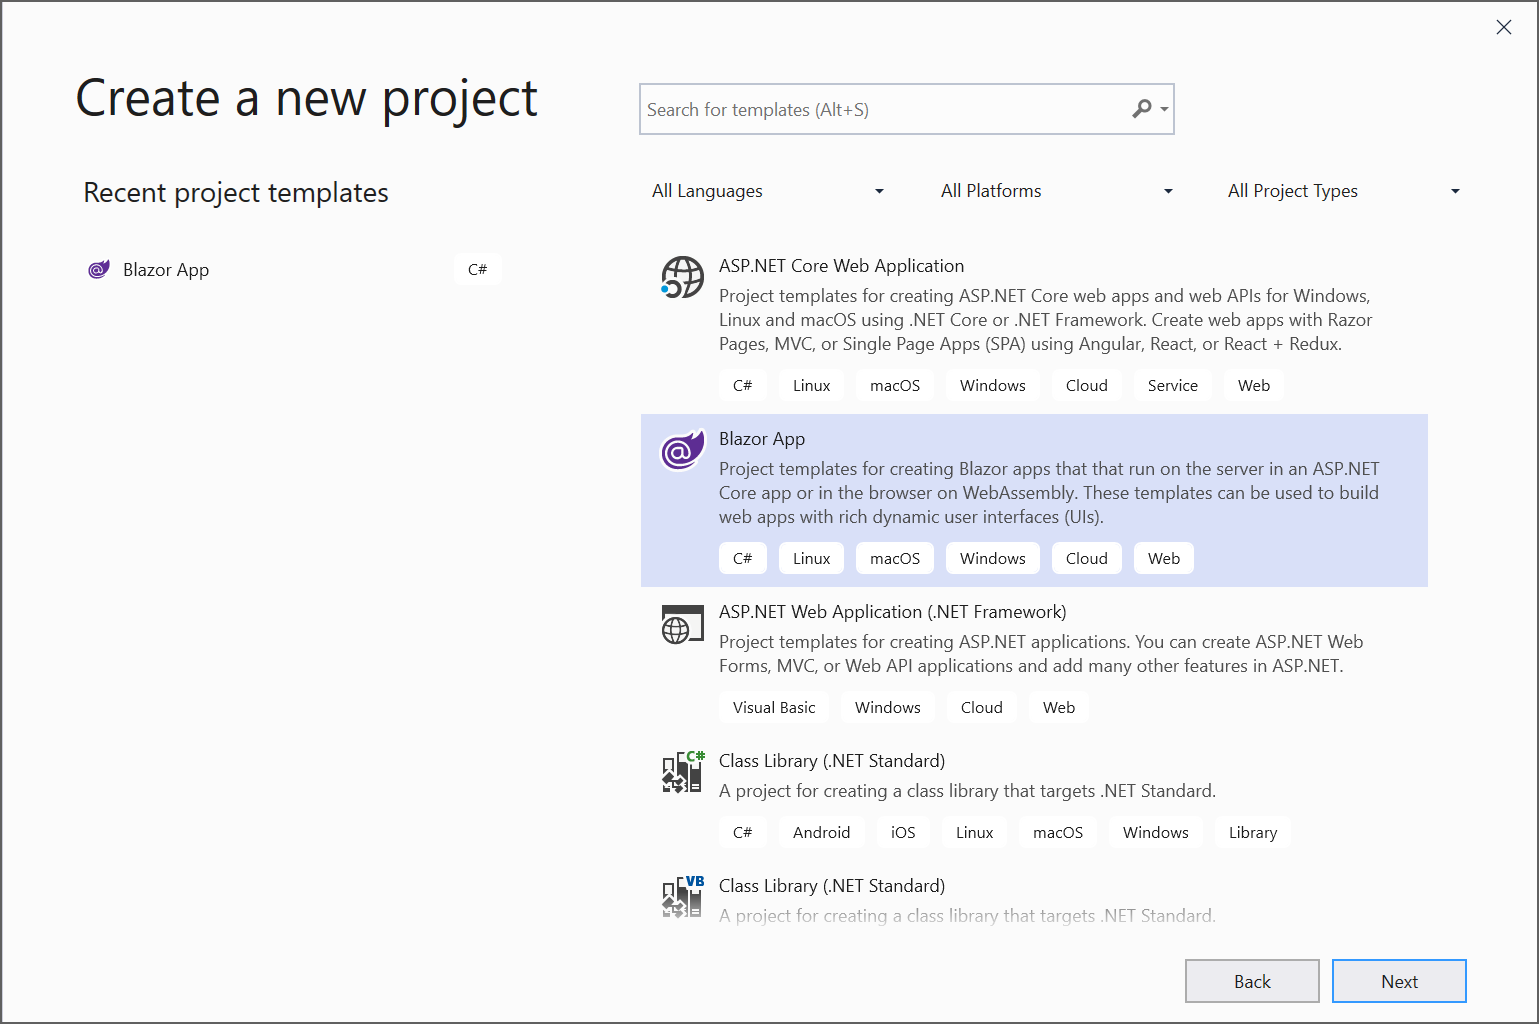
Step 1: Create a new C# Blazor client-side application project. Select Blazor App from the template and click the Next button.
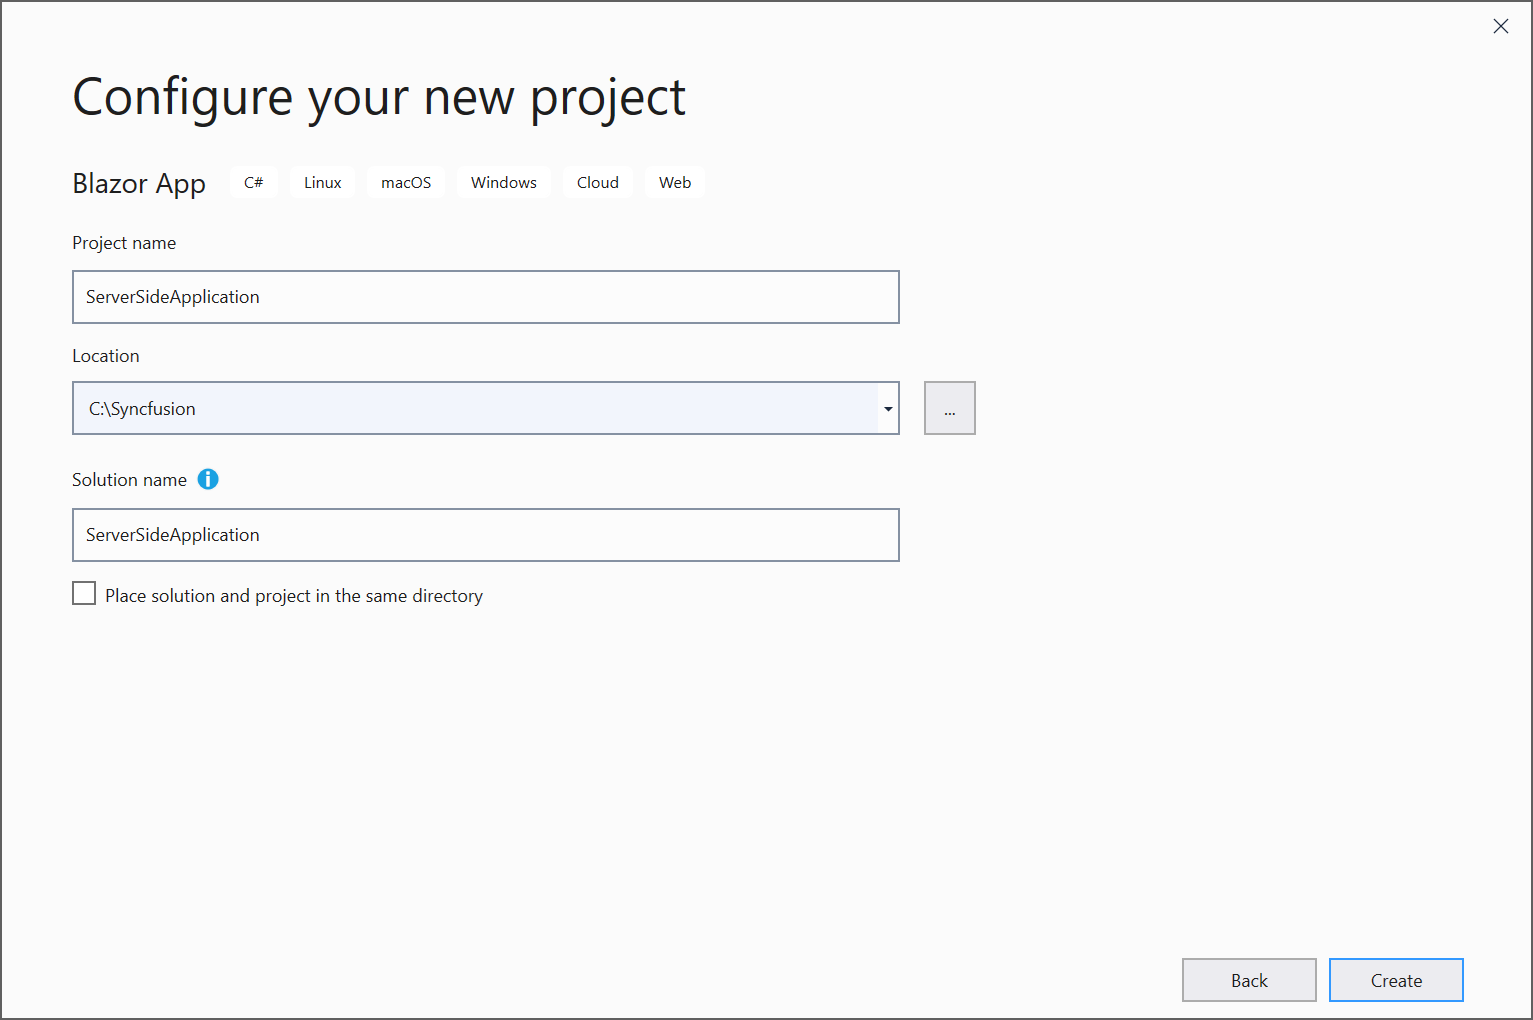
Step 2: Now, the project configuration window appears. Click Create button to create a new project with the default project configuration.
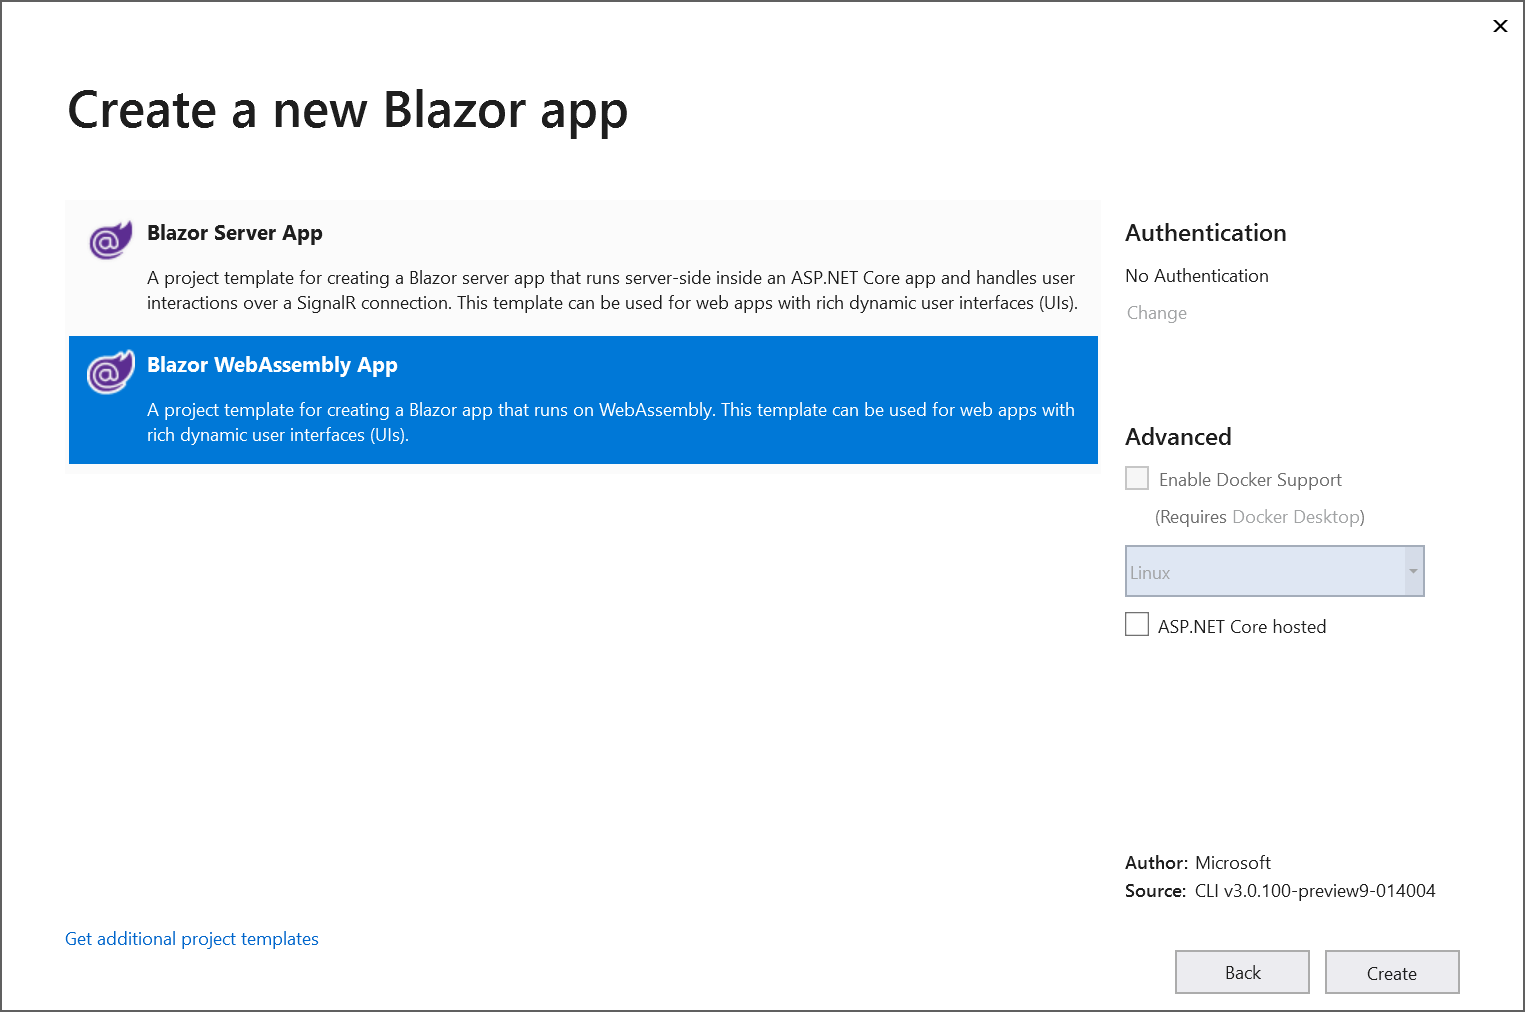
Step 3: Blazor WebAssembly App from the dashboard and click Create button to create a new Blazor client-side application.
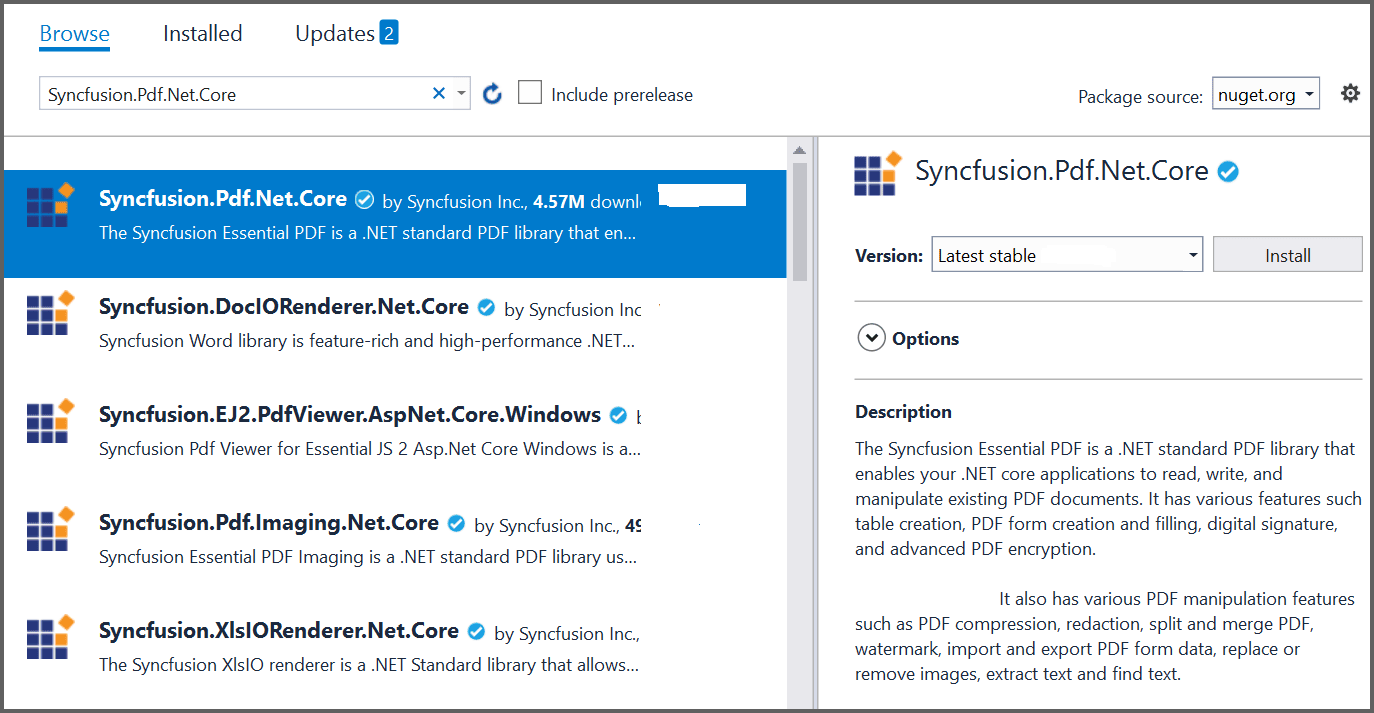
Step 4: Install the Syncfusion.PDF.Net.Core NuGet package as a reference to your Blazor application from NuGet.org.
NOTE
Starting with v16.2.0.x, if you reference Syncfusion® assemblies from trial setup or from the NuGet feed, you also have to add “Syncfusion.Licensing” assembly reference and include a license key in your projects. Please refer to this link to know about registering Syncfusion® license key in your application to use our components.
Step 5: Next, include the following namespaces in that FetchData.razor file.
@using Syncfusion.Pdf
@using Syncfusion.Pdf.Grid;
@using Syncfusion.Drawing;
@using Syncfusion.Pdf.Graphics;
@inject Microsoft.JSInterop.IJSRuntime JS
@using System.IO;
Step 6: Create a button in the FetchData.razor using the following code.
<button class="btn btn-primary" @onclick="@ExportToPdf">Export to PDF</button>Step 7: Define the @ExportToPdf click function on FetchData.razor file.
The PdfDocument object represents an entire PDF document that is being created and add a PdfPage to it. The PdfTextElement is used to add text in a PDF document and which provides the layout result of the added text by using the location of the next element that decides to prevent content overlapping. The PdfGrid allows you to create table by entering data manually or from an external data sources.
@functions {
void ExportToPdf()
{
int paragraphAfterSpacing = 8;
int cellMargin = 8;
//Create a new PDF document.
PdfDocument pdfDocument = new PdfDocument();
//Add Page to the PDF document.
PdfPage page = pdfDocument.Pages.Add();

//Create a new font.
PdfStandardFont font = new PdfStandardFont(PdfFontFamily.TimesRoman, 16);
//Create a text element to draw a text in PDF page.
PdfTextElement title = new PdfTextElement("Weather Forecast", font, PdfBrushes.Black);
PdfLayoutResult result = title.Draw(page, new PointF(0, 0));
PdfStandardFont contentFont = new PdfStandardFont(PdfFontFamily.TimesRoman, 12);
//Create text element.
PdfTextElement content = new PdfTextElement("This component demonstrates fetching data from a client side and Exporting the data to PDF document using Syncfusion .NET PDF library.", contentFont, PdfBrushes.Black);
PdfLayoutFormat format = new PdfLayoutFormat();
format.Layout = PdfLayoutType.Paginate;
//Draw a text to the PDF document.
result = content.Draw(page, new RectangleF(0, result.Bounds.Bottom + paragraphAfterSpacing, page.GetClientSize().Width, page.GetClientSize().Height), format);

//Create a PdfGrid.
PdfGrid pdfGrid = new PdfGrid();
pdfGrid.Style.CellPadding.Left = cellMargin;
pdfGrid.Style.CellPadding.Right = cellMargin;
//Applying built-in style to the PDF grid
pdfGrid.ApplyBuiltinStyle(PdfGridBuiltinStyle.GridTable4Accent1);
//Assign data source.
pdfGrid.DataSource = forecasts;
pdfGrid.Style.Font = contentFont;
//Draw PDF grid into the PDF page.
pdfGrid.Draw(page, new Syncfusion.Drawing.PointF(0, result.Bounds.Bottom + paragraphAfterSpacing));

//Create memory stream.
MemoryStream memoryStream = new MemoryStream();
//Save the PDF document.
pdfDocument.Save(memoryStream);
//Download the PDF document
JS.SaveAs("Sample.pdf", memoryStream.ToArray());
}
}
Step 8: Create a class file with FileUtil name and add the following code to invoke the JavaScript action to download the file in the browser.
public static class FileUtil
{
    public static ValueTask<object> SaveAs(this IJSRuntime js, string filename, byte[] data)
       => js.InvokeAsync<object>(
           "saveAsFile",
           filename,
           Convert.ToBase64String(data));
}
Step 9: Add the following JavaScript function in the index.html available under the wwwroot folder.
<script type="text/javascript">
    function saveAsFile(filename, bytesBase64) {
            if (navigator.msSaveBlob) {
                //Download document in Edge browser
                var data = window.atob(bytesBase64);
                var bytes = new Uint8Array(data.length);
                for (var i = 0; i < data.length; i++) {
                    bytes[i] = data.charCodeAt(i);
                }
                var blob = new Blob([bytes.buffer], { type: "application/octet-stream" });
                navigator.msSaveBlob(blob, filename);
            }
            else {
        var link = document.createElement('a');
        link.download = filename;
        link.href = "data:application/octet-stream;base64," + bytesBase64;
        document.body.appendChild(link); // Needed for Firefox
        link.click();
        document.body.removeChild(link);
    }
        }
</script>
Step 10: Build the project.
Click on Build > Build Solution or press Ctrl + Shift + B to build the project.
Step 11: Run the project.
Click the Start button (green arrow) or press F5 to run the app.