Getting Started with .NET PDF Library in Azure App Service Linux
13 Aug 20268 minutes to read
The .NET Core PDF library is used to create, read, edit PDF documents programmatically without the dependency of Adobe Acrobat. Using this library, you can create PDF document in Azure App Service on Linux.
Prerequisites
- An active Microsoft Azure subscription.
- Visual Studio 2022 (17.0 or later) with the ASP.NET and web development and Azure development workloads installed.
- An active Syncfusion license. If you do not have one, request a free 30-day trial at https://www.syncfusion.com/sales/communitylicense.
- The Linux App Service plan supports .NET 6.0 or later; verify your target framework before publishing.
Steps to create PDF document in Azure App Service on Linux
Step 1: Create a new ASP.NET Core Web App (Model-View-Controller).
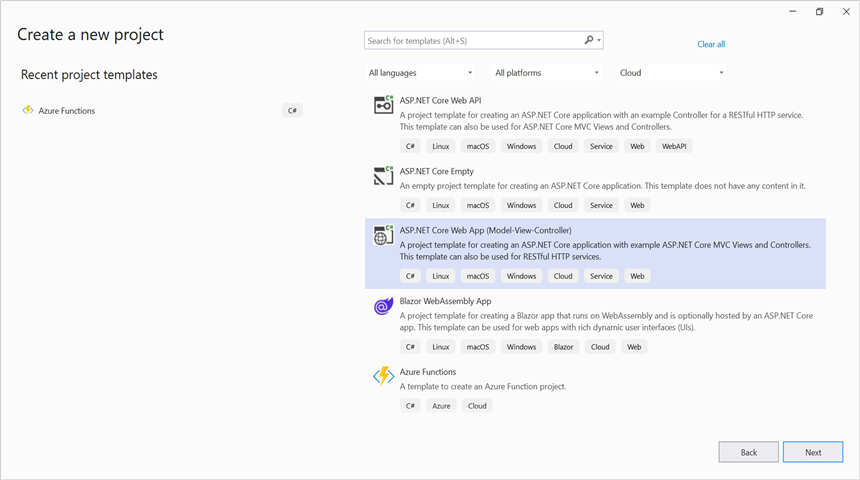
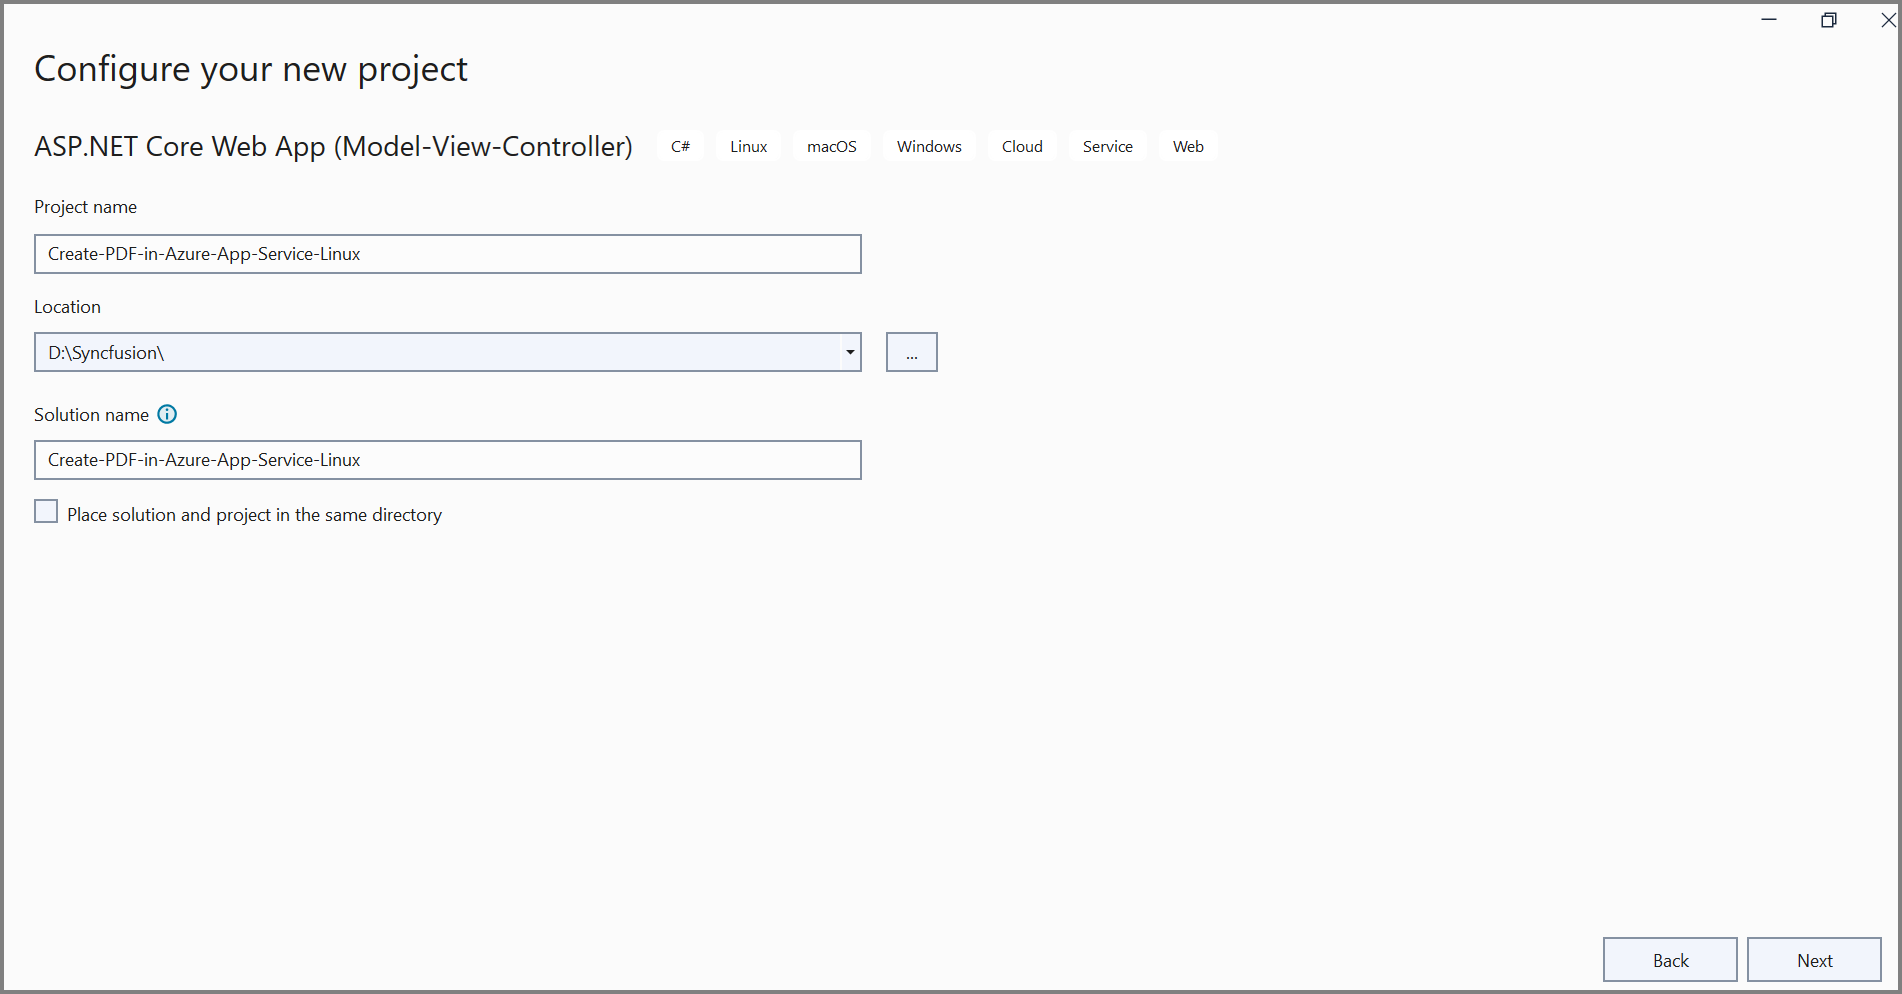
Step 2: Create a project name and select the location.
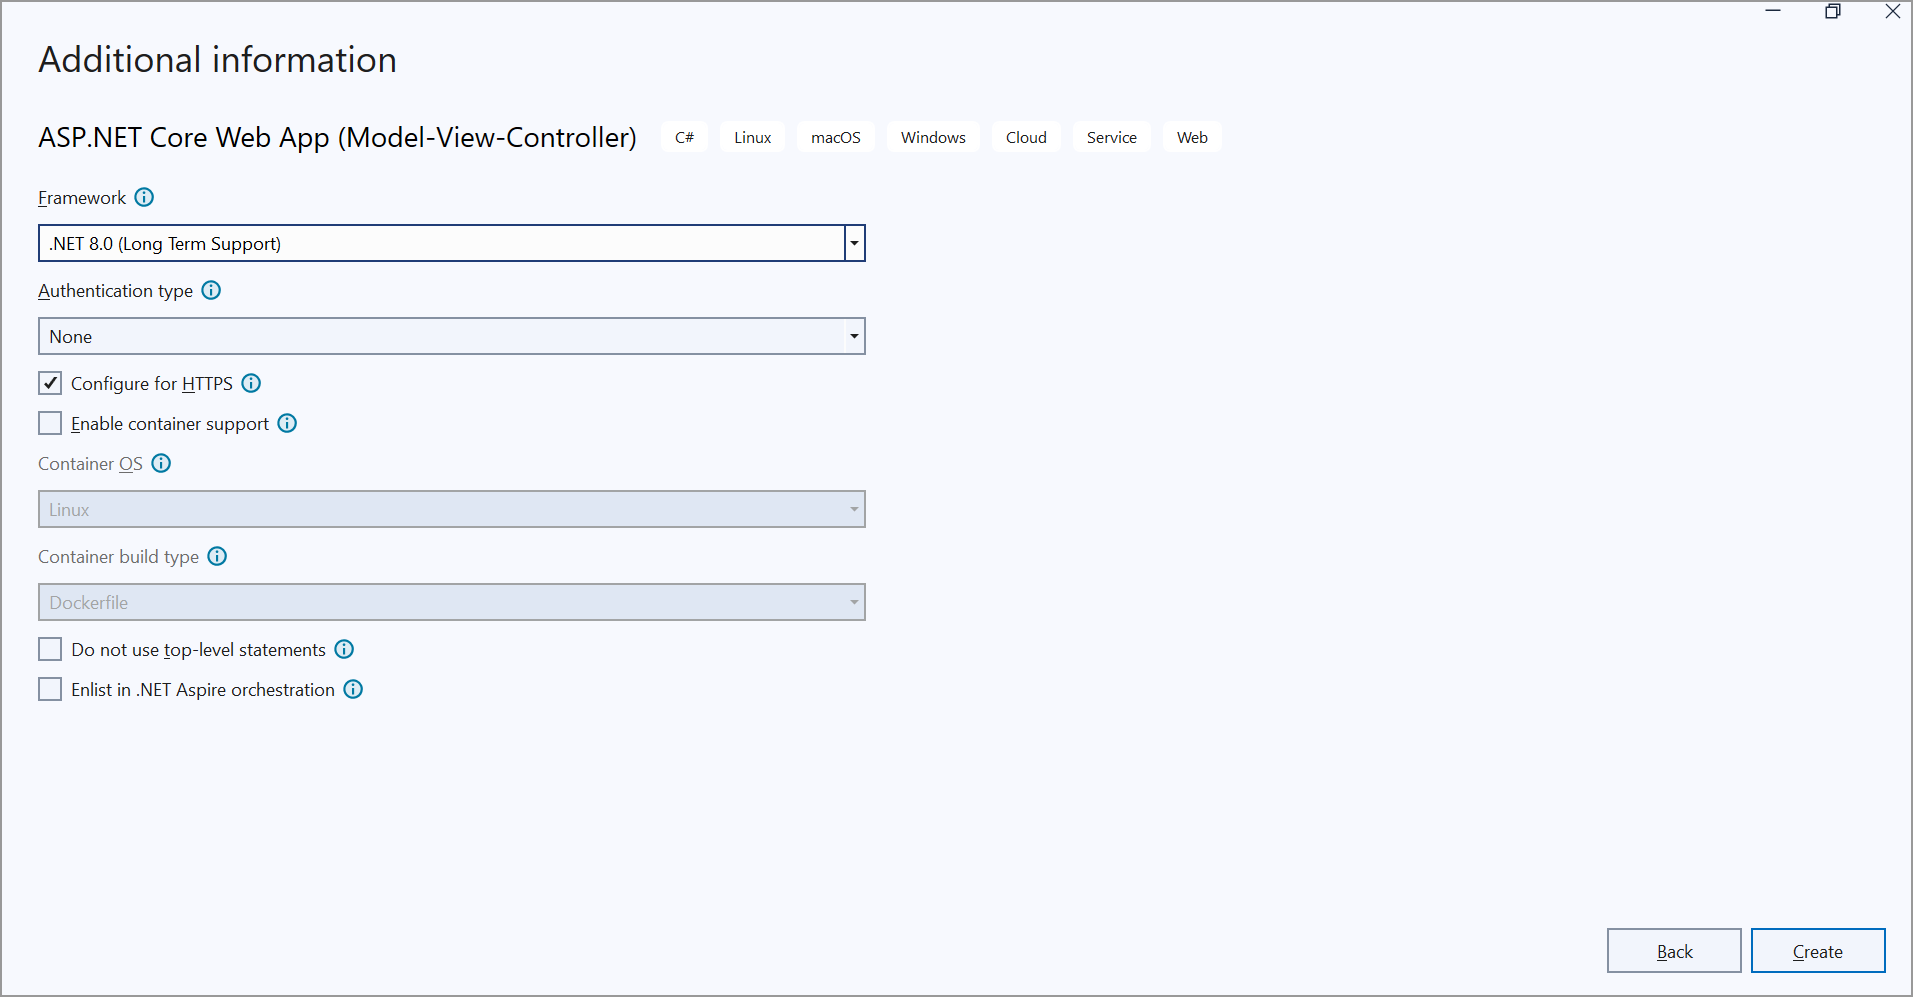
Step 3: Click Create button.
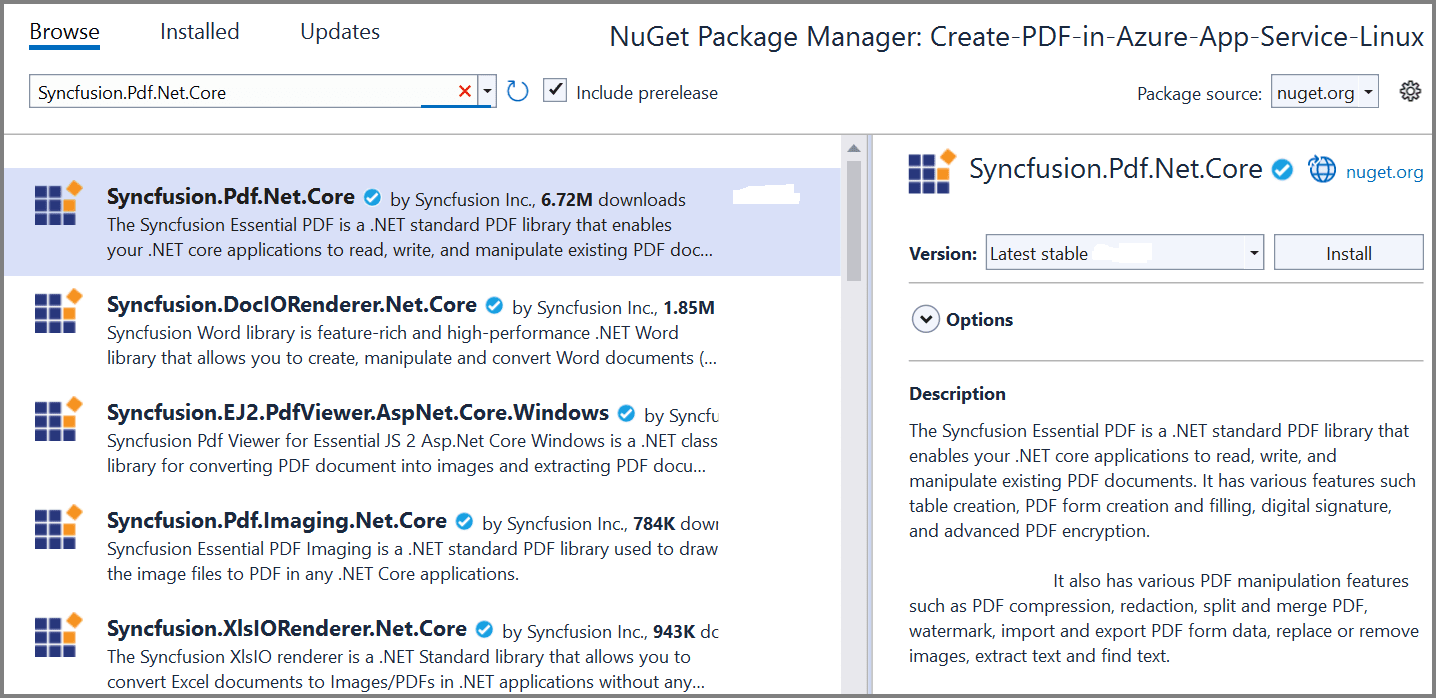
Step 4: Install the Syncfusion.Pdf.Net.Core NuGet package as a reference to your project from NuGet.org.
Step 5: Register the Syncfusion® license key. A trial watermark is added to every page of the generated PDF until a valid key is registered. Include the license key in Program.cs before initializing any Syncfusion® component:
using Syncfusion.Licensing;

var builder = WebApplication.CreateBuilder(args);
// Register the Syncfusion license
Syncfusion.Licensing.SyncfusionLicenseProvider.RegisterLicense("YOUR LICENSE KEY");

// Add services to the container.
builder.Services.AddControllersWithViews();

var app = builder.Build();
Replace "YOUR LICENSE KEY" with the license key associated with your Syncfusion® account. If you do not have a license key, you can request a free 30-day trial or apply for a Community License from the Syncfusion® website. For more information about registering a license key in your application, refer to the Syncfusion® Licensing Documentation.
Step 6: A default action method named Index will be present in HomeController.cs. Right click on Index method and select Go To View where you will be directed to its associated view page Index.cshtml. Add a new button in the Index.cshtml as shown below.
@{
    Html.BeginForm("CreatePDFDocument", "Home", FormMethod.Get);
    {
        <div>
            <input type="submit" value="Create PDF Document" style="width:200px;height:27px" />
        </div>
    }
    Html.EndForm();
}
Step 7: Include the following namespaces in HomeController.cs.
using Syncfusion.Pdf.Graphics;
using Syncfusion.Drawing;
using Syncfusion.Pdf.Grid;
using Syncfusion.Pdf;
Step 8: Add a new action method named CreatePDFDocument in HomeController.cs file and include the below code example to generate a PDF document in HomeController.cs.
//To load an existing file.
private readonly IWebHostEnvironment _hostingEnvironment;
public HomeController(IWebHostEnvironment hostingEnvironment)
{
    _hostingEnvironment = hostingEnvironment;
}

public IActionResult CreatePDFDocument()
{
    //Create a new PDF document.
    PdfDocument document = new PdfDocument();
    //Set the page size.
    document.PageSettings.Size = PdfPageSize.A4;
    //Add a page to the document.
    PdfPage page = document.Pages.Add();

    //Create PDF graphics for the page.
    PdfGraphics graphics = page.Graphics;
    //Load the image from the disk.
    string imagePath = Path.Combine(_hostingEnvironment.WebRootPath, "Data/AdventureCycle.jpg");
    FileStream imageStream = new FileStream(imagePath, FileMode.Open, FileAccess.Read);
    PdfBitmap image = new PdfBitmap(imageStream);
    //Draw an image.
    graphics.DrawImage(image, new RectangleF(130, 0, 250, 100));

    //Draw header text.
    graphics.DrawString("Adventure Works Cycles", new PdfStandardFont(PdfFontFamily.TimesRoman, 20, PdfFontStyle.Bold), PdfBrushes.Gray, new PointF(150, 150));

    //Add paragraph.
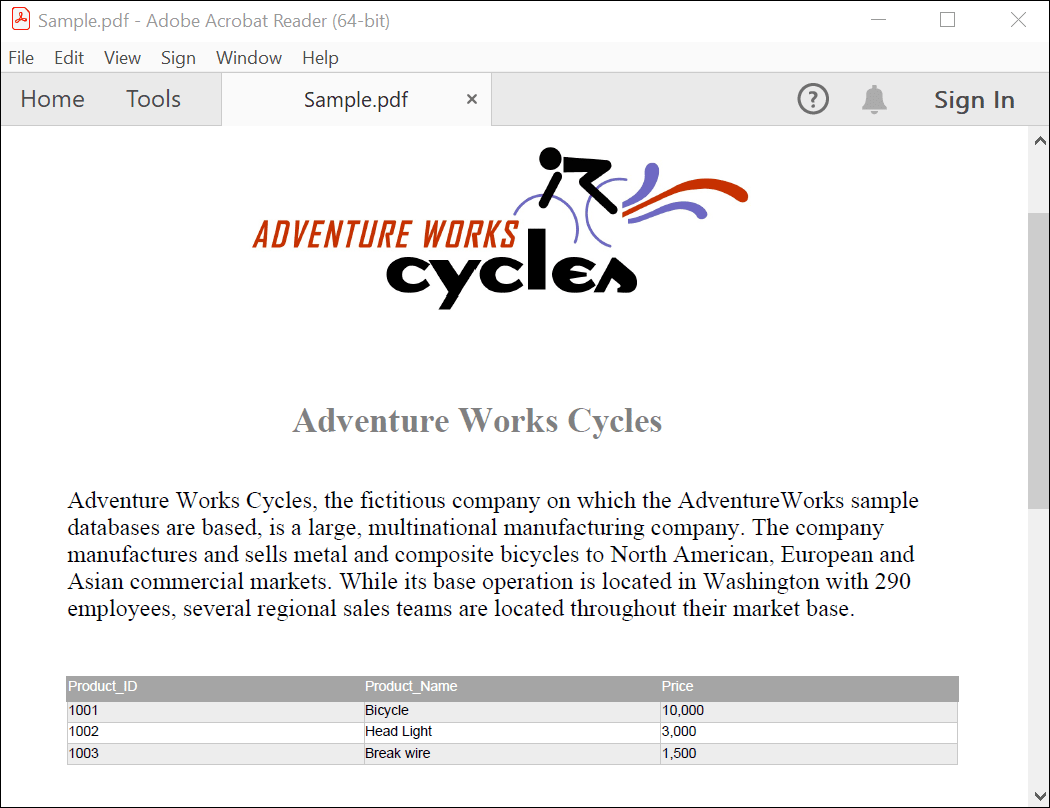
    string text = "Adventure Works Cycles, the fictitious company on which the AdventureWorks sample databases are based, is a large, multinational manufacturing company. The company manufactures and sells metal and composite bicycles to North American, European and Asian commercial markets. While its base operation is located in Washington with 290 employees, several regional sales teams are located throughout their market base.";
    //Create a text element with the text and font.
    PdfTextElement textElement = new PdfTextElement(text, new PdfStandardFont(PdfFontFamily.TimesRoman, 12));
    //Draw the text in the first column.
    textElement.Draw(page, new RectangleF(0, 200, page.GetClientSize().Width, page.GetClientSize().Height));

    //Create a PdfGrid.
    PdfGrid pdfGrid = new PdfGrid();
    //Add values to the list.
    List<object> data = new List<object>();
    Object row1 = new { Product_ID = "1001", Product_Name = "Bicycle", Price = "10,000" };
    Object row2 = new { Product_ID = "1002", Product_Name = "Head Light", Price = "3,000" };
    Object row3 = new { Product_ID = "1003", Product_Name = "Break wire", Price = "1,500" };
    data.Add(row1);
    data.Add(row2);
    data.Add(row3);
    //Add list to IEnumerable.
    IEnumerable<object> dataTable = data;
    //Assign data source.
    pdfGrid.DataSource = dataTable;
    //Apply built-in table style.
    pdfGrid.ApplyBuiltinStyle(PdfGridBuiltinStyle.GridTable4Accent3);
    //Draw the grid to the page of PDF document.
    pdfGrid.Draw(graphics, new RectangleF(0, 300, page.Size.Width - 80, 0));

    //Saving the PDF to the MemoryStream.
    MemoryStream stream = new MemoryStream();
    document.Save(stream);
    //Set the position as '0'.
    stream.Position = 0;
    //Download the PDF document in the browser.
    FileStreamResult fileStreamResult = new FileStreamResult(stream, "application/pdf");
    fileStreamResult.FileDownloadName = "Sample.pdf";
    return fileStreamResult;
}
Steps to publish as Azure App Service on Linux
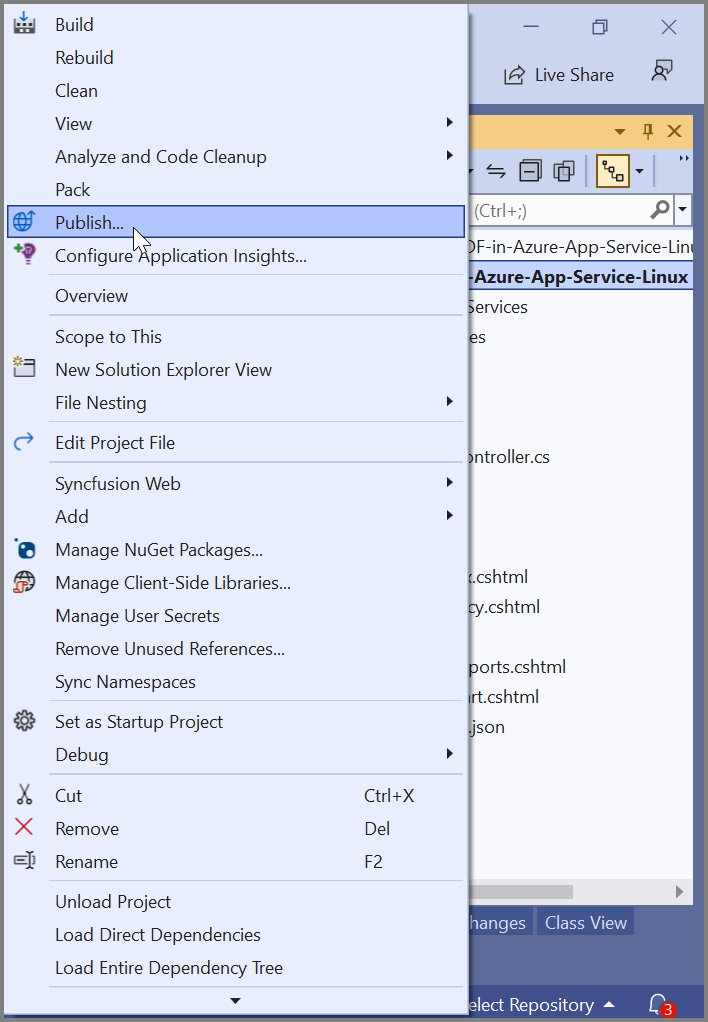
Step 1: Right-click the project and select Publish option.
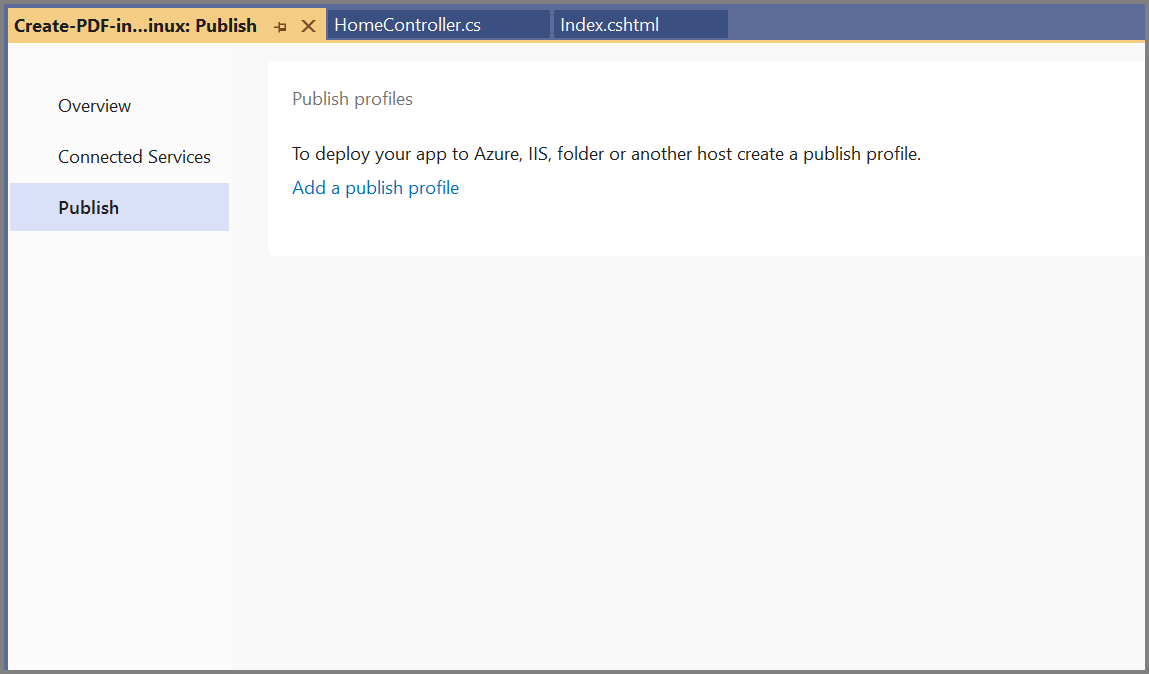
Step 2: Click the Add a Publish Profile button.
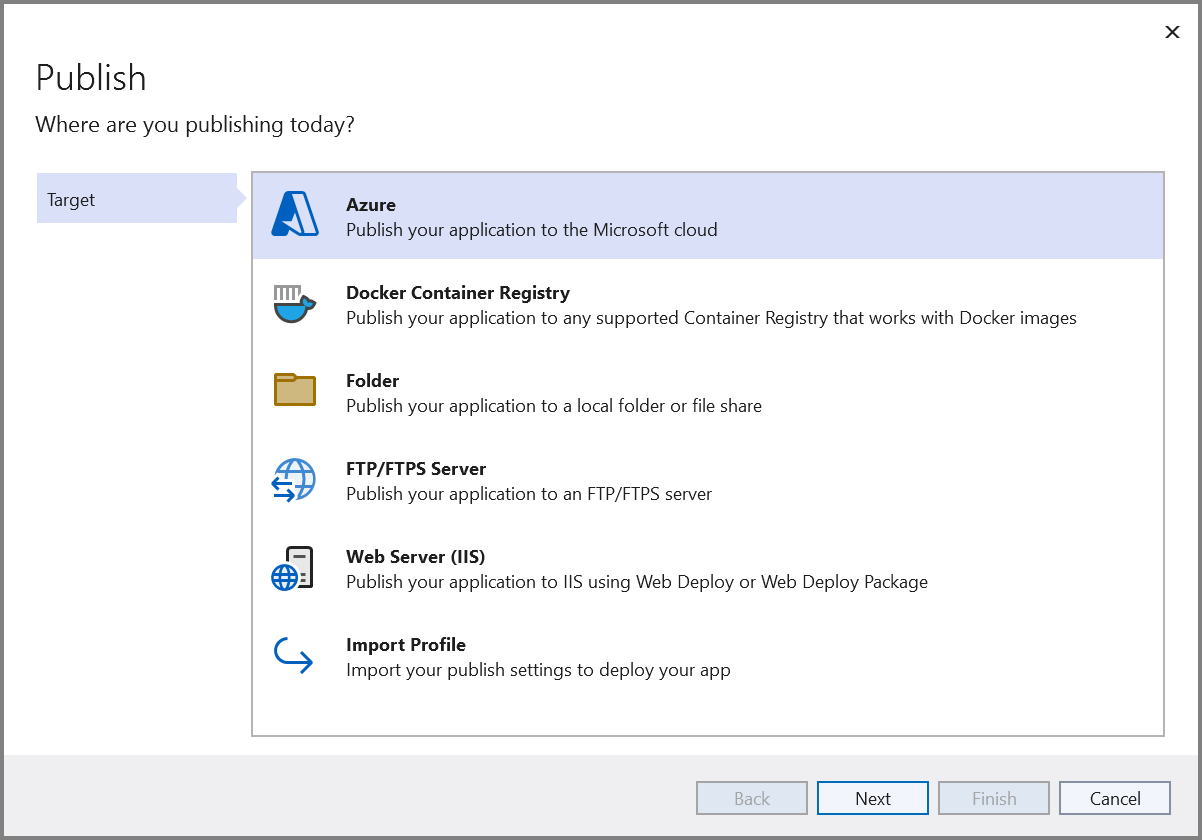
Step 3: Select the publish target as Azure.
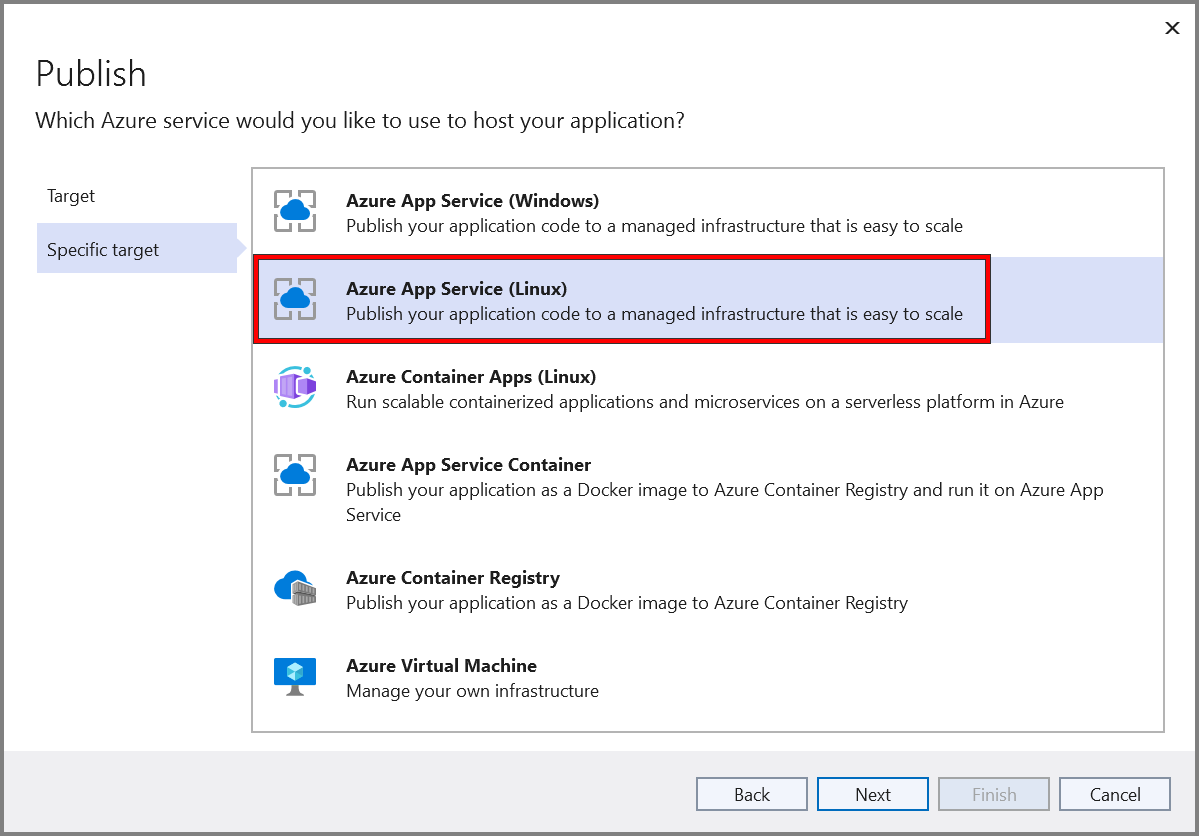
Step 4: Select the Specific target as Azure App Service (Linux).
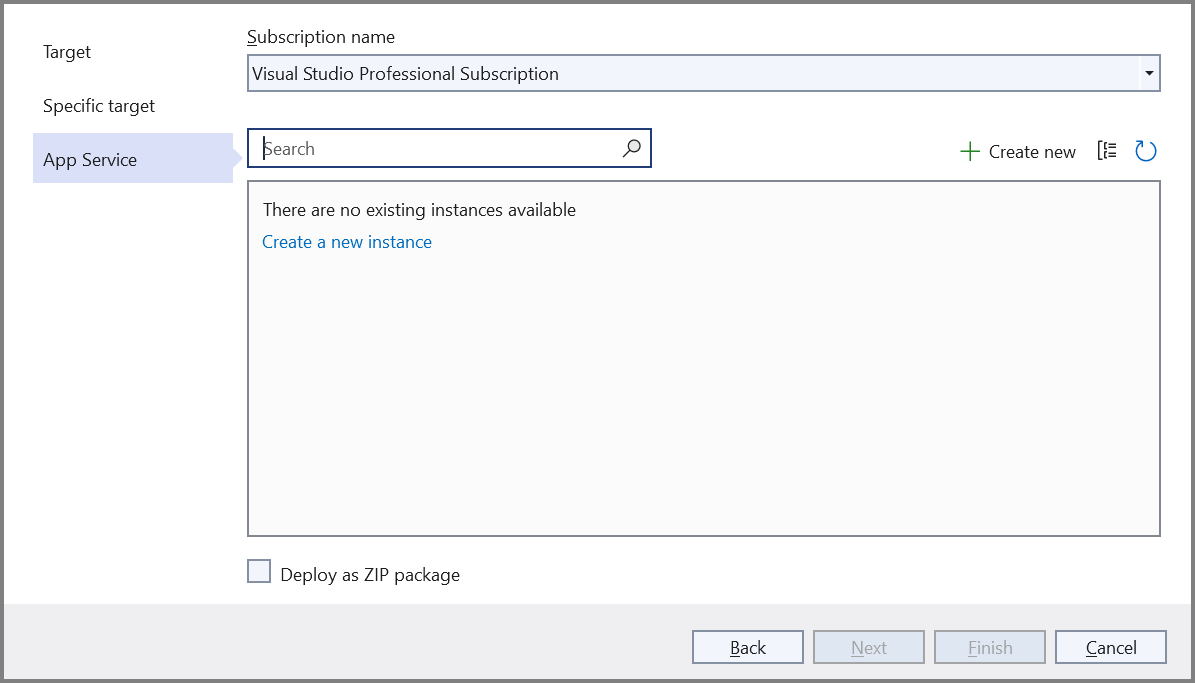
Step 5: To create a new app service, click Create new option.
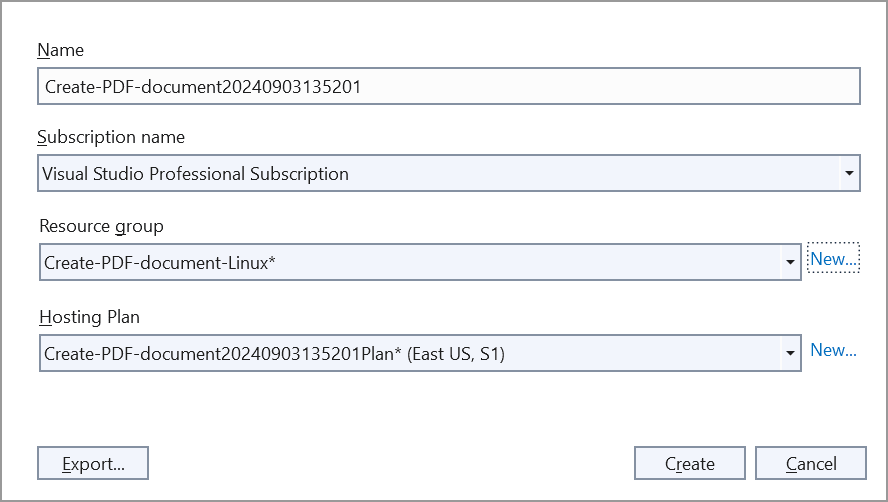
Step 6: Click the Create button to proceed with App Service creation.
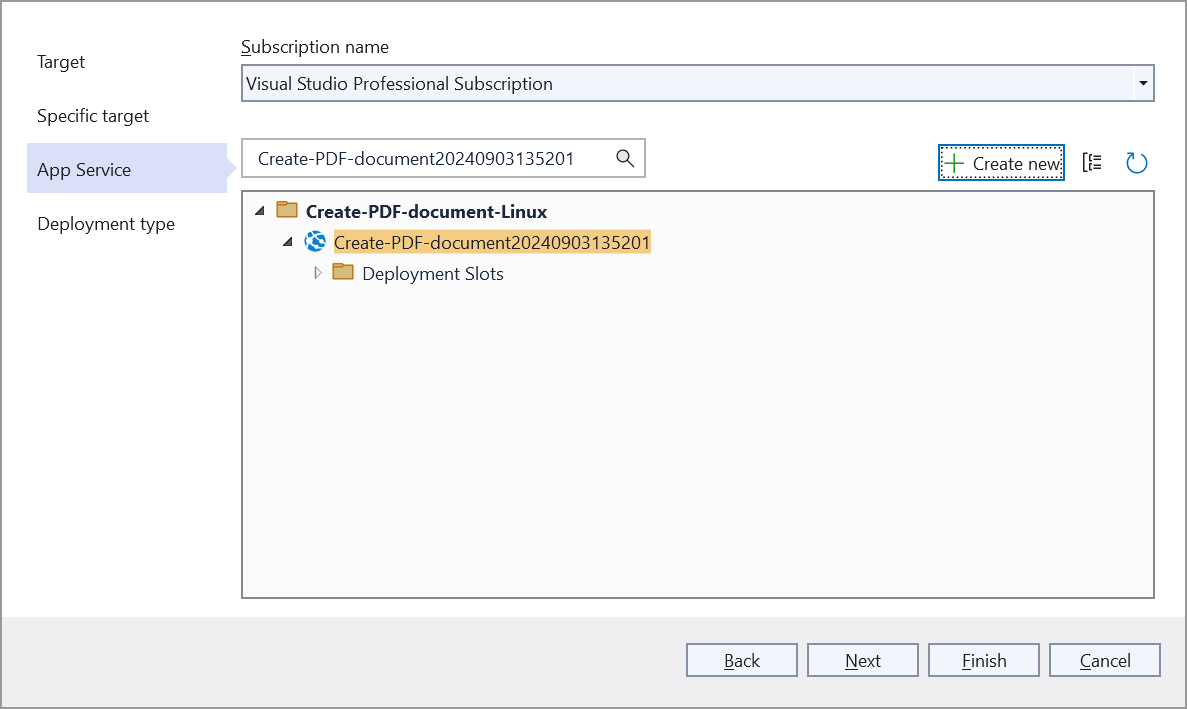
Step 7: Click the Finish button to finalize the App Service creation.
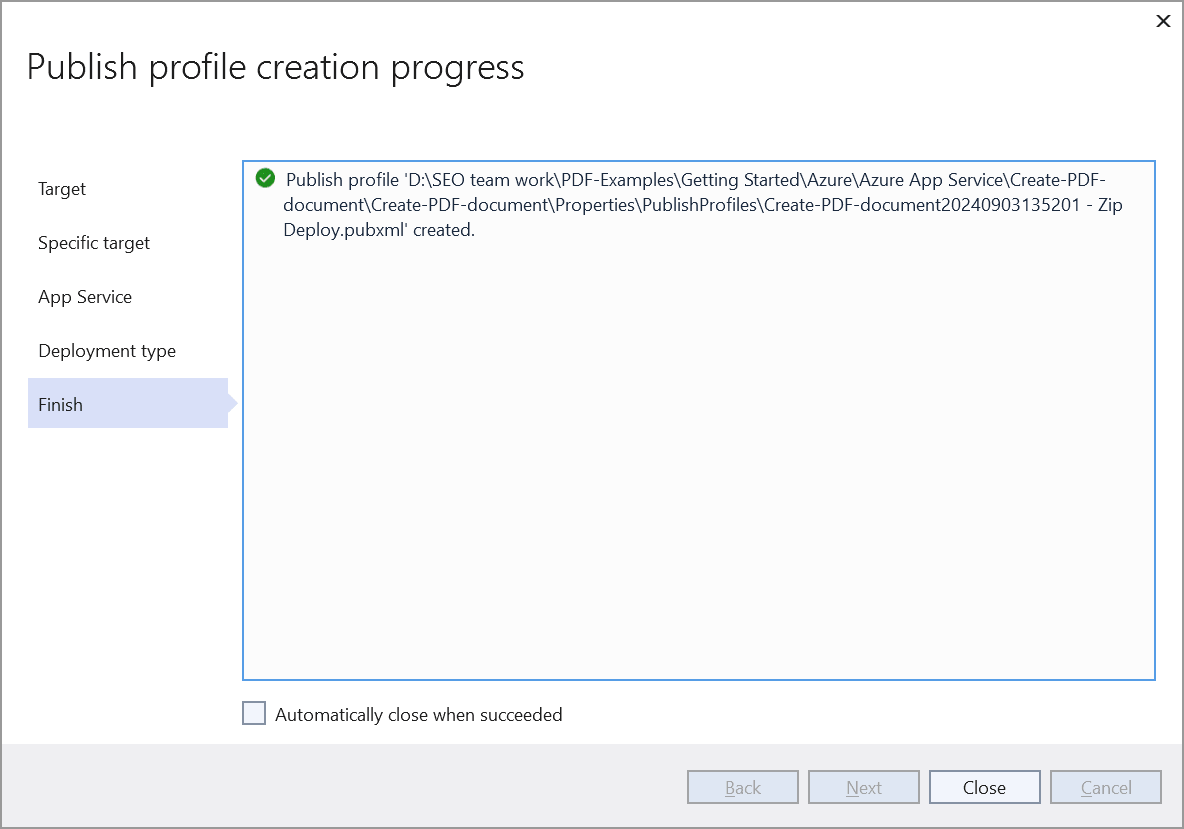
Step 8: Click deployment type.

Step 9: Click Close button.
Step 10: Click the Publish button.
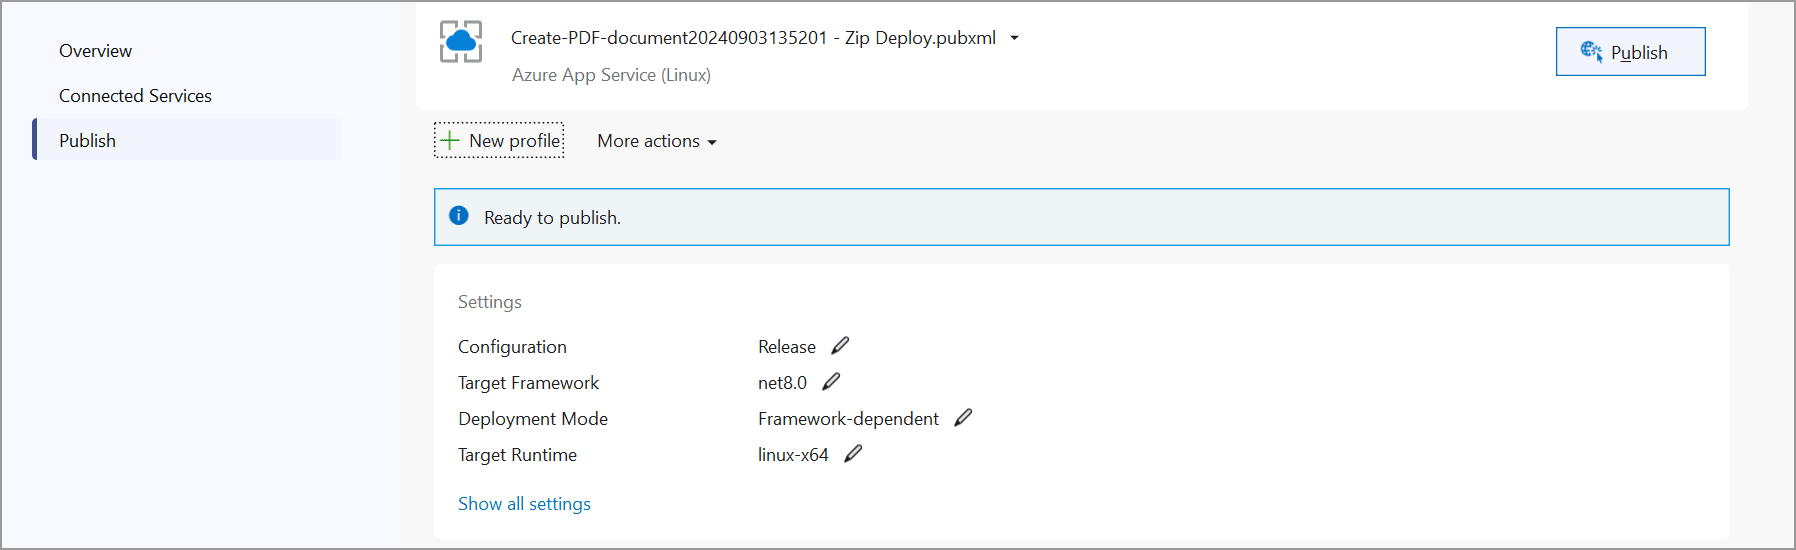
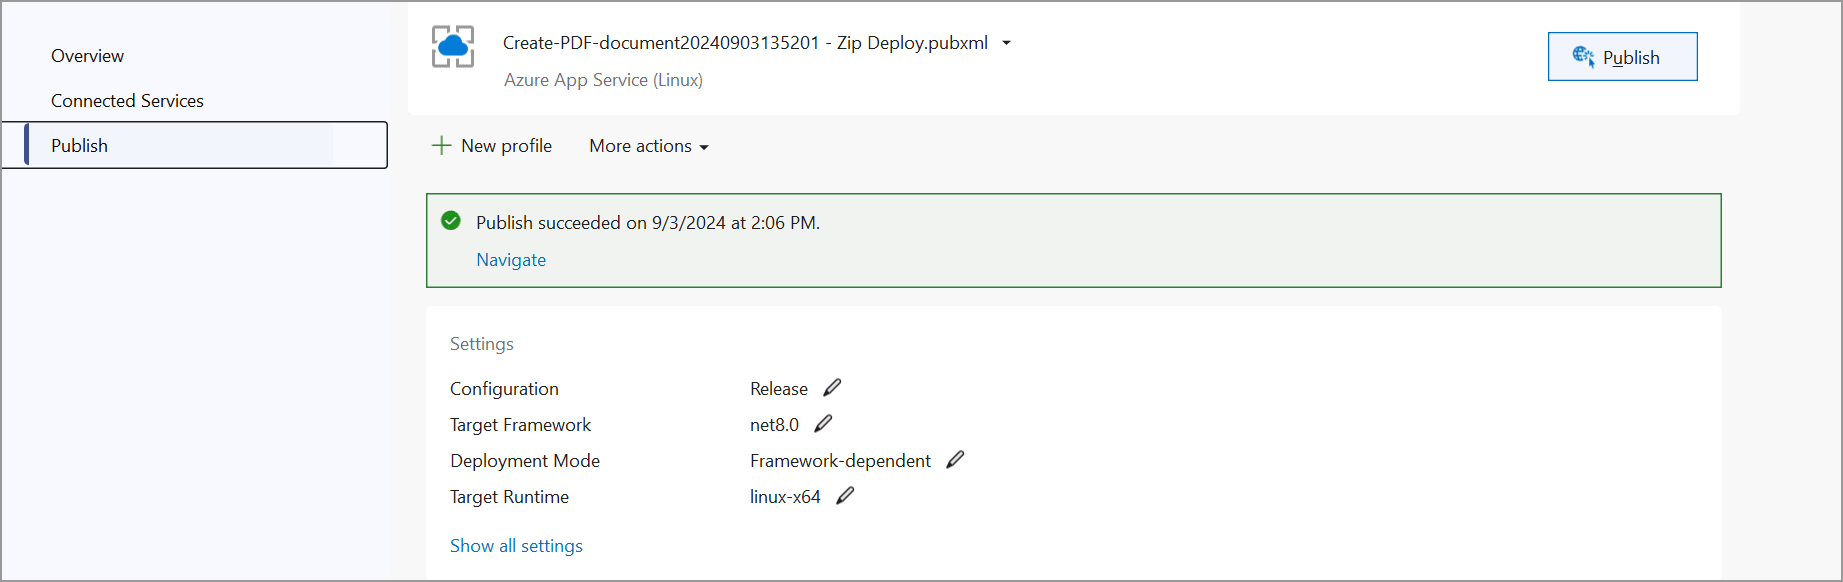
Step 11: Now, Publish has been succeeded.
Step 12: Now, the published webpage will open in the browser.
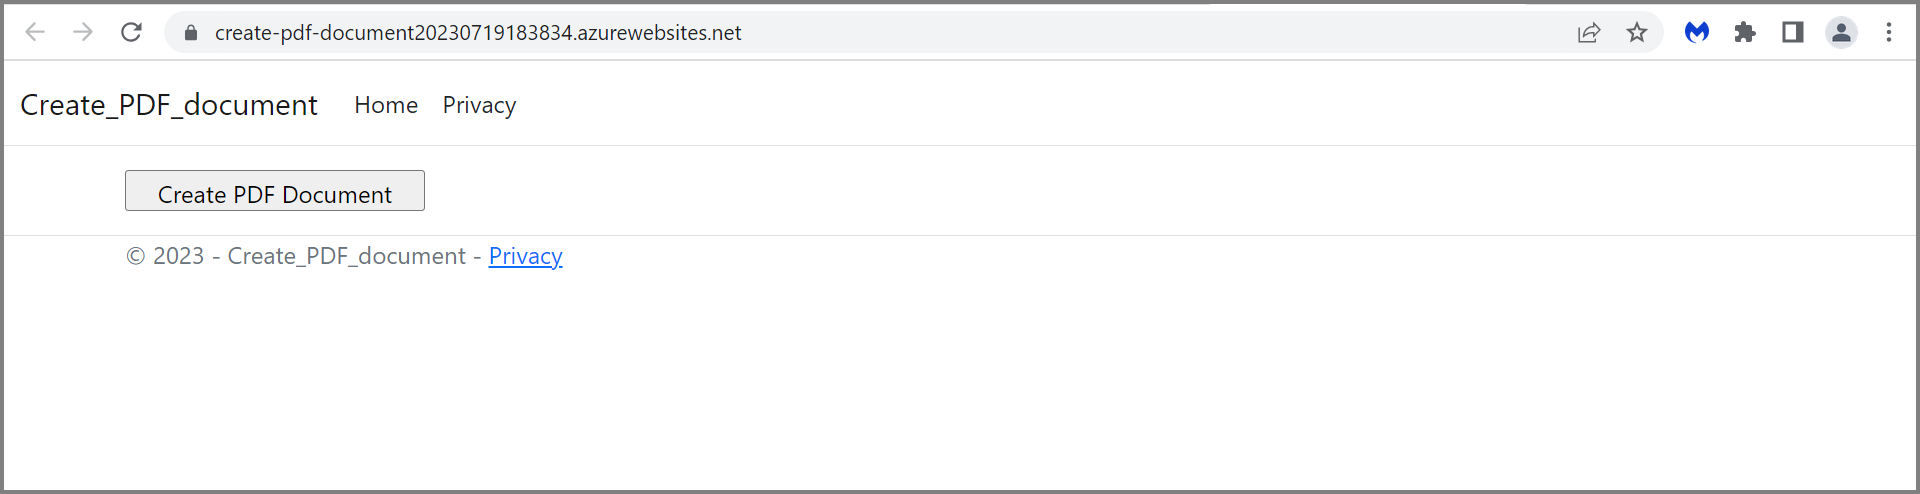
Step 13: Select the PDF document and Click Create PDF document to generate the PDF document. You will get the output PDF document as follows.
You can download a complete working sample from GitHub.
Click here to explore the rich set of Syncfusion® PDF library features.
An online sample link to create PDF document.