Loading and Saving Files in Azure Functions v4
14 Aug 20265 minutes to read
Syncfusion® XlsIO is a .NET Excel Library that can be used to create, read, edit Excel files in Azure Functions v4.
Steps to Load and Save an Excel document in Azure Functions v4
The following steps illustrate loading and saving a simple invoice-formatted Excel document in Azure Functions v4.
Step 1: Create a new Azure Functions project.
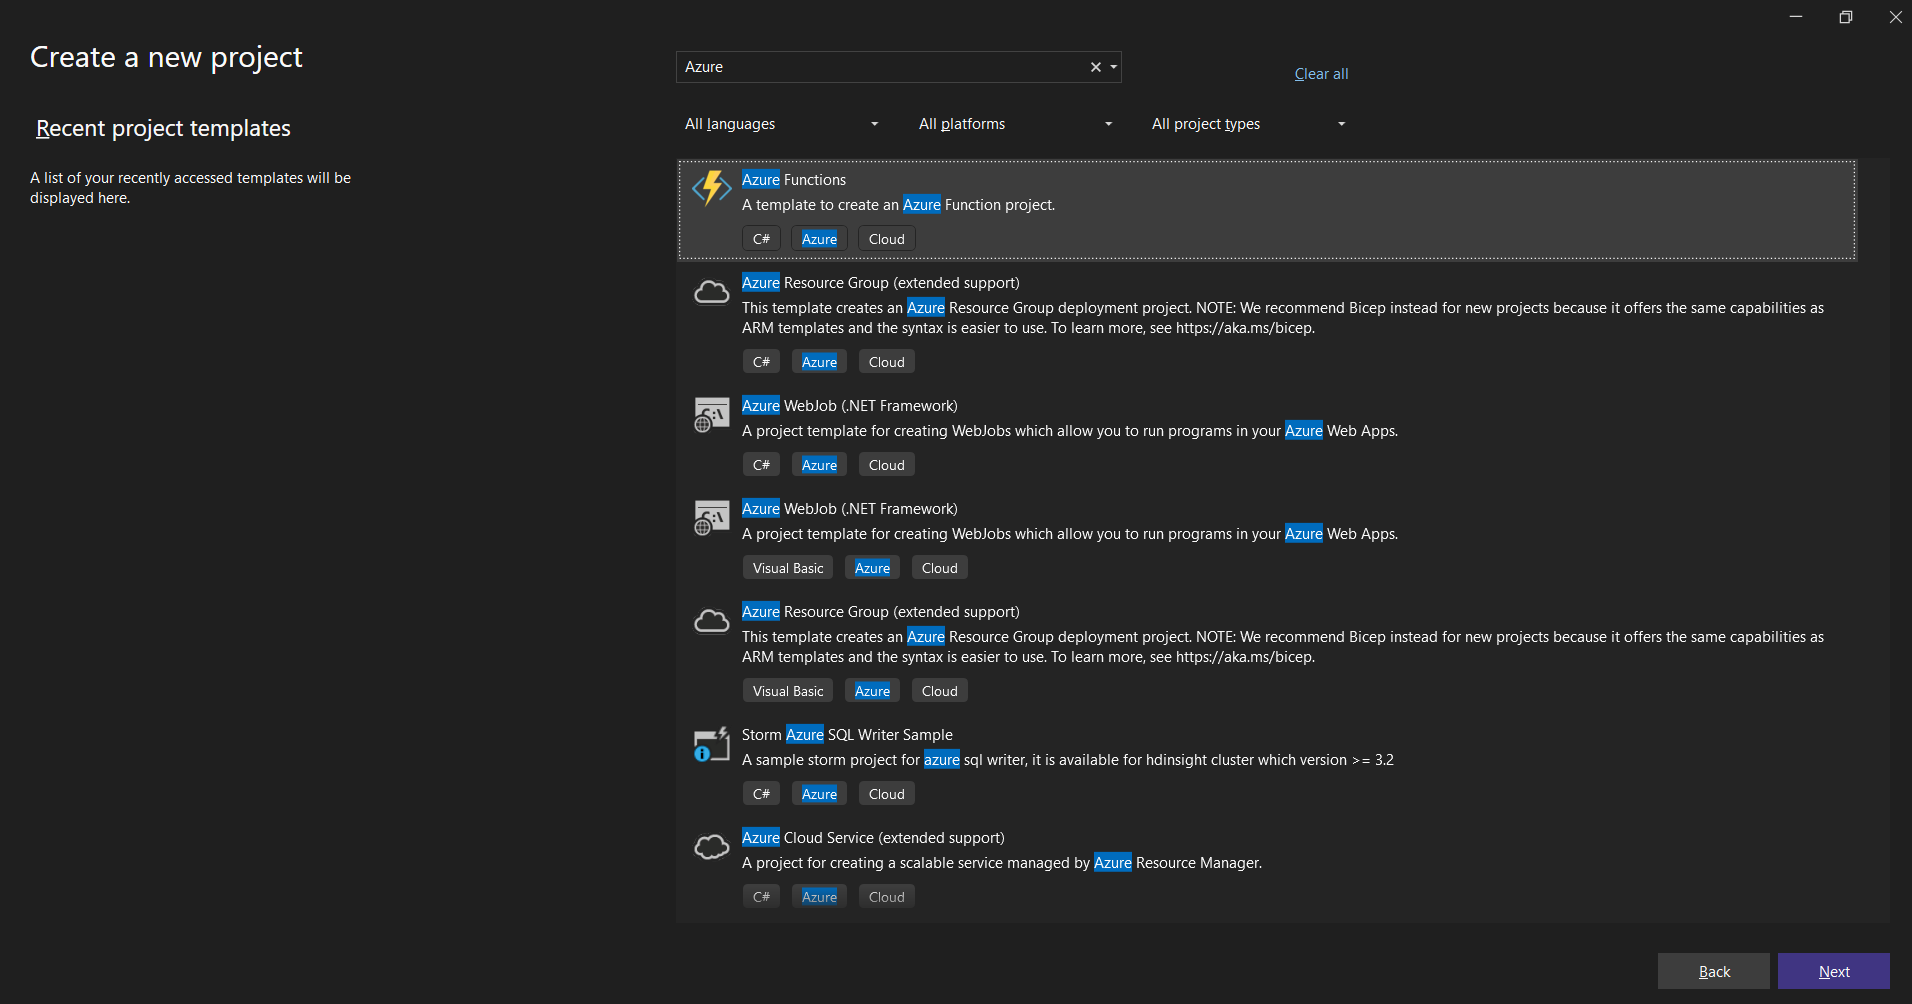
Step 2: Name the project.

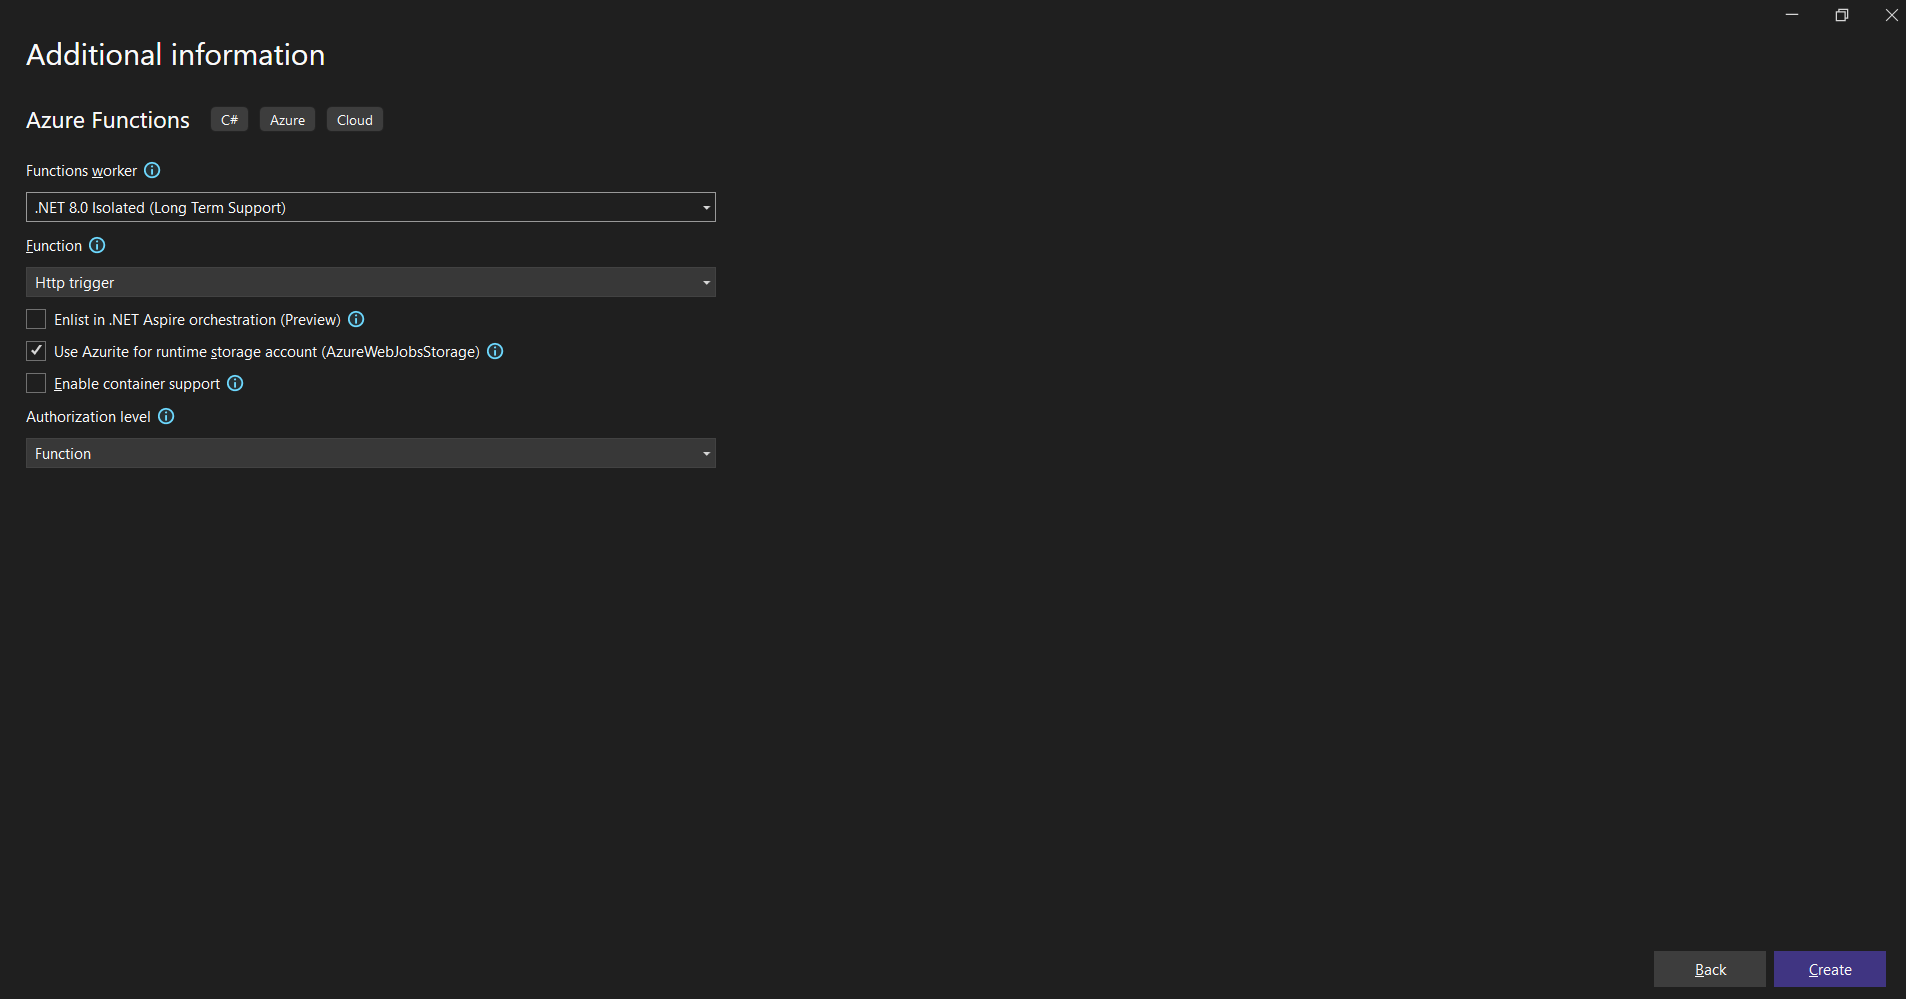
Step 3: Select the framework and click Create button.
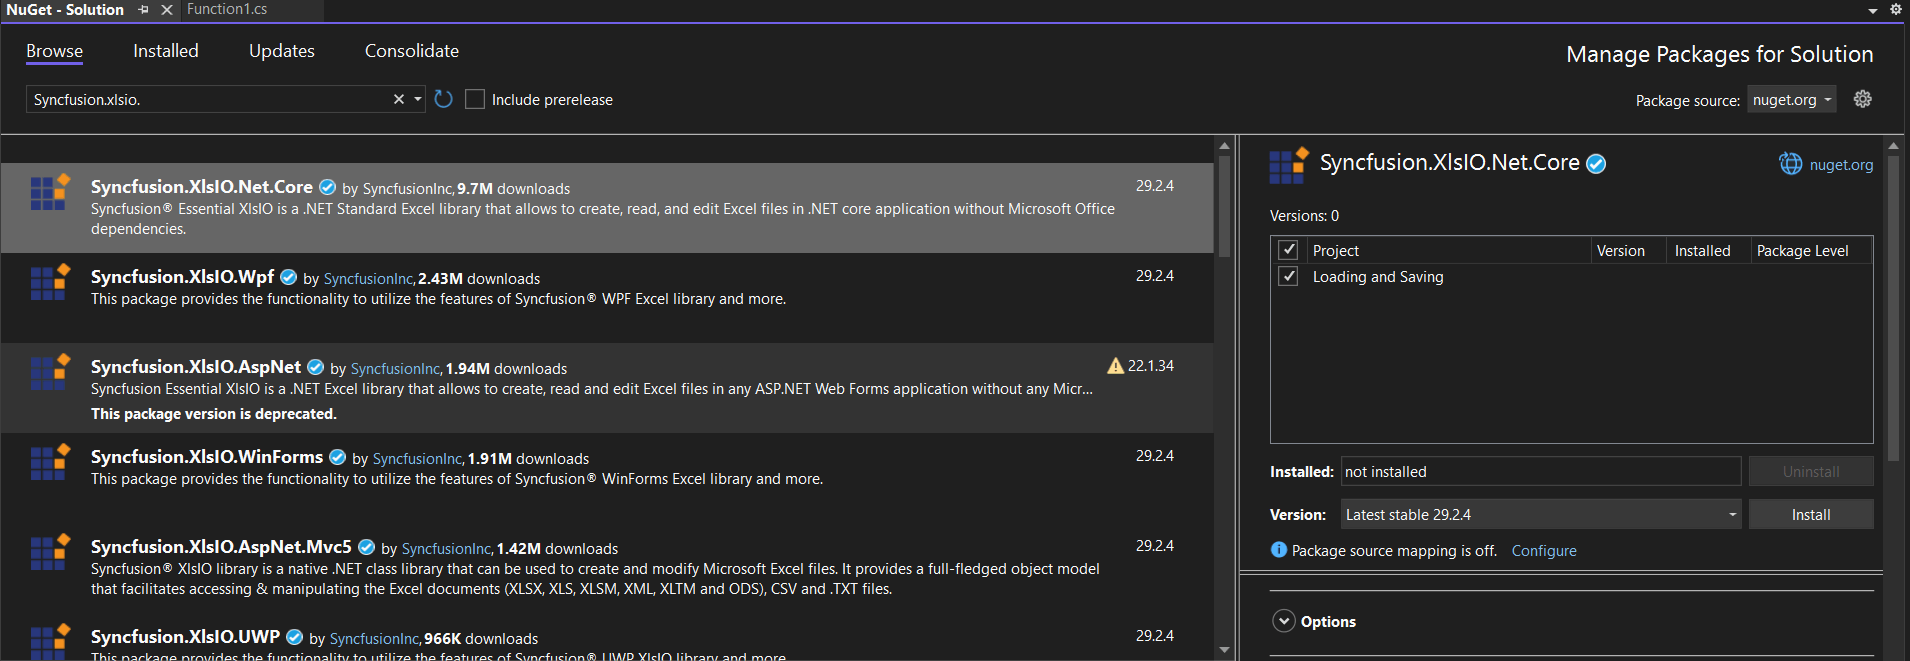
Step 4: Install the Syncfusion.XlsIO.Net.Core NuGet package as a reference in your project from NuGet.org.
Starting with v16.2.0.x, if you reference Syncfusion® assemblies from trial setup or from the NuGet feed, you also have to add “Syncfusion.Licensing” assembly reference and include a license key in your projects. Please refer to this link to know about registering Syncfusion® license key in your applications to use our components.
Step 5: Include the following namespaces in the Function1.cs file.
using Syncfusion.XlsIO;Step 6: Add the following code snippet in Run method of Function1 class to perform Loading and Saving Excel files in Azure Functions v4.
using (ExcelEngine excelEngine = new ExcelEngine())
{
    IApplication application = excelEngine.Excel;
    application.DefaultVersion = ExcelVersion.Xlsx;

    //Load an existing Excel document
    IWorkbook workbook = application.Workbooks.Open("Data/InputTemplate.xlsx");

    //Access first worksheet from the workbook
    IWorksheet worksheet = workbook.Worksheets[0];

    //Set Text in cell A3
    worksheet.Range["A3"].Text = "Hello World";

    MemoryStream outputStream = new MemoryStream();
    workbook.SaveAs(outputStream);
    outputStream.Position = 0;

    //Set headers
    response.Headers.Add("Content-Disposition", "attachment; filename=Output.xlsx");

    //Set the content type as Excel document mime type
    response.Headers.Add("Content-Type", "application/vnd.openxmlformats-officedocument.spreadsheetml.sheet");

    await response.Body.WriteAsync(outputStream.ToArray());

    //Return the response with output Excel document stream
    return response;
}
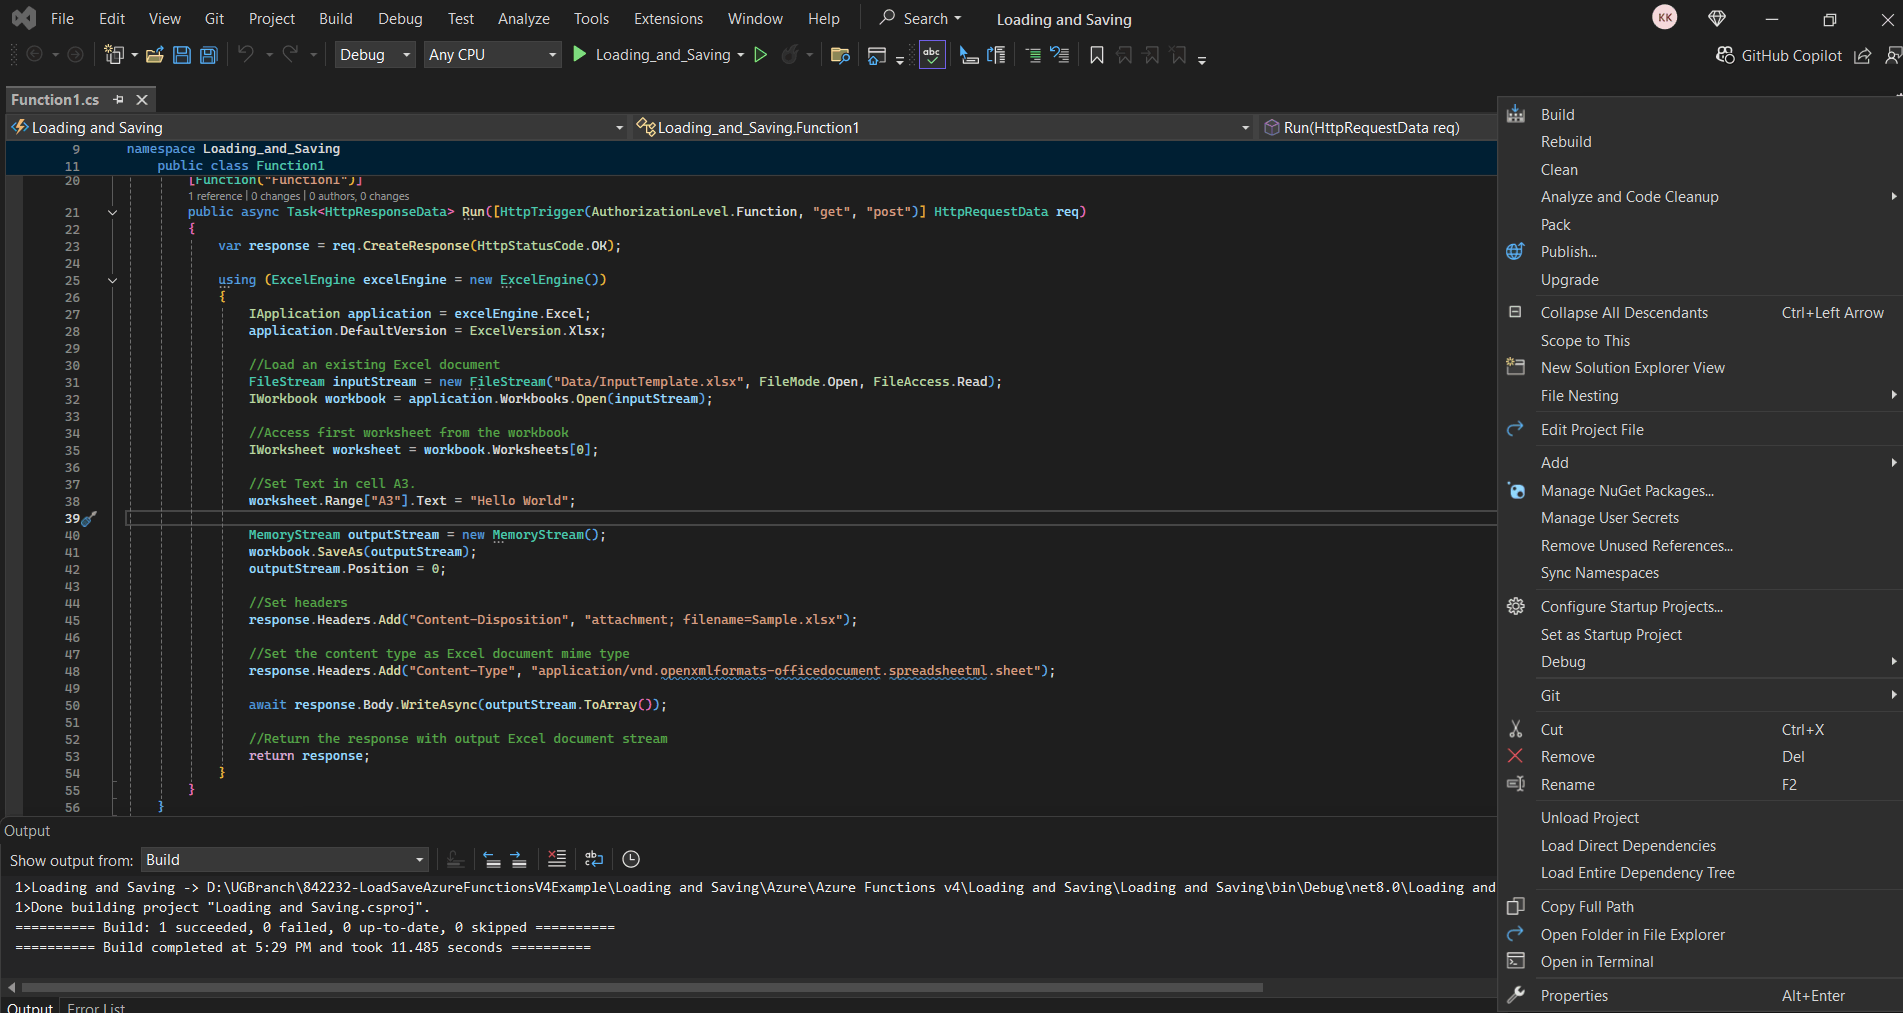
Step 7: Right-click the project and select Publish option.
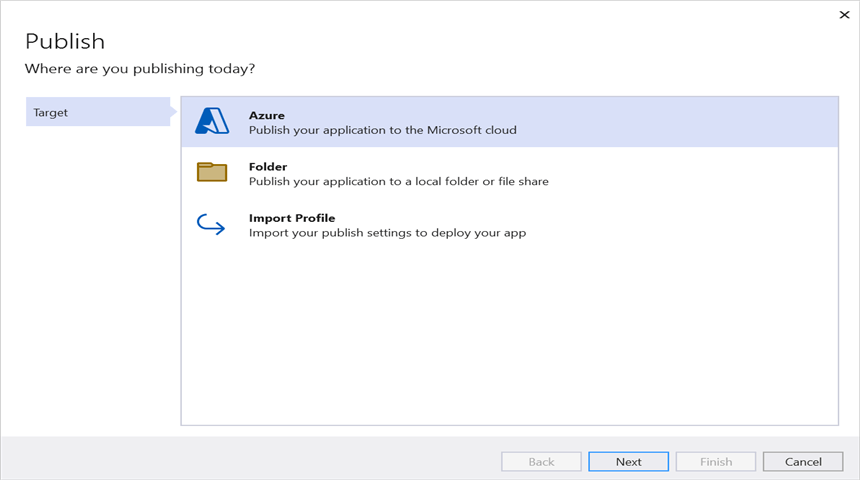
Step 8: Select the publish target as Azure.
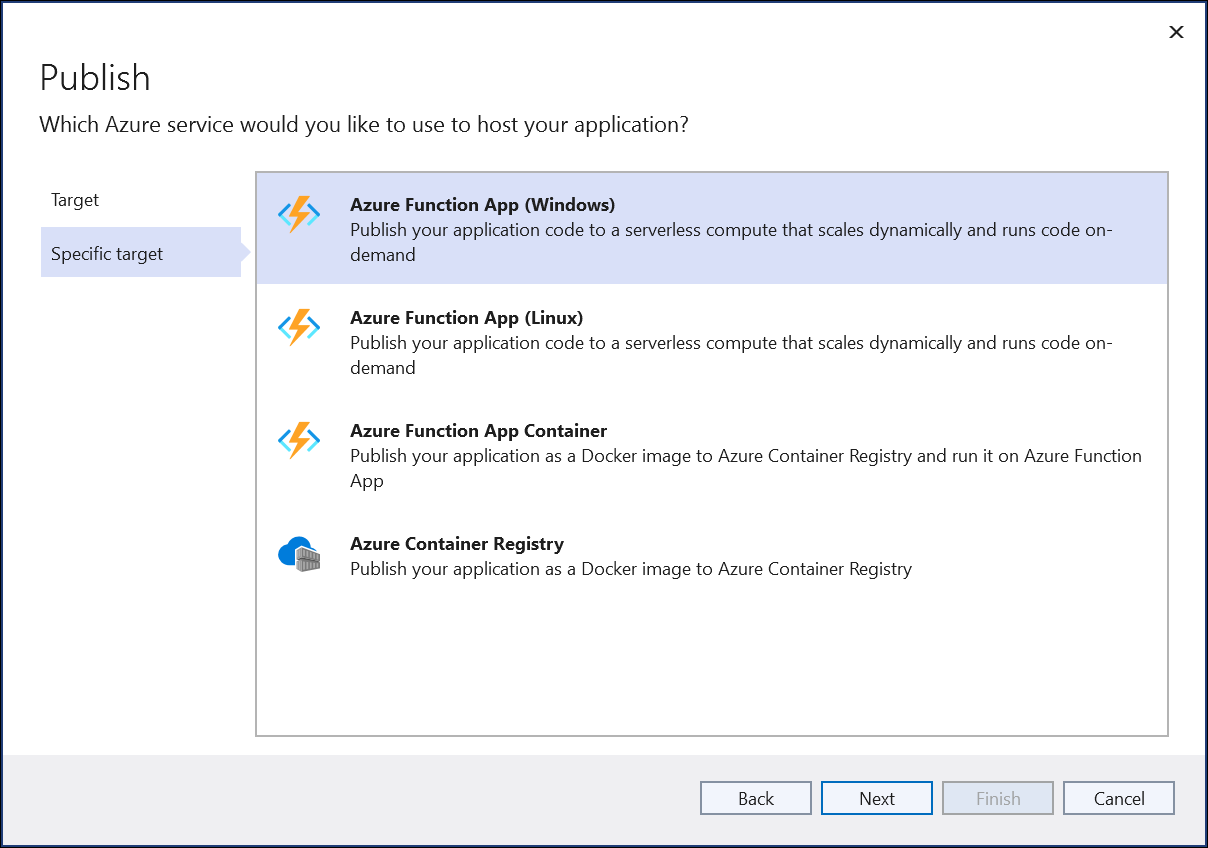
Step 9: Select the Specific target as Azure Function App (Windows).
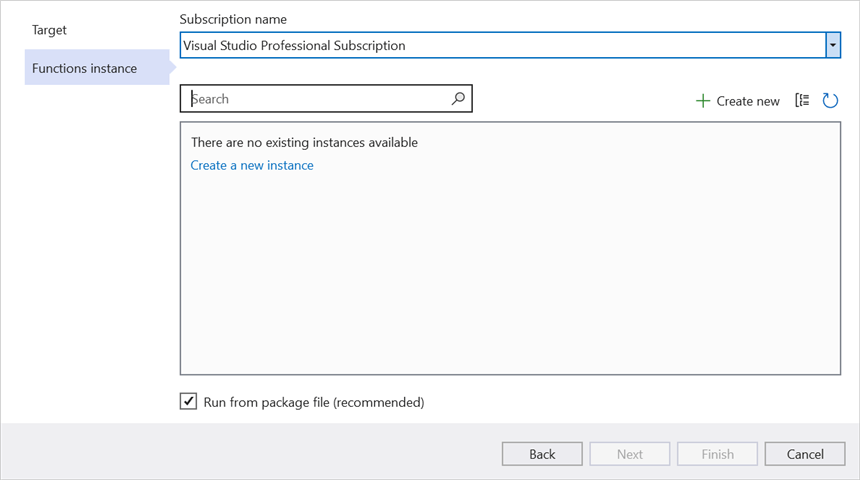
Step 10: Select the Create new button.
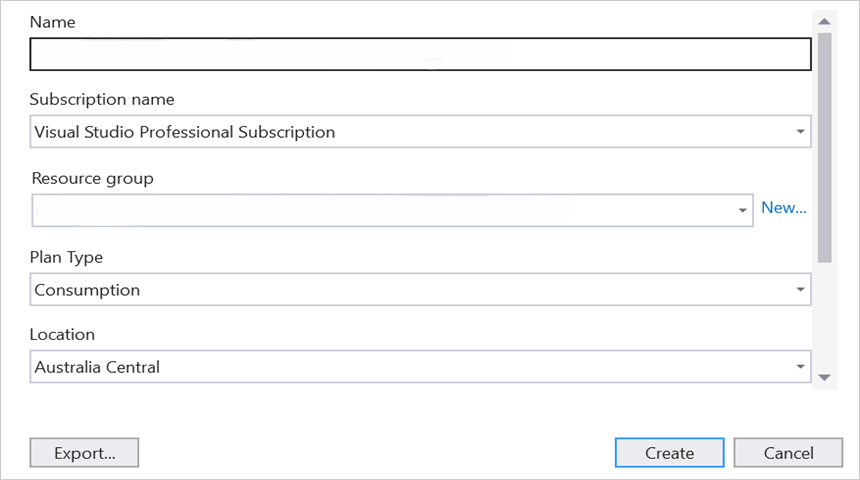
Step 11: Click the Create button to proceed with creation.
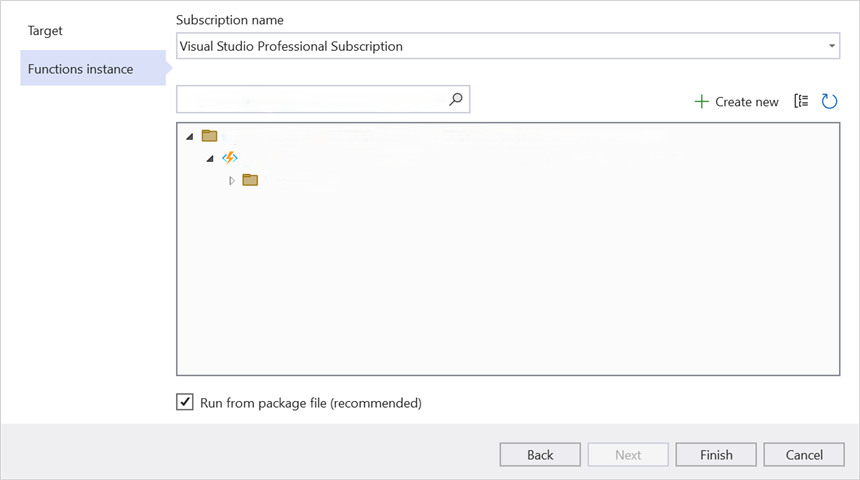
Step 12: Click the Finish button to finalize the Azure Function creation.
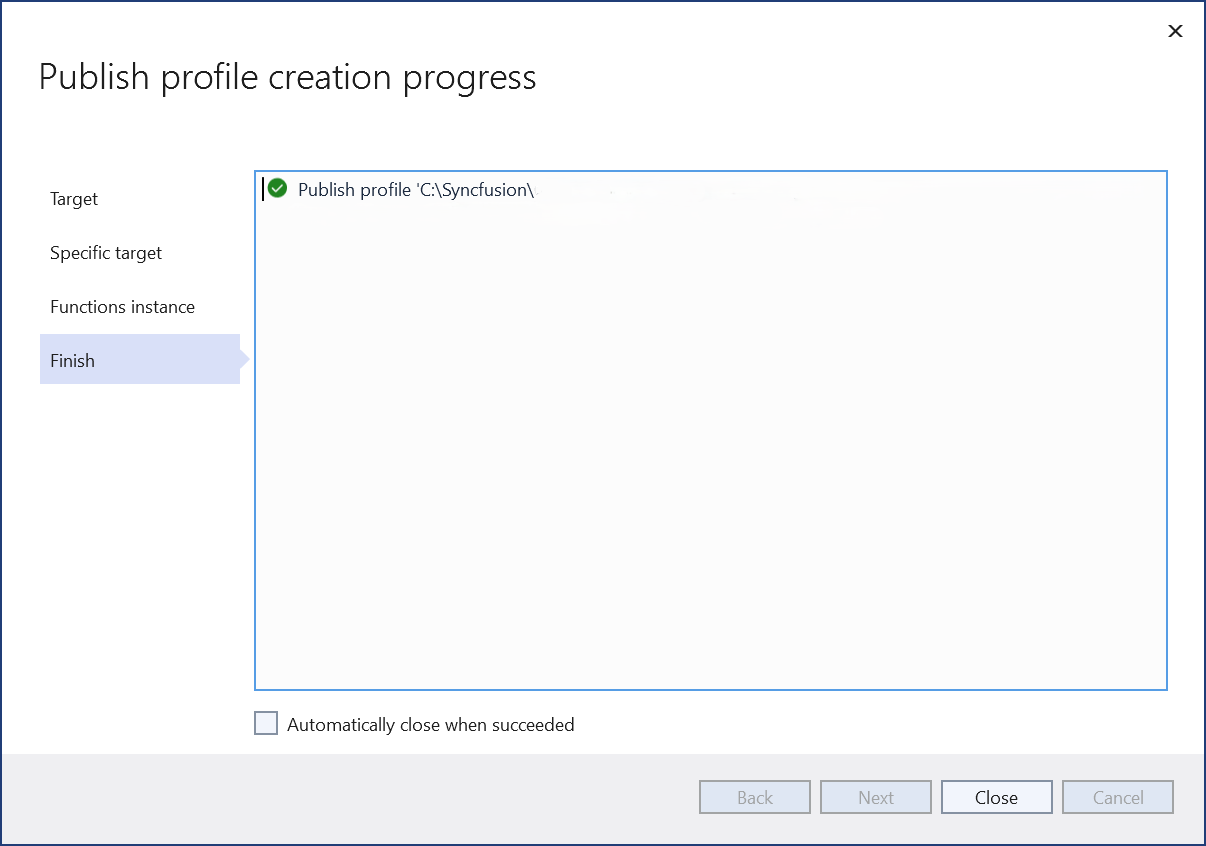
Step 13: Click the Close button.
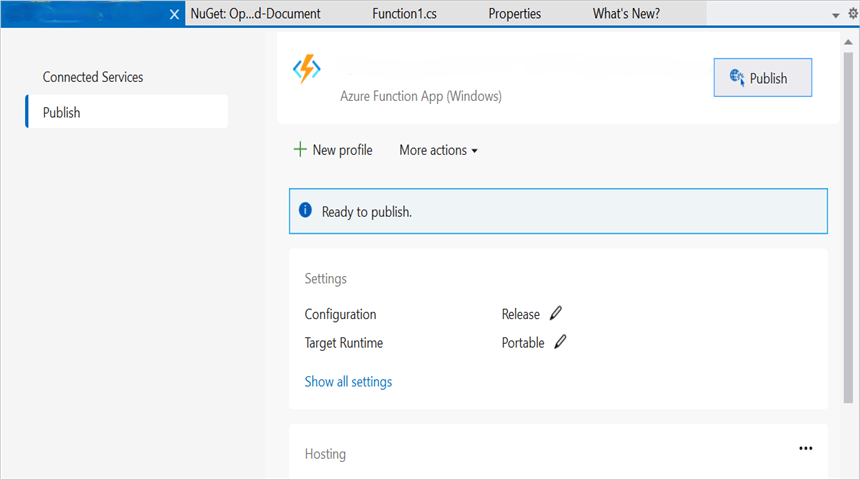
Step 14: Click the Publish button.
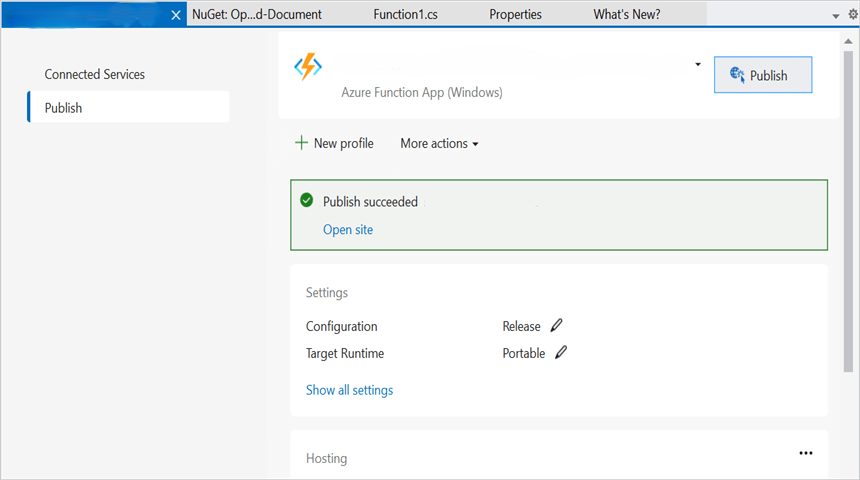
Step 15: Publishing has been completed.
Step 16: Now, go to Azure portal and select the App Services. After running the service, click Get function URL by copying it. Then, paste it in the below client sample (which will request the Azure Functions, to perform Loading and Saving Excel files using the template Excel document). You will get the output Excel document as follows.
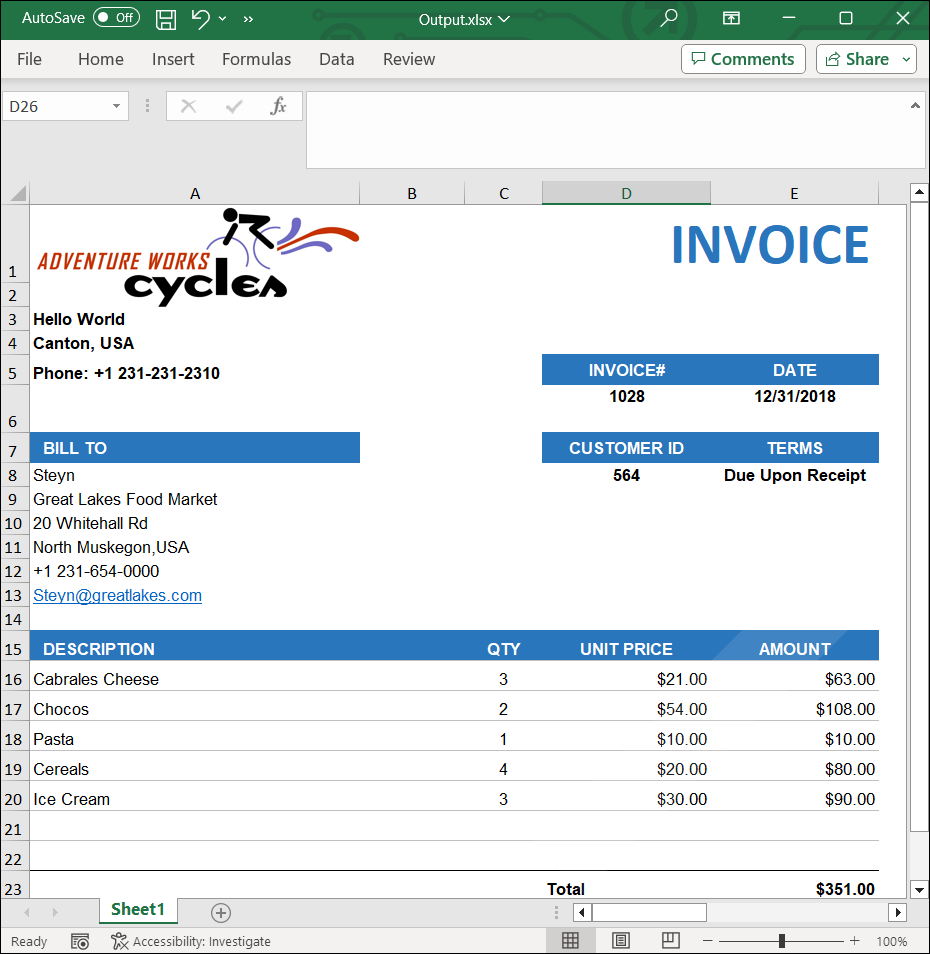
Steps to post the request to Azure Functions
Step 1: Create a console application to request the Azure Functions API.
Step 2: Add the following code snippet into Main method to post the request to Azure Functions with template Excel document and get the resultant Excel document.
//Reads the template Excel document.
FileStream excelStream = new FileStream("../../Sample.xlsx", FileMode.Open, FileAccess.Read);
excelStream.Position = 0;

//Saves the Excel document in memory stream.
MemoryStream inputStream = new MemoryStream();
excelStream.CopyTo(inputStream);
inputStream.Position = 0;

try
{
  Console.WriteLine("Please enter your Azure Functions URL :");
  string functionURL = Console.ReadLine();

  //Create HttpWebRequest with hosted azure functions URL
  HttpWebRequest req = (HttpWebRequest)WebRequest.Create(functionURL);

  //Set request method as POST
  req.Method = "POST";

  //Get the request stream to save the Excel document stream
  Stream stream = req.GetRequestStream();

  //Write the Excel document stream into request stream
  stream.Write(inputStream.ToArray(), 0, inputStream.ToArray().Length);

  //Gets the response from the Azure Functions
  HttpWebResponse res = (HttpWebResponse)req.GetResponse();

  //Saves the Excel stream
  FileStream outStream = File.Create("Sample.xlsx");
  res.GetResponseStream().CopyTo(outStream);

  //Dispose the streams
  inputStream.Dispose();
  outStream.Dispose();
}
catch (Exception ex)
{
    throw;
}
A complete working example of how to load and save an Excel document in Azure Functions v4 in C# is present on this GitHub page.
Click here to explore the rich set of Syncfusion® Excel library (XlsIO) features.
An online sample link to create an Excel document in ASP.NET Core.