Convert Excel document to PDF in AWS Lambda
11 Dec 20256 minutes to read
Syncfusion® XlsIO is a .NET Core Excel library used to create, read, edit and convert Excel documents programmatically without Microsoft Excel or interop dependencies. Using this library, you can convert a Excel document to PDF in AWS Lambda.
Steps to convert Excel document to PDF in AWS Lambda
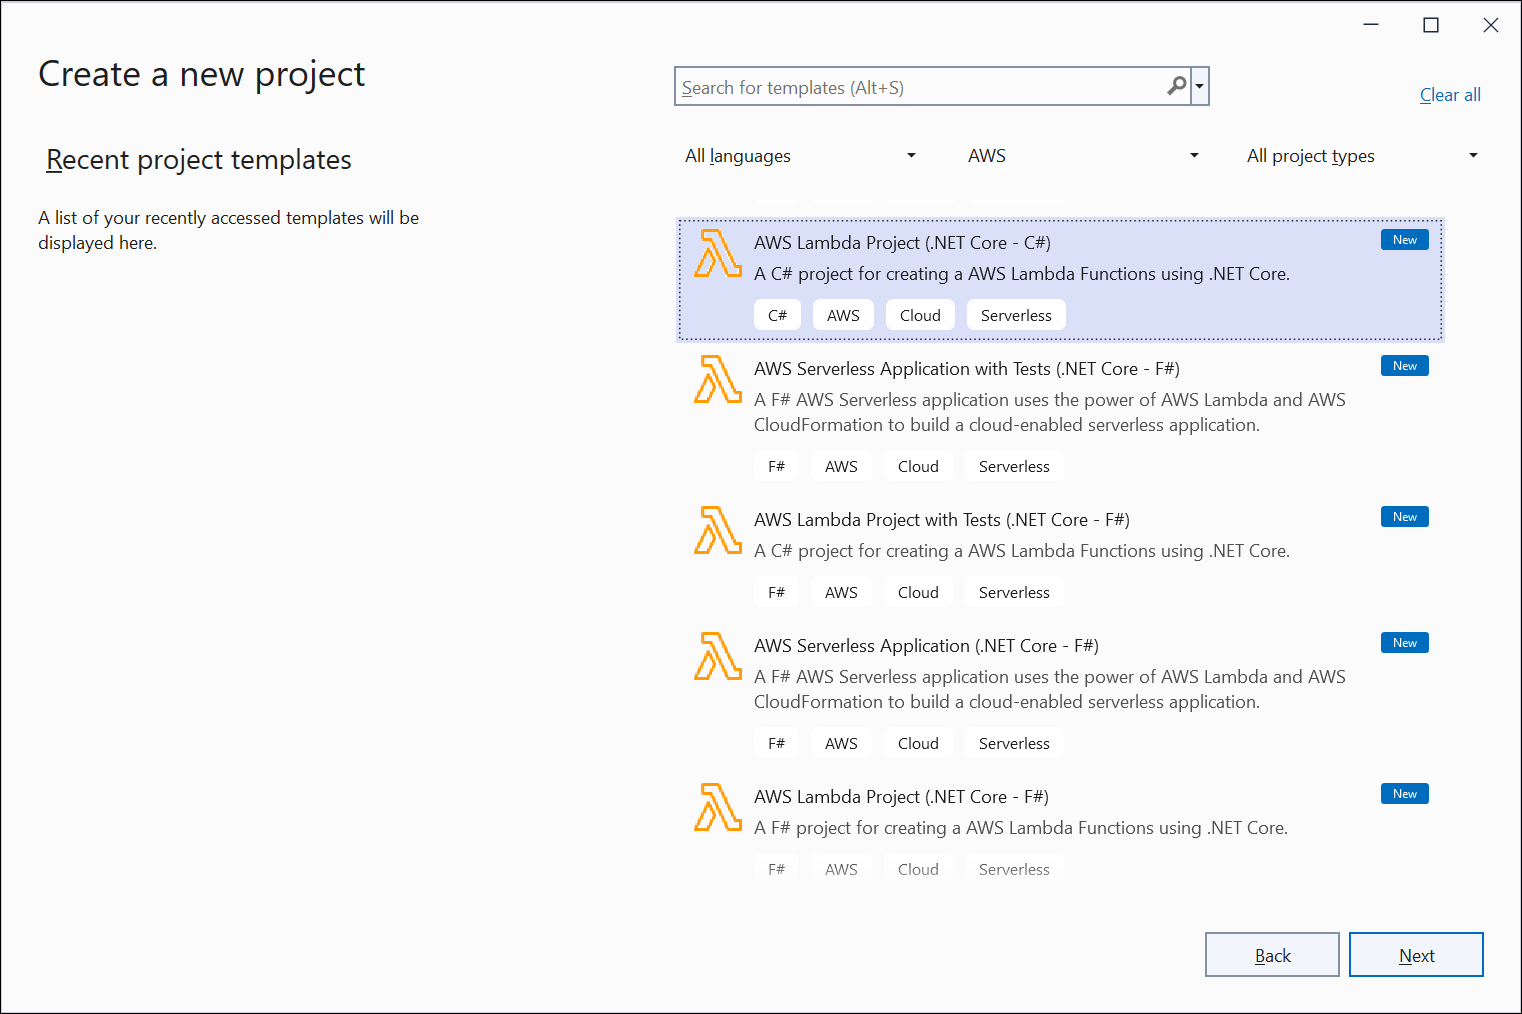
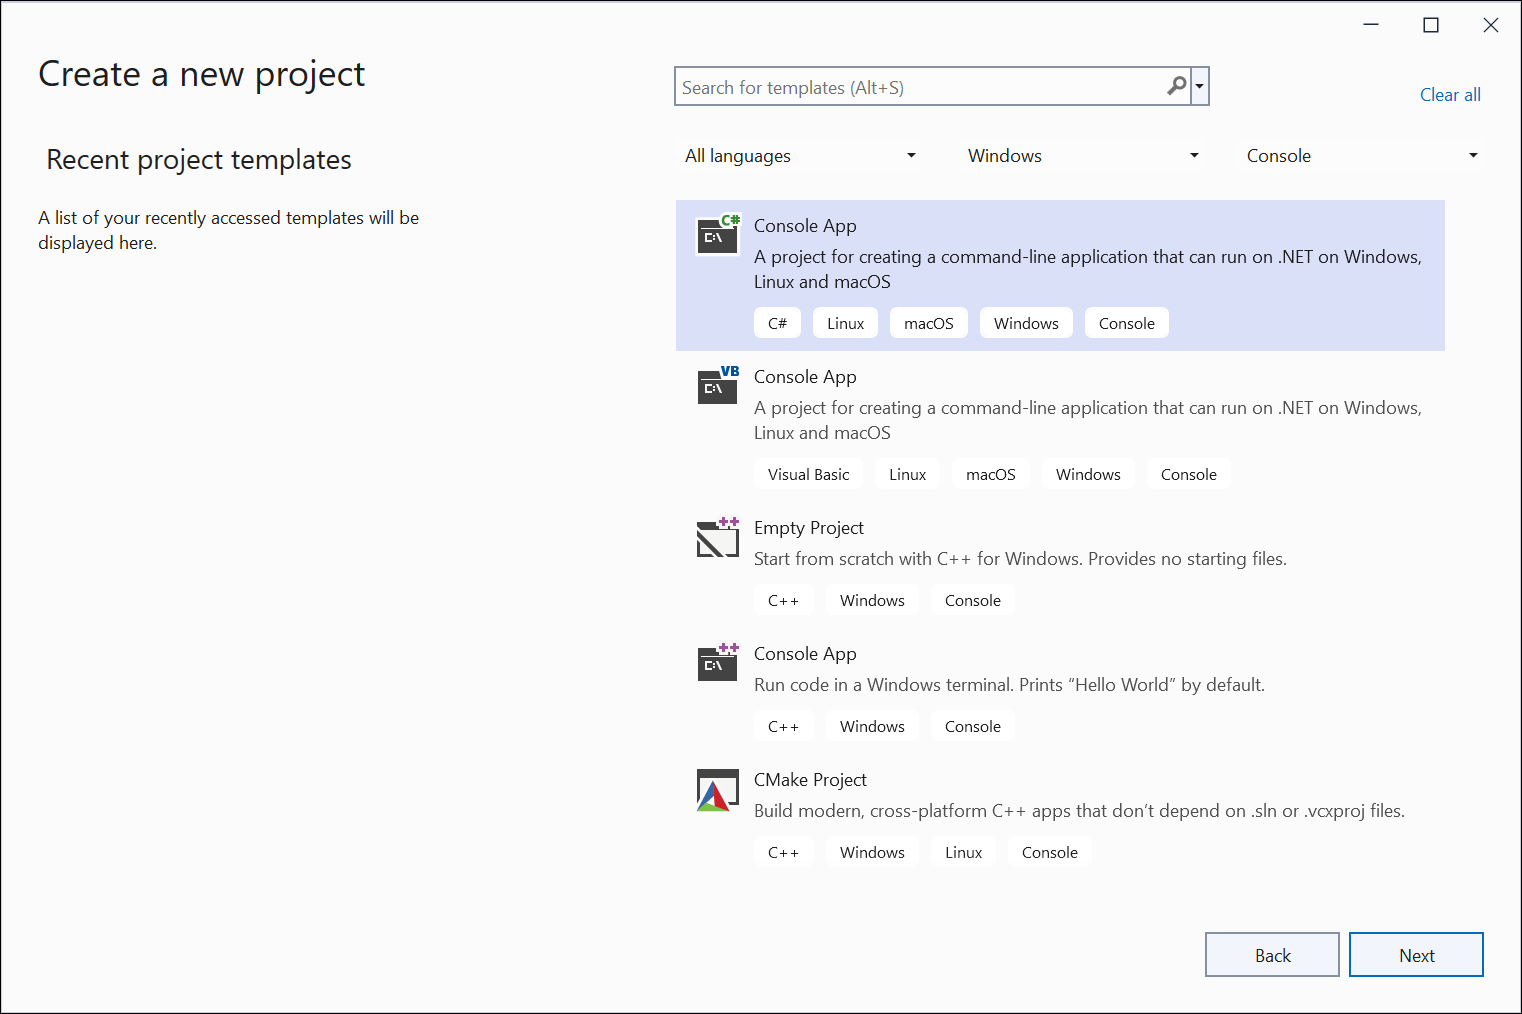
Step 1: Create a new AWS Lambda project as follows.
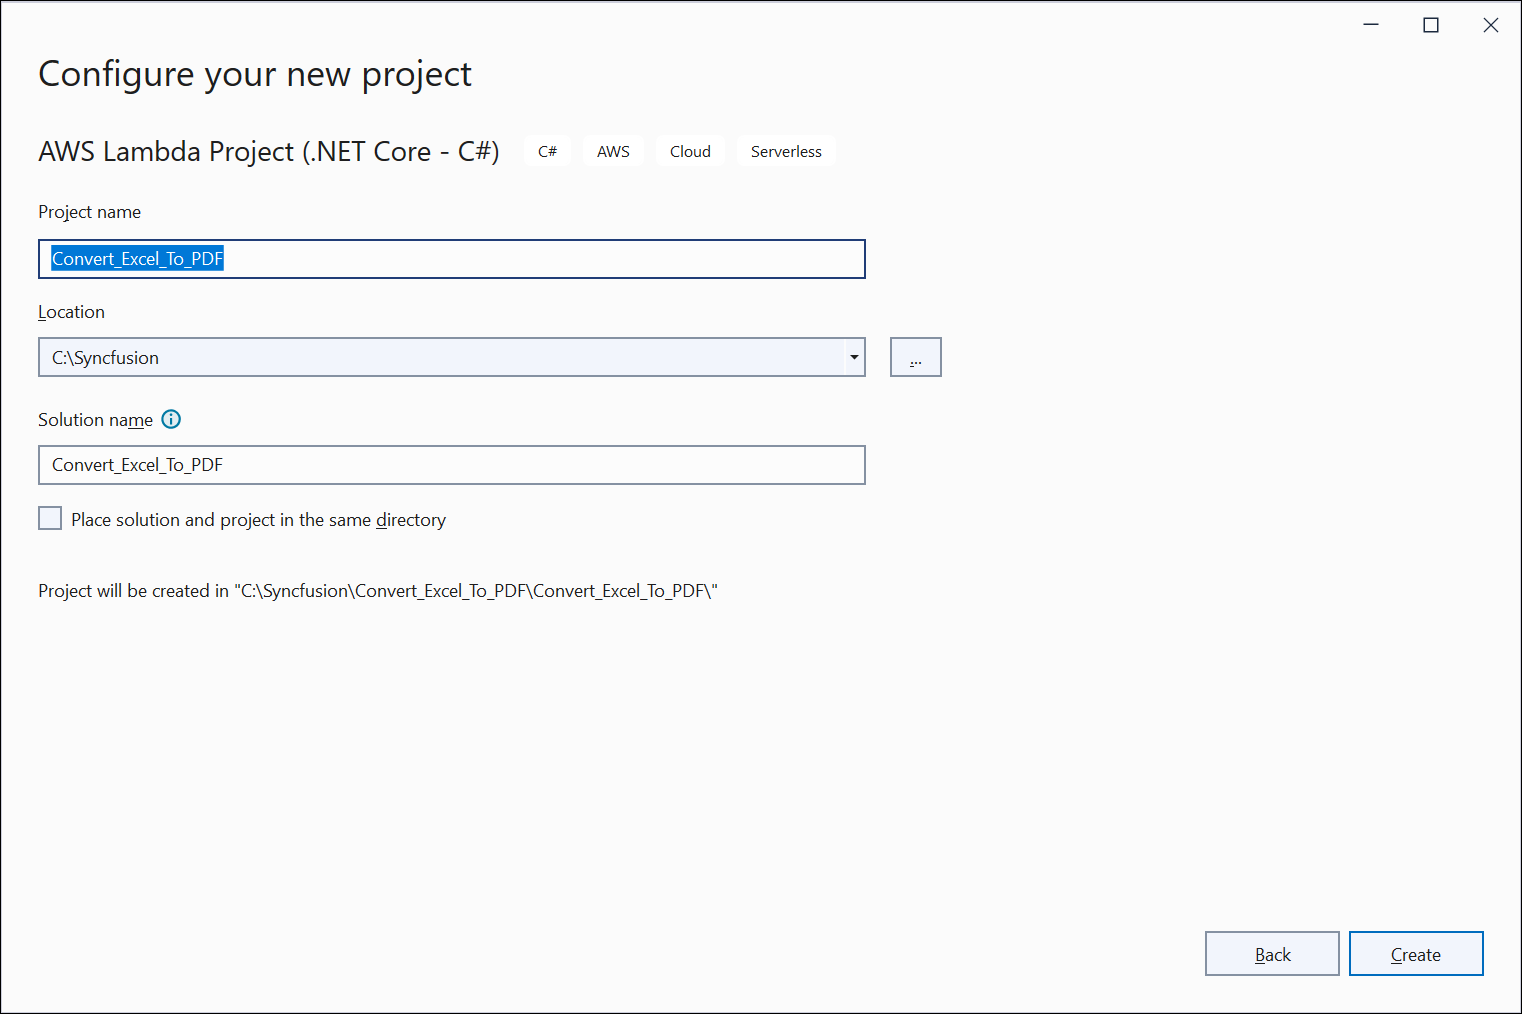
Step 2: Name the application.
Step 3: Select Blueprint as Empty Function and click Finish.

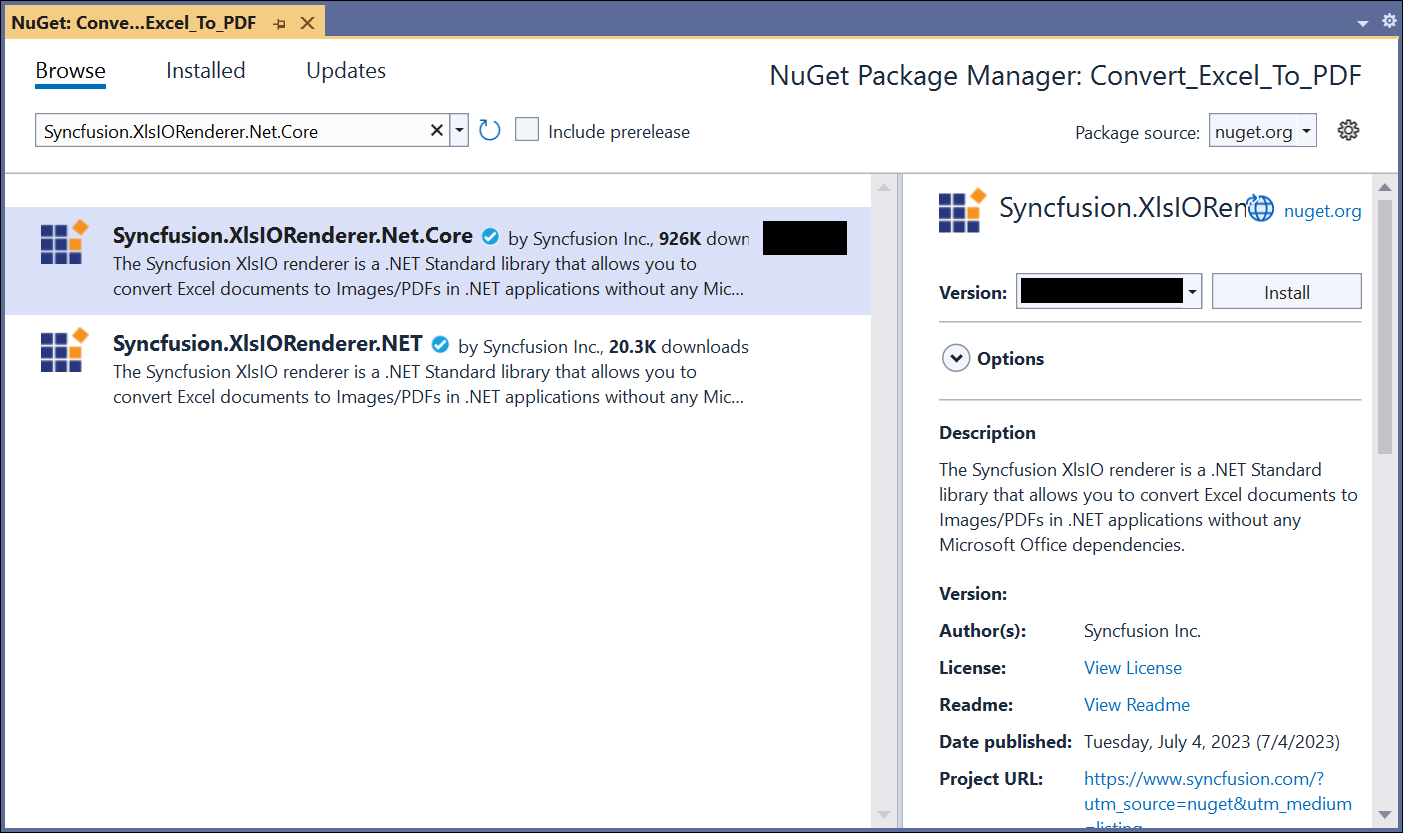
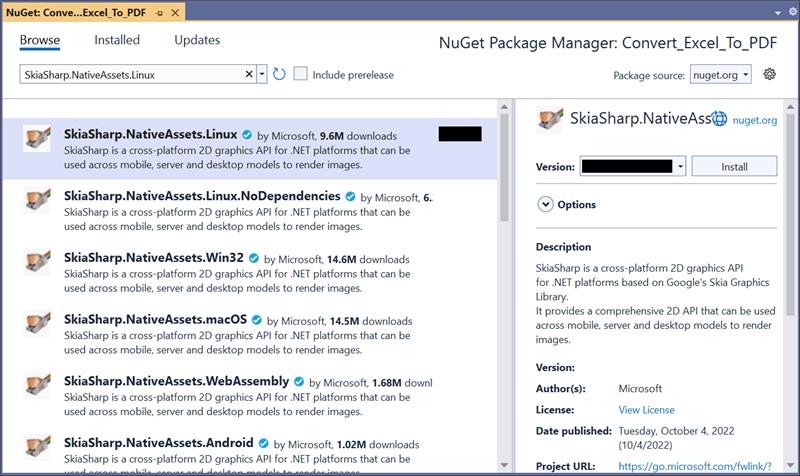
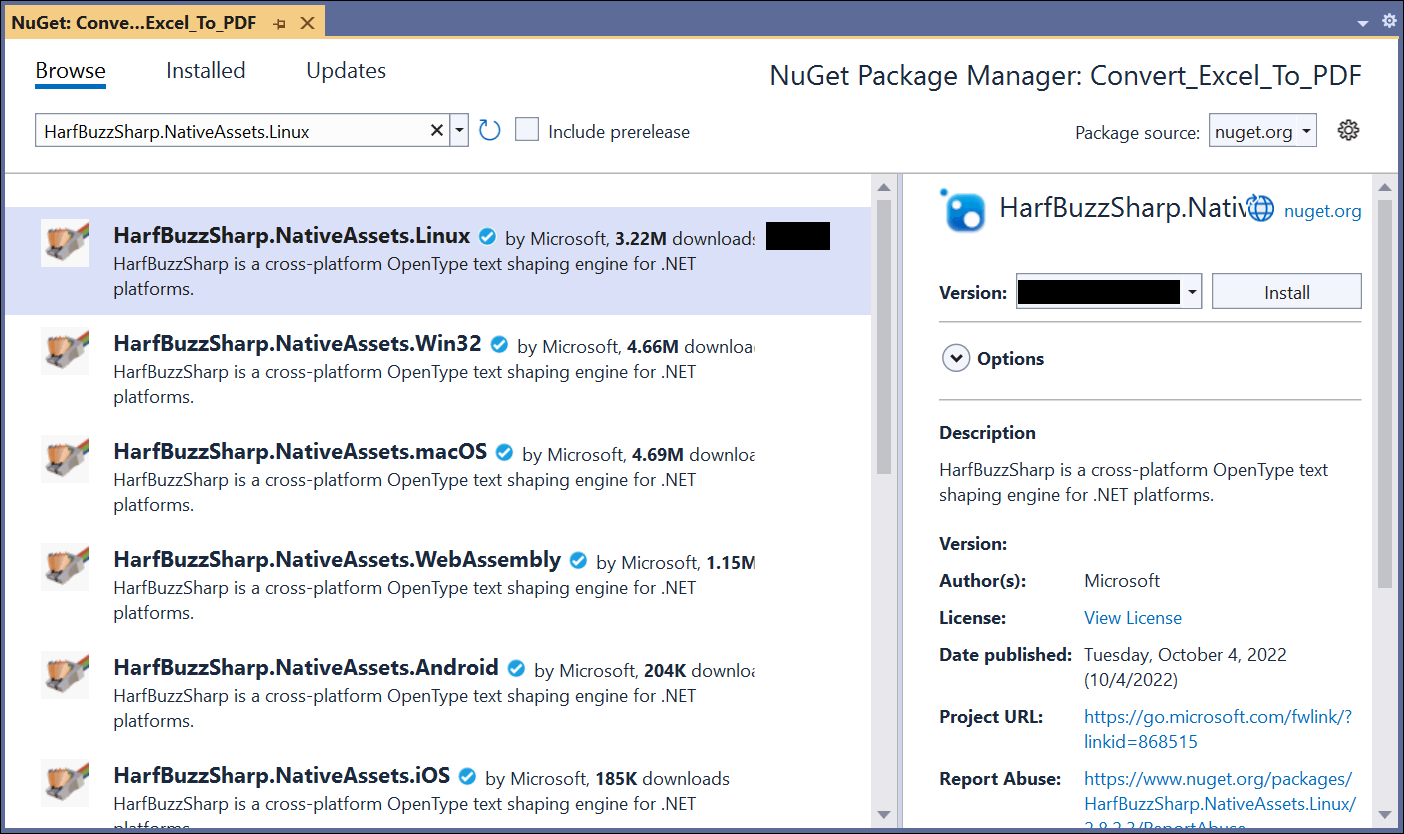
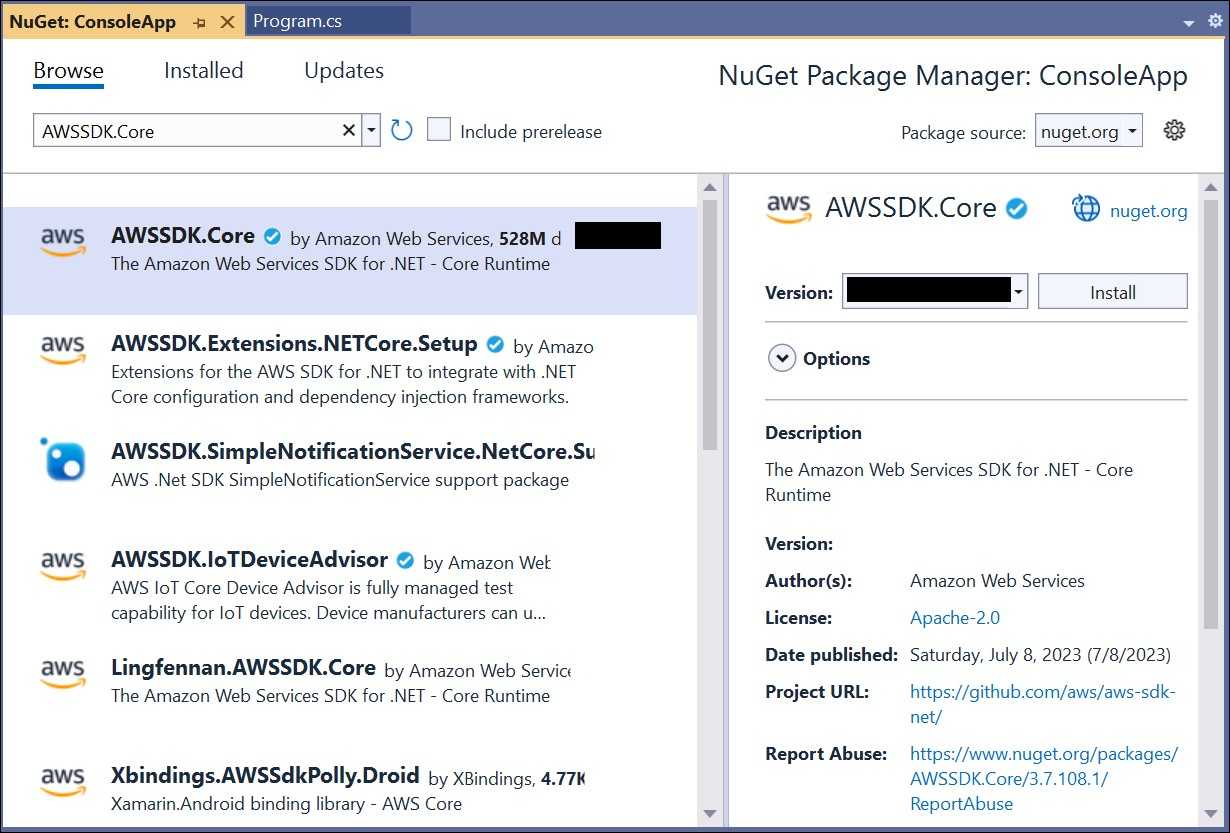
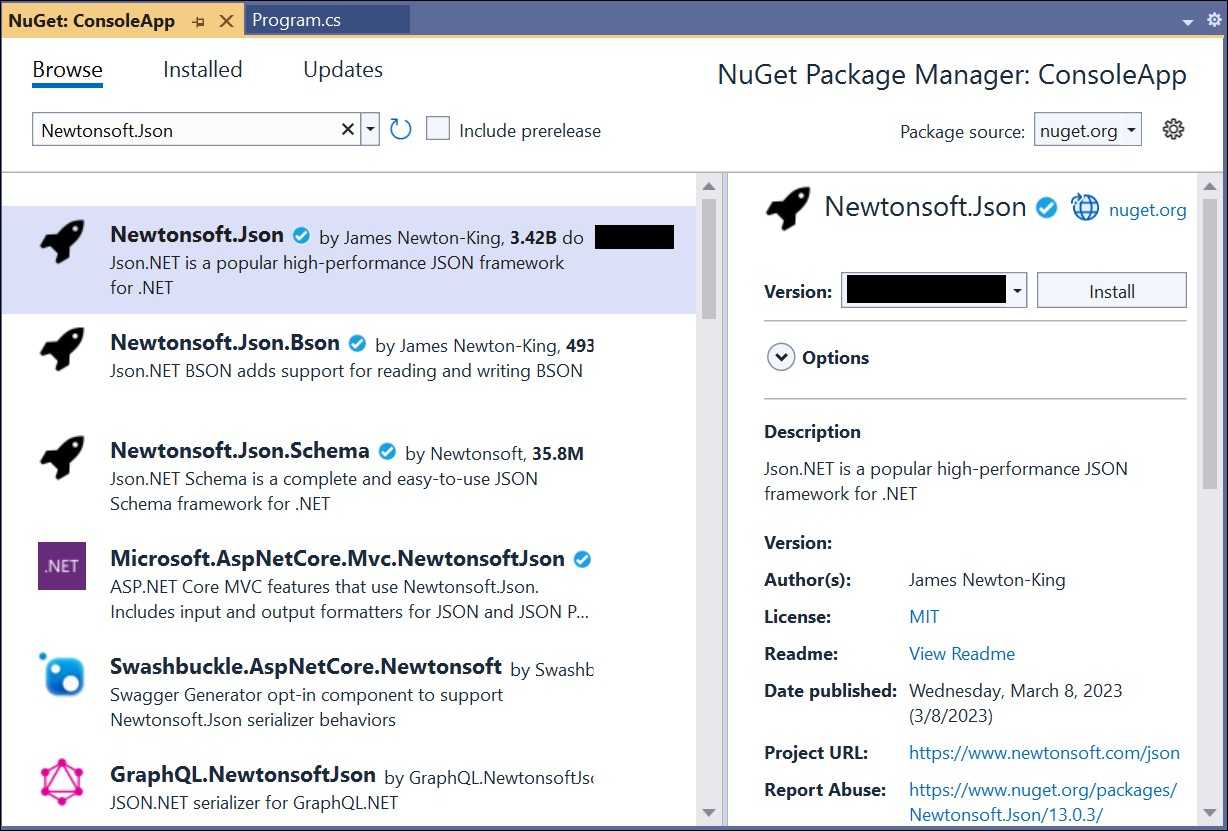
Step 4: Install the following NuGet packages in your application from Nuget.org.
- Syncfusion.XlsIORenderer.Net.Core
- SkiaSharp.NativeAssets.Linux v3.119.1
- HarfBuzzSharp.NativeAssets.Linux v2.8.2.2
NOTE
- If you’re deploying the application in a Linux environment, refer to the documentation for the required additional NuGet packages.
NOTE
- Starting with v16.2.0.x, if you reference Syncfusion® assemblies from trial setup or from the NuGet feed, you also have to add “Syncfusion.Licensing” assembly reference and include a license key in your projects. Please refer to this link to know about registering Syncfusion® license key in your application to use our components.
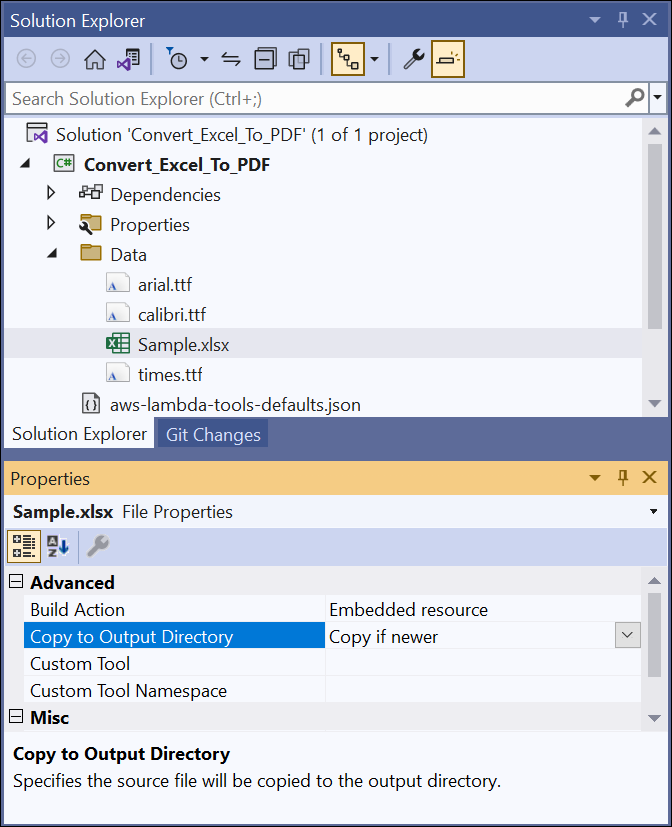
Step 5: Create a folder and copy the required data files and include the files to the project.

Step 6: Set the copy to output directory to Copy if newer to all the data files.
Step 7: Include the following namespaces in Function.cs file.
using Syncfusion.XlsIO;
using Syncfusion.XlsIORenderer;
using Syncfusion.Pdf;
using Syncfusion.XlsIO.Implementation;
step 8: Add the following code snippet in Function.cs to convert an Excel document to PDF.
public string FunctionHandler(string input, ILambdaContext context)
{
using (ExcelEngine excelEngine = new ExcelEngine())
{
IApplication application = excelEngine.Excel;
application.DefaultVersion = ExcelVersion.Xlsx;
//Initializes the SubstituteFont event to perform font substitution during Excel-to-PDF conversion
application.SubstituteFont += new SubstituteFontEventHandler(SubstituteFont);
IWorkbook workbook = application.Workbooks.Open(Path.GetFullPath(@"Data/Sample.xlsx"));
//Initialize XlsIO renderer.
XlsIORenderer renderer = new XlsIORenderer();
//Convert Excel document into PDF document
PdfDocument pdfDocument = renderer.ConvertToPDF(workbook);
//Create the MemoryStream to save the converted PDF.
MemoryStream pdfStream = new MemoryStream();
//Save the converted PDF document to MemoryStream.
pdfDocument.Save(pdfStream);
pdfStream.Position = 0;
return Convert.ToBase64String(pdfStream.ToArray());
}
}
private void SubstituteFont(object sender, SubstituteFontEventArgs args)
{
string filePath = string.Empty;
FileStream fileStream = null;
if (args.OriginalFontName == "Calibri")
{
filePath = Path.GetFullPath(@"Data/calibri.ttf");
fileStream = new FileStream(filePath, FileMode.Open, FileAccess.Read);
args.AlternateFontStream = fileStream;
}
else if (args.OriginalFontName == "Arial")
{
filePath = Path.GetFullPath(@"Data/arial.ttf");
fileStream = new FileStream(filePath, FileMode.Open, FileAccess.Read);
args.AlternateFontStream = fileStream;
}
else
{
filePath = Path.GetFullPath(@"Data/times.ttf");
fileStream = new FileStream(filePath, FileMode.Open, FileAccess.Read);
args.AlternateFontStream = fileStream;
}
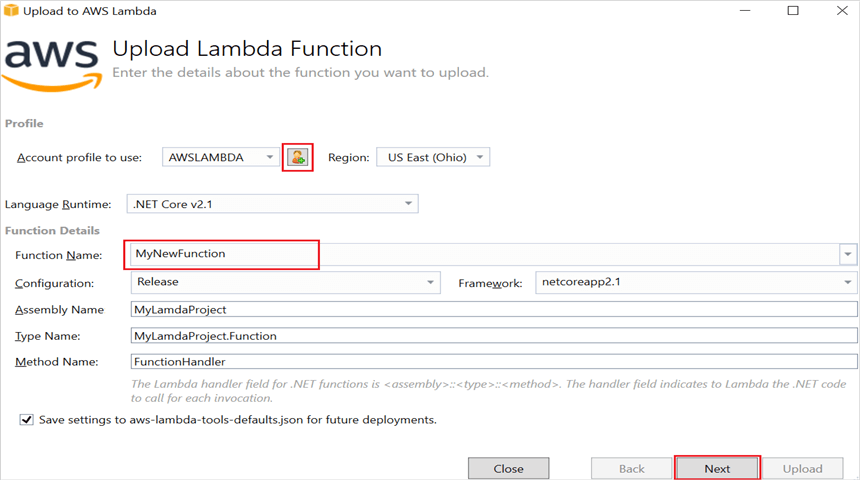
}Step 9: Right-click the project and select Publish to AWS Lambda.

Step 10: Create a new AWS profile in the Upload Lambda Function Window. After creating the profile, add a name for the Lambda function to publish. Then, click Next.
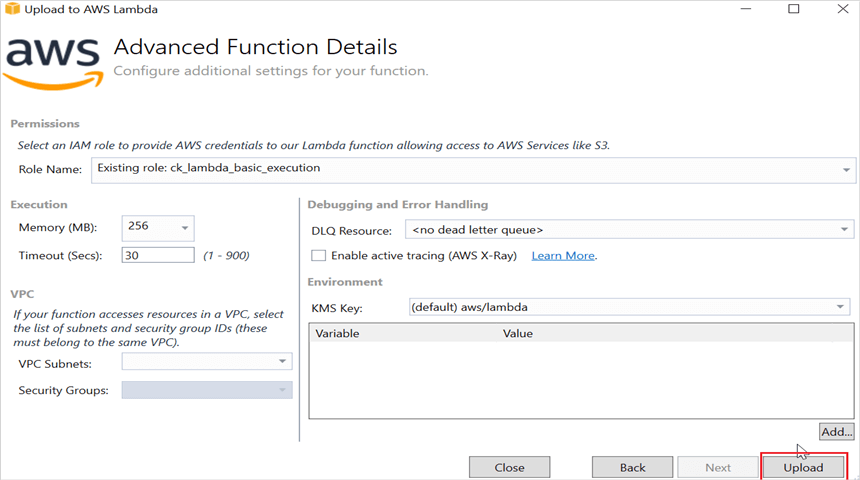
Step 11: In the Advanced Function Details window, specify the Role Name as based on AWS Managed policy. After selecting the role, click the Upload button to deploy your application.
Step 12: After deploying the application, you can see the published Lambda function in AWS console.

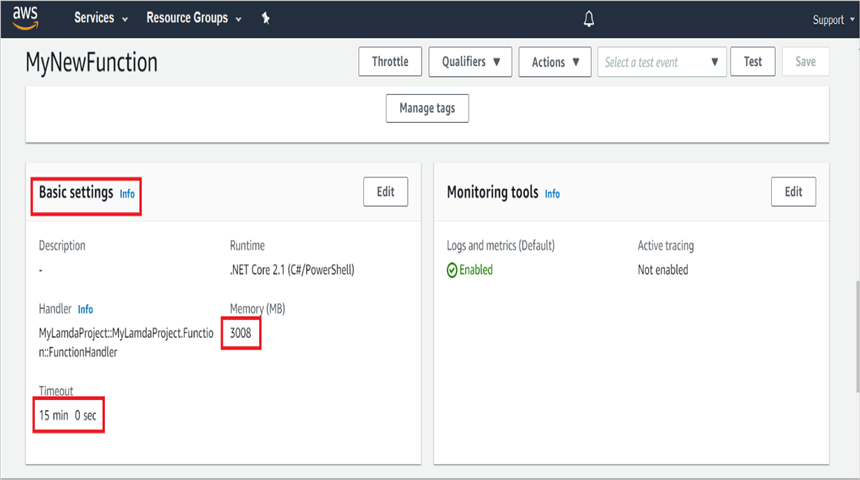
Step 13: Edit Memory size and Timeout as maximum in Basic settings of the AWS Lambda function.
Steps to post the request to AWS Lambda
Step 1: Create a new console project.
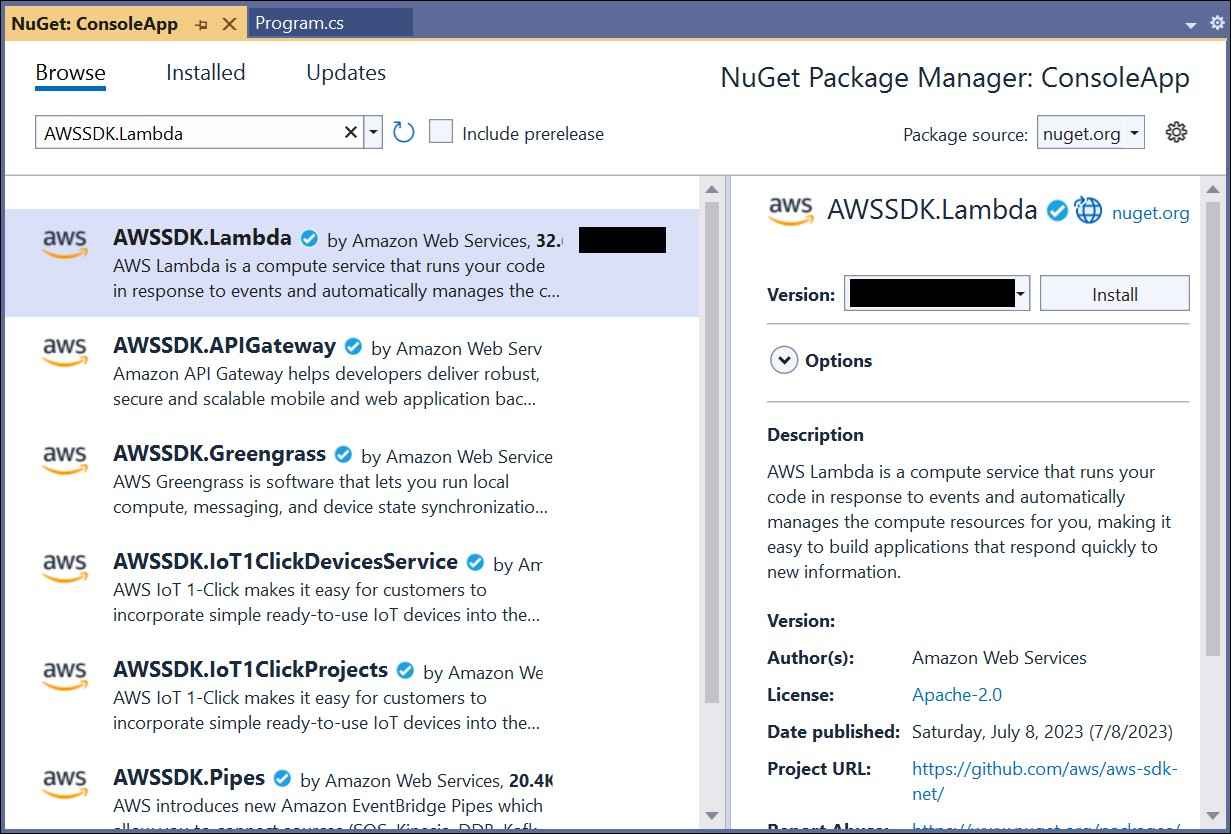
step 2: Install the following NuGet packages in your application from Nuget.org.
Step 3: Include the following namespaces in Program.cs file.
using Amazon;
using Amazon.Lambda;
using Amazon.Lambda.Model;
using Newtonsoft.Json;
Step 4: Add the following code snippet in Program.cs to invoke the published AWS Lambda function using the function name and access keys.
//Create a new AmazonLambdaClient
AmazonLambdaClient client = new AmazonLambdaClient("awsaccessKeyID", "awsSecreteAccessKey", RegionEndpoint.USEast2);
//Create new InvokeRequest with published function name.
InvokeRequest invoke = new InvokeRequest
{
FunctionName = "MyNewFunction",
InvocationType = InvocationType.RequestResponse,
Payload = "\"Test\""
};
//Get the InvokeResponse from client InvokeRequest.
InvokeResponse response = client.Invoke(invoke);
//Read the response stream
var stream = new StreamReader(response.Payload);
JsonReader reader = new JsonTextReader(stream);
var serilizer = new JsonSerializer();
var responseText = serilizer.Deserialize(reader);
//Convert Base64String into PDF document
byte[] bytes = Convert.FromBase64String(responseText.ToString());
FileStream fileStream = new FileStream("Sample.pdf", FileMode.Create);
BinaryWriter writer = new BinaryWriter(fileStream);
writer.Write(bytes, 0, bytes.Length);
writer.Close();
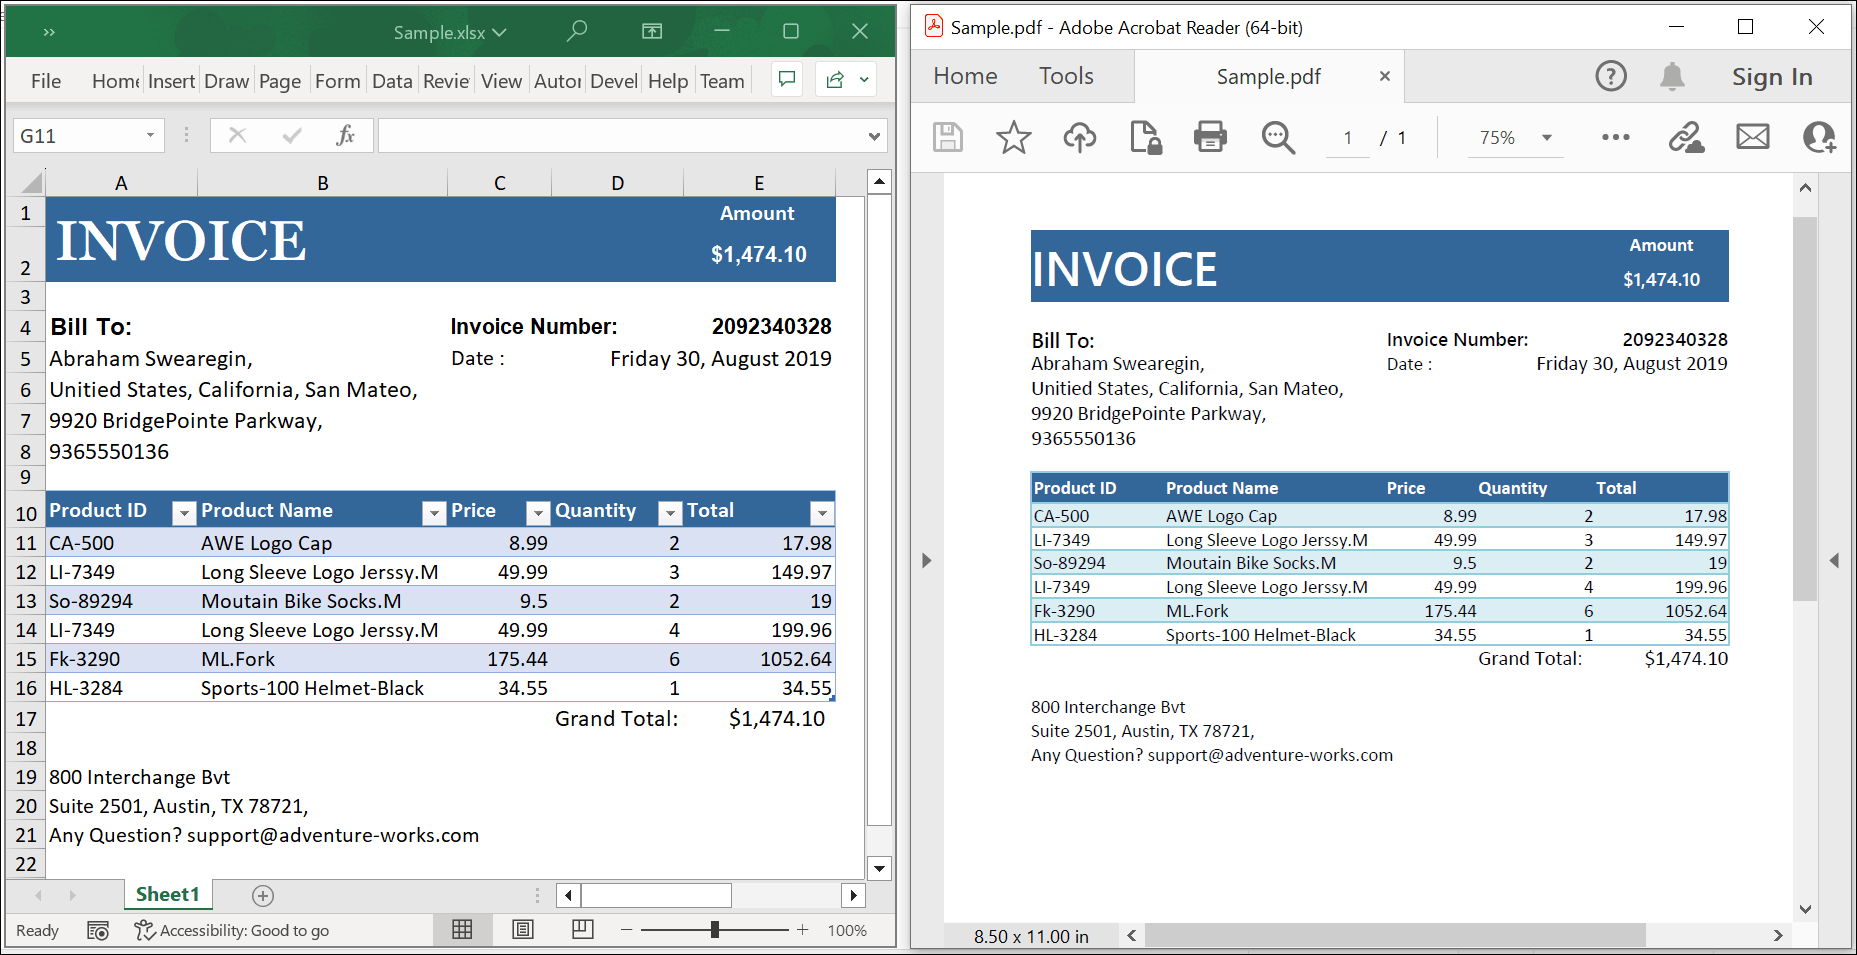
System.Diagnostics.Process.Start("Sample.pdf");By executing the program, you will get the PDF document as follows.
Click here to explore the rich set of Syncfusion® Excel library (XlsIO) features.
An online sample link to convert an Excel document to PDF in ASP.NET Core.