Getting Started with Blazor Smart Data Extractor
14 Aug 202616 minutes to read
The Syncfusion® Smart Data Extractor is a .NET library used to extract structured data and document elements from PDFs and images in Blazor applications.
Steps to Extract Data from PDF in Blazor application
Prerequisites:
- Install .NET SDK: Ensure that you have the .NET SDK installed on your system. You can download it from the .NET Downloads page.
- Install Visual Studio: Download and install Visual Studio from the official website.
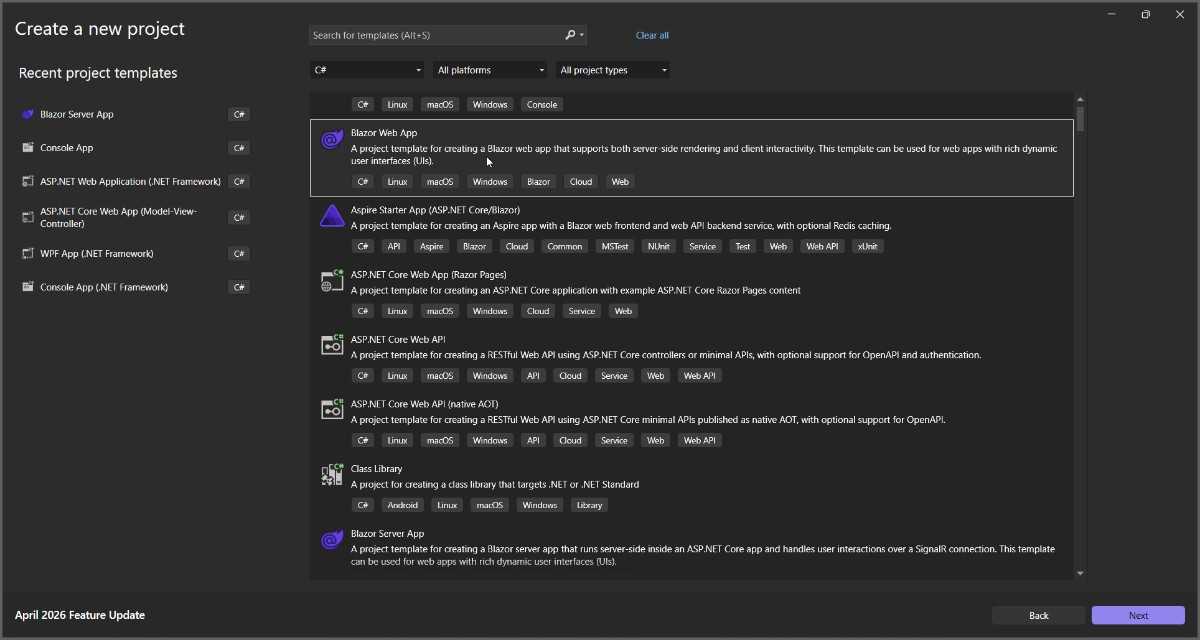
Step 1: Create a new C# Blazor Web App project.
- Select “Blazor Web App” from the template and click Next.
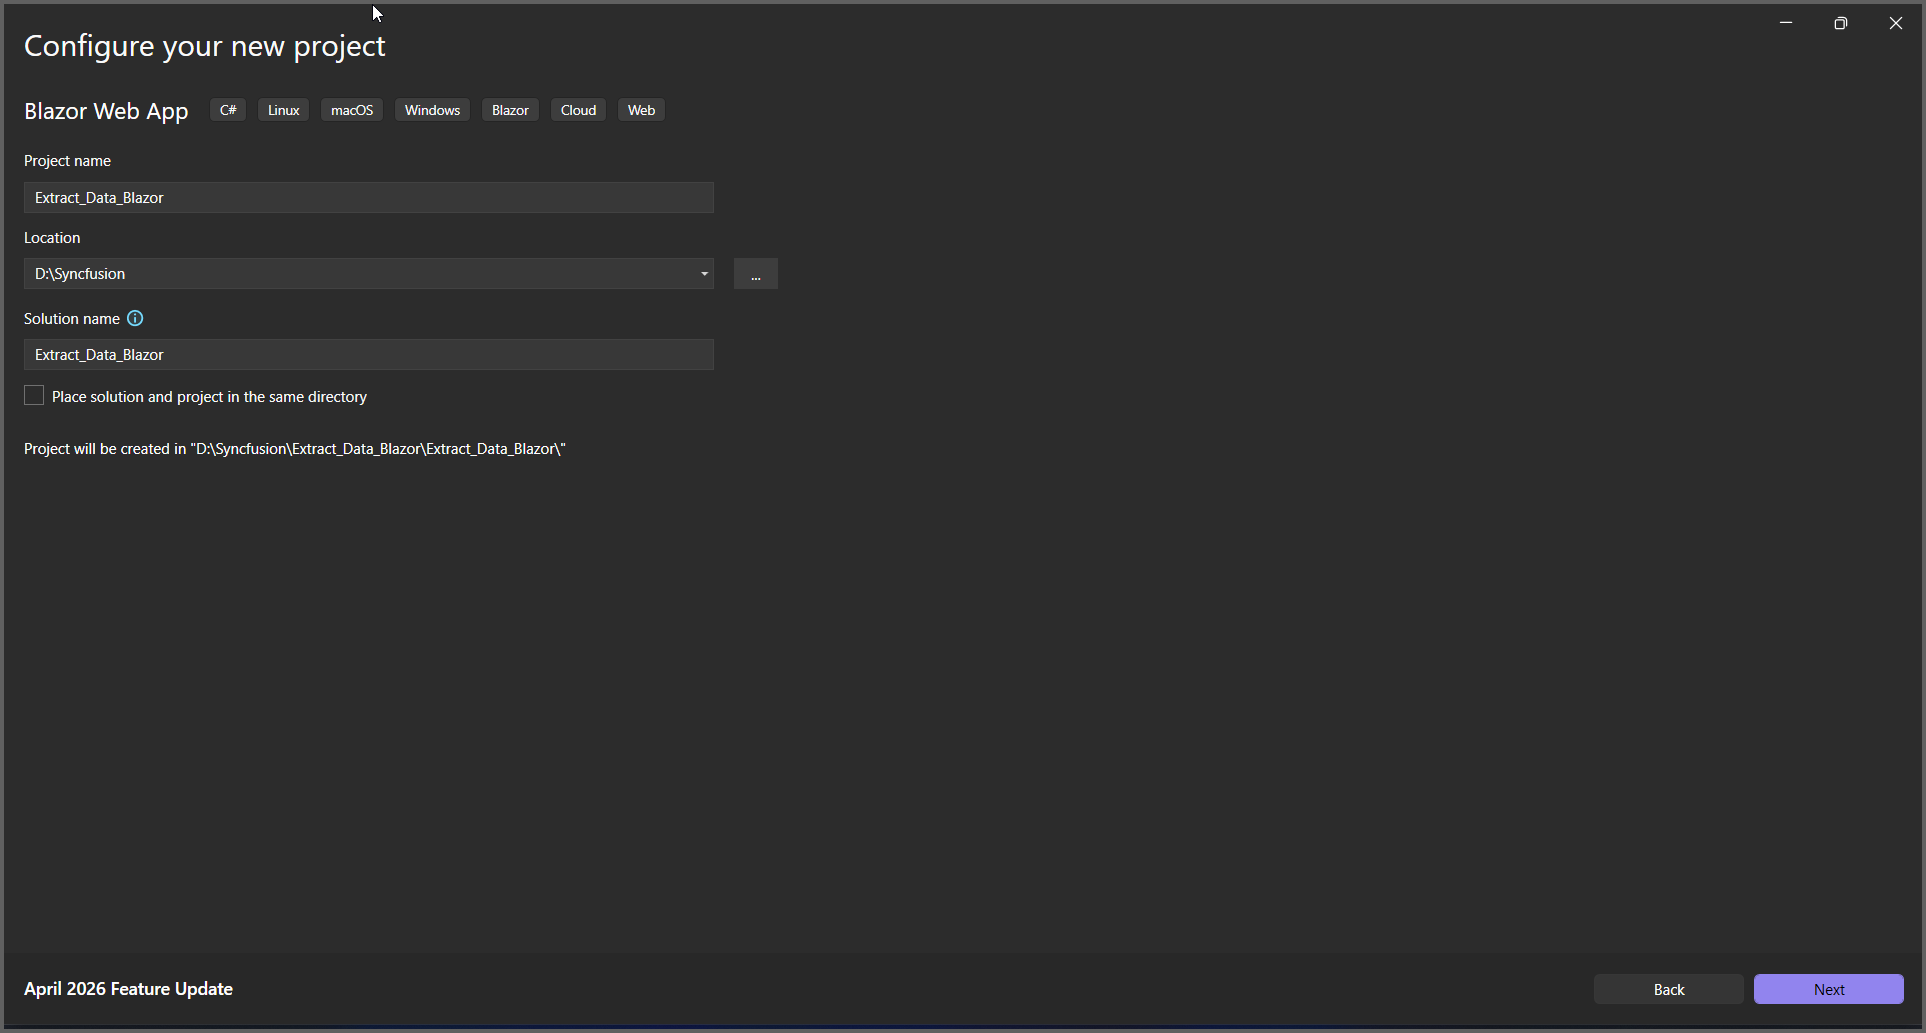
- Name the project and click Next.
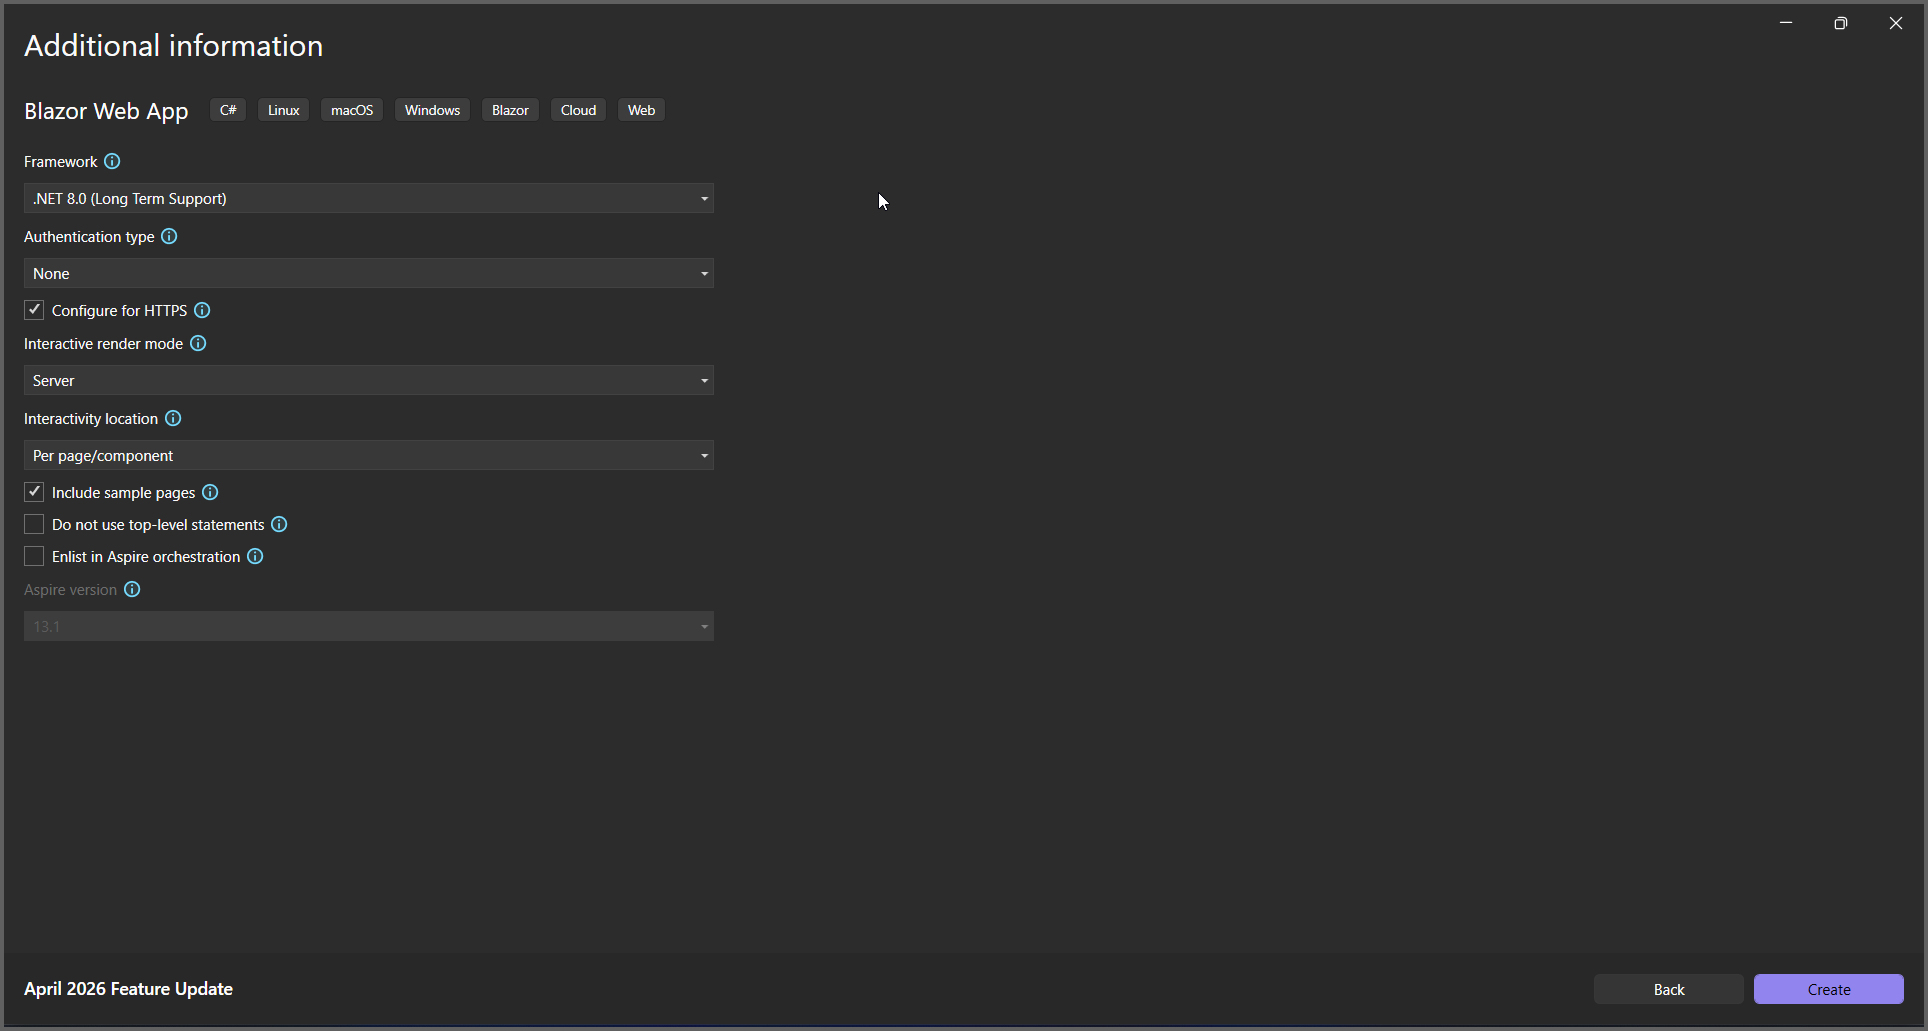
- Select the framework and click Create button.
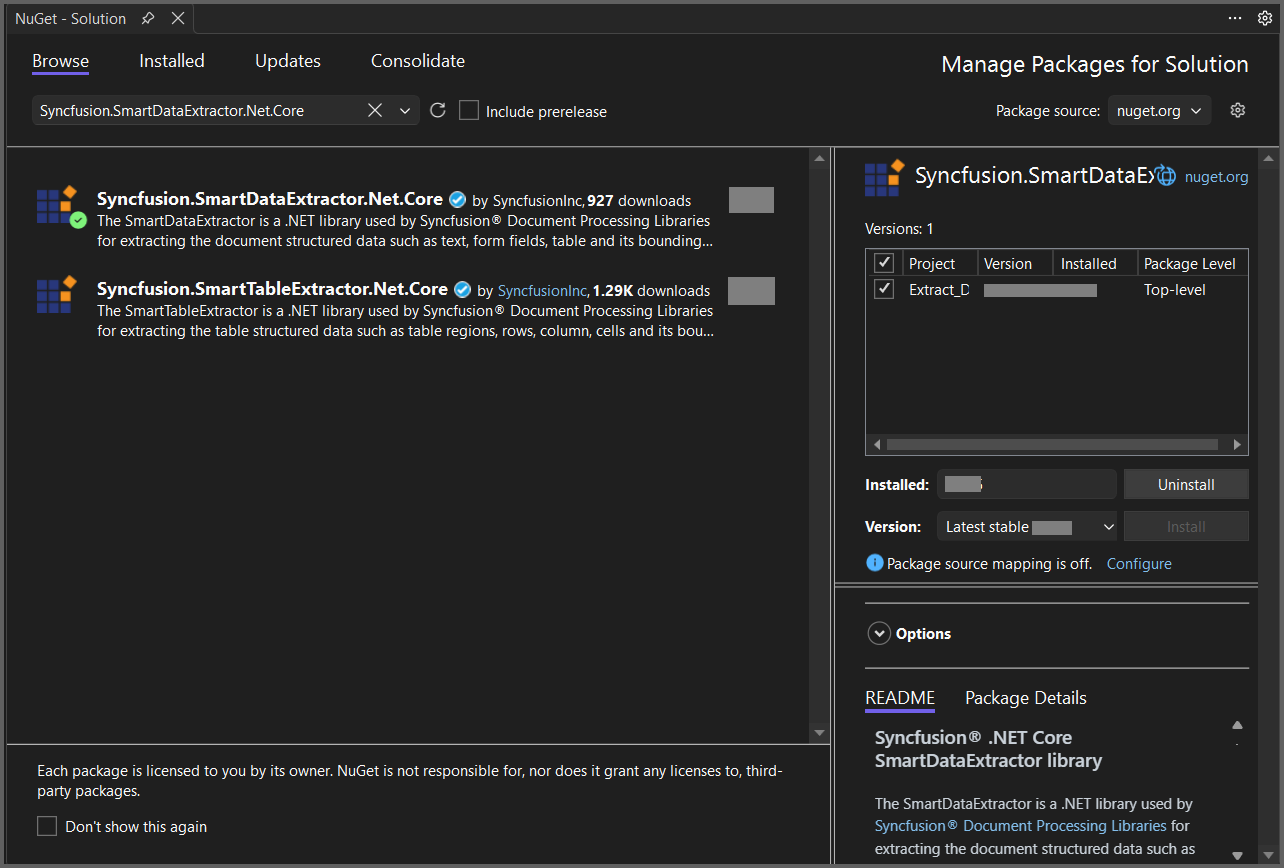
Step 2: Install the Syncfusion.SmartDataExtractor.Net.Core NuGet package.
To Extract Data from PDF in a Blazor Web App Server, install Syncfusion.SmartDataExtractor.Net.Core into the Blazor project.
Add the input PDF file named Input.pdf to the wwwroot folder before running the sample.
Step 3: Create a Razor file named Home.razor in the Pages folder, which is located inside the Components folder.
Add the following directives and service injections in the file
@page "/"
@rendermode InteractiveServer
@using  Extract_Data_Blazor.Services
@using Microsoft.JSInterop
@inject ExtractionService extractor
@inject IJSRuntime JS
Step 4: Add a button to Home.razor.
Include the following code snippet to add a button in your Blazor application that triggers the “Extract Data as JSON” conversion:
<h1>Run Extraction</h1>
<button @onclick="RunExtraction" class="btn btn-primary">
    Run Extractor
</button>
<p>@message</p>
Step 5: Implement the method in Home.razor.
Add the following code snippet to extract data from a PDF and download the file in your Blazor application.
@code {
    string message = "Waiting...";
    async Task RunExtraction()
    {
        message = "Processing...";
        StateHasChanged(); // force UI update immediately
        message = await extractor.RunExtraction();
    }
}
Step 6: Create a new cs file ExtractionService.cs in the Services folder.
Include the following namespaces in the file:
using Syncfusion.Pdf.Parsing;
using Syncfusion.SmartDataExtractor;
Step 7: Implement the method in ExtractionService.cs.
Create a new method in the ExtractionService class, and add the following code snippet to extract data as JSON from a PDF in a Blazor Web App Server.
public class ExtractionService
{
    public string RunExtraction()
    {
        using (FileStream stream = new FileStream(@"wwwroot/Input.pdf", FileMode.Open, FileAccess.Read, FileShare.ReadWrite))
        {
            // Initialize the Data Extractor
            DataExtractor extractor = new DataExtractor();
            // Extract data as JSON string
            string data = extractor.ExtractDataAsJson(stream);
            // Return the JSON string
            return data;
        }
    }
}
Step 8: Add the service in Program.cs.
Include the following namespaces in the Program.cs file:
using Extract_Data_Blazor.Components;
using Extract_Data_Blazor.Services;
Add the following line to the Program.cs file to register ExtractionService as a scoped service in the Blazor application.
builder.Services.AddScoped<ExtractionService>();Step 9: Create FileUtils.cs for JavaScript interoperability.
Create a new class file named FileUtils in the project and add the following code to invoke the JavaScript action for file download in the browser.
using System;
using System.Threading.Tasks;
using Microsoft.JSInterop;

public static class FileUtils
{
    public static ValueTask<object> SaveAs(this IJSRuntime js, string filename, byte[] data)
        => js.InvokeAsync<object>(
                "saveAsFile",
                filename,
                Convert.ToBase64String(data));
}
Step 10: Add JavaScript function to App.razor.
Add the following JavaScript function in the App.razor file located in the root of the project.
<script type="text/javascript">
    function saveAsFile(filename, bytesBase64) {
        if (navigator.msSaveBlob) {
            // Download document in Edge browser
            var data = window.atob(bytesBase64);
            var bytes = new Uint8Array(data.length);
            for (var i = 0; i < data.length; i++) {
                bytes[i] = data.charCodeAt(i);
            }
            var blob = new Blob([bytes.buffer], { type: "application/octet-stream" });
            navigator.msSaveBlob(blob, filename);
        }
        else {
            var link = document.createElement('a');
            link.download = filename;
            link.href = "data:application/octet-stream;base64," + bytesBase64;
            document.body.appendChild(link); // Needed for Firefox
            link.click();
            document.body.removeChild(link);
        }
    }
</script>
Step 11: Add navigation link.
Add the following code snippet to the NavMenu.razor file in the Layout folder.
<div class="nav-item px-3">
    <NavLink class="nav-link" href="extraction">
        <span class="oi oi-list-rich" aria-hidden="true"></span> Data Extraction
    </NavLink>
</div>
Step 12: Build the project.
Click on Build → Build Solution or press Ctrl+Shift+B to build the project.
Step 13: Run the project.
Click the Start button (green arrow) or press F5 to run the application.
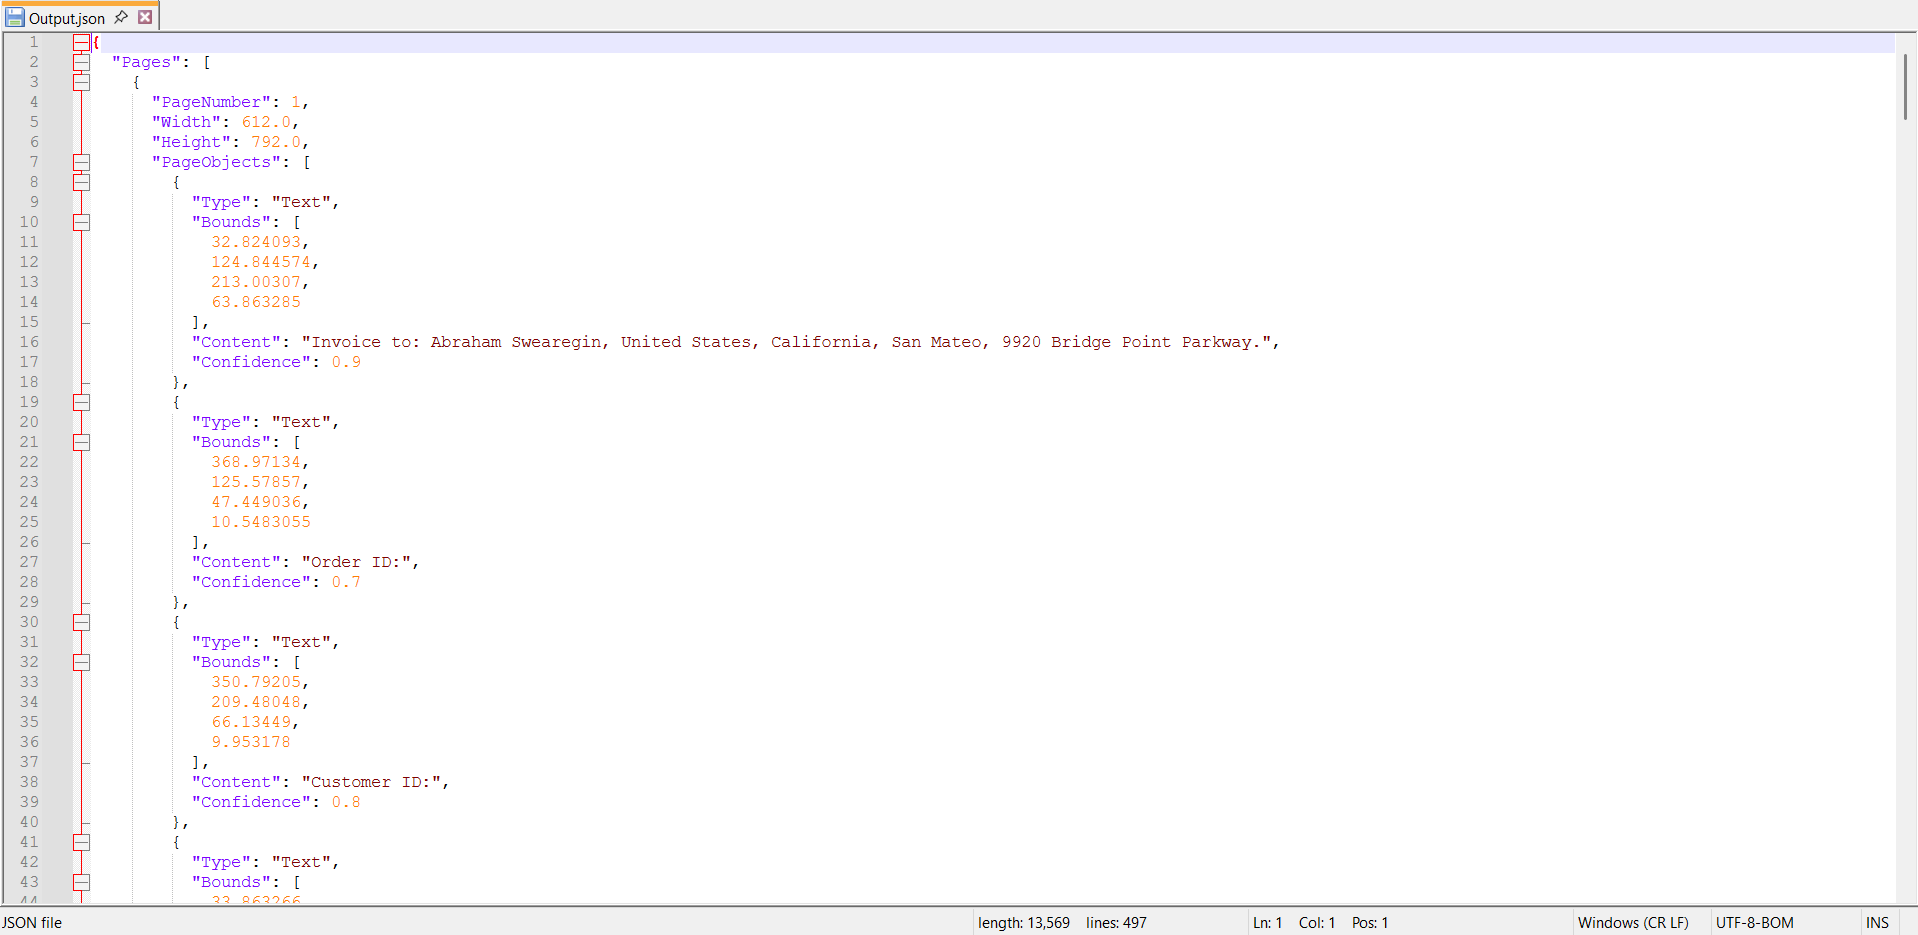
Upon executing the program, the JSON file will be generated as follows.
Prerequisites:
- Visual Studio Code.
- Install .NET 8 SDK or later.
- Open Visual Studio Code and install the C# for Visual Studio Code extension from the Extensions Marketplace.
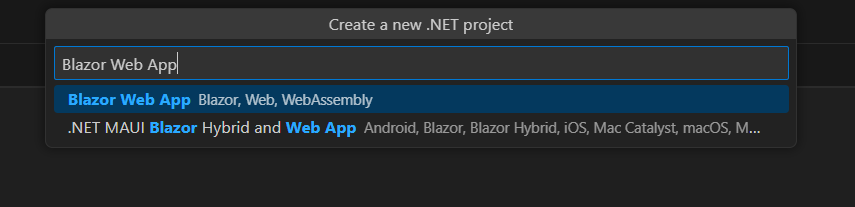
Step 1: Create a new C# Blazor Web App project.
- Open the command palette by pressing Ctrl+Shift+P and type .NET:New Project and enter.
- Choose the Blazor Web App template.
- Select the project location, type the project name and press enter.
- Then choose Create project.
Step 2: To Extract Data from PDF in Web app, install Syncfusion.SmartDataExtractor.Net.Core to the Blazor project.
- Press Ctrl + ` (backtick) to open the integrated terminal in Visual Studio Code.
- Ensure you’re in the project root directory where your .csproj file is located.
- Run the command
dotnet add package Syncfusion.SmartDataExtractor.Net.Coreto install the NuGet package.
dotnet add package Syncfusion.SmartDataExtractor.Net.Core
Add the input PDF file named Input.pdf to the wwwroot folder before running the sample.
Step 3: Create a Razor file named Home.razor in the Pages folder, which is located inside the Components folder.
Add the following directives and service injections in the file
@page "/"
@rendermode InteractiveServer
@using  Extract_Data_Blazor.Services
@using Microsoft.JSInterop
@inject ExtractionService extractor
@inject IJSRuntime JS
Step 4: Add a button to Home.razor.
Include the following code snippet to add a button in your Blazor application that triggers the “Extract Data as JSON” conversion:
<h1>Run Extraction</h1>

<button @onclick="RunExtraction" class="btn btn-primary">
    Run Extractor
</button>

<p>@message</p>
Step 5: Implement the method in Home.razor.
Add the following code snippet to extract data from a PDF and download the file in your Blazor application.
@code {
    string message = "Waiting...";
    async Task RunExtraction()
    {
        message = "Processing... ";
        StateHasChanged(); // force UI update immediately
        // Run extractor to get JSON string
        var json = await extractor.RunExtraction();
        // Convert JSON to UTF8 bytes and trigger browser download via JS interop
        var bytes = System.Text.Encoding.UTF8.GetBytes(json ?? string.Empty);
        await JS.SaveAs("extracted.json", bytes);
        message = "Download started";
    }
}
Step 6: Create a new cs file ExtractionService.cs in the Services folder.
Include the following namespaces in the file:
using Syncfusion.Pdf.Parsing;
using Syncfusion.SmartDataExtractor;
Step 7: Implement the method in ExtractionService.cs.
Create a new method in the ExtractionService class, and add the following code snippet to extract data as JSON from a PDF in a Blazor Web App Server.
using (FileStream stream = new FileStream(@"wwwroot/Input.pdf", FileMode.Open, FileAccess.Read, FileShare.ReadWrite))
{
	// Initialize the Data Extractor
	DataExtractor extractor = new DataExtractor();

	// Extract data as JSON string
	string data = extractor.ExtractDataAsJson(stream);

	// Return the JSON string
	return data;
}
Step 8: Add the service in Program.cs.
Include the following namespaces in the Program.cs file:
using Extract_Data_Blazor.Components;
using Extract_Data_Blazor.Services;
Add the following line to the Program.cs file to register ExtractionService as a scoped service in the Blazor application.
builder.Services.AddScoped<ExtractionService>();Step 9: Create FileUtils.cs for JavaScript interoperability.
Create a new class file named FileUtils in the project and add the following code to invoke the JavaScript action for file download in the browser.
public static class FileUtils
{
    public static ValueTask<object> SaveAs(this IJSRuntime js, string filename, byte[] data)
        => js.InvokeAsync<object>(
                "saveAsFile",
                filename,
                Convert.ToBase64String(data));
}
Step 10: Add JavaScript function to App.razor.
Add the following JavaScript function in the App.razor file located in the root of the project.
<script type="text/javascript">
    function saveAsFile(filename, bytesBase64) {
        if (navigator.msSaveBlob) {
            // Download document in Edge browser
            var data = window.atob(bytesBase64);
            var bytes = new Uint8Array(data.length);
            for (var i = 0; i < data.length; i++) {
                bytes[i] = data.charCodeAt(i);
            }
            var blob = new Blob([bytes.buffer], { type: "application/octet-stream" });
            navigator.msSaveBlob(blob, filename);
        }
        else {
            var link = document.createElement('a');
            link.download = filename;
            link.href = "data:application/octet-stream;base64," + bytesBase64;
            document.body.appendChild(link); // Needed for Firefox
            link.click();
            document.body.removeChild(link);
        }
    }
</script>
Step 11: Add navigation link.
Add the following code snippet to the Navigation menu’s Razor file in the Layout folder.
<div class="nav-item px-3">
    <NavLink class="nav-link" href="extraction">
        <span class="oi oi-list-rich" aria-hidden="true"></span> Data Extraction
    </NavLink>
</div>
Step 12: Build the project.
Run the following command in terminal to build the project.
dotnet build
Step 13: Run the project.
Run the following command in terminal to run the project.
dotnet run
Upon executing the program, the JSON file will be generated as follows.