Checkpoints and Editing requests
14 May 20263 minutes to read
Overview
The Checkpoints and Editing Requests features in Syncfusion Code Studio provide powerful tools for managing your development workflow. Checkpoints automatically record the state of your workspace at important moments, while Editing Requests allows you to revise previous chat instructions and revert the workspace to the state before those instructions were applied. Together, these features create a safe, traceable, and flexible environment that supports iterative development and experimentation.
Use Cases
-
Save the current state so you can safely experiment with new features or code updates.
-
Roll back to a known state when trying different approaches without worrying about breaking the workspace.
-
Quickly restore to a safe state if AI-generated edits or manual changes don’t work as expected
Editing a Previous Chat Request
Code Studio allows you to edit any previous chat request in your conversation history. When you modify an earlier request, Code Studio treats it as a new instruction and sends it again to the AI model. The workspace is then reverted to the state it was in before the original request—undoing any file changes made by that request and the requests that came after it.
How to Edit Previous Chat request ?
Steps:
-
To edit a previous chat request, navigate to the chat request.
-
Click the chat request to modify and then resend it.
Restoring a Checkpoint
When you restore a checkpoint, Code Studio returns your workspace to the exact state it was in when that checkpoint was created. Any file changes made after that point are undone, allowing you to safely roll back to a known good version.
How to use Restore Check Point in Code Studio ?
Steps:
-
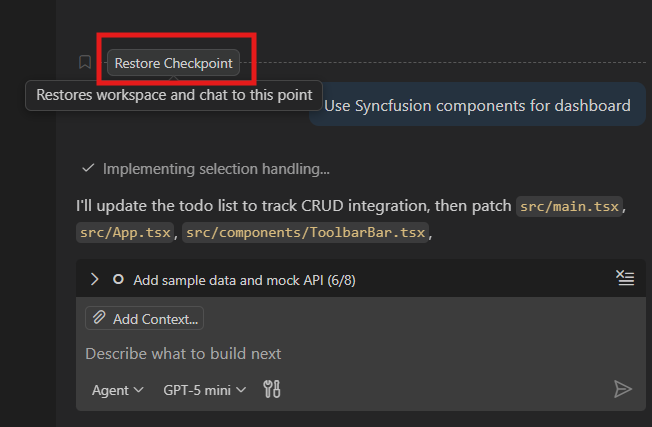
In the Chat view, navigate to a previous request in the chat session.
-
Hover over the request and select Restore Checkpoint.
-
Confirm that you want to restore the checkpoint and undo any file changes made after that point. Notice that the chat request is removed from the conversation history, and the workspace files are restored to their state at the time of the checkpoint
Redo Changes After Restoring a Checkpoint
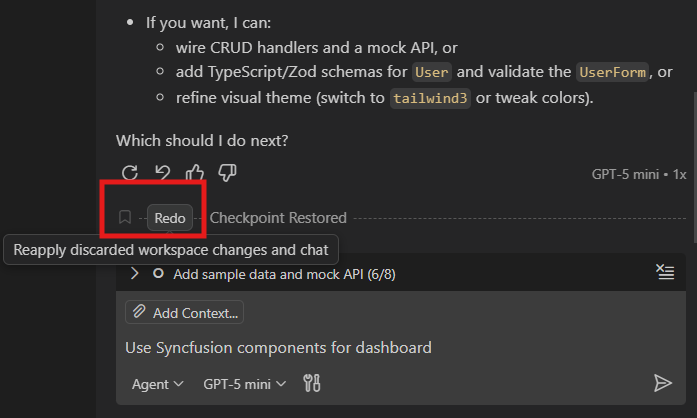
After restoring the previous checkpoint, Code Studio allows you to redo the changes that were undone. This is helpful if you restored the checkpoint by mistake or want to reapply the edits you rolled back.
How to redo changes After Restoring a Checkpoint ?
-
To redo these changes, simply select Redo from the Chat view after the checkpoint has been restored.
How to Undo and Redo the Last Request
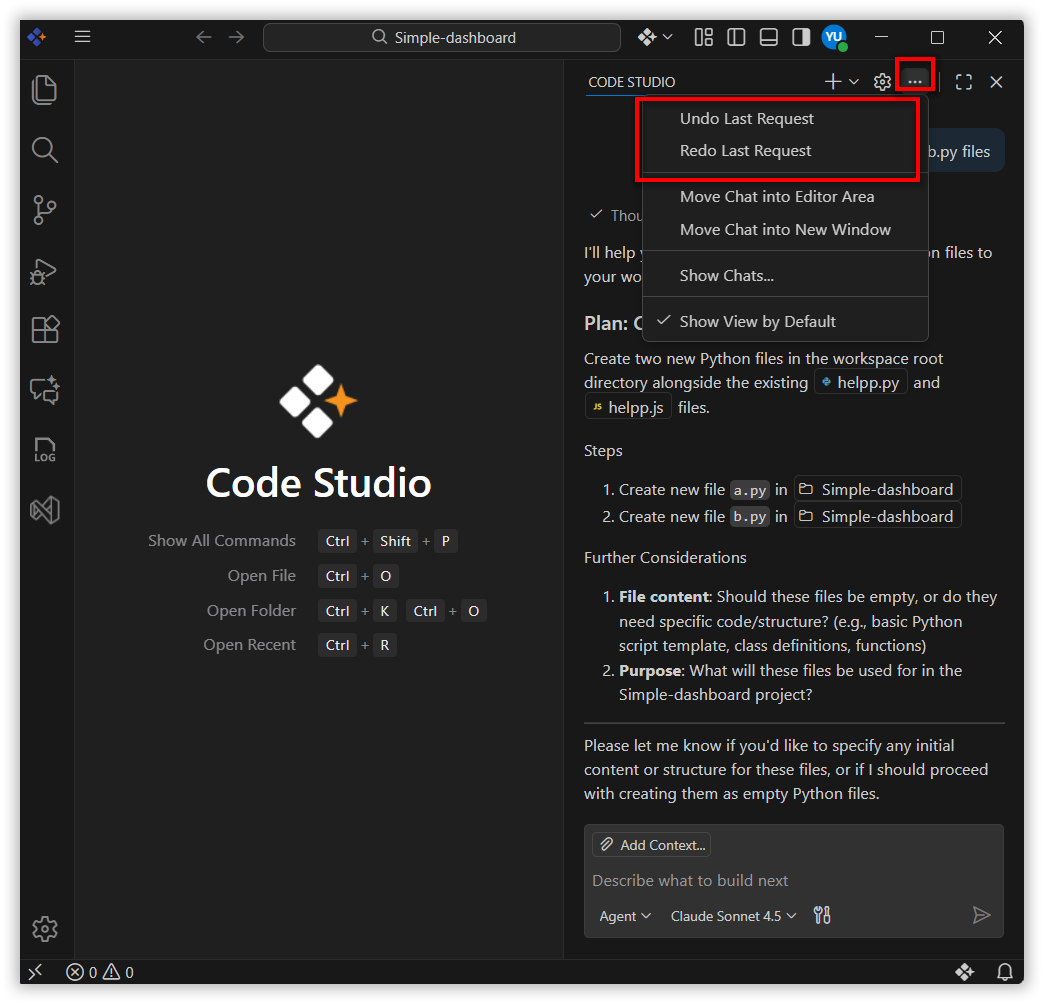
Code Studio lets you quickly reverse or reapply your most recent action. Use Undo Last Request to roll back the workspace to the state before the change was applied. If you change your mind, select Redo Last Request to bring the workspace back to the state with those changes. This helps you stay flexible and in control while experimenting with edits.
Best Practices
1. Review checkpoints before restoring
Always confirm which point in your project timeline you’re reverting to so no important changes are unintentionally lost.
2. Use editing requests to refine earlier instructions
If an AI-generated update wasn’t what you expected, modify the earlier request instead of creating new ones on top of it—this keeps your workspace clean and consistent.
3. Restore and redo changes carefully
When restoring a checkpoint, verify the impact on recently edited files. If needed, use the Redo option to reapply reverted changes safely.
Releted Features
- Agent Mode - File changes can occur as the AI assists with coding tasks in agent mode. Checkpoints become especially useful here because they let you restore the workspace to a safe state if needed, or redo changes that were rolled back. This ensures you stay in control even when the agent is making edits.