Getting Started with the Vue Maps Component in Vue 3
This guide provides a step-by-step walkthrough for setting up a Vite project with JavaScript and integrating the Syncfusion® Vue Maps component using the Composition API / Options API. By the end, you’ll have a working Maps component displaying geographic data with legends, tooltips, and data labels.
Choosing Between Composition API and Options API
Vue 3 supports two patterns for organizing component logic:
-
Composition API (
<script setup>) - A modern, function-based approach that helps organize related logic into reusable functions and improves code maintainability. - Options API - Traditional, object-based approach with separate sections for data, methods, computed properties, and lifecycle hooks. Familiar for developers transitioning from Vue 2.
Prerequisites
Ensure that the development environment meets the required criteria listed in System requirements for Syncfusion® Vue UI components.
Set Up the Vite Project
Create a Vite project using either npm or yarn.
npm
npm create vite@latest my-app -- --template vueyarn
yarn create vite my-app --template vueIf Vite prompts you to install dependencies and start the project immediately, select No. The Syncfusion package is installed in a later step.
Navigate to the project directory:
cd my-appInstall the project dependencies using either npm or yarn.
npm
npm installyarn
yarn installNow that my-project is ready, add Syncfusion® Vue components to the project.
Note: To create a TypeScript project, use
npm create vite@latest my-app -- --template vue-tsoryarn create vite my-app --template vue-ts.
Add Syncfusion® Vue Packages
Syncfusion® Vue component packages are available at npmjs.com. Install the required npm package to use Syncfusion components.
This guide uses the Vue Maps component as an example. From the project root, install the @syncfusion/ej2-vue-maps package using either npm or Yarn:
npm
npm install @syncfusion/ej2-vue-mapsyarn
yarn add @syncfusion/ej2-vue-mapsNote: npm v5+ saves packages to
dependenciesby default; the--saveflag is not required.
Add Syncfusion® Vue Maps Component
Step 1: Import and register the Maps component and its child directives in the src/App.vue file. The import structure differs slightly between the two APIs:
-
Composition API: Use the
<script setup>syntax. -
Options API: Register the component and directives using the
componentsoption.
<script setup>
  import { MapsComponent as EjsMaps, LayersDirective as ELayers, LayerDirective as ELayer, MapAjax } from '@syncfusion/ej2-vue-maps';
</script><script>
import { MapsComponent, LayersDirective, LayerDirective, MapAjax } from '@syncfusion/ej2-vue-maps'
// Component registration
export default {
name: "App",
components: {
'ejs-maps' : MapsComponent,
'e-layers' : LayersDirective,
'e-layer' : LayerDirective
}
}
</script>Step 2: Declare the property values referenced in the template:
<script setup>
    const shapeData = new MapAjax('https://cdn.syncfusion.com/maps/map-data/world-map.json');
</script><script>
data() {
return {
shapeData: new MapAjax('https://cdn.syncfusion.com/maps/map-data/world-map.json'),
};
}
</script>Step 3: Define the Maps component template and bind the shapeData property to the layer:
<template>
   <ejs-maps>
        <e-layers>
            <e-layer :shapeData='shapeData'></e-layer>
        </e-layers>
    </ejs-maps>
</template>
Here is the complete code combining all steps in the src/App.vue file:
<template>
    <ejs-maps>
        <e-layers>
            <e-layer :shapeData='shapeData'></e-layer>
        </e-layers>
    </ejs-maps>
</template>

<script setup>
import { MapsComponent as EjsMaps, LayersDirective as ELayers, LayerDirective as ELayer, MapAjax } from '@syncfusion/ej2-vue-maps';
const shapeData = new MapAjax('https://cdn.syncfusion.com/maps/map-data/world-map.json');
</script><template>
<ejs-maps>
<e-layers>
<e-layer :shapeData='shapeData'></e-layer>
</e-layers>
</ejs-maps>
</template>
<script>
import { MapsComponent, LayersDirective, LayerDirective, MapAjax } from '@syncfusion/ej2-vue-maps';
// Component registration
export default {
name: "App",
// Declaring component and its directives
components: {
'ejs-maps' : MapsComponent,
'e-layers' : LayersDirective,
'e-layer' : LayerDirective
},
// Bound properties declarations
data() {
return {
shapeData: new MapAjax('https://cdn.syncfusion.com/maps/map-data/world-map.json'),
};
}
};
</script>Run the Project
To run the project, use either npm or Yarn:
npm
npm run devyarn
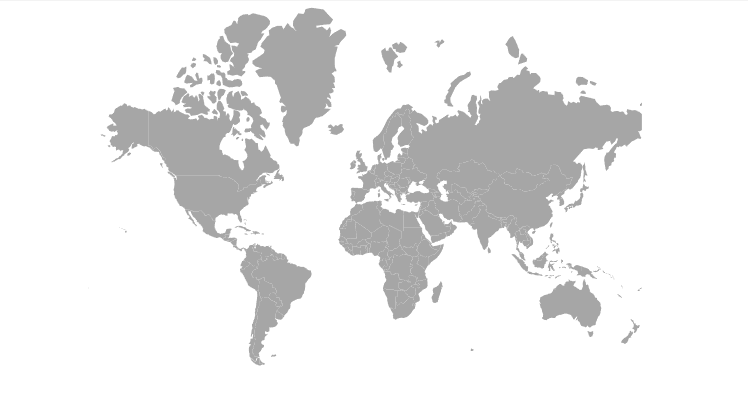
yarn run devVite starts the development server (default URL: http://localhost:5173). Open this URL in your browser to see the basic Maps component rendering the world map:
Sample: You can explore the complete sample project in the vue3-maps-getting-started repository.
Module Injection
The Vue Maps component uses a modular architecture where features are split into individual modules. To use advanced features such as tooltips, data labels, and the legend, inject the corresponding modules using the Vue provide option. The following example adds MapsTooltip, DataLabel, and Legend to the Composition API example:
<script setup>
import { MapsComponent as EjsMaps, LayersDirective as ELayers, LayerDirective as ELayer, MapAjax, Legend, DataLabel, MapsTooltip } from '@syncfusion/ej2-vue-maps';

const shapeData = new MapAjax('https://cdn.syncfusion.com/maps/map-data/world-map.json');
const legendSettings = { visible: true };
const dataLabelSettings = { visible: true, labelPath: 'name' };
const tooltipSettings = { visible: true };

provide('maps', [Legend, DataLabel, MapsTooltip]);
</script><script>
import { MapsComponent, LayersDirective, LayerDirective, MapAjax, Legend, DataLabel, MapsTooltip } from '@syncfusion/ej2-vue-maps';
export default {
name: "App",
components: {
'ejs-maps' : MapsComponent,
'e-layers' : LayersDirective,
'e-layer' : LayerDirective
},
data() {
return {
shapeData: new MapAjax('https://cdn.syncfusion.com/maps/map-data/world-map.json'),
legendSettings: { visible: true },
dataLabelSettings: { visible: true, labelPath: 'name' },
tooltipSettings: { visible: true }
};
},
provide: {
maps: [Legend, DataLabel, MapsTooltip]
}
};
</script>Troubleshooting
The following are common issues you may encounter when getting started with the Maps component in Vue 3:
-
Blank map is displayed — Confirm that
MapAjaxis constructed and passed to theshapeDataproperty on<e-layer>, and that the template is wrapped in a single root element if Vite reports a multi-root warning. -
CORS errors when loading the remote GeoJSON — Self-host the
world-map.jsonfile in yourpublic/folder and replace the URL with a relative path, or configure CORS on the host serving the JSON. -
Module features do not render (tooltips, legend, data labels) — Confirm the corresponding module is added to the
provide.mapsarray (Options API) or passed toprovide('maps', [...])(Composition API).