How can I help you?
Editing in Aurelia TreeGrid
TreeGrid provides support to add, edit and delete the records dynamically using editSettings property.
Add new record
TreeGrid provides support for adding a new record by setting allowAdding property as true. You can add new record by toolbar add item click or context menu.
The below code example shows how to enable add option in TreeGrid.
<template>
    <div style="padding:10px;">
        <ej-tree-grid
            e-widget.bind="TreeGrid"
            id="TreeGrid"
            e-edit-settings.bind="editSettings"
            >
        </ej-tree-grid>
    </div>
</template>export class DefaultSample {
constructor() {
this.editSettings = {
allowEditing: true,
allowAdding: true,
//...
};
}
}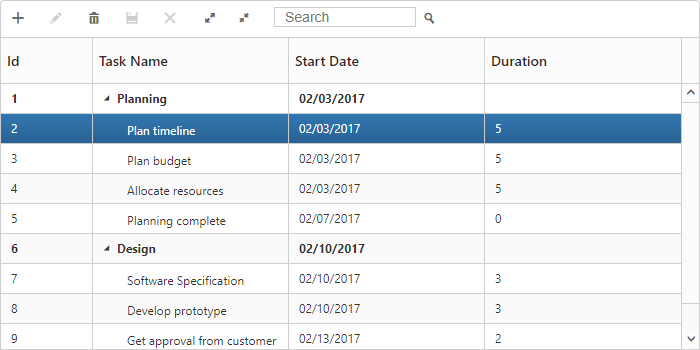
The above screenshot shows before add a new record in TreeGrid.
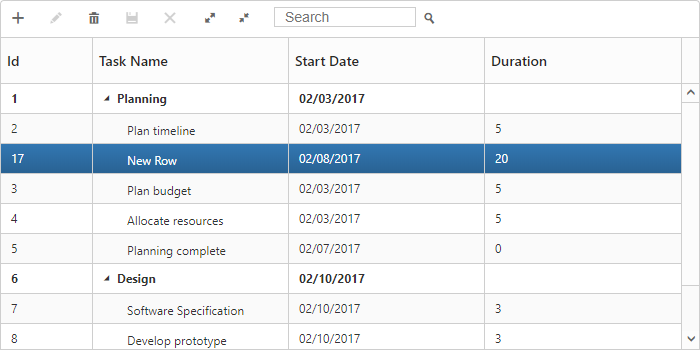
The above screenshot shows after add a new record in TreeGrid.
Add row position
Using the editSettings.rowPosition parameter, user can able to insert the record at any desired index at run-time. The user can insert a record dynamically in the following positions
- Top: Top to all the existing records
- Bottom: Bottom to all the existing records
- AboveSelectedRow: Above to the selected row
- BelowSelectedRow: Below to the selected row
- Child: As a child to the selected row
The below code example shows how to set row position for new record add in TreeGrid.
<template>
    <div style="padding:10px;">
        <ej-tree-grid
            e-widget.bind="TreeGrid"
            id="TreeGrid"
            e-edit-settings.bind="editSettings"
            >
        </ej-tree-grid>
    </div>
</template>export class DefaultSample {
constructor() {
this.editSettings = {
allowEditing: true,
allowAdding: true,
rowPosition: ej.TreeGrid.RowPosition.Child,
//...
};
}
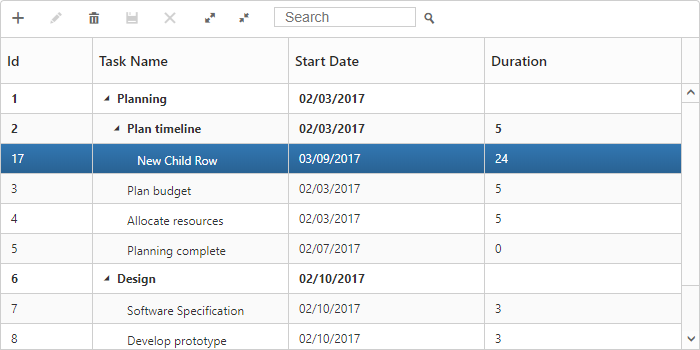
}The below screenshot shows new record added in row position of Child.
Adding records using method
Using addRow method records can be added dynamically to the TreeGrid. Before calling this method, you should enable the allowAdding property.
The below code snippet explains dynamically inserting a record in TreeGrid. The record will be inserted as a child node to the current selected record.
<template>
      <div style="padding:10px;">
        <ej-tree-grid
            e-widget.bind="TreeGrid"
            id="TreeGrid"
            e-edit-settings.bind="editSettings"
            >
        </ej-tree-grid>
      </div>
      <button type="button" click.delegate="addRecord()">Add New Record</button>
</template>export class DefaultSample {
constructor() {
this.editSettings = {
allowEditing: true,
allowAdding: true,
rowPosition: ej.TreeGrid.RowPosition.Child,
//...
};
}
addRecord() {
var data = {
taskID: 20,
taskName: 'New Task 20',
startDate: '2/20/2014',
duration: 7
};
this.TreeGrid.addRow(data, ej.TreeGrid.RowPosition.Top);
}
}Edit Modes
TreeGrid supports the below editModes,
- Cell Editing
- Row Editing
- Dialog Editing
You can enable editing in TreeGrid by enabling the property allowEditing.
Cell Editing
Update the record through editing a cell by setting editMode as the CellEditing.
The following code example shows you how to enable the CellEditing in TreeGrid control.
<template>
    <div style="padding:10px;">
        <ej-tree-grid
            e-widget.bind="TreeGrid"
            id="TreeGrid"
            e-edit-settings.bind="editSettings"
            >
        </ej-tree-grid>
    </div>
</template>export class DefaultSample {
constructor() {
this.editSettings = {
allowEditing: true,
allowAdding: true,
rowPosition: ej.TreeGrid.RowPosition.Child,
editMode: ej.TreeGrid.EditMode.CellEditing,
//...
};
}
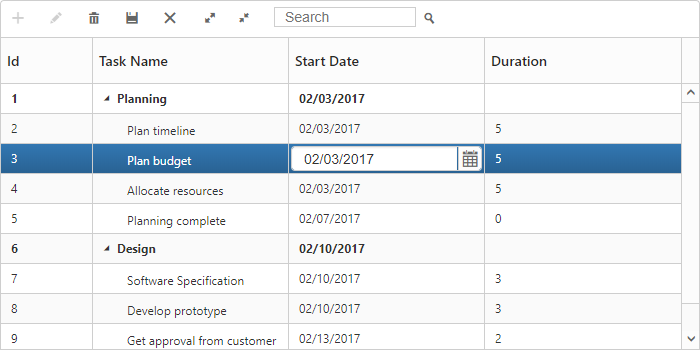
}The output of TreeGrid with CellEditing is as follows.
Prevent cell editing
In cell edit action beginEdit and endEdit events are triggered before and after the editing action. Cell editing for specific cell can be prevented by using beginEdit event.
The following code example show, how to prevent cell editing in TreeGrid.
<template>
    <div style="padding:10px;">
        <ej-tree-grid
            e-widget.bind="TreeGrid"
            id="TreeGrid"
            e-edit-settings.bind="editSettings"
            e-on-begin-edit.delegate="beginEdit($event.detail)"
            e-on-end-edit.delegate="endEdit($event.detail)"
            >
        </ej-tree-grid>
    </div>
</template>export class DefaultSample {
constructor() {
this.editSettings = {
allowEditing: true,
allowAdding: true,
rowPosition: ej.TreeGrid.RowPosition.Child,
editMode: ej.TreeGrid.EditMode.CellEditing,
//...
};
}
beginEdit(args) {
if (args.columnIndex === 1) {
args.cancel = true;
}
}
endEdit(args) {
}
}Row Editing
It is possible to make the entire row to editable state and to update a record by setting editMode as RowEditing.
The following code example shows you how to enable RowEditing in TreeGrid control.
<template>
    <div style="padding:10px;">
        <ej-tree-grid
            e-widget.bind="TreeGrid"
            id="TreeGrid"
            e-edit-settings.bind="editSettings"
            >
        </ej-tree-grid>
    </div>
</template>export class DefaultSample {
constructor() {
this.editSettings = {
allowEditing: true,
allowAdding: true,
rowPosition: ej.TreeGrid.RowPosition.Child,
editMode: ej.TreeGrid.EditMode.RowEditing,
//...
};
}
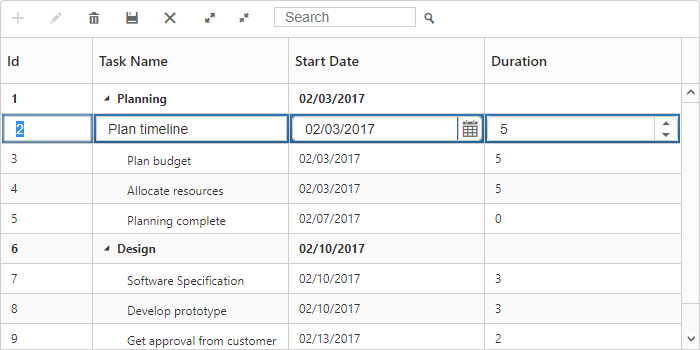
}The following output is displayed as a result of the above code example.
Dialog Editing
Set the editMode as DialogEditing to edit/add a record using dialog.
The following code example shows you how to enable the DialogEditing in TreeGrid control.
<template>
    <div style="padding:10px;">
        <ej-tree-grid
            e-widget.bind="TreeGrid"
            id="TreeGrid"
            e-edit-settings.bind="editSettings"
            >
        </ej-tree-grid>
    </div>
</template>export class DefaultSample {
constructor() {
this.editSettings = {
allowEditing: true,
allowAdding: true,
rowPosition: ej.TreeGrid.RowPosition.Child,
editMode: ej.TreeGrid.EditMode.DialogEditing,
//...
};
}
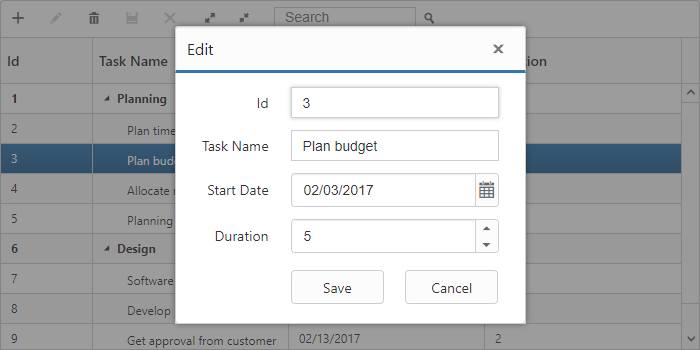
}The output of the TreeGrid with DialogEditing is as follows.
The add and edit dialogs can be opened on custom actions instead of toolbar icons using the methods showAddDialog and showEditDialog.
Prevent dialog editing
In dialog editing action actionBegin and actionComplete client side events are triggered before and after the edit action. Dialog editing for specific row can be prevented by using actionBegin event.
The following code example show, how to prevent dialog editing in TreeGrid.
<template>
    <div style="padding:10px;">
        <ej-tree-grid
            e-widget.bind="TreeGrid"
            id="TreeGrid"
            e-edit-settings.bind="editSettings"
            e-on-action-begin.delegate="actionBegin($event.detail)"
            >
        </ej-tree-grid>
    </div>
</template>export class DefaultSample {
constructor() {
this.editSettings = {
allowEditing: true,
allowAdding: true,
rowPosition: ej.TreeGrid.RowPosition.Child,
editMode: ej.TreeGrid.EditMode.DialogEditing,
//...
};
}
actionBegin(args) {
if (args.requestType === 'beforeOpenEditDialog') {
if (args.data.taskID === 4)
args.cancel = true;
}
}
}NOTE
While saving the edited record
actionCompleteevent will be triggered with updated record value indataargument andrequestTypeasrecordUpdate. Using this event we can update the database.
BeginEditAction - edit cell/row by single/double click
In TreeGrid we can perform edit action by single or double click using beginEditAction , default value of this property is DblClick.
The following code example shows how to enable single click edit in TreeGrid.
<template>
    <div style="padding:10px;">
        <ej-tree-grid
            e-widget.bind="TreeGrid"
            id="TreeGrid"
            e-edit-settings.bind="editSettings"
            >
        </ej-tree-grid>
    </div>
</template>export class DefaultSample {
constructor() {
//...
this.editSettings = {
//...
beginEditAction: ej.TreeGrid.BeginEditAction.Click,
};
}
}Cell Edit Template
Edit template is used to create custom editor for editing the column values. This can be achieved by using columns.editTemplate.
Following functions required to render edit template in TreeGrid,
-
create- It is used to create the control on initialization. -
read- It is used to read the input value on save. -
write- It is used to assign the value to control on editing.
The following code example describes edit template behavior
<template>
    <div style="padding:10px;">
        <ej-tree-grid
            e-widget.bind="TreeGrid"
            id="TreeGrid"
            e-edit-settings.bind="editSettings"
            >
        </ej-tree-grid>
    </div>
</template>export class DefaultSample {
constructor() {
this.editSettings = {
allowEditing: true,
editMode: 'cellEditing',
};
this.columns = [
{ field: 'taskName', headerText: 'Task Name',
editTemplate: {
create: function() {
return '<input>';
},
write: function(args) {
var autocompleteData = ['Planning', 'Plan Timeline', 'Plan Budget', 'Allocate Resources', 'Planning Complete'];
args.element.ejAutocomplete({
width: '100%',
height: 30,
dataSource: autocompleteData,
enableDistinct: true,
value: args.rowData !== undefined ? args.rowData.taskName : ''
});
},
read: function(args) {
args.ejAutocomplete('suggestionList').css('display', 'none');
return args.ejAutocomplete('getValue');
}
}
},
//...
]
}
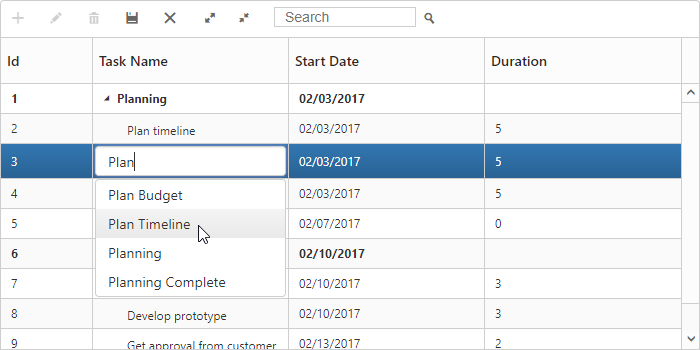
}The output of the TreeGrid width EditTemplate as follows.
The updated record values are maintained in collection in TreeGrid, and the user can retrieve the updated record collection at any time by using the getUpdatedRecords method.
Delete record
TreeGrid provides support to delete a record by enabling allowDeleting property.
The below code example shows how to enable delete option in TreeGrid.
<template>
    <div style="padding:10px;">
        <ej-tree-grid
            e-widget.bind="TreeGrid"
            id="TreeGrid"
            e-edit-settings.bind="editSettings"
            >
        </ej-tree-grid>
    </div>
</template>export class DefaultSample {
constructor() {
//...
this.editSettings = {
allowDeleting: true,
//...
};
}
}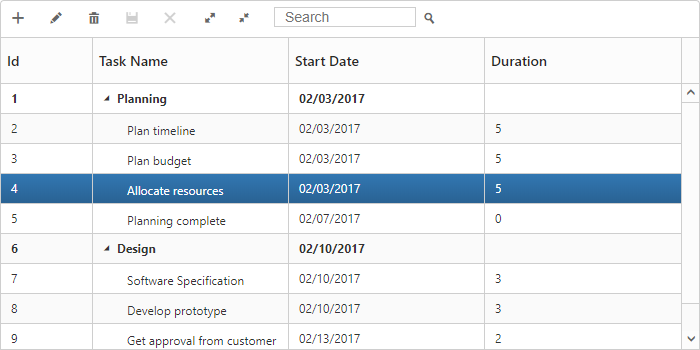
The above screenshot shows before delete a record in TreeGrid.
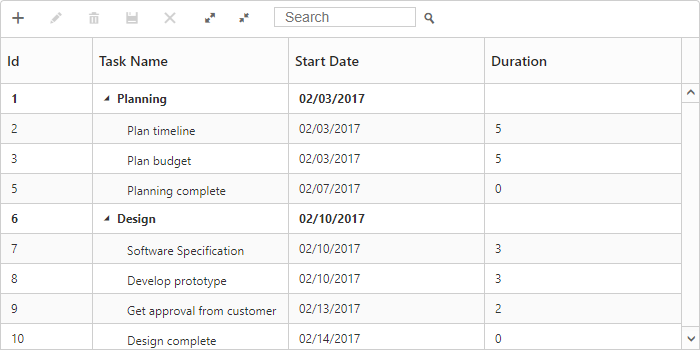
The above screenshot shows after delete a record in TreeGrid.
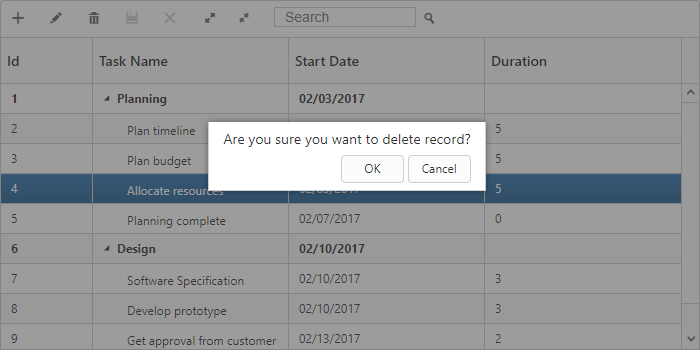
Delete confirmation message
Delete confirmation message is used to get the confirmation from the user before deleting action. This confirmation message can be enabled by setting showDeleteConfirmDialog property as true.
The following code snippet explains how to enable delete confirmation message in TreeGrid.
<template>
    <div style="padding:10px;">
        <ej-tree-grid
            e-widget.bind="TreeGrid"
            id="TreeGrid"
            e-edit-settings.bind="editSettings"
            >
        </ej-tree-grid>
    </div>
</template>export class DefaultSample {
constructor() {
//...
this.editSettings = {
allowDeleting: true,
showDeleteConfirmDialog: true
};
}
}