Behavior settings
5 Jul 201810 minutes to read
The following are some miscellaneous properties that enables you to change the behavior of Toolbar control.
Enabling Toolbar
Enabled property is Boolean type, which allow us to enable or disable the Toolbar control. By default Enabled value is true. You can specify the property Enabled in the script as follows.
// Add this code in your CSHTML page and refer local data section for data source

<ej-toolbar id="toolbar" width="250px" enabled="false" dataSource="ViewBag.datasource">
    <e-toolbar-fields id="id" sprite-css-class="spriteCss">
</ej-toolbar>public class ToolbarLocalBinding
{
public string id { get; set; }
public string spriteCss { get; set; }
}
public IActionResult Index()
{
List<ToolbarLocalBinding> t = new List<ToolbarLocalBinding>();
t.Add(new ToolbarLocalBinding { id = "1", spriteCss = "tools movetofolder" });
t.Add(new ToolbarLocalBinding { id = "2", spriteCss = "tools categorize" });
t.Add(new ToolbarLocalBinding { id = "3", spriteCss = "tools flag" });
t.Add(new ToolbarLocalBinding { id = "4", spriteCss = "tools forward" });
t.Add(new ToolbarLocalBinding { id = "5", spriteCss = "tools newmail" });
ViewBag.datasource = t;
return View();
}<style type="text/css" class="cssStyles">
.e-tooltxt .tools {
background-image: url('../Content/images/maild.png');
}
.e-tooltxt .tools {
display: block;
background-image: url('../Content/images/maill.png');
height: 24px;
width: 24px;
background-repeat: no-repeat;
}
.e-tooltxt:hover .tools, .darktheme .cols-sample-area .e-tooltxt:hover .tools {
background-image: url('../Content/images/mailh.png');
}
.tools.movetofolder {
background-position: -12px -40px;
}
.tools.categorize {
background-position: -14px -248px;
}
.tools.flag {
background-position: -13px -282px;
}
.tools.forward {
background-position: -14px -314px;
}
.tools.newmail {
background-position: -14px -348px;
}
.frame {
height: 280px;
width: 695px;
border-radius: none;
margin-left: 0;
margin-top: 40px;
padding: 0;
}
.control {
margin: 120px 200px 0;
}
</style>The following screenshot illustrates a Toolbar with Disable mode.
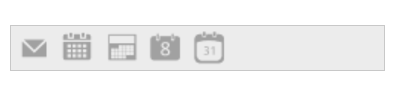
ToolBar control in Enabled (false)
Hiding Toolbar
The Hide property is Boolean type, which allow us to show or hide the Toolbar. Default value of Hide is false. You can specify the property Hide in the script as follows.
// Add this code in your CSHTML page and refer local data section for data source

<ej-toolbar id="toolbar" width="250px" hide="true" dataSource="ViewBag.datasource">
    <e-toolbar-fields id="id" sprite-css-class="spriteCss">
</ej-toolbar>
Disable Or Enable Separate Toolbar Item
We can enable or disable a separate toolbar item by using the following methods.
Disable Item
The Toolbar method disableItem and disableItemByID can be used to disable separate toolbar item. In the below code we have disabled the third toolbar item by using these two methods
<ej-toolbar id="editingToolbar" create="create">
        <e-toolbar-items>
            <e-toolbar-item sprite-css-class="e-icon e-cut_01" tooltip-text="Cut" />
            <e-toolbar-item sprite-css-class="e-icon e-copy_02" tooltip-text="Copy" />
            <e-toolbar-item sprite-css-class="e-icon e-paste_01" tooltip-text="paste" />
            <e-toolbar-item sprite-css-class="e-icon e-bold_01" tooltip-text="Bold" />
            <e-toolbar-item sprite-css-class="e-icon e-underline_01" tooltip-text="Underline" />
            <e-toolbar-item sprite-css-class="e-icon  e-strikethrough_01" tooltip-text="StrikeThrough" />
            <e-toolbar-item sprite-css-class="e-icon e-align-left_01" tooltip-text="Left" />
            <e-toolbar-item sprite-css-class="e-icon e-align-center_01" tooltip-text="Center" />
            <e-toolbar-item sprite-css-class="e-icon e-align-right_01" tooltip-text="Right" />
            <e-toolbar-item sprite-css-class="e-icon  e-align-justify_01" tooltip-text="Justify" />
        </e-toolbar-items>
</ej-toolbar>function create() {
var obj = $("#editingToolbar").data("ejToolbar");
obj.disableItem($(".e-toolbar li")[2]);
}OR
function create() {
            var obj = $("#editingToolbar").data("ejToolbar");
             obj.disableItemByID("paste");
        }
Enable Item
The Toolbar method enableItem and enableItemByID can be used to enable separate toolbar item. In the below code we have disabled the first five items initially and enabled the third toolbar item by using these two methods
@{
           List<int> index = new List<int> { 0,1,2,3,4 };
       }
	 <ej-toolbar id="editingToolbar" create="create"  disabled-item-indices="index">
        <e-toolbar-items>
            <e-toolbar-item sprite-css-class="e-icon e-cut_01" tooltip-text="Cut" />
            <e-toolbar-item sprite-css-class="e-icon e-copy_02" tooltip-text="Copy" />
            <e-toolbar-item sprite-css-class="e-icon e-paste_01" tooltip-text="paste" />
            <e-toolbar-item sprite-css-class="e-icon e-bold_01" tooltip-text="Bold" />
            <e-toolbar-item sprite-css-class="e-icon e-underline_01" tooltip-text="Underline" />
            <e-toolbar-item sprite-css-class="e-icon  e-strikethrough_01" tooltip-text="StrikeThrough" />
            <e-toolbar-item sprite-css-class="e-icon e-align-left_01" tooltip-text="Left" />
            <e-toolbar-item sprite-css-class="e-icon e-align-center_01" tooltip-text="Center" />
            <e-toolbar-item sprite-css-class="e-icon e-align-right_01" tooltip-text="Right" />
            <e-toolbar-item sprite-css-class="e-icon  e-align-justify_01" tooltip-text="Justify" />
        </e-toolbar-items>
</ej-toolbar>function create() {
var obj = $("#editingToolbar").data("ejToolbar");
obj.enableItem($(".e-toolbar li")[2]);
}OR
function create() {
            var obj = $("#editingToolbar").data("ejToolbar");
             obj.enableItemByID("paste");
        }