Getting Started
22 Feb 20185 minutes to read
This section explains you the steps required to populate the Sparkline with data, tooltips and type for Sparkline. This section covers only the minimal features that you need to know to get started with the Sparkline.
Create your sparkline
In this tutorial, you will learn how to create a simple Sparkline.The following screen shot displays the output after completing this tutorial.

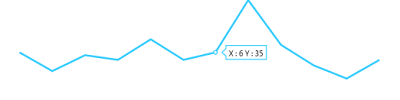
Simple Sparkline
-
First, create a new ASP.NET core project. please refer ASP.NET core 1.0-Getting Started documentation to create new project and add necessary DLL’s and script files.
-
Add the following code in the index.cshtml file to create the Sparkline control in View page.
<div>

 <ej-spark-line id="sparkline"></ej-spark-line>

</div>
Now, the Sparkline is rendered with some auto-generated random values and with default Line type Sparkline.
Initialize the Sparkline by using the ej-spark-line tag helper. The Sparkline is rendered to it’s default size. You can also customize the Sparkline dimension either by setting the width and height of the container element as in the above code example or by using the e-size tag option of the Sparkline.
Populate Sparkline with data
Now, let’s see how to plot data source to the Sparkline. First, let us generate a data source containing following fields in controller– Month and Sales.
public class HomeController : Controller
    {
         public IActionResult Index()

        {
            //// Create dataSource to Sparkline
            List<SparklineData> data = new List<SparklineData>();
            data.Add(new SparklineData(0, 35));
            data.Add(new SparklineData(1, 28));
            data.Add(new SparklineData(2, 34));
            data.Add(new SparklineData(3, 32));
            data.Add(new SparklineData(4, 40));
            data.Add(new SparklineData(5, 32));
            data.Add(new SparklineData(6, 35));
            data.Add(new SparklineData(7, 55));
            data.Add(new SparklineData(8, 38));
            data.Add(new SparklineData(9, 30));
            data.Add(new SparklineData(10, 25));
            data.Add(new SparklineData(11, 32));
            ///...
            ViewBag.SparklineData = data;
            return View();
        }
    }

    public class SparklineData
    {
        public double Month;
        public double Sales;
        public SparklineData(double month, double sales)
        {
            this.Month = month;
            this.Sales = sales;
        }
    }
Sparkline cshtml file code for dataSource binding.
<ej-spark-line id="sparkline" datasource="ViewBag.SparklineData" x-name="Month" y-name="Sales">
        <e-size height="400" width="500"></e-size>
</ej-spark-line>
Sparkline Type
To change the sparkline types, following example code illustrates this.
<ej-spark-line id="sparkline" datasource="ViewBag.SparklineData" x-name="Month" y-name="Sales"
                   type="Column">
</ej-spark-line>
Enable Tooltip
To enable the Sparkline tooltip we can see the current point values.
The following code example illustrates enable tooltip in sparkline,
<ej-spark-line id="sparkline" datasource="ViewBag.SparklineData" x-name="Month" y-name="Sales">
        <e-size height="400" width="500"></e-size>

        <e-tool-tip visible="true"></e-tool-tip>

</ej-spark-line>