Getting Started
17 Dec 20183 minutes to read
This section helps to get started of the Rotator component for AngularJS.
Adding dependencies
The following steps guide you to add a Rotator component.
-
Create an HTML file and add required scripts and CSS files for rendering Essential JavaScript component as given in the Getting Started.
-
In addition to it for AngularJS implementation, refer the “angular.min.js” and “ej.widgets.angular.min.js” files.
<html ng-app="rotatApp">
        <head>
        <title>Simple Rotator</title>
        <!-- Add Scripts and CSS for rendering Essential JS components -->

            <script src="http://cdn.syncfusion.com/js/assets/external/angular.min.js"></script>
            <script src="[http://cdn.syncfusion.com/28.1.33/js/common/ej.widget.angular.min.js"></script>
        </head>
        <body ng-controller="RotatCtrl">
                <!-- Add Rotator component Here -->
            <ul id="sliderContent" ej-rotator />
        </body>
        </html>
Component initialization
-
Initialize the ng-app and ng-controller for the application. For adding Rotator component, you have to use ej-rotator directive to corresponding element.
-
Now initialize the component using angular module in script section
angular.module('rotateApp', ['ejangular']).controller('RotateCtrl', function ($scope) {});Configure data
To configure images for Rotator component, define data and apply to scope variable as given below.
var list = [
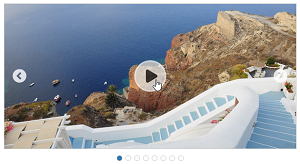
{text:"Sea view", url:"http://js.syncfusion.com/demos/web/content/images/rotator/seaview.jpg"},
{ text: "Snowfall", url: "http://js.syncfusion.com/demos/web/content/images/rotator/snowfall.jpg" },
{ text: "Tablet", url: "http://js.syncfusion.com/demos/web/content/images/rotator/tablet.jpg" },
{ text: "Nature", url: "http://js.syncfusion.com/demos/web/content/images/rotator/nature.jpg" },
{ text: "Card", url: "http://js.syncfusion.com/demos/web/content/images/rotator/card.jpg" },
{ text: "Bird", url: "http://js.syncfusion.com/demos/web/content/images/rotator/bird.jpg" },
{ text: "Wheat", url: "http://js.syncfusion.com/demos/web/content/images/rotator/wheat.jpg" },
{ text: "Night", url: "http://js.syncfusion.com/demos/web/content/images/rotator/night.jpg" }];
angular.module('rotateApp', ['ejangular']).controller('RotateCtrl', function ($scope) {
$scope.animation="slide";
$scope.data=list;
});Configuring properties
Declare the rotator properties with prefix “e- “, refer the following code,
<div class="frame" style="width:600px; height:300px">
    <ul id="sliderContent" ej-rotator e-slideHeight="100%" e-dataSource="data" e-showPlayButton="true" e-isResponsive="true" e-slideWidth="500px"
    e-showCaption="true" e-animationType="animation" e-pagerPosition="TopLeft" e-frameSpace="2px" />
    </div>
NOTE
All the Syncfusion component’s properties for Angular is defined using [
e-prefix] followed by the property name. You can find the complete API list from the API reference