Getting Started
27 Sep 201713 minutes to read
This section helps to get started of the Navigation Drawer component for AngularJS.
Adding dependencies
The following steps guide you to add a Navigation Drawer component.
-
Create an HTML file and add required scripts and CSS files for rendering Essential JavaScript component as given in the Getting Started.
-
In addition to it for AngularJS implementation, refer the “angular.min.js” and “ej.widgets.angular.min.js” files.
<html ng-app="NavApp">
        <head>
        <title>Simple Navigation Drawer</title>
        <!-- Add Scripts and CSS for rendering Essential JS components -->

            <script src="http://cdn.syncfusion.com/js/assets/external/angular.min.js"></script>
            <script src="[http://cdn.syncfusion.com/24.2.3/js/common/ej.widget.angular.min.js"></script>
        </head>
        <body ng-controller="NavCtrl">
                <!-- Add Navigation Drawer component Here -->
            <div id="navpane" ej-navigationdrawer />
        </body>
        </html>
Component initialization
-
Initialize the ng-app and ng-controller for the application. For adding Navigation Drawer component, you have to use ej-navigationdrawer directive to corresponding element.
-
Now initialize the component using angular module in script section
angular.module('NavApp', ['ejangular']).controller('NavCtrl', function ($scope) {});Configuring properties
Declare the navigation drawer properties with prefix “e- “, refer the following code,
<div id="navpane" class="ang-navigationdrawer" ej-navigationdrawer
        e-type="overlay" e-enablelistview=true e-listviewsettings-width="220" e-listviewsettings-height="100%"
        e-listviewsettings-selecteditemindex=0 e-position="normal">
        <ul>
            <li data-ej-text="Home"></li>
            <li data-ej-text="People"></li>
            <li data-ej-text="Profile"></li>
        </ul>
    </div>
Create the target element as follows to display the list items by clicking target icon.
<div id="targetPane">
        <div class="e-lv">
            <div class="e-header">
                <div id="butdrawer" class="drawericon e-icon">
                </div>
            </div>
        </div>
    </div>
To set the target icon image and position it use the below mentioned styles .
<style>
      .drawericon {
            background-position: center center;
            background-repeat: no-repeat;
            height: 45px;
            width: 32px;
            background-size: 100% 100%;
            padding-right: 10px;
        }

        .drawericon:before {
            content: "\e76b";
            font-size: 24px;
            height: 26px;
            line-height: 24px;
        }

        #targetPane {
            height: 220px;
            position: relative;
            padding: 0px;
            overflow: hidden;
            margin: 0px;
        }
    </style>
You can open the list items by clicking on target element using the targetId property.
<div id="navpane" class="ang-navigationdrawer" ej-navigationdrawer e-targetid="butdrawer" e-enablelistview=true e-listviewsettings-width="220" e-listviewsettings-height="100%"
            e-listviewsettings-selecteditemindex=0 e-position="normal">
        <ul>
            <li data-ej-text="Home"></li>
            <li data-ej-text="People"></li>
            <li data-ej-text="Profile"></li>
        </ul>
    </div>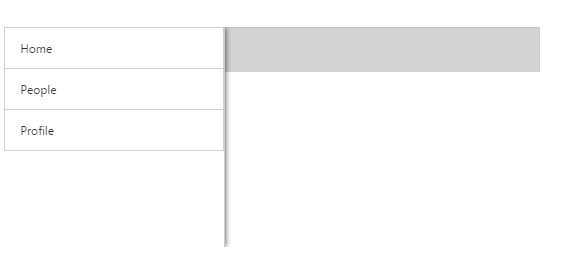
You can set the images for list items of the Navigation Drawer by using the ImageClass property as follows.
<div id="navpane" class="ang-navigationdrawer" ej-navigationdrawer e-targetid="butdrawer"
            e-type="overlay" e-direction="left" e-enablelistview=true e-listviewsettings-width="220" e-listviewsettings-height="100%"
            e-listviewsettings-selecteditemindex=0 e-position="normal">
        <ul>
            <li data-ej-imageclass="e-icon e-home" data-ej-text="Home"></li>
            <li data-ej-imageclass="e-icon e-photo" data-ej-text="Photos"></li>
            <li data-ej-imageclass="e-icon e-profile" data-ej-text="Profile"></li>
        </ul>
    </div>
You can set the images with the correct position by using the mentioned styles.
<style>

    @font-face {
        font-family: 'ej-font';
        src: url('../../common-images/tools/icons.eot');
        src: url('../../common-images/tools/icons.eot') format('embedded-opentype'), url('../../common-images/tools/icons.woff') format('woff'),url('../../common-images/tools/icons.woff') format('woff'), url('../../common-images/tools/icons.ttf') format('truetype'), url('../../common-images/tools/icons.svg') format('svg');
        font-weight: normal;
        font-style: normal;
    }

    .e-home:before {
        font-family: "ej-font";
        content: "\e900";
    }

    .e-profile:before {
        font-family: "ej-font";
        content: "\e901";
    }

    .e-photo:before {
        font-family: "ej-font";
        content: "\e903";
    }

    .e-location:before {
        font-family: "ej-font";
        content: "\e905";
    }

    .e-people:before {
        font-family: "ej-font";
        content: "\e902";
    }

    .e-communities:before {
        font-family: "ej-font";
        content: "\e904";
    }

    .e-home, .e-profile, .e-people, .e-photo, .e-communities, .e-location {
        font-size: 24px;
        color: black;
    }

    </style>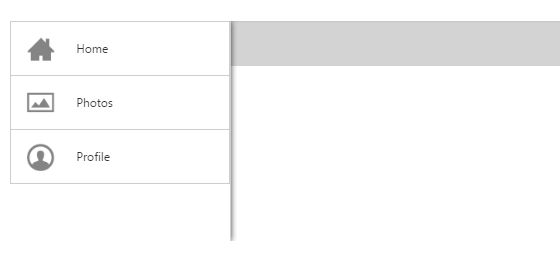
You can add desired page content while selecting the options in navigation drawer as follows.
<!-- Home Page Content-->

    <div id="Home">

        The Home screen allows you to choose the specific content type displayed.

    </div>

    <!-- Profile Page Content-->

    <div id="Profile" style="display: none">

        The Profile page content is displayed.

    </div>

    <!-- Photos Page Content-->

    <div id="Photos" style="display: none">

        The Photos page content is displayed.

    </div>
You can load the appropriate content for the navigation by using the mouseUp event handler of ListView component.
<div id="navpane" class="ang-navigationdrawer" ej-navigationdrawer e-targetid="butdrawer"
        e-type="overlay" e-direction="left" e-enablelistview=true e-listviewsettings-width="220" e-listviewsettings-height="100%"
        e-listviewsettings-selecteditemindex=0 e-listviewsettings-mouseup="headChange" e-position="normal">
        <ul>
            <li data-ej-imageclass="e-icon e-home" data-ej-text="Home"></li>
            <li data-ej-imageclass="e-icon e-photo" data-ej-text="Photos"></li>
            <li data-ej-imageclass="e-icon e-profile" data-ej-text="Profile"></li>
        </ul>
    </div>
In the mouseUp handler,it’s display the respective selected item’s content.
$scope.headChange = function (e) {
        $('#Home, #Profile, #Photos').hide(); //Hiding all other contents
        $('#' + e.text).show(); //Displaying the content based on the text of item selected
    }
Run the above code to render the following output.

Customize Direction
By using this property, you can change the list view open direction. The possible directions are Right, Left and the Left is default value.
<div id="navpane" class="ang-navigationdrawer" ej-navigationdrawer e-targetid="butdrawer"
        e-type="overlay" e-direction="right" e-enablelistview=true e-listviewsettings-width="220" e-listviewsettings-height="100%"
        e-listviewsettings-selecteditemindex=0 e-listviewsettings-mouseup="headChange" e-position="normal">
        <ul>
            <li data-ej-imageclass="e-icon e-home" data-ej-text="Home"></li>
            <li data-ej-imageclass="e-icon e-photo" data-ej-text="Photos"></li>
            <li data-ej-imageclass="e-icon e-profile" data-ej-text="Profile"></li>
        </ul>
    </div>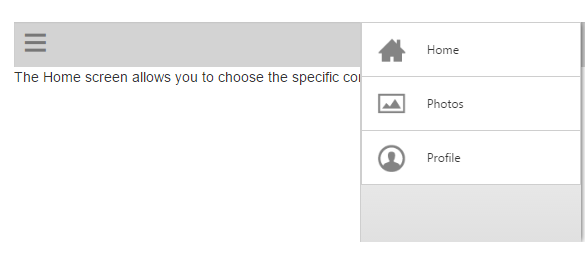
NOTE
All the Syncfusion component’s properties for AngularJS defined using e- prefix followed by the property name.You can find the complete API list from the API reference