How can I help you?
Getting Started with AngularJS ListView
The ListView control allows you to select an item from a list-like interface and provides the infrastructure to display a set of data items in different layouts or views. Lists display data, data navigation, result lists, and data entry.
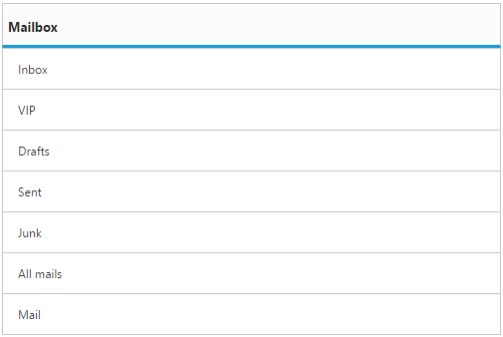
This section explains briefly about how to create a web ListView widget in your application with Angular JavaScript by step-by-step instructions. The following screenshot illustrates the output of a ListView widget.
Create a ListView widget in AngularJS
Essential JS includes angular directives for all controls with the ej.widget.angular.min.js script file. All the Essential JS directives have been encapsulated into a single module called ejangular. To render our ej controls in angular, you need to refer the “angular.min.js” and “ej.widget.angular.min.js” in your application.
Create a new HTML file and include the below code:
<!DOCTYPE html>
<html lang="en" ng-app="listviewApp">
<head>
    <title>Essential Studio for JavaScript : AngularJS Support for Listview </title>
    <!-- Style sheet for default theme (flat azure) -->
    <link href="http://cdn.syncfusion.com/ 32.2.3/js/web/flat-azure/ej.web.all.min.css" rel="stylesheet" />
    <!--Scripts-->
    <script src="http://cdn.syncfusion.com/js/assets/external/jquery-3.0.0.min.js" type="text/javascript"> </script>
    <script src="[http://borismoore.github.io/jsrender/jsrender.min.js](http://borismoore.github.io/jsrender/jsrender.min.js)"></script>
    <script src="http://cdn.syncfusion.com/js/assets/external/angular.min.js"></script>
    <script type="text/javascript" src="http://cdn.syncfusion.com/ 32.2.3/js/web/ej.web.all.min.js "></script>
    <script src="http://cdn.syncfusion.com/ 32.2.3/js/common/ej.widget.angular.min.js"></script>
    <!--Add custom scripts here -->
</head>
<body ng-controller="ListviewCtrl">
    <!--Add necessary HTML elements-->
</body>
</body>
</html>
The ng-app directive explains the root element (<html> or <body> tags) of the application. You will assign a name to the ng-app directive, then you must create a module with that name. In this module, you will have to define your directives, services, filters and configurations.
A controller is defined using ng-controller directive. Each controller accepts an object $scope which we pass as a parameter. This object is used to bind the controller with view.
Properties can be bind to ejListView control using the prefix e- and particular property name as shown as below
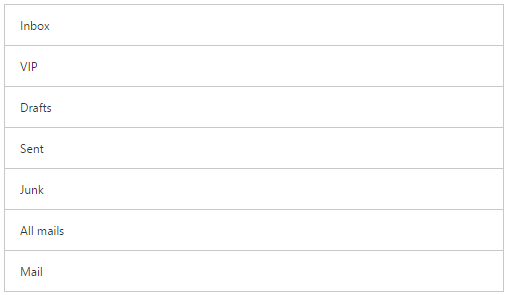
Add a <div> element. It is a container for ListView control.
<div id="listview">
    <ul>
        <li data-ej-text="Inbox"></li>
        <li data-ej-text="VIP"></li>
        <li data-ej-text="Drafts"></li>
        <li data-ej-text="Sent"></li>
        <li data-ej-text="Junk"></li>
        <li data-ej-text="All mails"></li>
        <li data-ej-text="Mail"></li>
    </ul>
</div>
To render the ejListview using angular directive, we need to inject the ejangular directive with modules.
<script>
        angular.module('listviewApp', ['ejangular'])
         .controller('ListviewCtrl', function ($scope) {
         });
    </script>
Data binding
The Listview supports the data binding feature. When a widget’s model attribute is bound to a scope variable, it can reflect the changes both ways.
The below table depicts the properties of Listview widget that supports model binding:
| control | Supported properties |
| ejListview | selectedItemIndex checkedIndices dataSource |
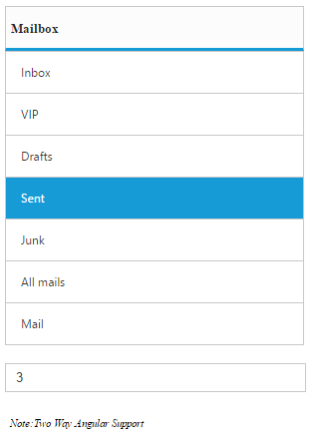
Please use the below code the bind the Listview in two-way support.
<div class="content-container-fluid">
    <div class="row">
        <div class="cols-sample-area">
            <div class="frame">
                <div class="angularbind">
                    <div id="control">
                        <div>
                            <div ej-listview id="listview" e-selecteditemindex="selected" e-width="300px" e-persistselection="true" e-showheader="true" e-headertitle="Mailbox">
                            <ul>
                            <li data-ej-text="Inbox"></li>
                            <li data-ej-text="VIP"></li>
                            <li data-ej-text="Drafts"></li>
                            <li data-ej-text="Sent"></li>
                            <li data-ej-text="Junk"></li>
                            <li data-ej-text="All mails"></li>
                            <li data-ej-text="Mail"></li>
                            </ul>
                            </div>
                        </div>
                    </div>
                    </br>
                    <div id="binding">
                        <input type="text" id="listValue" class="input ejinputtext" ng-model="selected" />
                    </div>
                    <h6><span style="font-style: italic; font-weight: normal; margin: 5px; text-align: center">Note:Two Way Angular Support</span></h6>
                </div>
            </div>
        </div>
    </div>
</div>angular.module("ListViewApp", ['ejangular'])
.controller('ListViewCtrl', function ($scope) {
$scope.selected = 3;
});Here the ngModel directive binds an input, select, textarea (or custom form control) to a property on the scope using NgModelController, which is created and exposed by this directive.
Run the above code to render the following output.
Add Header
We can add a header for ListView. Refer to the following script.
<div ej-listview id="listview" e-showheader="false" e-headertitle="Mailbox">
    <ul>
        <li data-ej-text="Inbox"></li>
        <li data-ej-text="VIP"></li>
        <li data-ej-text="Drafts"></li>
        <li data-ej-text="Sent"></li>
        <li data-ej-text="Junk"></li>
        <li data-ej-text="All mails"></li>
        <li data-ej-text="Mail"></li>
    </ul>
</div>
Run the above code to render the following output.