How can I help you?
Introduction
DateRangePicker is integrated in AngularJS using Syncfusion widgets , which allows to use daterangepicker features such as One-way binding , Two-way binding , Form validation. Please refer the getting started page for general information regarding integrating Syncfusion widget’s.
Behavior Settings
Behavior Settings in DateRangePicker refers to the default behavior of the daterangepicker component. It help us to perform more built in operations of the daterangepicker component like selecting range value of the daterangepicker, presetting the ranges as required, enabling timepicker along with date range picker
Select Date Range
Value
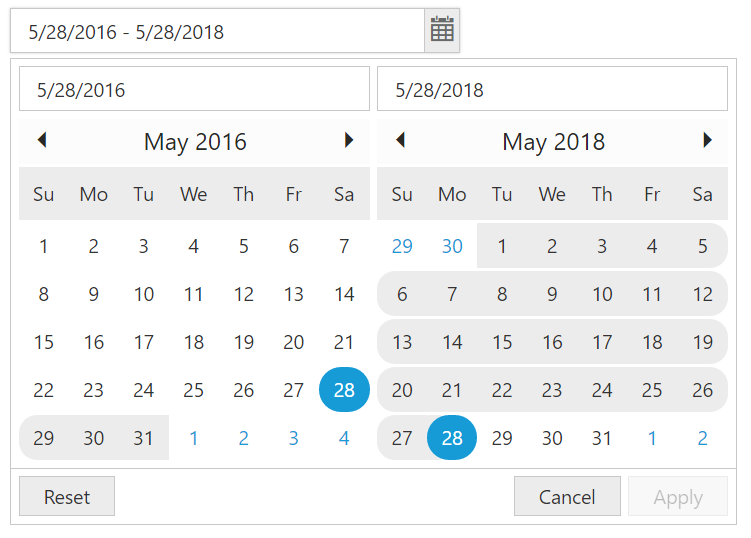
DateRangePicker value can be selected by picking two date values from available two calendars or you can bind it by using e-value property.
The value property can be bound to the DateRangePicker as used in the snippet below.
(Note: Value property of DateRangePicker is Two-Way Bindable.)
<div ng-controller="dateRangeCtrl" >
     <input type="text" id="daterange" ej-daterangepicker e-value="value" e-width="300px" />
</div><script>
angular.module('syncApp', ['ejangular'])
.controller('dateRangeCtrl', function ($scope) {
$scope.value = "5/28/2016 - 5/28/2018";
});
</script>Run the above code to get the below output.
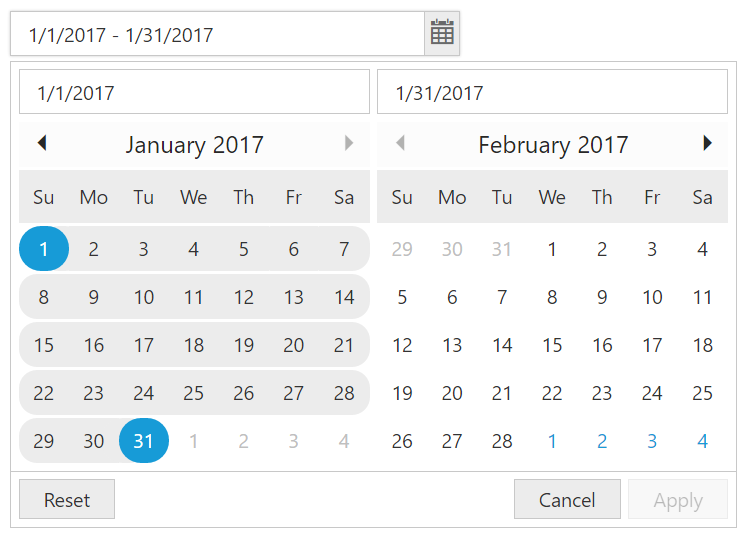
StartDate and EndDate
Start Date and End Date properties allows to set the starting and ending date of DateRangePicker. Start Date and End Date of the date range can be pick from DatePicker calendars or we can use the e-startdate and e-enddate properties to bind their values.
Start Date and End Date of range, can be bound by using e-startdate and e-enddate as used in the snippet below:
<div ng-controller="dateRangeCtrl" >
   <input type="text" id="daterange" ej-daterangepicker e-startdate="startDate" e-enddate="endDate" e-width="300px" />
</div><script>
angular.module('syncApp', ['ejangular'])
.controller('dateRangeCtrl', function ($scope) {
$scope.startDate = new Date("1/1/2017");
$scope.endDate = new Date("1/31/2017");
});
</script>Run the above code to get the below output.
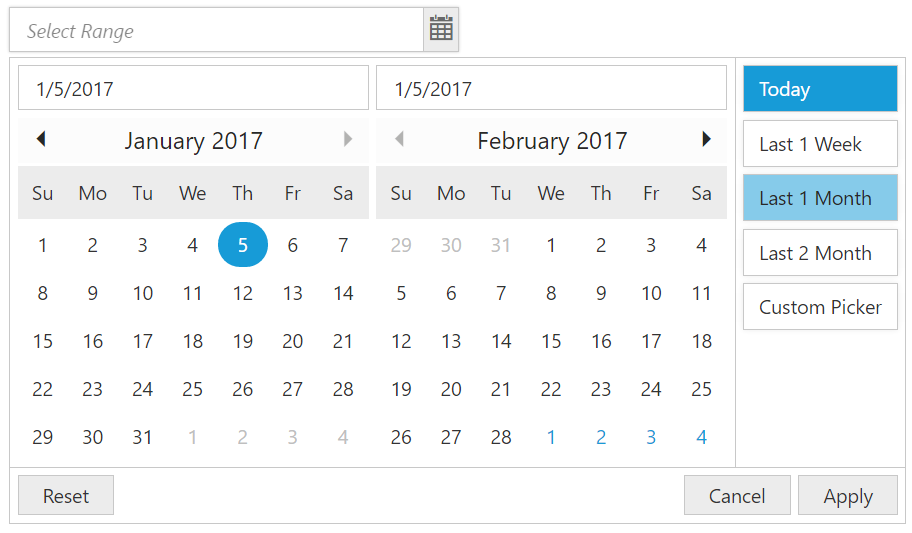
Preset Ranges
We can make use of preset range for easy selection of a date range in the popup that is predefined in the code. The ranges are bounded with the e-ranges property, this will be processed and corresponding label will be added to popup in right side with given label name as given in the below snippet.
<div ng-controller="dateRangeCtrl" >
        <input type="text" id="daterange" ej-daterangepicker e-ranges="ranges" e-width="300px" />
</div><script >
angular.module('syncApp', ['ejangular'])
.controller('dateRangeCtrl', function ($scope) {
$scope.ranges = [
{ label: "Today", range: [new Date(), new Date()] },
{ label: "Last 1 Week", range: [new Date(new Date().setDate(new Date().getDate() - 7)), new Date()] },
{ label: "Last 1 Month", range: [new Date(new Date().setMonth(new Date().getMonth() - 1)), new Date()] },
{ label: "Last 2 Month", range: [new Date(new Date().setMonth(new Date().getMonth() - 2)), new Date()] },
];
});
</script>Run the above code to get the below output.
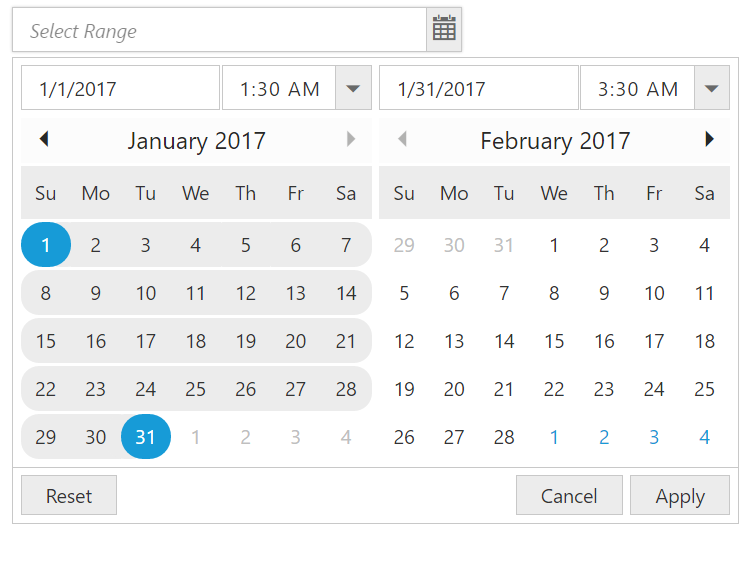
Enable TimePicker
DateRangePicker comes inbuilt with Timepicker control that lets you select the time range along with date range. Both start date and end date, have separate Time Pickers. Enabling the time picker can be bounded with the enableTimePicker property as shown in the below snippet.
<div ng-controller="dateRangeCtrl" >
        <input type="text" id="daterange" ej-daterangepicker e-enableTimePicker="enable" e-width="300px" />
</div><script>
angular.module('syncApp', ['ejangular'])
.controller('dateRangeCtrl', function ($scope) {
$scope.enable = "true";
});
</script>Run the above code to get the below output.