How can I help you?
Easy Customization in AngularJS Button
Button being used in all applications, button size, content and content location is varies based on each application. Here you can see some customizable options available for button control.
Button Size
You can bound the buttons of different size using e-size property. Here, we have some predefined sizing options for defining the size of the button, each having different height and width as shown in the below code.
<div ng-controller="ButtonCtrl">
    <div>
            <button id="button1" ej-button e-size="sizelarge">Login</button>
            <button id="button2" ej-button e-size="sizemedium">Login</button>
            <button id="button3" ej-button e-size="sizesmall">Login</button>
    </div>
</div><script>
angular.module('buttonApp', ['ejangular'])
.controller('ButtonCtrl', function ($scope) {
$scope.sizesmall = "small";
$scope.sizemedium = "medium";
$scope.sizelarge = "large";
});
</script>Run the above code to get the below output.

Content Type
The content type of the Button is mainly text and images. To render a button with text and images, some predefined content options are being used with the e-contentType property to render a button with text and image.
Icon
Button control supports built-in icon libraries. The icons are added inside a button using the e-prefixIcon and e-suffixIcon properties. Simply you can use these Built-in icons by mentioning the icon class name as value in e-prefixIcon and e-suffixIcon property as shown below.
<div ng-controller="ButtonCtrl">
    <div>
            <button id="button1" ej-button e-size="large" e-contentType="textandimage" e-prefixIcon="prefix" e-imagePosition="imageleft">Image Left</button>
            <button id="button2" ej-button e-size="large" e-contentType="textandimage" e-prefixIcon="prefix" e-imagePosition="imageright">Image Right</button>
            <button id="button3" ej-button e-size="normal" e-contentType="textandimage" e-prefixIcon="prefix" e-imagePosition="imagetop">Image Top</button>
            <button id="button4" ej-button e-size="normal" e-contentType="textandimage" e-prefixIcon="prefix" e-imagePosition="imagebottom">Image Bottom</button>
    </div>
</div><script>
angular.module('buttonApp', ['ejangular'])
.controller('ButtonCtrl', function ($scope) {
$scope.prefix = "e-icon e-handup";
$scope.sufix = "e-icon e-palette";
});
</script>Run the above code to get the below output.

Image position
The e-imagePosition property of the button allows you to position the image within the button. The e-imagePosition property is applicable only with the textandimage of e-contentType property. The image position of the button is defined using the e-imagePosition property is shown in the below code.
<div ng-controller="ButtonCtrl">
    <div>
            <button id="button1" ej-button e-size="large" e-contentType="textandimage" e-prefixIcon="prefix" e-imagePosition="imageleft">Image Left</button>
            <button id="button2" ej-button e-size="large" e-contentType="textandimage" e-prefixIcon="prefix" e-imagePosition="imageright">Image Right</button>
            <button id="button3" ej-button e-size="normal" e-contentType="textandimage" e-prefixIcon="prefix" e-imagePosition="imagetop">Image Top</button>
            <button id="button4" ej-button e-size="normal" e-contentType="textandimage" e-prefixIcon="prefix" e-imagePosition="imagebottom">Image Bottom</button>
    </div>
</div><script>
angular.module('buttonApp', ['ejangular'])
.controller('ButtonCtrl', function ($scope) {
$scope.prefix = "e-icon e-handup";
$scope.sufix = "e-icon e-palette";
});
</script>Run the above code to get the below output.

Button Type
Button is used as normal click able button, submitting form data, resetting the form data to its initial value. Based on the usage of a button, you can render the button in three types. The button type defined using the e-type property has been shown in the below code example.
<body ng-controller="ButtonCtrl">
    <div>
            <button id="button1" ej-button e-size="large" e-type="sumbit">Submit</button>
            <button id="button2" ej-button e-size="large" e-type="reset">Reset</button>
            <button id="button3" ej-button e-size="large" e-type="button">Button</button>
    </div>
</div><script>
angular.module('buttonApp', ['ejangular'])
.controller('ButtonCtrl', function ($scope) {
});
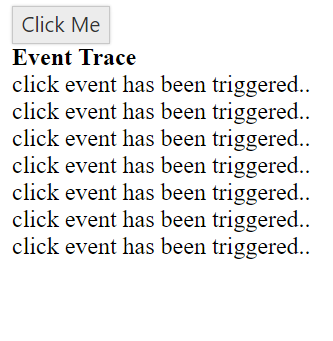
</script>Repeat Button
When you press a button continuously, click event is raised at each specific time interval. This type of button is called Repeat Button.
Time Interval
The e-timeInterval property is used to specify the time Interval for triggering click event, when the button is in pressed state. The time interval for the repeat button triggering event is bounded using the e-timeInterval property.
<div ng-controller="ButtonCtrl">
    <div>
            <button id="button1" ej-button  e-text="Click Me" e-click="onClick" e-repeatButton="repeat" e-timeInterval="interval"></button>
    </div>
    <div>
            <div><b>Event Trace</b></div>
            <div class="eventTrace"></div>
    </div>
<div><script>
angular.module('buttonApp', ['ejangular'])
.controller('ButtonCtrl', function ($scope) {
$scope.repeat = true;
$scope.interval = "1000";
$scope.onClick = function (e) {
$(".eventTrace").html("click event has been triggered..</br>" + $(".eventTrace").html());
};
});
</script>Run the above code to get the below output.