Getting Started
20 Jul 201715 minutes to read
This section explains briefly about how to create a Scroller control in your application with Angular.
Create Scroller in Angular Application using Webpack
To quick start with Syncfusion JavaScript Angular components run the below commands to clone the repository for Webpack starter and installing required dependency packages.
> git clone https://github.com/syncfusion/angular2-seeds

 > cd angular2-seeds

 > npm install
The below steps describes to add Scroller component with above cloned seed application.
Syncfusion JavaScript components source configuration and sample creation
- Copy required Syncfusion Angular source component(s) from the below build location and add it in
src/app/ejfolder.
(Installed Location)\Syncfusion\Essential Studio\14.3.0.49\JavaScript\assets-src\angular2\NOTE
core.tsfile is mandatory for all Syncfusion JavaScript Angular components. The repository having the source file from Essential Studio for JavaScript v14.3.0.49.
-
Create
scrollerfolder insidesrc/appfolder. -
Create
scroller.component.htmlview file insidesrc/app/scrollerfolder and render ejScroller Angular component using the below code example.
<ej-scroller height="300" width="460px" style="display:block;border:1px solid #bbbcbb">
<div>
<div class="sampleContent" style="width:700px;padding:10px">
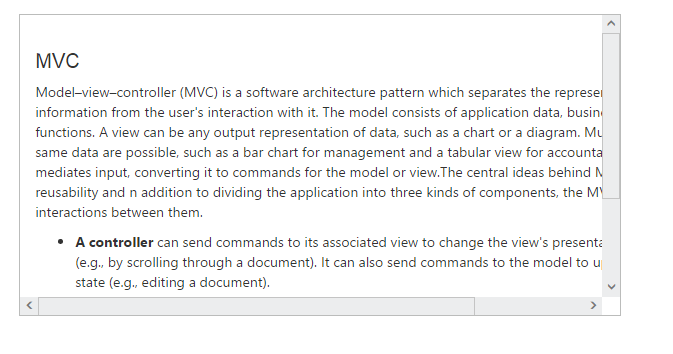
Model–view–controller (MVC) is a software architecture pattern which separates the representation of information from the
user's interaction with it. The model consists of application data, business rules, logic, and functions. A view
can be any output representation of data, such as a chart or a diagram. Multiple views of the same data are possible,
such as a bar chart for management and a tabular view for accountants. The controller mediates input, converting
it to commands for the model or view.The central ideas behind MVC are code reusability and n addition to dividing
the application into three kinds of components, the MVC design defines the interactions between them.
<ul>
<li>
<b>A controller </b>can send commands to its associated view to change the view's presentation of the
model (e.g., by scrolling through a document). It can also send commands to the model to update the model's
state (e.g., editing a document).
</li>
<li>
<b>A model</b> notifies its associated views and controllers when there has been a change in its state.
This notification allows the views to produce updated output, and the controllers to change the available
set of commands. A passive implementation of MVC omits these notifications, because the application does
not require them or the software platform does not support them.
</li>
<li>
<b>A view</b> requests from the model the information that it needs to generate an output representation
to the user.
</li>
</ul>
</div>
</div>
</ej-scroller>- Create
scroller.component.tsmodel file inside the foldersrc/app/scrollerand create scroller sample component using the below code example.
import { Component } from '@angular/core';

@Component({
  selector: 'ej-app',
  templateUrl: './scroller.component.html'
})
export class DefaultComponent {
  constructor() { }
}
Configure the routes for the Router
Before adding router configuration for above created ejScroller component, we recommend you to go through the Angular Routing configuration to get the deeper knowledge about Angular routing.
- Now, we are going to configure the route navigation link for created Scroller sample in
src/app/app.component.htmlfile.
<div>
	<ul class="nav navbar-nav">
		. . . .
		<li><a data-toggle="collapse" data-target="#skeleton-navigation-navbar-collapse.in" href="#scroller" [routerLink]="['/scroller']">Scroller</a></li>
	</ul>
</div>
<main>
	<router-outlet></router-outlet>
</main>- Import the ejScroller sample component and define the route in
src/app/app.routes.tsfile.
import { Routes } from '@angular/router';
. . . .
import { ScrollerComponent } from './scroller/scroller.component';

export const rootRouterConfig: Routes = [
    { path: '', redirectTo: 'home', pathMatch: 'full' },
    . . . .
    { path: 'scroller', component: ScrollerComponent }
];- Import and declare the Syncfusion source component and ejScroller sample component into
app.module.tslike the below code snippet.
import { NgModule, enableProdMode, ErrorHandler } from '@angular/core';
. . . . .
import { EJ_SCROLLER_COMPONENTS } from './ej/scroller.component';
import { ScrollerComponent } from './scroller/scroller.component';

import { rootRouterConfig } from './app.routes';
. . . .
@NgModule({
  imports: [BrowserModule, FormsModule, HttpModule, RouterModule.forRoot(rootRouterConfig, { useHash: true })],
  declarations: [. . . . , EJ_SCROLLER_COMPONENTS,ScrollerComponent],
  bootstrap: [AppComponent]
})
export class AppModule { }
Running the application
- To run the application, execute below command.
npm start- Browse to http://localhost:3000 to see the application. And navigate to Scroller tab. The component is rendered as like the below screenshot. You can make changes in the code found under src folder and the browser should auto-refresh itself while you save files.
NOTE
if you want to use other port, open
package.jsonfile, then change port in--port 3000script and also change the port inconfig/webpack.dev.js.
Create Scroller in Angular Application using SystemJS
To quick start with Syncfusion JavaScript Angular components run the below commands to clone the repository for SystemJS starter and installing required dependency packages.
> git clone https://github.com/syncfusion/angular2-seeds/ -b systemjs

 > cd angular2-seeds

 > npm install
The below steps describes to add Scroller component with above cloned seed application.
Syncfusion JavaScript components source configuration and sample creation
- Copy required Syncfusion Angular source component(s) from the below build location and add it in
src/ejfolder.
(Installed Location)\Syncfusion\Essential Studio\14.3.0.49\JavaScript\assets-src\angular2\NOTE
core.tsfile is mandatory for all Syncfusion JavaScript Angular components. The repository having the source file from Essential Studio for JavaScript v14.3.0.49.
-
Create
scrollerfolder insidesrcfolder. -
Create
scroller.component.htmlview file insidesrc/scrollerfolder and render ejScroller Angular component using the below code example.
<ej-scroller height="300" width="460px" style="display:block;border:1px solid #bbbcbb">
    <div>
        <div class="sampleContent" style="width:700px;padding:10px">
            Model–view–controller (MVC) is a software architecture pattern which separates the representation of information from the
            user's interaction with it. The model consists of application data, business rules, logic, and functions. A view
            can be any output representation of data, such as a chart or a diagram. Multiple views of the same data are possible,
            such as a bar chart for management and a tabular view for accountants. The controller mediates input, converting
            it to commands for the model or view.The central ideas behind MVC are code reusability and n addition to dividing
            the application into three kinds of components, the MVC design defines the interactions between them.
            <ul>
                <li>
                    <b>A controller </b>can send commands to its associated view to change the view's presentation of the
                    model (e.g., by scrolling through a document). It can also send commands to the model to update the model's
                    state (e.g., editing a document).
                </li>
                <li>
                    <b>A model</b> notifies its associated views and controllers when there has been a change in its state.
                    This notification allows the views to produce updated output, and the controllers to change the available
                    set of commands. A passive implementation of MVC omits these notifications, because the application does
                    not require them or the software platform does not support them.
                </li>
                <li>
                    <b>A view</b> requests from the model the information that it needs to generate an output representation
                    to the user.
                </li>
            </ul>
        </div>
    </div>
</ej-scroller>- Create
scroller.component.tsmodel file inside the foldersrc/scrollerand create scroller sample component using the below code example.
import { Component } from '@angular/core';

@Component({
  selector: 'ej-app',
  templateUrl: './scroller.component.html'
})
export class DefaultComponent {
  constructor() { }
}
Configure the routes for the Router
Before adding router configuration for above created ejScroller component, we recommend you to go through the Angular Routing configuration to get the deeper knowledge about Angular routing.
- Now, we are going to configure the route navigation link for created Scroller sample in
src/app.component.htmlfile.
<div>
	<ul class="nav navbar-nav">
		. . . .
		<li><a data-toggle="collapse" data-target="#skeleton-navigation-navbar-collapse.in" href="#scroller" [routerLink]="['/scroller']">Scroller </a></li>
	</ul>
</div>
<main>
	<router-outlet></router-outlet>
</main>- Import the ejScroller sample component and define the route in
src/app.routes.tsfile.
import { Routes } from '@angular/router';
. . . .
import { ScrollerComponent } from './scroller/scroller.component';

export const rootRouterConfig: Routes = [
    { path: '', redirectTo: 'home', pathMatch: 'full' },
    . . . .
    { path: 'scroller', component: ScrollerComponent }
];- Import and declare the Syncfusion source component and ejScroller sample component into
app.module.tslike the below code snippet.
import { NgModule, enableProdMode, ErrorHandler } from '@angular/core';
. . . . .
import { EJ_SCROLLER_COMPONENTS } from './ej/scroller.component';
import { ScrollerComponent } from './scroller/scroller.component';

import { rootRouterConfig } from './app.routes';
. . . .
@NgModule({
  imports: [BrowserModule, FormsModule, HttpModule, RouterModule.forRoot(rootRouterConfig, { useHash: true })],
  declarations: [. . . . , EJ_SCROLLER_COMPONENTS,ScrollerComponent],
  bootstrap: [AppComponent]
})
export class AppModule { }
Running the application
- To run the application, execute below command.
npm start- Browse to http://localhost:3000 to see the application. And navigate to Scroller tab. The component is rendered as like the below screenshot. You can make changes in the code found under src folder and the browser should auto-refresh itself while you save files.