How To Section in Angular Dialog
9 Jun 20236 minutes to read
Create Multiple Dialogs
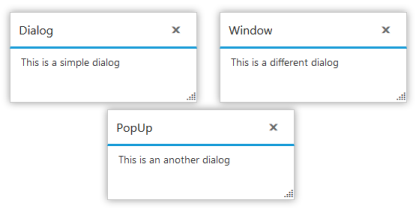
The Essential Angular Dialog can support multiple Dialog components in the same web page with different contents and different functionalities.
Initialize the Dialog components by adding the following code in HTML page.
<div class="cols-sample-area">
        <ej-dialog id="dialog1" title="Dialog" [position]="position1" width="250">
            This is a simple dialog
        </ej-dialog>
        <ej-dialog id="dialog2" title="Window" [position]="position2" width="250">
            This is a different dialog
        </ej-dialog>
        <ej-dialog id="dialog3" title="Popup" [position]="position3" width="250">
            This is an another dialog
        </ej-dialog>
    </div>
Add the following code in constructor to set position of each dialogs.
export class AppComponent {
        position1:object;
        position2:object;
        position3:object;
        constructor() {
            this.position1={ X:20,Y:20};
            this.position2={ X:300,Y:20};
            this.position3={ X:150,Y:150};
    }
NOTE:
If the position of the dialog is not set as above, all the three dialogs will be overlapped with each other.

Create Nested Dialog
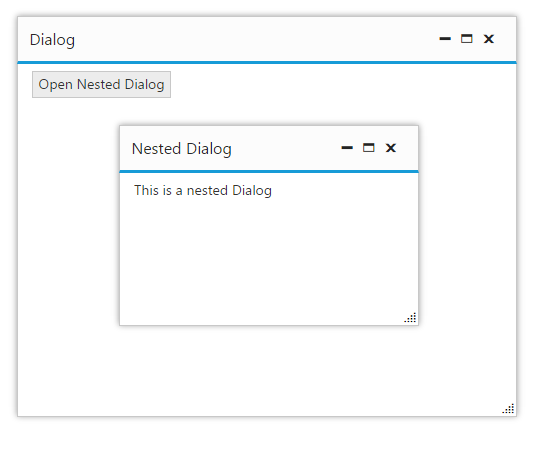
A Dialog component can be nested within another Dialog component.
Create a div element to render the child Dialog component and use it as a content of parent Dialog component.
<input id="button1" style="display:block; height: 30px" type="button" class="ejinputtext" value="Open Dialog" (click)="OpenDialog($event)" />
    <div class="cols-sample-area">
        <ej-dialog id="dialog" title="Dialog" width="500" height="400" [showOnInit]="showoninit" [actionButtons]="actionbuttons">
            <input id="button2" style="display:block; height: 30px" type="button" class="ejinputtext" value="Open Nested Dialog" (click)="OpenNestedDialog($event)" />
        </ej-dialog>
        <ej-dialog id="nesteddialog" title="Nested Dialog" width="300" height="200" [showOnInit]="showoninit" [actionButtons]="actionbuttons">
            This is a nested dialog
        </ej-dialog>

    </div>
Initialize both the Dialog components by adding the code in constructor as below.
export class AppComponent {
        actionbuttons:any;
        showoninit:boolean;
        constructor() {
            this.actionbuttons=["close", "maximize", "minimize"];
            this.showoninit=false;
    }
    OpenDialog(event){
            $("#dialog").ejDialog("open");
        }
    OpenNestedDialog(event){
                $("#nesteddialog").ejDialog("open");
        }

    }
Create Confirmation Dialog with Footer option.
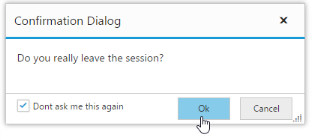
We can use the showFooter property to render Alert type Dialog box with Footers in Dialog component.
Initialize the Dialog component using the below code.
<input id="GetOpen" style="display:block; height: 30px" type="button" class="ejinputtext" value="Click to Open Dialog" (click)="OnOpen($event)" />
    <ej-dialog id="basicDialog" title="Confirmation Dialog" [showFooter]="true" [footerTemplateId]="footerTemplate" [showOnInit]="false">
        Do you really leave the session?
    </ej-dialog>
Initialize Footer in Dialog component by adding the script section in JsRender in the index.html page
<script id="sample" type="text/x-jsrender">
        <div class="footerspan" style="float:right">
            <input id='btn1' type="button" class="ejinputtext" value="Ok" />
            <input id='btn2' type="button" class="ejinputtext" value="Cancel" />
        </div>
        <div class="condition" style="float:left; margin-left:15px">
            <input id="Checkbox1" type="checkbox" class="ejinputcheckbox" />Don't ask me this again
        </div>
    </script>
Add the below code in constructor to render the Dialog component.
export class AppComponent {
        footerTemplate:any;
        constructor() {
           this.footerTemplate= "sample";
        }
    OnOpen(event){
            $("#basicDialog").ejDialog("open");
        }
    }