Getting Started
4 Jun 20196 minutes to read
This section will explain the rendering the Angular-2 DatePicker with the step-by-step instructions.
You can create the Angular-2 project with the required script and themes files with the help of the below link:
https://help.syncfusion.com/angular/overview
Creating a DatePicker in Angular-2 environment
Create the DatePicker using input html tag with plugin name, inside the body tag as like below.
<div class="content-container-fluid">
        <div class="row">
            <div class="cols-sample-area" style="height:400px; margin:0 auto;">
                Datepicker
                <input type="text" ej-datepicker id="datepick" />
            </div>
        </div>
    </div>
Create the component TS file like below to render the component.
import { Component, ViewEncapsulation} from '@angular/core';
@Component({
selector: 'ej-app',
templateUrl: 'app/app.component.html',
})
export class AppComponent {
constructor() {}
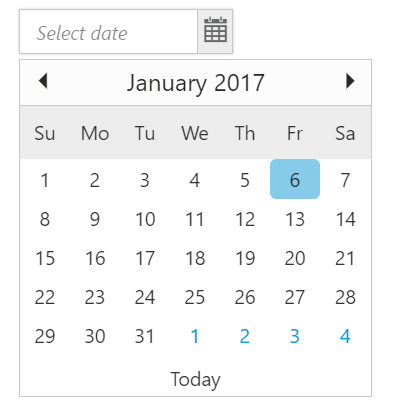
}Execution of above code will render the following output.
Model biding
Date value for DatePicker can be set to component via model binding like below code example.
Here we have sets the DatePicker date value (inside the constructor of component)
export class AppComponent {
       intBeginn: string;
     constructor() {
        this.intBeginn = "11/10/2016";
        }
    }
Two Way Binding
The **Angular-2 DatePicker** supports the Two-Way binding feature. Normally the binding will synchronize the values between model and view which will result in all views get change (the widgets/element that bounded with same scope variable). Please check with the below code example.
<div class="content-container-fluid">
        <div class="row">
            <div class="cols-sample-area" style="height:400px; margin:0 auto;">
                Datepicker
                <input type="text" ej-datepicker id="datepick"  [(ngModel)]="_beginDate"/>
                <br>You can enter the date here to check two way binding :<input type="text" [(ngModel)]="_beginDate" />
            </div>
        </div>
    </div>
To render the Angular-2 DatePicker Two Way binding using below code.
import { Component, ViewEncapsulation} from '@angular/core';
        @Component({
            selector: 'ej-app',
            templateUrl: 'app/app.component.html',
        })
        export class AppComponent {
            _beginDate:Date;
        constructor() {
            this._beginDate =new Date();
            }
        }
Configuring the APIs of Angular-2 DatePicker
All API of DatePicker can be configured and values can be updated from constructor. Please check with the below code example
<div class="content-container-fluid">
            <div class="row">
                <div class="cols-sample-area" style="height:400px; margin:0 auto;">
                    Datepicker
                    <input type="text" ej-datepicker id="datepick"  [(ngModel)]="_beginDate" [minDate]="min" [maxDate]="max"/>
                </div>
            </div>
</div>import { Component, ViewEncapsulation} from '@angular/core';
@Component({
selector: 'ej-app',
templateUrl: 'app/app.component.html',
})
export class AppComponent {
_beginDate:Date;
min:Date;
max:Date;
constructor() {
this._beginDate = new Date();
this.min = new Date("11/11/2012");
this.max = new Date("11/11/2019")
}
}