Getting Started with SfBorder
8 Aug 20237 minutes to read
This section provides an overview for working with the SfBorder control for Xamarin.Forms and explains the entire process of creating a real-world application.
Assembly deployment
After installing Essential Studio for Xamarin, you can find all the required assemblies in the installation folders, {Syncfusion Essential Studio Installed location} \Essential Studio\{Version #}\Xamarin\lib.
E.g.: C:\Program Files (x86) \Syncfusion\Essential Studio\19.1.0.54\Xamarin\lib
NOTE
Assemblies can be found in unzipped package location(Documents/Syncfusion/{Version #}/Xamarin/lib) in Mac.
Adding SfBorder reference
You can add SfBorder reference using one of the following methods:
Method 1: Adding SfBorder reference from nuget.org
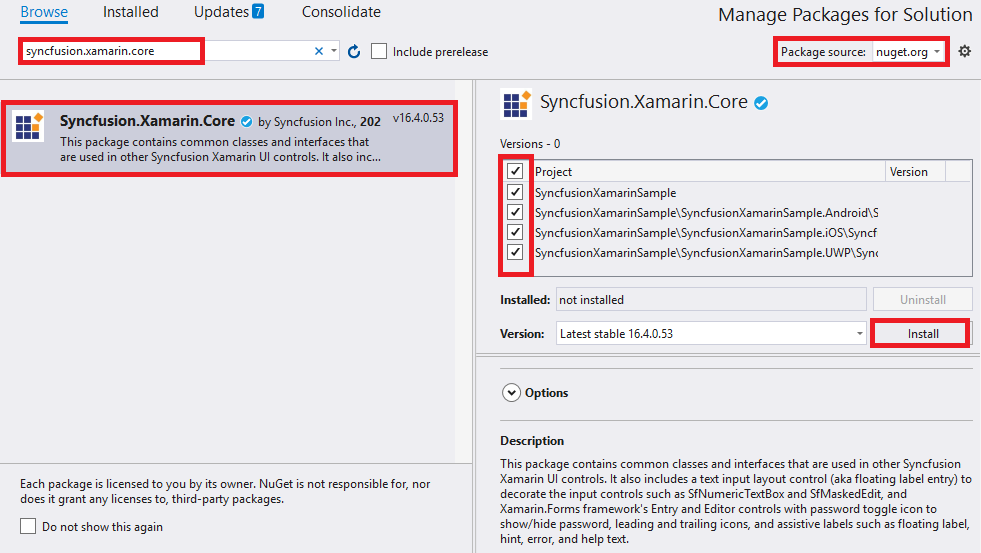
Syncfusion Xamarin components are available in nuget.org. To add SfBorder to your project, open the NuGet package manager in Visual Studio, search for Syncfusion.Xamarin.Core, and then install it.
NOTE
- Install the same version of SfBorder NuGet in all the projects.
- In addition, you need to install the Syncfusion.Xamarin.Core.WPF package for Xamarin.Forms WPF platform only.
Method 2: Adding SfBorder reference from toolbox
Syncfusion also provides Xamarin Toolbox. Using this toolbox, you can drag the SfBorder control to the XAML page. It will automatically install the required NuGet packages and add the namespace to the page. To install Syncfusion Xamarin Toolbox, refer to Toolbox.
Method 3: Adding SfBorder assemblies manually from the installed location
If you prefer to manually reference the assemblies instead referencing from NuGet, add the following assemblies in respective projects.
Location: {Installed location}/{version}/Xamarin/lib
| PCL | Syncfusion.Core.XForms.dll Syncfusion.Licensing.dll |
| Android | Syncfusion.Core.XForms.dll Syncfusion.Core.XForms.Android.dll Syncfusion.Licensing.dll |
| iOS | Syncfusion.Core.XForms.dll Syncfusion.Core.XForms.iOS.dll Syncfusion.Licensing.dll |
| UWP | Syncfusion.Core.XForms.dll Syncfusion.Core.XForms.UWP.dll Syncfusion.Licensing.dll |
| WPF | Syncfusion.Core.XForms.dll Syncfusion.Core.XForms.WPF.dll Syncfusion.Licensing.dll |
NOTE
To know more about obtaining our components, refer to these links for Mac and Windows.
IMPORTANT
Starting with v16.2.0.x, if you reference Syncfusion assemblies from the trial setup or from the NuGet feed, you also have to include a license key in your projects. Please refer to Syncfusion license key to know about registering Syncfusion license key in your Xamarin application to use our components.
Launching an application on each platform with SfBorder.
To use the SfBorder control inside an application, each platform application must initialize the SfBorder renderer. This initialization step varies from platform to platform and is discussed in the following sections:
NOTE
If you are adding the references from toolbox, below steps are not needed.
Android and UWP
The Android and UWP launches the SfBorder without any initialization, and it is enough to only initialize the Xamarin.Forms Framework to launch the application.
iOS
To launch the SfBorder in iOS, call the SfBorderRenderer.Init() in the FinishedLaunching overridden method of the AppDelegate class after the Xamarin.Forms Framework has been initialized and before the LoadApplication is called, as demonstrated in the following code example.
public override bool FinishedLaunching(UIApplication app, NSDictionary options)
{
    …
    global::Xamarin.Forms.Forms.Init ();
    Syncfusion.XForms.iOS.Border.SfBorderRenderer.Init();
    LoadApplication (new App ());
    …
}
Release mode issue in UWP platform
The known Framework issue in UWP platform is that the custom controls will not be rendered when deployed an application in Release Mode. It can be resolved by initializing the SfBorder assemblies in the App.xaml.cs file in the UWP project, as demonstrated in the following code example.
// In App.xaml.cs

protected override void OnLaunched(LaunchActivatedEventArgs e)
    {
        …
    	    rootFrame.NavigationFailed += OnNavigationFailed;

        // you'll need to add `using System.Reflection;`
        List<Assembly> assembliesToInclude = new List<Assembly>();

        //Now, add all the assemblies your app uses
        assembliesToInclude.Add(typeof(Syncfusion.XForms.UWP.Border.SfBorderRenderer).GetTypeInfo().Assembly);

        // replaces Xamarin.Forms.Forms.Init(e);
        Xamarin.Forms.Forms.Init(e, assembliesToInclude);
        …
    }
Windows Presentation Foundation (WPF)
To launch the border in WPF, call the SfBorderRenderer.Init() method in the MainWindow constructor of the MainWindow class after the Xamarin.Forms framework has been initialized and before the LoadApplication method is called as demonstrated in the following code sample.
public partial class MainWindow : FormsApplicationPage
{
     public MainWindow()
     {
            InitializeComponent();

            Forms.Init();

            Syncfusion.XForms.WPF.Border.SfBorderRenderer.Init();

            LoadApplication(new App());
     }
}
Creating SfBorder control
The SfBorder control is configured entirely in C# code or in XAML markup. The following steps explain how to create a SfBorder and configure its elements.
Adding namespace for referred assemblies
xmlns:border="clr-namespace:Syncfusion.XForms.Border;assembly=Syncfusion.Core.XForms"using Syncfusion.XForms.Border;Add the SfBorder control as the content of ContentPage.
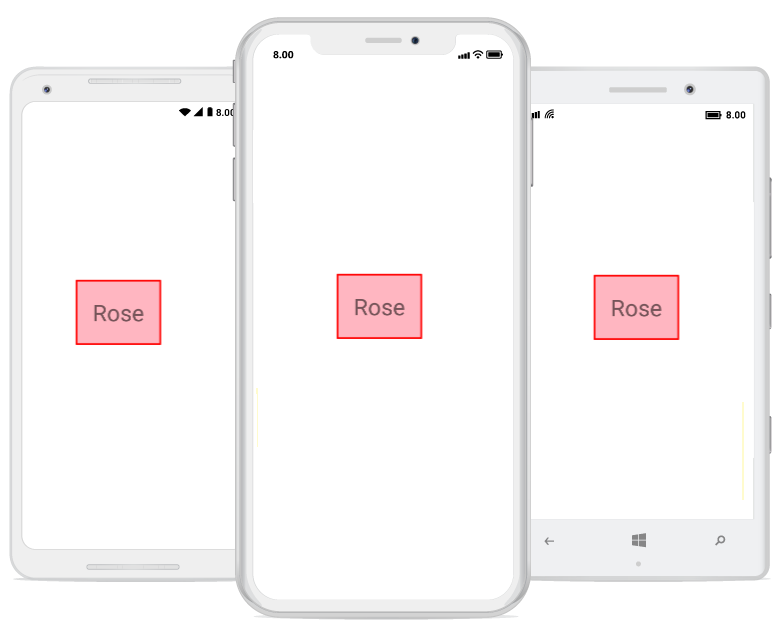
<Grid>
<border:SfBorder
   BorderColor="Red"
   BackgroundColor="#ffb6c1"
   HorizontalOptions="Center"
   VerticalOptions="Center"
   BorderWidth="3">
<Label
  Text="Rose"
  Margin="10"
  Font="15"  />
</border:SfBorder>
</Grid>
using System;
using Syncfusion.XForms.Border;
using Xamarin.Forms;
namespace BorderGettingStarted
{
public partial class MainPage : ContentPage
{
public MainPage()
{
InitializeComponent();
Grid mainGrid = new Grid();
// Create Border control
SfBorder border = new SfBorder();
border.VerticalOptions = LayoutOptions.Center;
border.HorizontalOptions = LayoutOptions.Center;
border.BorderColor = Color.Red;
border.BackgroundColor = Color.FromHex("#ffb6c1");
//Create Label control
Label label = new Label();
label.Text = "Rose";
label.FontSize = 15;
border.Content = label;
mainGrid.Children.Add(border);
this.Content = mainGrid;
}
}
}
The complete Getting Started sample is available in this link.