Getting Started with WPF Autocomplete (SfTextBoxExt)
19 Oct 202214 minutes to read
Assembly deployment
Refer to this Control Dependencies section to get the list of assemblies or NuGet package that needs to be added as a reference to use the control in any application.
Refer to this How to install nuget packages documentation to find more details about installing the NuGet package in a WPF application.
Creating a simple application
Create a WPF application with SfTextBoxExt control using the following steps:
Create a project
Create a new WPF project in Visual Studio to display the SfTextBoxExt control with their functionalities.
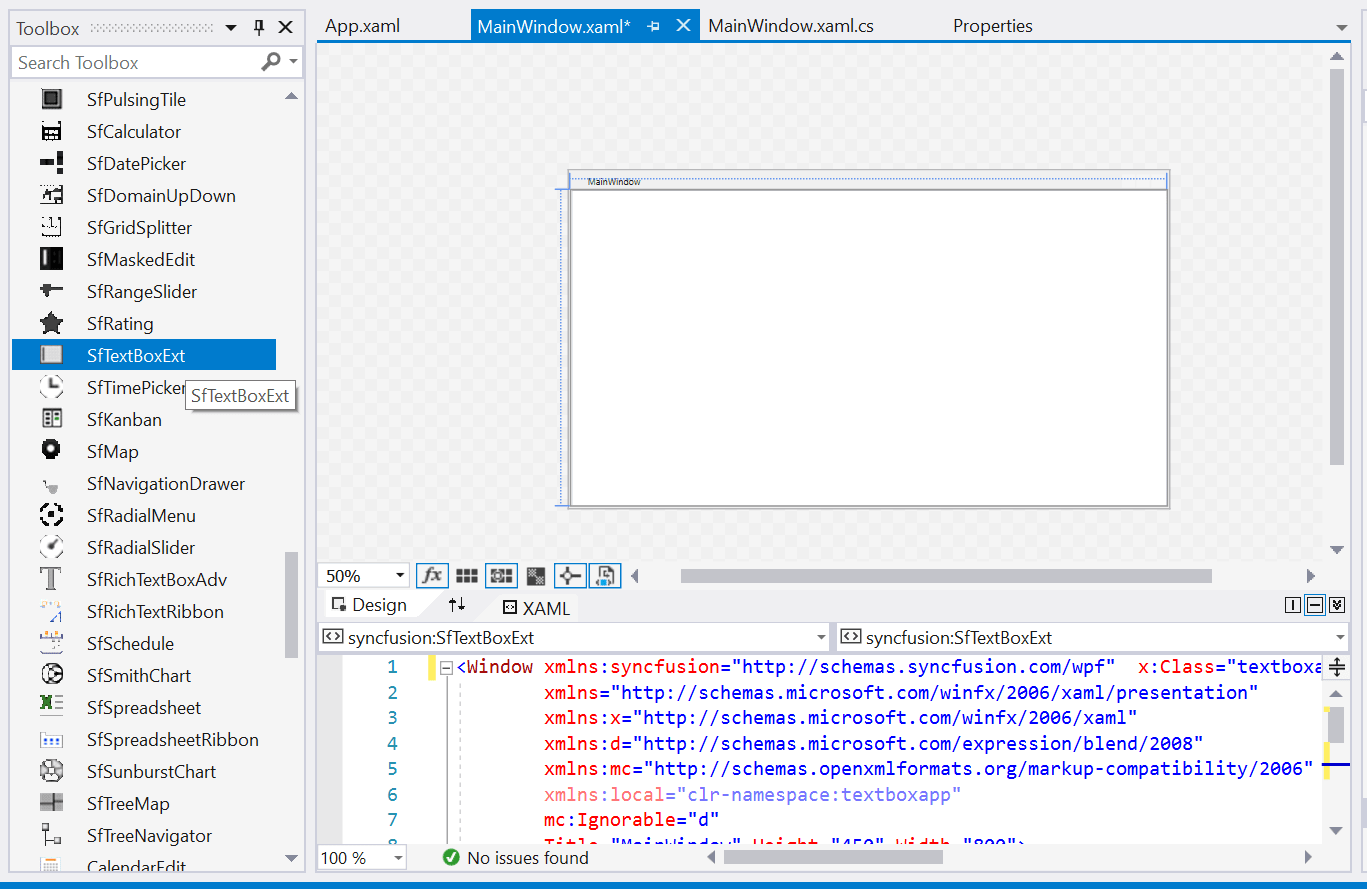
Add a control using the designer
The SfTextBoxExt control can be added to an application by dragging it from the toolbox to a designer view. The following required assembly references will be added automatically:
- Syncfusion.SfInput.WPF
- Syncfusion.SfShared.WPF
Adding control manually in XAML
To add the control manually in XAML, follow the given steps:
- Add the following required assembly references to the project:
- Syncfusion.SfInput.WPF
- Syncfusion.SfShared.WPF
- Import Syncfusion WPF schema http://schemas.syncfusion.com/wpf in the XAML page.
-
Declare the SfTextBoxExt control in the XAML page.
<Window x:Class="TextBoxExt.MainWindow"
        xmlns="http://schemas.microsoft.com/winfx/2006/xaml/presentation"
        xmlns:x="http://schemas.microsoft.com/winfx/2006/xaml"
        xmlns:d="http://schemas.microsoft.com/expression/blend/2008"
        xmlns:mc="http://schemas.openxmlformats.org/markup-compatibility/2006"
        xmlns:local="clr-namespace:TextBoxExt"
        mc:Ignorable="d"
        xmlns:editors="http://schemas.syncfusion.com/wpf"
        Title="MainWindow" Height="450" Width="800">
    <editors:SfTextBoxExt HorizontalAlignment="Center"
                                  VerticalAlignment="Center"
                                  HorizontalContentAlignment="Center"
                                  Height="40"
                                  Width="200"
                                  Text="Hello! World..."/>
</Window>
Add a control manually in C#
To add the control manually in C#, follow the given steps:
- Add the following required assembly references to the project:
- Syncfusion.SfInput.WPF
- Syncfusion.SfShared.WPF
- Import the SfTextBoxExt namespace using Syncfusion.Windows.Controls.Input;.
-
Create an SfTextBoxExt instance, and add it to the window.
using System.Windows;
using Syncfusion.Windows.Controls.Input;

namespace TextBoxExt
{
    public partial class MainWindow : Window
    {
        public MainWindow()
        {
            InitializeComponent();
            SfTextBoxExt textBoxExt = new SfTextBoxExt();
            textBoxExt.HorizontalContentAlignment = HorizontalAlignment.Center;
            textBoxExt.HorizontalAlignment = HorizontalAlignment.Center;
            textBoxExt.VerticalAlignment = VerticalAlignment.Center;
            textBoxExt.Width = 200;
            textBoxExt.Height = 40;
            textBoxExt.Text = "Hello! World...";
            this.Content = textBoxExt;
        }
    }
}

Populating AutoComplete with Data
AutoComplete is a data-bound control. So before create binding to the control, you must create data model for Application.
For illustration, let us create a textbox, which will populate a list of employees.
-
Create data object class named Employee and declare properties as shown below,
- C#
-
Create a EmployeeViewModel class with Employees property and Employees property is initialized with several data objects in constructor.
- C#
-
To populate the AutoComplete with data, set the AutoCompleteSource property to
IEnumerableimplementation.
public class Employee
{
        string name;
        string email;

        public string Name
        {
            get { return name; }
            set { name = value; }
        }

        public string Email
        {
            get { return email; }
            set { email = value; }
        }
}public class EmployeeViewModel
{
private List<Employee> employees;
public List<Employee> Employees
{
get { return employees; }
set { employees = value; }
}
public EmployeeViewModel()
{
Employees = new List<Employee>();
Employees.Add(new Employee() { Name = "Eric", Email = "Eric@syncfusion.com" });
Employees.Add(new Employee() { Name = "James", Email = "James@syncfusion.com" });
Employees.Add(new Employee() { Name = "Jacob", Email = "Jacob@syncfusion.com" });
Employees.Add(new Employee() { Name = "Lucas", Email = "Lucas@syncfusion.com" });
Employees.Add(new Employee() { Name = "Mark", Email = "Mark@syncfusion.com" });
Employees.Add(new Employee() { Name = "Aldan", Email = "Aldan@syncfusion.com" });
Employees.Add(new Employee() { Name = "Aldrin", Email = "Aldrin@syncfusion.com" });
Employees.Add(new Employee() { Name = "Alan", Email = "Alan@syncfusion.com" });
Employees.Add(new Employee() { Name = "Aaron", Email = "Aaron@syncfusion.com" });
}
}Bind the collection created in previous step to AutoCompleteSource property in XAML by setting EmployeeViewModel as DataContext.
<Window x:Class="TextBoxExt.MainWindow"
           xmlns="http://schemas.microsoft.com/winfx/2006/xaml/presentation"
           xmlns:x="http://schemas.microsoft.com/winfx/2006/xaml"
           xmlns:d="http://schemas.microsoft.com/expression/blend/2008"
           xmlns:mc="http://schemas.openxmlformats.org/markup-compatibility/2006"
           xmlns:local="clr-namespace:TextBoxExt"
           mc:Ignorable="d"
           xmlns:editors="http://schemas.syncfusion.com/wpf"
           Title="MainWindow" Height="450" Width="800">

       <Window.DataContext>
           <local:EmployeeViewModel/>
       </Window.DataContext>
       <editors:SfTextBoxExt HorizontalAlignment="Center"
                                 VerticalAlignment="Center"
                                 Width="300"
                                 Height="40"
                                 SearchItemPath="Name"
                                 AutoCompleteMode="Suggest"
                                 AutoCompleteSource="{Binding Employees}" />


   </Window>
EmployeeViewModel viewModel = new EmployeeViewModel();
this.DataContext = viewModel;
SfTextBoxExt textBoxExt = new SfTextBoxExt();
textBoxExt.HorizontalAlignment = HorizontalAlignment.Center;
textBoxExt.VerticalAlignment = VerticalAlignment.Center;
textBoxExt.Width = 200;
textBoxExt.Height = 40;
textBoxExt.SearchItemPath = "Name";
textBoxExt.AutoCompleteMode = AutoCompleteMode.Suggest;
textBoxExt.AutoCompleteSource = viewModel.Employees;
this.Content = textBoxExt;For further details, refer to AutoComplete source.
AutoComplete modes
Suggestions can be shown in number of ways. SfTextBoxExt supports the following.
| AutoCompleteMode | Description |
|---|---|
| Suggest | Shows the suggestion in the drop-down list user. |
| Append | Appends the first suggestion to the text. |
| SuggestAppend | Shows the suggestion in the drop-down list and appends the first suggestion to the text. |
| None | In None mode, the search algorithm starts even when the item is not available in the data source. |
NOTE
The default value of AutoCompleteMode is None. So, running the control without specifying this property will not show any suggestions.
<editors:SfTextBoxExt HorizontalAlignment="Center"
VerticalAlignment="Center"
Width="300"
Height="40"
SearchItemPath="Name"
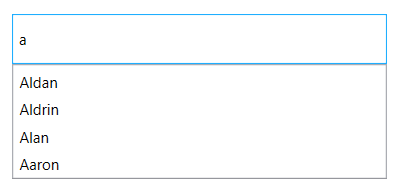
AutoCompleteMode="Suggest"
SuggestionMode="StartsWith"
AutoCompleteSource="{Binding Employees}" />textBoxExt.AutoCompleteMode = AutoCompleteMode.Suggest;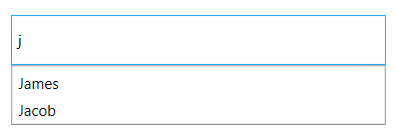
Selection
By default single selection is enable in AutoComplete control. It can set the MultiSelectMode property to specify whether a single or multiple selection.
Index of the selected items can be retrieved using the SuggestionIndex property.
The selected items of the AutoComplete can be retrieved using the SelectedItem property for single selection.
In Multi-selection, SelectedItems property contains the items that are selected in the control.
The selected values of the AutoComplete can be retrieved using the SelectedValue property.
For further details, refer to the Retrieving SelectedValue and Setting and retrieving SelectedItem.
NOTE
View sample in GitHub
Theme
SfTextBoxExt supports various built-in themes. Refer to the below links to apply themes for the SfTextBoxExt,