Getting Started with Windows Forms AutoLabel
11 Oct 20227 minutes to read
This section briefly describes how to create a new Windows Forms project in Visual Studio, and add the AutoLabel control with its basic functionalities.
Assembly deployment
Refer to the control dependencies section to get the list of assemblies or NuGet package details that need to be added as reference to use the control in any application.
Refer to this documentation to find more details on how to install NuGet packages in a Windows Forms application.
Creating Application with AutoLabel
In this walk through, users will create WinForms application that contains AutoLabel control.
Creating the Project
Create new Windows Forms Project in Visual Studio to display AutoLabel Control.
Adding the AutoLabel control via designer
-
Create a new Windows Forms application in Visual Studio.
-
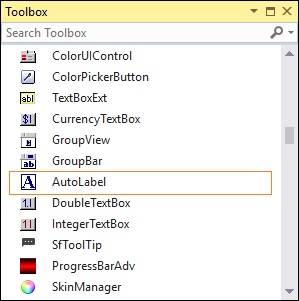
The AutoLabel control can be added to an application by dragging it from the toolbox to the design view. The following dependent assemblies will be added automatically.
- Syncfusion.Shared.Base
- Set the desired properties for the AutoLabel control using the Properties dialog.
Adding the AutoLabel control in Code
In order to add control manually, do the below steps,
-
Create a C# or VB application via Visual Studio.
-
Add the following assembly reference to the project.
- Syncfusion.Shared.Base
-
Include the required namespace.
using Syncfusion.Windows.Forms.Tools;Imports Syncfusion.Windows.Forms.Tools -
Create an instance of the AutoLabel control. Set the following properties and add it to the form.
//Initialization
private Syncfusion.Windows.Forms.Tools.AutoLabel autoLabel1;
this.autoLabel1 = new Syncfusion.Windows.Forms.Tools.AutoLabel();

//Set the properties
this.autoLabel1.Text = "autoLabel1";
this.autoLabel1.BackColor = System.Drawing.Color.DarkGray;
this.autoLabel1.ForeColor = System.Drawing.Color.DarkBlue;
this.autoLabel1.Font = new System.Drawing.Font("Microsoft Sans Serif", 8.25F, System.Drawing.FontStyle.Bold, System.Drawing.GraphicsUnit.Point, ((byte)(0)));
this.autoLabel1.TextAlign = System.Drawing.ContentAlignment.MiddleCenter;

// Add the AutoLabel control to the form.
this.Controls.Add(this.autoLabel1);
' Initialization Private autoLabel1 As Syncfusion.Windows.Forms.Tools.AutoLabel Me.autoLabel1 = New Syncfusion.Windows.Forms.Tools.AutoLabel() ' Set the properties Me.autoLabel1.Text = "autoLabel1" Me.autoLabel1.BackColor = System.Drawing.Color.DarkGray Me.autoLabel1.ForeColor = System.Drawing.Color.DarkBlue Me.autoLabel1.Font = New System.Drawing.Font("Microsoft Sans Serif", 8.25F, System.Drawing.FontStyle.Bold, System.Drawing.GraphicsUnit.Point, CByte((0))) Me.autoLabel1.TextAlign = System.Drawing.ContentAlignment.MiddleCenter ' Add the AutoLabel control to the form. Me.Controls.Add(Me.autoLabel1)
Labeling a control
-
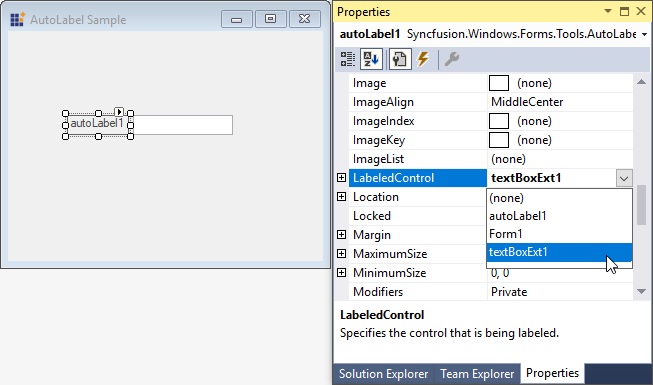
Add one control to the form. For example, TextBoxExt.
-
Right-click on the AutoLabel control. Choose Properties and select
LabeledControlproperty. Now, you can choose newly added TextBoxExt control.this.autoLabel1.LabeledControl = this.textBoxExt1;Me.autoLabel1.LabeledControl = Me.textBoxExt1
Spacing
The space between the AutoLabel control and the labeled control can be customized using the following properties. When using relative positioning, you can also specify the gap between the label and the control.
| AutoLabel Properties | Description |
|---|---|
| DX | The effective horizontal distance between the left of the AutoLabel and its labeled control. |
| DY | The effective vertical distance between the top of the AutoLabel and its labeled control. |
| Gap | Specifies the horizontal and vertical gap to use when computing the relative position. |
this.autoLabel1.DX = -70;
this.autoLabel1.DY = 3;
this.autoLabel1.Gap = 10;Me.autoLabel1.DX = -70
Me.autoLabel1.DY = 3
Me.autoLabel1.Gap = 10
Position
The AutoLabel control can be positioned relative to the top, left, bottom, or right of the labeled control.
| AutoLabel Property | Description |
|---|---|
| Position | Specifies the relative position of the control and the AutoLabel. The options included are as follows: Custom, Left, Top, and Side. |
When the Position property is set to Custom, you can drag the label to the required position using the mouse.
this.autoLabel1.Position = Syncfusion.Windows.Forms.Tools.AutoLabelPosition.Side;Me.autoLabel1.Position = Syncfusion.Windows.Forms.Tools.AutoLabelPosition.Side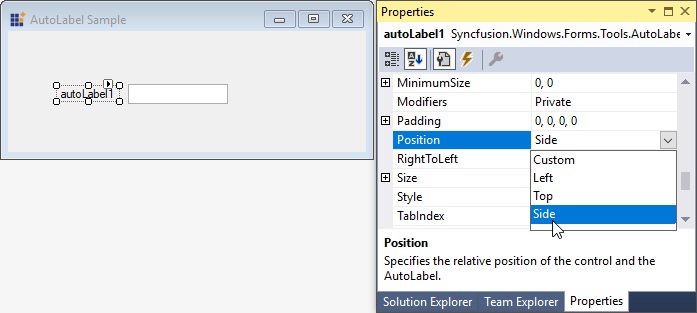
Size
This section explains the size settings of the AutoLabel control.
The AutoLabel control can be resized using the below given property.
| AutoLabel Property | Description |
|---|---|
| AutoSize | Enables automatic resizing based on the font size. |
NOTE
This is valid only for label controls that do not wrap text.
this.autoLabel1.AutoSize = true;Me.autoLabel1.AutoSize = TrueAdding themes to control with SkinManager
You can apply the required skin to the form using the VisualTheme property.
SkinManager.SetVisualStyle(this.autoLabel1, VisualTheme.Office2016Colorful);SkinManager.SetVisualStyle(Me.autoLabel1, VisualTheme.Office2016Colorful)
NOTE
This control supports only Office2016Colorful, Office2016Black, Office2016DarkGray, and Office2016White styles using SkinManager.