Download and Installation - Document SDK Extension for VSCode
11 Feb 20263 minutes to read
Syncfusion® publishes the Document SDK VSCode extension in the below Visual Studio Code marketplace link. You can either install it directly from Visual Studio or download and install it from the Visual Studio Code marketplace.
Prerequisites
The following software prerequisites must be installed to install the Syncfusion® Document SDK extension, as well as to create and add snippet in Syncfusion® Document SDK applications.
Install through the Visual Studio Code Extensions
The steps below describe how to install the Syncfusion® Document SDK extension from the Extensions view in Visual Studio Code.
- Open Visual Studio Code.
- Navigate to View > Extensions, and the Manage Extensions option will appear on the left side of the window.
-
In the search box, enter Document SDK VS Code Extensions - Syncfusion® to find the Syncfusion Document SDK extension in the Marketplace.
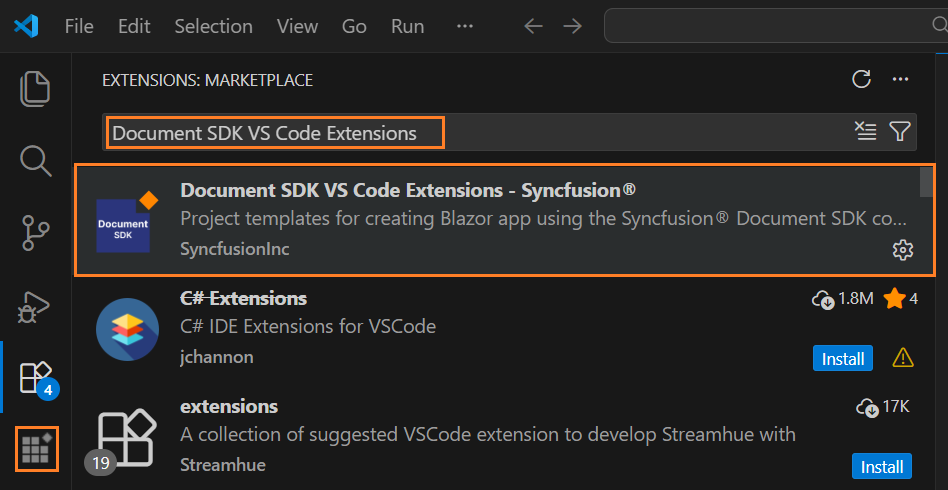
- Select Document SDK VS Code Extensions - Syncfusion®, and click Install.
-
Reload Visual Studio Code after installation by using the Reload Window command from the Command Palette. Open the Command Palette with Ctrl+Shift+P, then run Reload Window.

-
Now, you can create a new Syncfusion® Blazor application by using the Syncfusion® Document SDK extensions from the Visual Studio Code Palette Find the Syncfusion® Document SDK Template Studio: Launch from Visual Studio Code commands to open the Syncfusion® Document SDK Template Studio wizard.

Install from the Visual Studio Code Marketplace
The instructions below describe the process of downloading and installing Syncfusion® Document SDK applications from the Visual Studio Code Marketplace.
-
Open Syncfusion® Document SDK Extensions in Visual Studio Code Marketplace.
-
Click Install from Visual Studio Code Marketplace. The browser displays a popup window with information such as “Open Visual Studio Code”. When you click Open Visual Studio Code, the Syncfusion® Document SDK Extension will launch in Visual Studio Code.
-
Install the “Document SDK Blazor VSCode Extensions - Syncfusion” extension by clicking the Install button.
-
Reload Visual Studio Code after installation by using the Reload Window command in the Visual Studio Code palette. You can open the command palette by pressing Ctrl+Shift+P and find the Reload Window from Visual Studio Code commands.
-
Now, you can create a new Syncfusion® Document SDK application by using the Syncfusion® Document SDK extensions from the Visual Studio Code Palette Find the Syncfusion Document SDK Template Studio: Launch from Visual Studio Code commands to open the Syncfusion Document SDK Template Studio wizard.
Manually Installing an Extension in Visual Studio Code
The instructions below describe the process of installing the Syncfusion® Document SDK extensions manually in Visual Studio Code.
-
Install the extension by downloading it from the Visual Studio Marketplace and then installing it from a local file within VS Code. To do this: Download the “SyncfusionInc.Document-SDK-VSCode-Extensions.vsix” file from the Visual Studio Code Marketplace.
-
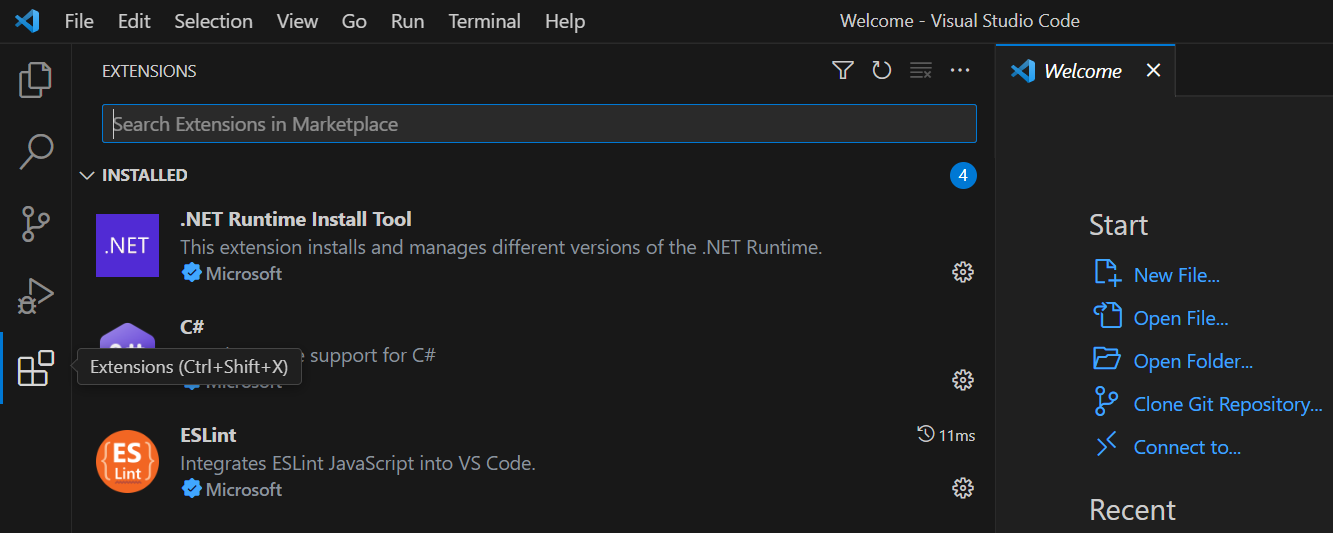
In VS Code, go to the Extensions view by clicking on the Extensions icon in the Activity Bar.
-
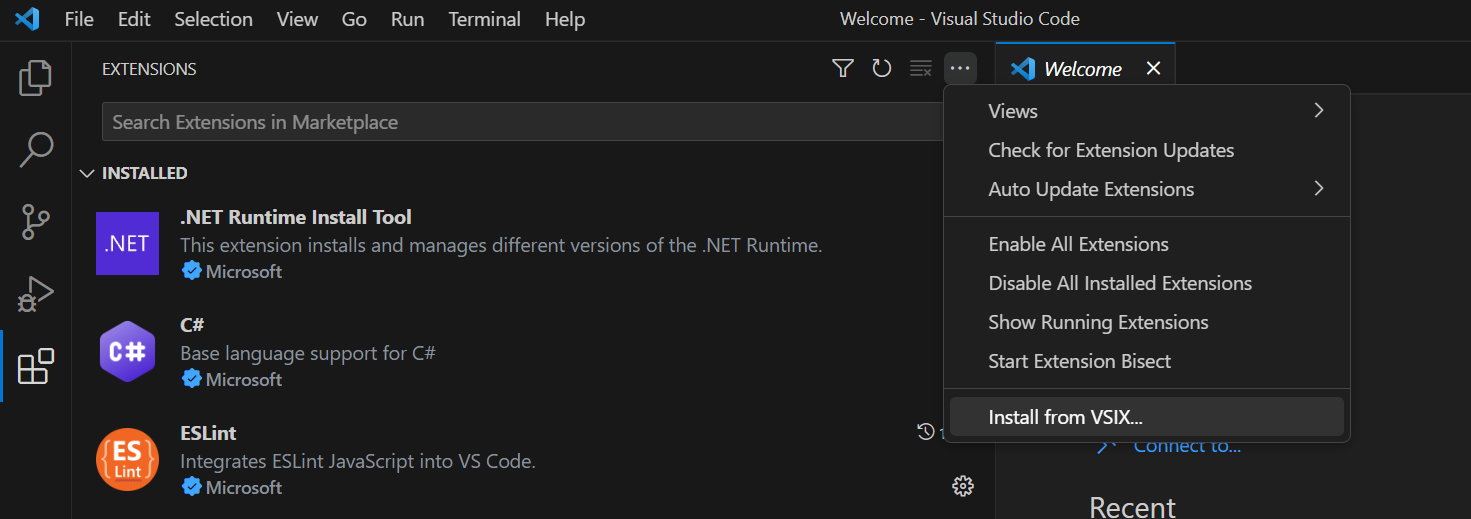
Click on the three dots (ellipsis) in the top-right corner and select “Install from VSIX.”
-
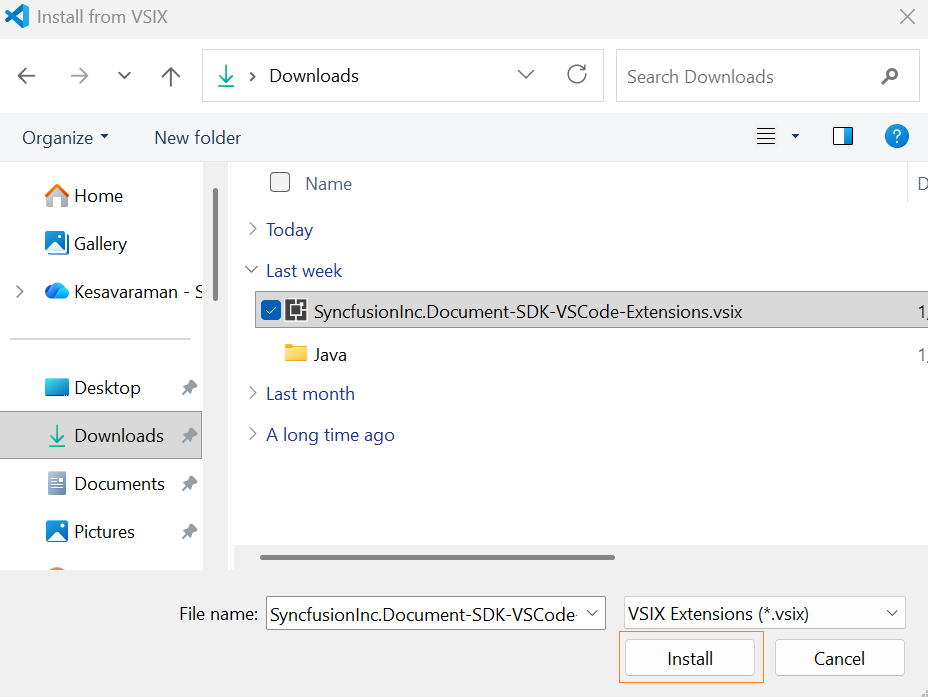
Browse to the downloaded SyncfusionInc.Document-SDK-VSCode-Extensions.vsix file and install it.