Localization in UWP DOCX Editor
30 Aug 20261 minute to read
Localization is the process of configuring the application to a specific language. SfRichTextBoxAdv provides support for localizing all the static text in the radial menu and in all its dialogs. Localization can be done by adding a resource file (.resw) and setting the desired culture in the application.
Setting the language in the app manifest file
The following steps illustrate how to configure the app package for localization using the Manifest Designer.
- In Solution Explorer, expand the project node of your UWP app.
- Double-click the Package.appxmanifest file. If the manifest file is already open in the XML code view, Visual Studio prompts you to close the file.
-
On the Application tab, specify the Default language as required to localize your app. Click More information to learn about the supported languages.
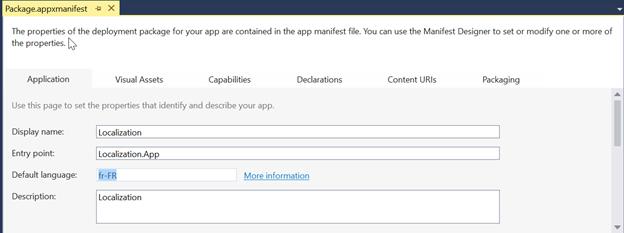
- Save the app manifest file after setting the default language.
Adding a resource file
- Create a folder named
Resourcesin your application. - Create a folder named after the culture (for example,
en-US,fr-FR) underResourcesto hold the resource file for that culture. -
Add the default English (
en-US).reswfiles forSfRichTextBoxAdvand your application — namedSyncfusion.SfRichTextBoxAdv.UWP.Resources.resw,Syncfusion.SfRibbon.UWP.Resources.resw, andLocalization.Resources.reswrespectively — in theen-USfolder. For reference, a French (fr-FR).reswfile.
-
Add the resource name and its corresponding localized value in the Resource Designer of each
.reswfile.
If you have not used
SfRibbonin your application, you can skip theSyncfusion.SfRibbon.UWP.[Culture name].reswfile mentioned above.
The following screenshot shows the localized SfRichTextBoxAdv.
