Open and save Presentation in Azure Functions Flex Consumption
3 Aug 202611 minutes to read
Syncfusion® PowerPoint is a .NET Core PowerPoint library used to create, read, edit, and convert PowerPoint documents programmatically without Microsoft PowerPoint or interop dependencies. Using this library, you can open and save a PowerPoint Presentation in Azure Functions deployed on the Flex Consumption plan.
Prerequisites: An active Azure subscription, Visual Studio 2022 (or later) with the Azure development workload installed, and the latest Azure Functions Core Tools. This article targets the Azure Functions Flex Consumption plan with the .NET 8.0 (Long Term Support) isolated worker model.
Steps to open and save Presentation in Azure Functions Flex Consumption
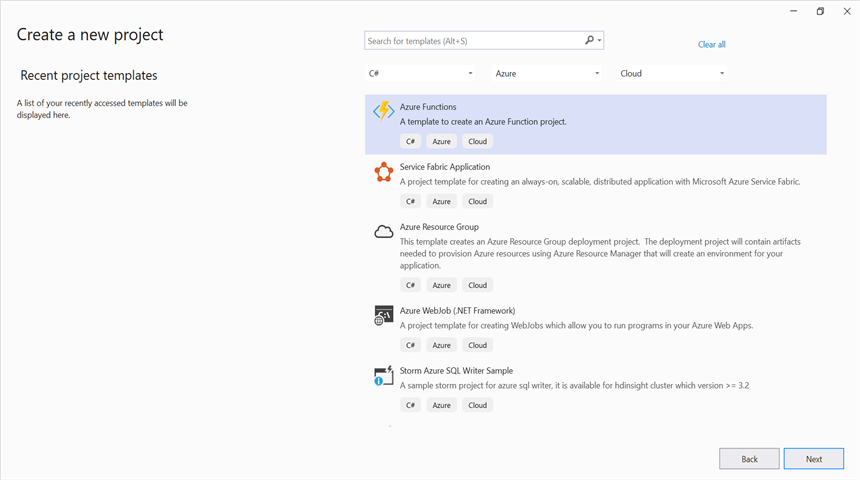
Step 1: Create a new Azure Functions project. Select the Azure Functions template and choose the HTTP trigger function type.
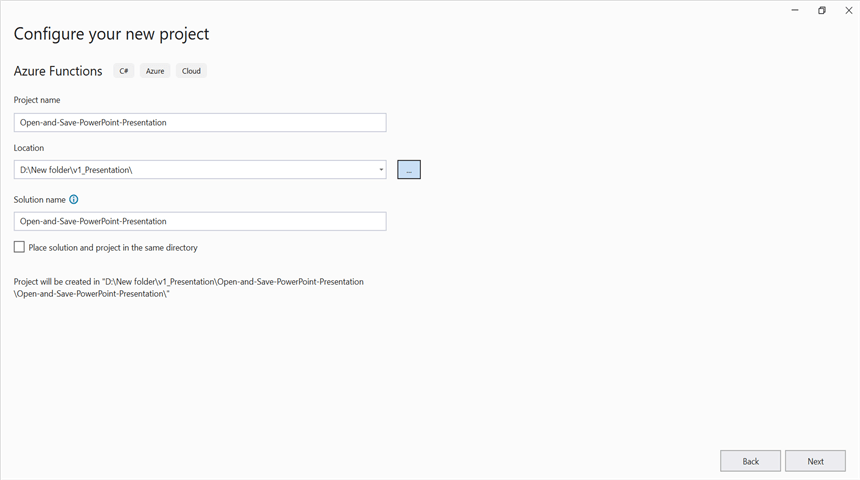
Step 2: Configure the project name and select the location.
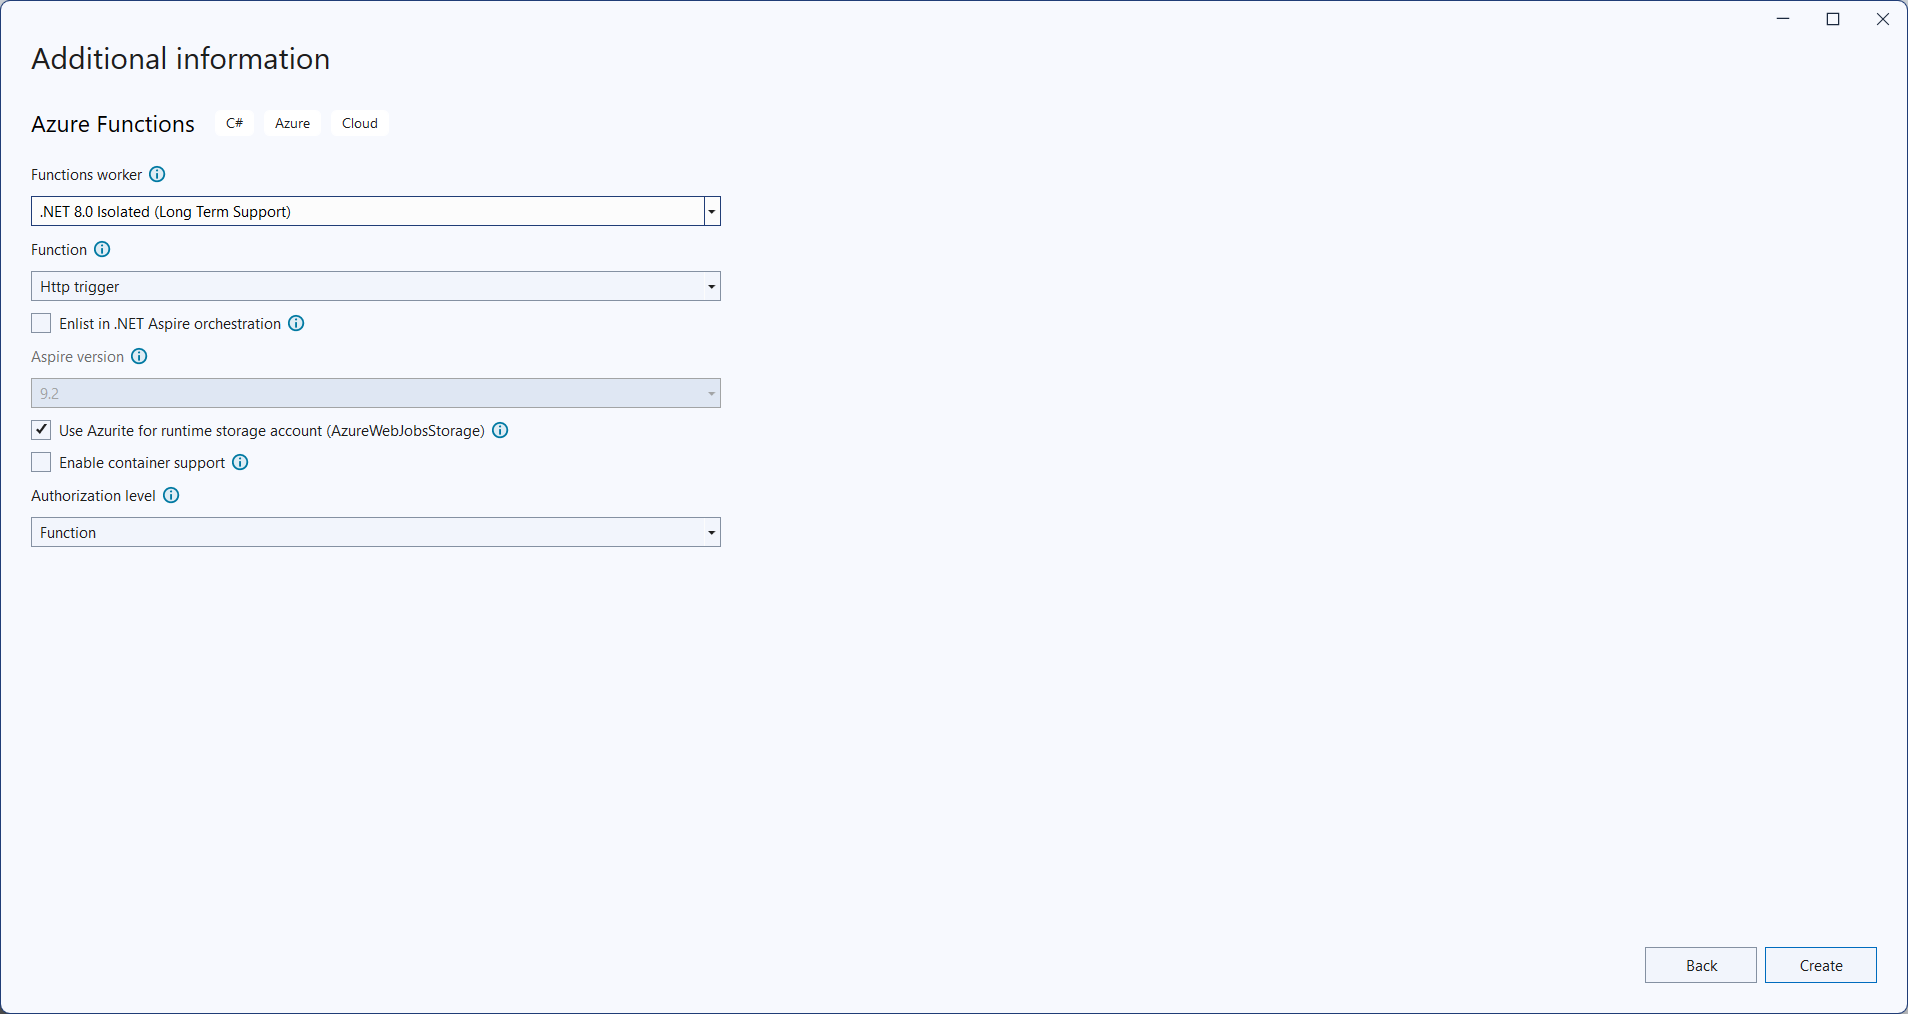
Step 3: Select the function worker as .NET 8.0 (Long Term Support) (isolated worker) and choose a Flex Consumption hosting plan that supports the isolated worker model.
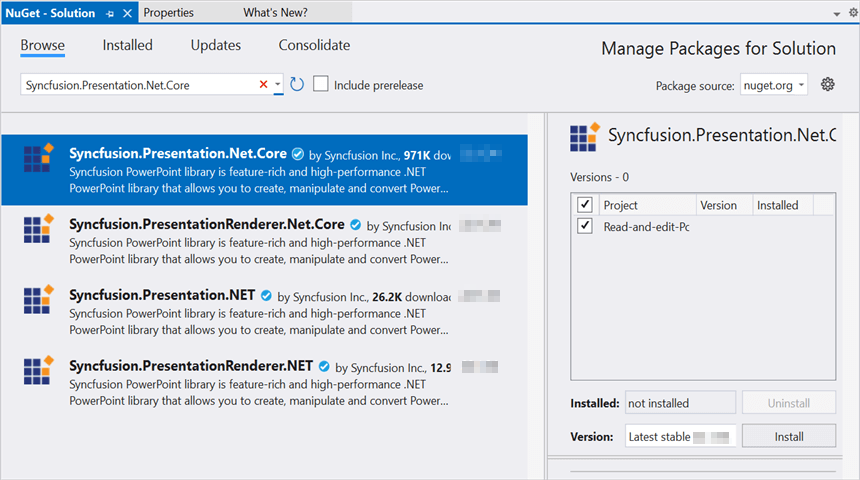
Step 4: Install the Syncfusion.Presentation.Net.Core NuGet package as a reference to your project from NuGet.org.
Starting with v16.2.0.x, if you reference Syncfusion® assemblies from the trial setup or from the NuGet feed, you also have to add the Syncfusion.Licensing assembly reference and include a license key in your project. Please refer to this link to know about registering the Syncfusion® license key in your application to use our components.
Step 5: Include the following namespaces in the Function1.cs file.
using System.IO;
using Microsoft.AspNetCore.Http;
using Microsoft.AspNetCore.Mvc;
using Microsoft.Azure.Functions.Worker;
using Microsoft.Extensions.Logging;
using Syncfusion.Presentation;
Step 6: Add the following complete Run method to the Function1 class to open the existing PowerPoint Presentation, modify a shape on the first slide, and return the modified Presentation in the HTTP response. The function uses an HTTP trigger with AuthorizationLevel.Function; the client posts a Template.pptx (any sample PowerPoint file) in the request body. The Presentation.Open(Stream) / Save(Stream) overloads are used because the function has no local file path; the path-based overloads (Presentation.Open("File.pptx"), presentation.Save("File.pptx")) are not applicable in this serverless scenario.
[Function("Function1")]
public async Task<IActionResult> Run([HttpTrigger(AuthorizationLevel.Function, "post")] HttpRequest req)
{
    try
    {
        // Register the Syncfusion license key (only required once per app domain).
        Syncfusion.Licensing.SyncfusionLicenseProvider.RegisterLicense("YOUR_LICENSE_KEY");

        // Create a memory stream to hold the incoming request body (PowerPoint Presentation bytes)
        await using MemoryStream inputStream = new MemoryStream();
        // Copy the request body into the memory stream
        await req.Body.CopyToAsync(inputStream);
        // Check if the stream is empty (no file content received)
        if (inputStream.Length == 0)
            return new BadRequestObjectResult("No file content received in request body.");
        // Reset stream position to the beginning for reading
        inputStream.Position = 0;
        // Load the PowerPoint Presentation from the stream
        using IPresentation pptxDoc = Presentation.Open(inputStream);
        // Get the first slide from the PowerPoint presentation
        ISlide slide = pptxDoc.Slides[0];
        // Get the first shape of the slide (with null-checks for shapes that have no text body)
        IShape shape = slide.Shapes[0];
        if (shape != null && shape.TextBody != null && shape.TextBody.Text == "Company History")
        {
            // Change the text of the shape
            shape.TextBody.Text = "Company Profile";
        }
        // Save the modified PowerPoint Presentation to a memory stream
        using MemoryStream memoryStream = new MemoryStream();
        pptxDoc.Save(memoryStream);
        memoryStream.Position = 0;
        return new FileContentResult(memoryStream.ToArray(), "application/vnd.openxmlformats-officedocument.presentationml.presentation")
        {
            FileDownloadName = "presentation.pptx"
        };
    }
    catch (Exception ex)
    {
        // Log the error with details for troubleshooting
        _logger.LogError(ex, "Error opening and saving PowerPoint Presentation.");
        // Return a 500 Internal Server Error response (do not leak the full exception to the client)
        return new ContentResult
        {
            StatusCode = 500,
            Content = $"An error occurred while processing the request: {ex.Message}",
            ContentType = "text/plain; charset=utf-8"
        };
    }
}
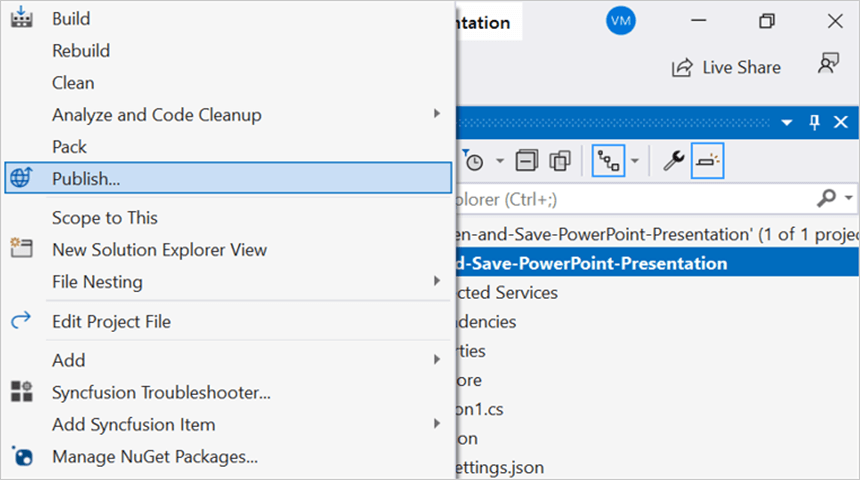
Step 7: Right-click the project and select Publish. Then, create a new profile in the Publish window.
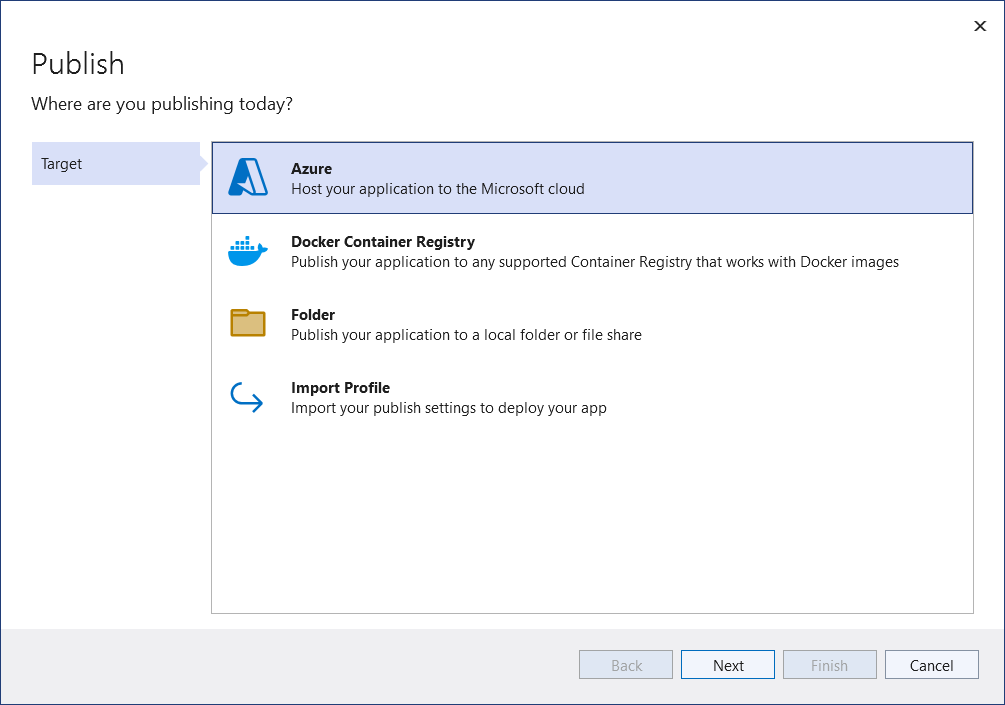
Step 8: Select the target as Azure and click the Next button.
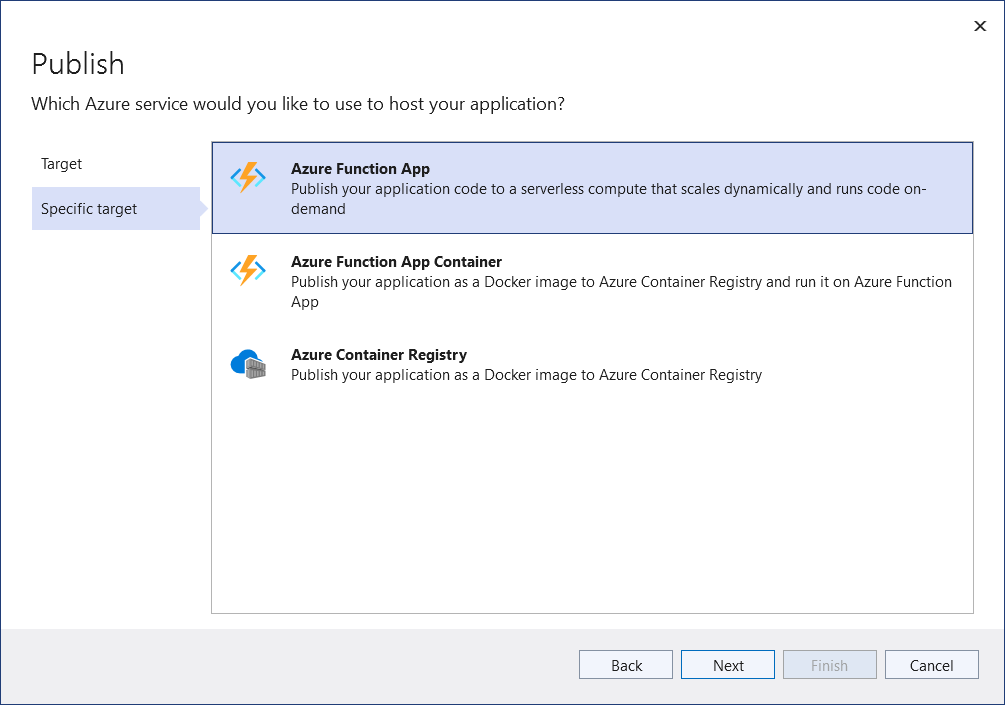
Step 9: Select the specific target as Azure Function App and click the Next button.
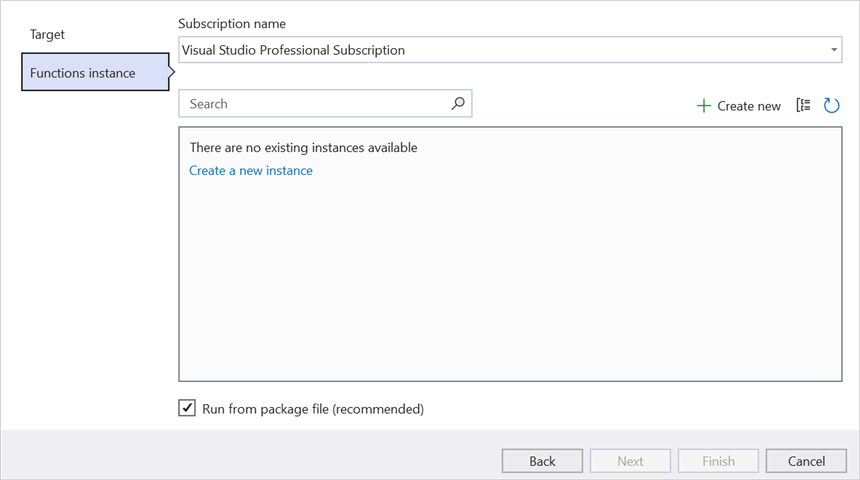
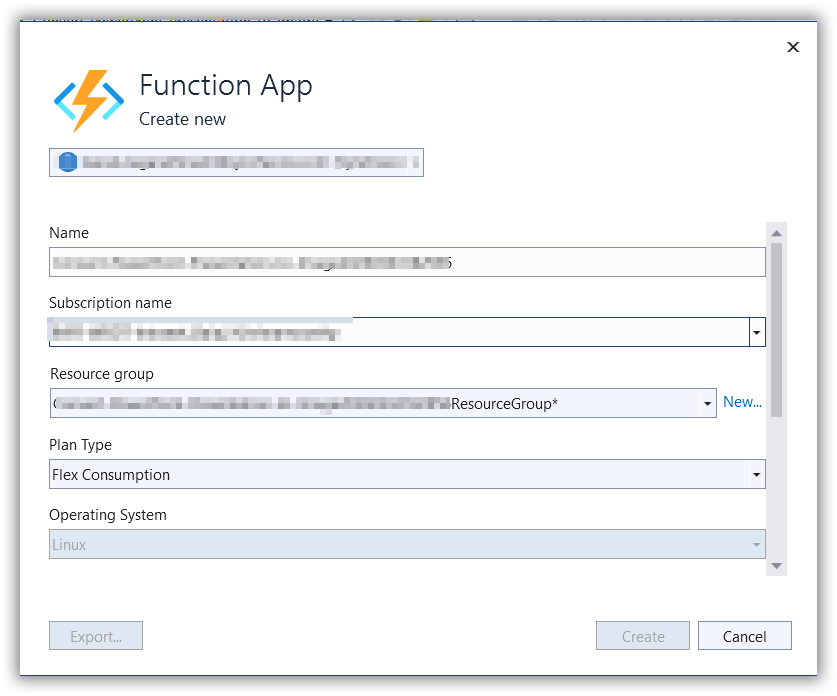
Step 10: Click the Create new button.
Step 11: Click the Create button.
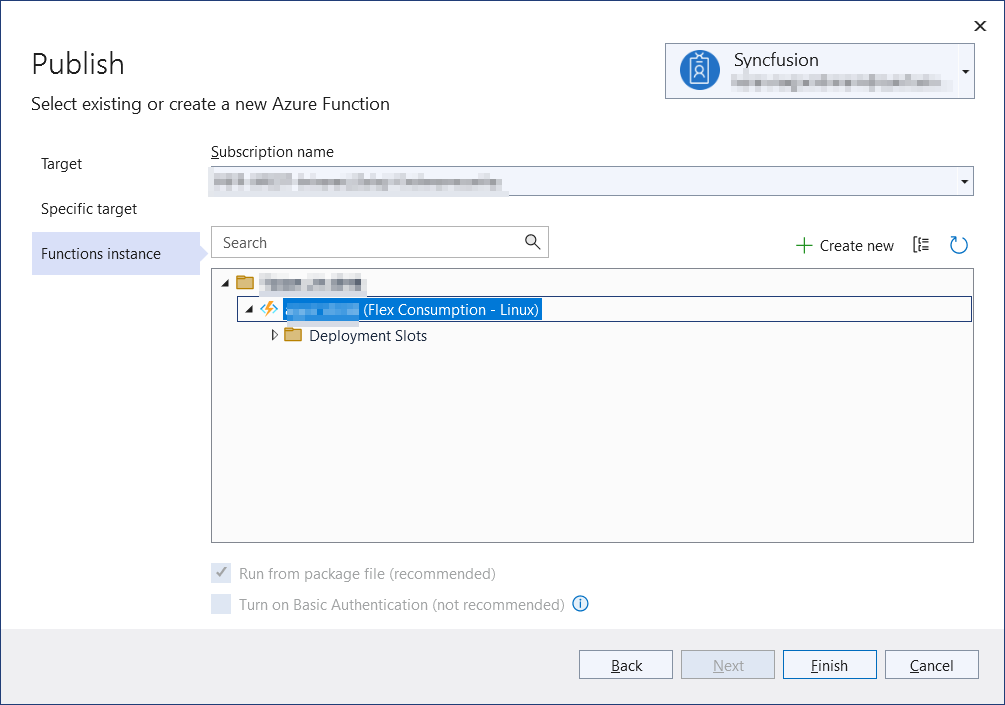
Step 12: After the Function App is created, click the Finish button.
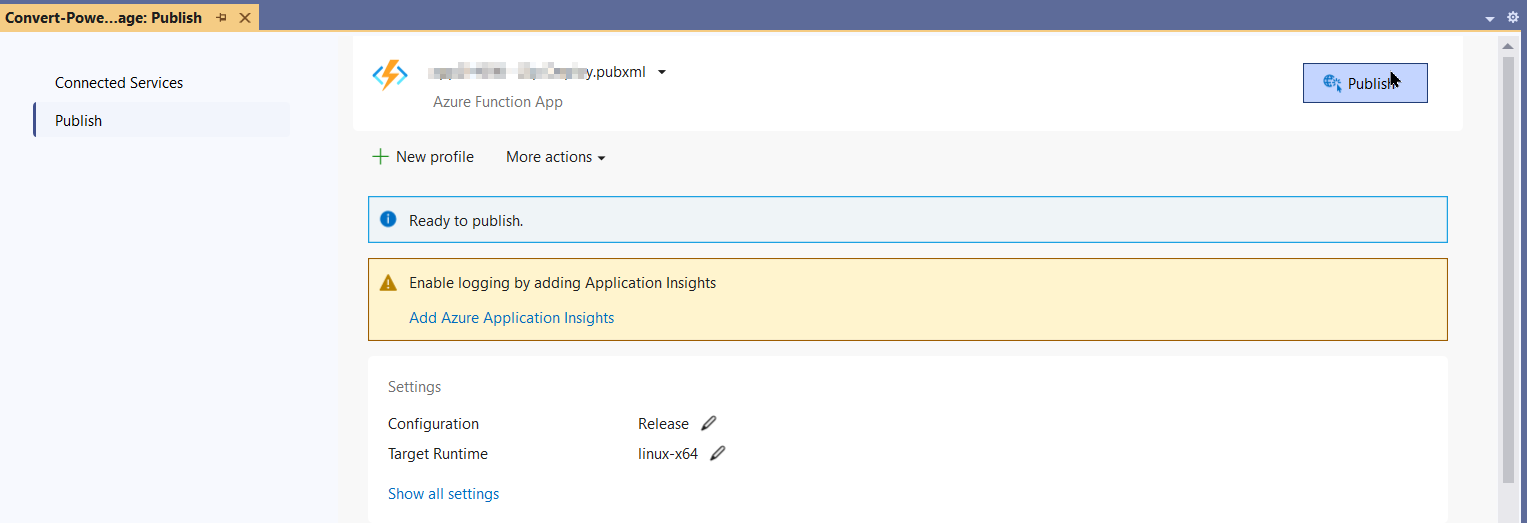
Step 13: Click the Publish button.
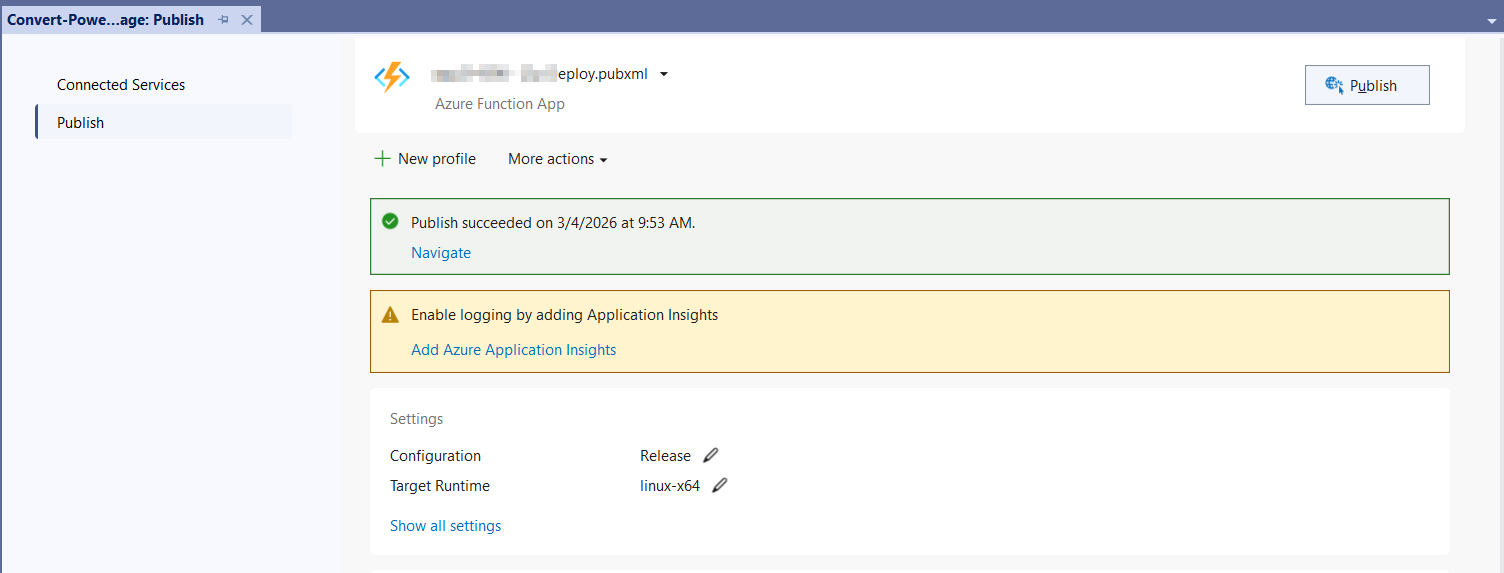
Step 14: Publishing has succeeded.
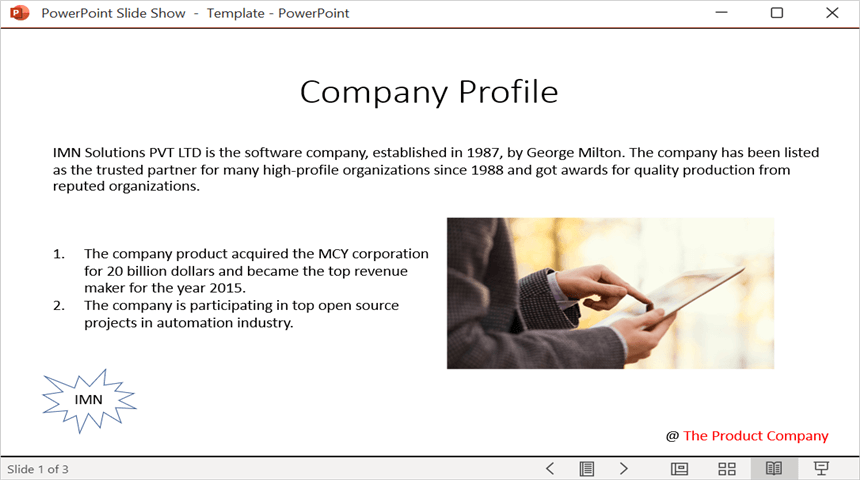
Step 15: Go to the Azure portal and select Function App. After the function is running, click Get Function URL and copy it. Then, paste the URL into the client sample in the next section (which will request the Azure Function to open and save a PowerPoint Presentation using the template PowerPoint document). The output PowerPoint Presentation is shown below.
Steps to post the request to Azure Functions
Step 1: Create a .NET 8.0 console application to request the Azure Functions API. Add a folder named Data to the project and place a sample PowerPoint file named Input.pptx inside it.
Step 2: Add the following code snippet into the Main method to post the request to Azure Functions with the template PowerPoint document and save the returned PowerPoint Presentation to disk.
static async Task Main()
    {
        try
        {
            Console.Write("Please enter your Azure Functions URL : ");
            string url = Console.ReadLine();
            if (string.IsNullOrEmpty(url)) return;
            // Create a new HttpClient instance for sending HTTP requests
            using var http = new HttpClient();
            // Read all bytes from the input PowerPoint file
            byte[] bytes = await File.ReadAllBytesAsync(@"Data/Input.pptx");
            // Wrap the file bytes into a ByteArrayContent object for HTTP transmission
            using var content = new ByteArrayContent(bytes);
            // Set the content type header to indicate binary data
            content.Headers.ContentType = new System.Net.Http.Headers.MediaTypeHeaderValue("application/octet-stream");
            // Send a POST request to the provided Azure Functions URL with the file content
            using var res = await http.PostAsync(url, content);
            // Read the response body as a byte array
            var resBytes = await res.Content.ReadAsByteArrayAsync();
            // Extract the media type from the response headers
            string mediaType = res.Content.Headers.ContentType?.MediaType ?? string.Empty;
            // Decide the output file path the response is an image or txt
            string outputPath = mediaType.Contains("presentation", StringComparison.OrdinalIgnoreCase)
                || mediaType.Contains("powerpoint", StringComparison.OrdinalIgnoreCase)
                || mediaType.Equals("application/vnd.openxmlformats-officedocument.presentationml.presentation", StringComparison.OrdinalIgnoreCase)
                ? Path.GetFullPath(@"../../../Output/Output.pptx")
                : Path.GetFullPath(@"../../../function-error.txt");
            // Write the response bytes to the output file
            await File.WriteAllBytesAsync(outputPath, resBytes);
            Console.WriteLine($"Saved: {outputPath}");
        }
        catch (Exception ex)
        {
            // Log the error so callers can diagnose failures without crashing the process
            Console.Error.WriteLine($"Error posting request to Azure Functions: {ex.Message}");
        }
    }
From GitHub, you can download the console application and Azure Functions Flex Consumption.
Looking for the full .NET PowerPoint Library component overview, features, pricing, and documentation? Visit the .NET PowerPoint Library page.