Open and save Presentation in ASP.NET Core Web API
3 Aug 20267 minutes to read
Prerequisites
- Visual Studio 2022 or later with the ASP.NET and web development workload installed.
- .NET SDK 8.0 or later.
Syncfusion® PowerPoint is a .NET PowerPoint library used to create, read, and edit a PowerPoint Presentation programmatically without Microsoft PowerPoint or interop dependencies. Using this library, you can open and save a PowerPoint Presentation in ASP.NET Core Web API.
Steps to open and save a Presentation programmatically
The steps below illustrate how to open and save a simple PowerPoint Presentation in ASP.NET Core Web API.
Server (Web API project)
Step 1: Create a new C# ASP.NET Core Web API project. Select the ASP.NET Core Web API template, choose C#, and pick a target framework of .NET 8.0 or later.
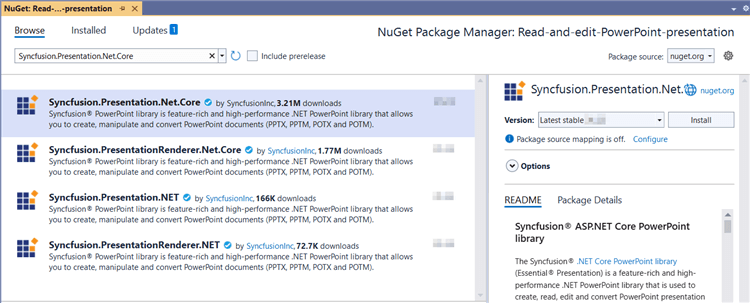
Step 2: Install the Syncfusion.Presentation.Net.Core NuGet package as a reference to your project from NuGet.org.
Starting with v16.2.0.x, if you reference Syncfusion® assemblies from trial setup or from the NuGet feed, you also have to add “Syncfusion.Licensing” assembly reference and include a license key in your projects. Please refer to this link to know about registering Syncfusion® license key in your application to use our components.
Step 3: Add a new empty API controller to the project. Right-click the Controllers folder → Add → Controller → API Controller - Empty, and name it ValuesController (the file name and class name must end with Controller).
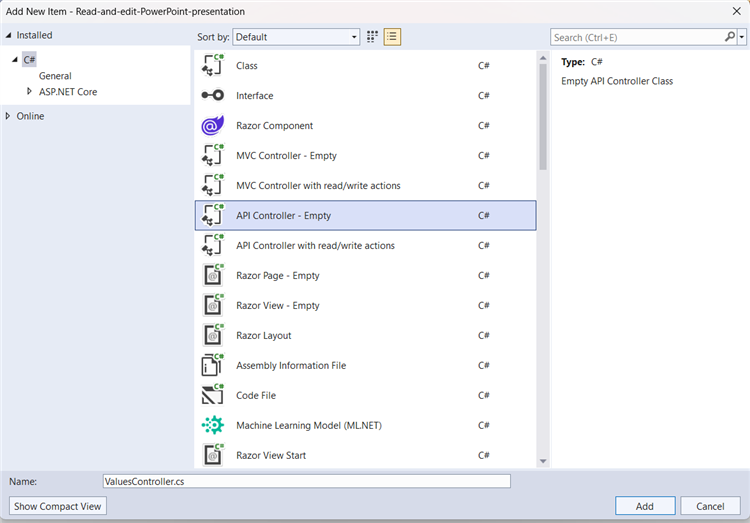
Step 4: Include the following namespaces in the ValuesController.cs file.
using System;
using System.IO;
using Microsoft.AspNetCore.Mvc;
using Syncfusion.Presentation;
Step 5: Add a new action method DownloadPresentation in ValuesController.cs and include the below code snippet to open and save a PowerPoint Presentation and download it.
[HttpGet]
[Route("api/PowerPoint")]
public IActionResult DownloadPresentation()
{
    try
    {
        var fileDownloadName = "Output.pptx";
        const string contentType = "application/vnd.openxmlformats-officedocument.presentationml.presentation";
        var stream = OpenAndSavePresentation();
        stream.Position = 0;
        return File(stream, contentType, fileDownloadName);
    }
    catch (Exception ex)
    {
        return BadRequest("Error occurred while creating PowerPoint file: " + ex.Message);
    }
}
Step 6: Implement the OpenAndSavePresentation method in ValuesController.cs.
public static MemoryStream OpenAndSavePresentation()
{
    // Open an existing PowerPoint Presentation. The path is relative to the application's working directory.
    IPresentation pptxDoc = Presentation.Open(Path.GetFullPath(@"Data/Template.pptx"));
    // Get the first slide from the PowerPoint Presentation.
    ISlide slide = pptxDoc.Slides[0];
    // Get the first shape of the slide.
    IShape shape = slide.Shapes[0];
    // Change the text of the shape (guarded for shapes without a text body).
    if (shape?.TextBody != null && shape.TextBody.Text == "Company History")
        shape.TextBody.Text = "Company Profile";
    // Save the PowerPoint Presentation to a stream.
    MemoryStream stream = new MemoryStream();
    pptxDoc.Save(stream);
    // Release Presentation resources.
    pptxDoc.Close();
    stream.Position = 0;
    return stream;
}
File()returns the stream to the response pipeline without disposing it, so the stream is correctly written to the client. Do not wrap the returnedMemoryStreamin ausingblock in the controller.
Step 7: Build the project.
Click on Build → Build Solution or press Ctrl+Shift+B to build the project.
Step 8: Run the project.
Click the Start button (green arrow) or press F5 to run the app. Note the port printed in the launch console (for example, https://localhost:7055) — you will need it in the client step below.
A complete working sample is available on GitHub.
Steps for accessing the Web API using HTTP requests
The following steps show how to call the Web API from a separate console application and save the returned Presentation to disk.
Step 1: Create a new C# console application targeting .NET 8.0 or later (required for top-level statements with await).
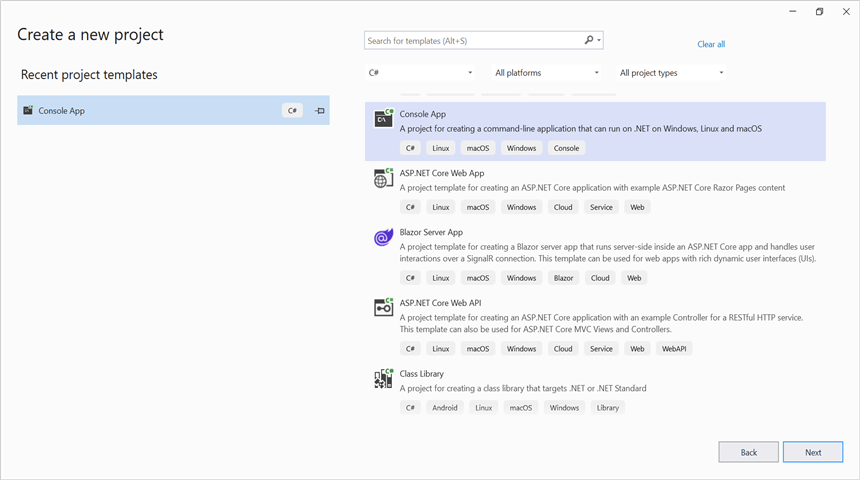
Ensure your ASP.NET Core Web API is running on the specified port before running this client. Adjust the port number if your Web API runs on a different port (check the ASP.NET Core app’s launchSettings.json).
Step 2: Add the below code snippet in the Program.cs file for accessing the Web API using HTTP requests.
This method sends a GET request to the Web API endpoint to retrieve and save the generated PowerPoint Presentation.
using System;
using System.IO;
using System.Net.Http;
using System.Threading.Tasks;

// Create an HttpClient instance
using (HttpClient client = new HttpClient())
{
    try
    {
        // Send a GET request to the Web API endpoint
        HttpResponseMessage response = await client.GetAsync("https://localhost:7055/api/Values/api/PowerPoint");
        // Check if the response is successful
        if (response.IsSuccessStatusCode)
        {
            // Read the response content as a stream
            Stream responseBody = await response.Content.ReadAsStreamAsync();
            // Ensure the Output directory exists
            Directory.CreateDirectory("../../../Output");
            using (FileStream fileStream = File.Create("../../../Output/Output.pptx"))
            {
                responseBody.CopyTo(fileStream);
            }
        }
        else
        {
            Console.WriteLine("HTTP error status code: " + response.StatusCode);
        }
    }
    catch (HttpRequestException e)
    {
        Console.WriteLine("Request exception: " + e.Message);
    }
}
Step 3: Build the project.
Click on Build → Build Solution or press Ctrl+Shift+B to build the project.
Step 4: Run the project.
Click the Start button (green arrow) or press F5 to run the console app. The Presentation is saved to Output/Output.pptx in the solution.
A complete working sample is available on GitHub.
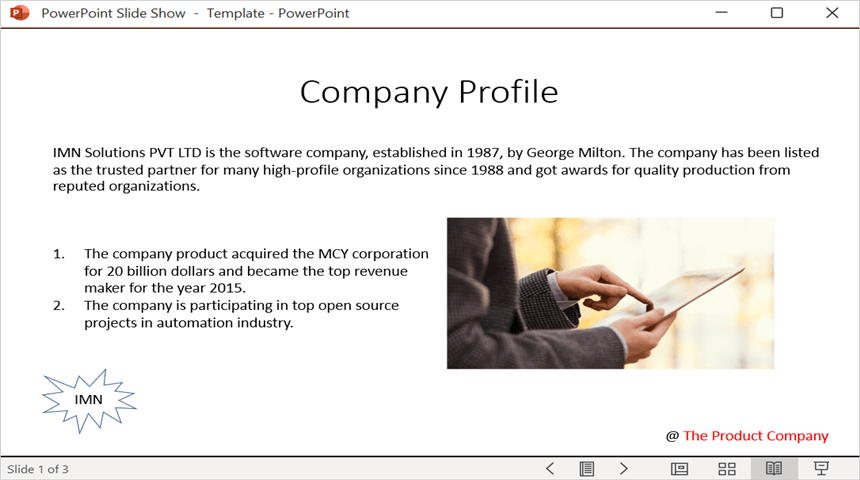
Upon executing the program, the PowerPoint Presentation will be generated as follows.
Looking for the full .NET PowerPoint Library overview, features, pricing, and documentation? Visit the .NET PowerPoint Library page.