Create Markdown document in Azure App Service on Linux
14 Aug 20268 minutes to read
Syncfusion® Markdown is a .NET Markdown library used to create, read, edit, and convert Markdown documents programmatically without external dependencies. Using this library, you can create a Markdown document in Azure App Service on Linux.
Prerequisites
- Visual Studio 2022 with the “ASP.NET and web development” workload.
- An active Azure subscription with permission to create an App Service and App Service plan.
- .NET 6.0 SDK or later.
Steps to create Markdown document in Azure App Service on Linux
Step 1: Create a new ASP.NET Core Web App (Model-View-Controller) targeting .NET 6.0 or later.
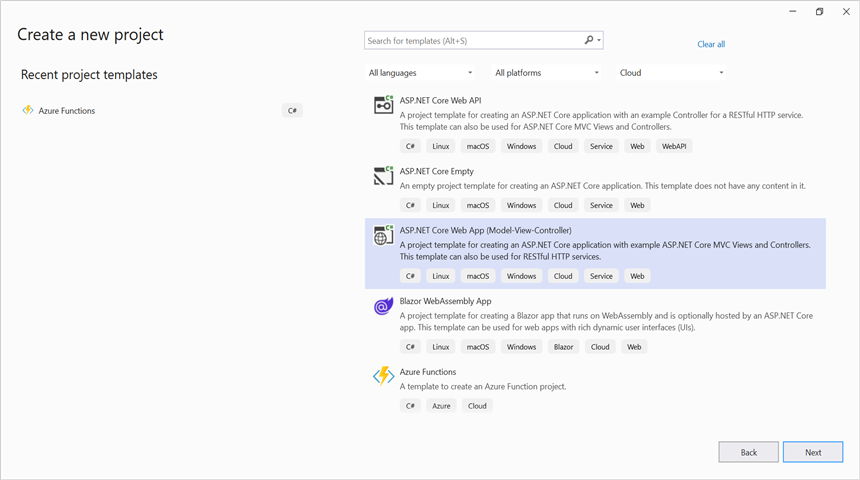
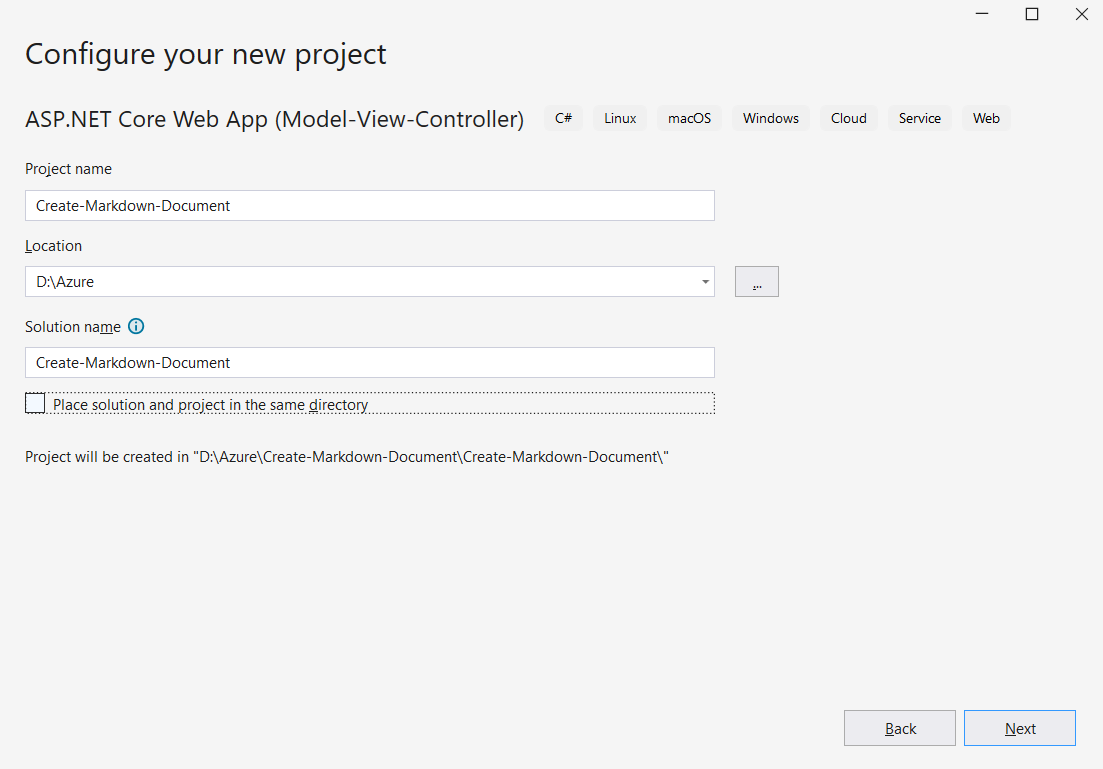
Step 2: Create a project name and select the location.
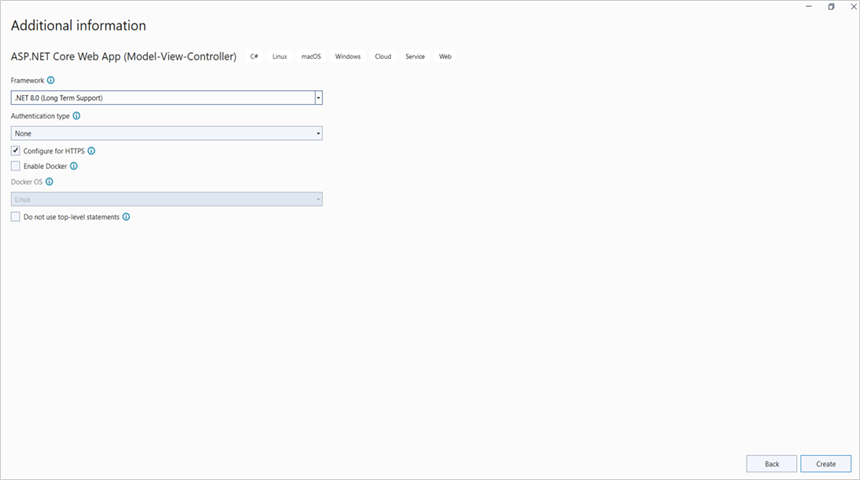
Step 3: Click the Create button.
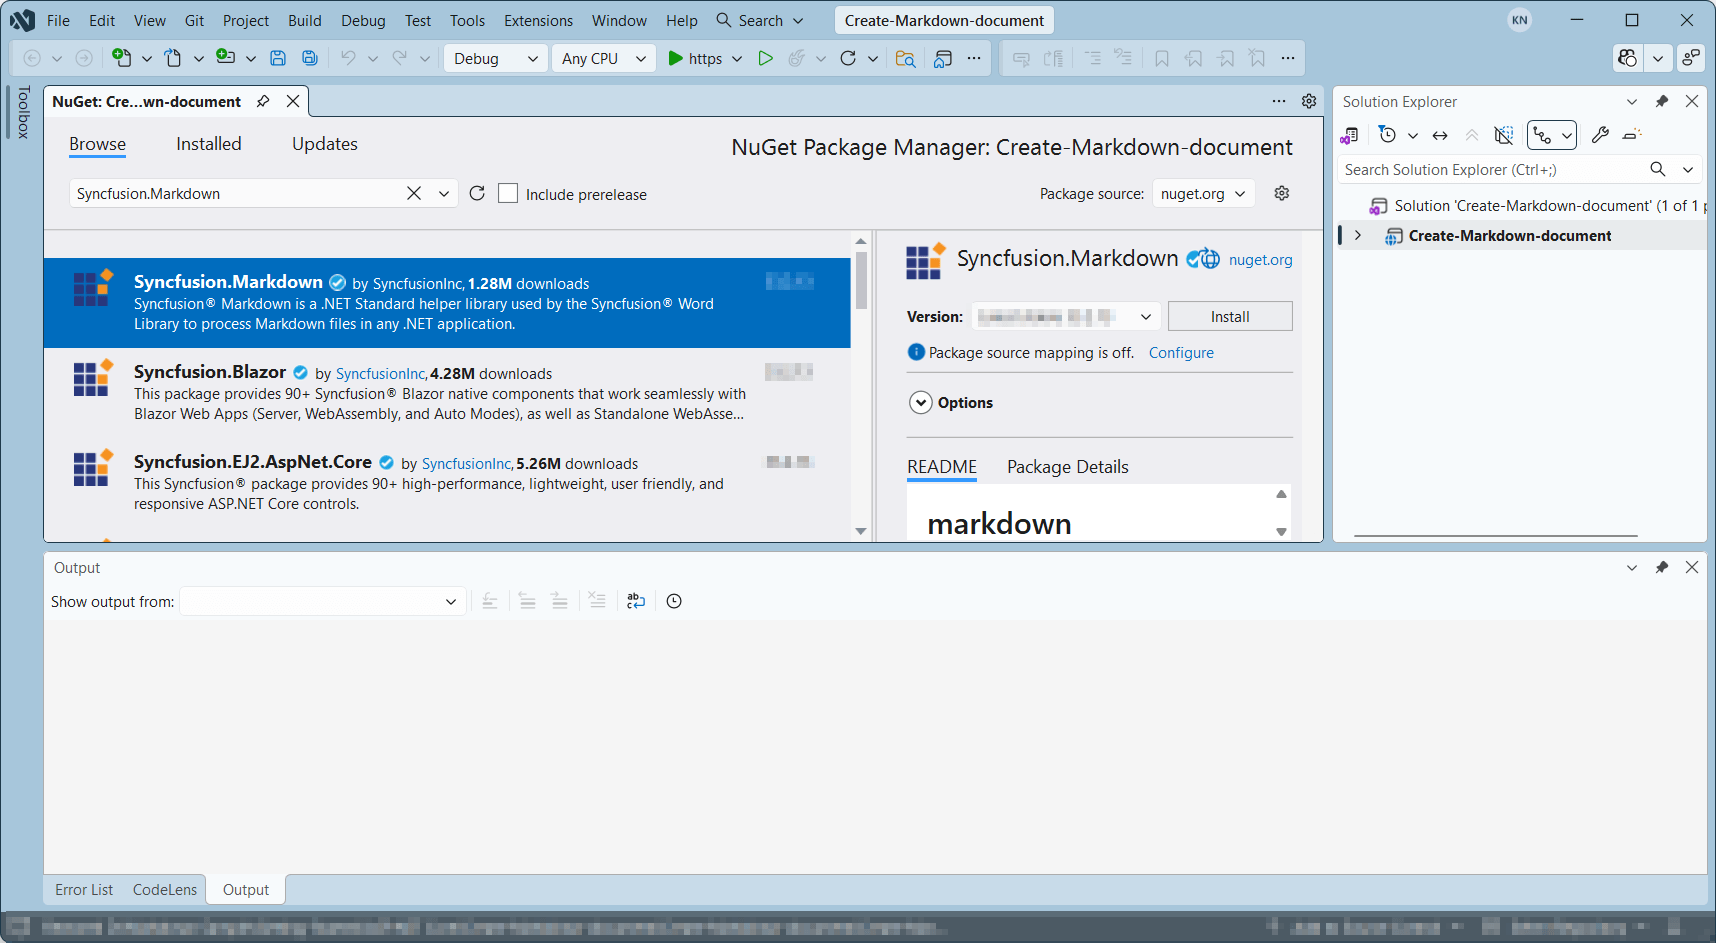
Step 4: Install the Syncfusion.Markdown NuGet package as a reference to your project from NuGet.org.
Starting with v34.x.x, if you reference Syncfusion® assemblies from the trial setup or from the NuGet feed, you must add a reference to the Syncfusion.Licensing assembly and include a valid license key in your application.
Install the Syncfusion.Licensing NuGet package and register the license key during application startup.
Syncfusion.Licensing.SyncfusionLicenseProvider.RegisterLicense("YOUR_LICENSE_KEY");For more information about generating and registering a license key, refer to the Syncfusion® licensing documentation.
Step 5: Add the image asset used by the sample. Create a Data folder under wwwroot and add the following image to it:
photo.jpg
The code in Step 8 reads this image from wwwroot/Data/ at runtime. You can obtain it from the complete working sample linked at the end of this article.
Step 6: Add a new button in the Index.cshtml as shown below.
@{
    Html.BeginForm("CreateMarkdownDocument", "Home", FormMethod.Get);
    {
        <div>
            <input type="submit" value="Create Markdown Document" style="width:200px;height:27px" />
        </div>
    }
    Html.EndForm();
}
Step 7: Include the following namespaces in the HomeController.cs file.
using System.IO;
using Microsoft.AspNetCore.Mvc;
using Syncfusion.Office.Markdown;
Step 8: Include the following code snippet in HomeController.cs to create a Markdown document.
private readonly IWebHostEnvironment _hostingEnvironment;
public HomeController(IWebHostEnvironment hostingEnvironment)
{
  _hostingEnvironment = hostingEnvironment;
}

public ActionResult CreateMarkdownDocument()
{
    // Creates a new instance of MarkdownDocument.
    MarkdownDocument markdownDocument = new MarkdownDocument();
    // Adds a heading to the Markdown document.
    MdParagraph mdHeadingParagraph = markdownDocument.AddParagraph();
    // Applies the Heading 1 style to the paragraph.
    mdHeadingParagraph.ApplyParagraphStyle("Heading 1");
    MdTextRange mdHeadingTextRange = mdHeadingParagraph.AddTextRange();
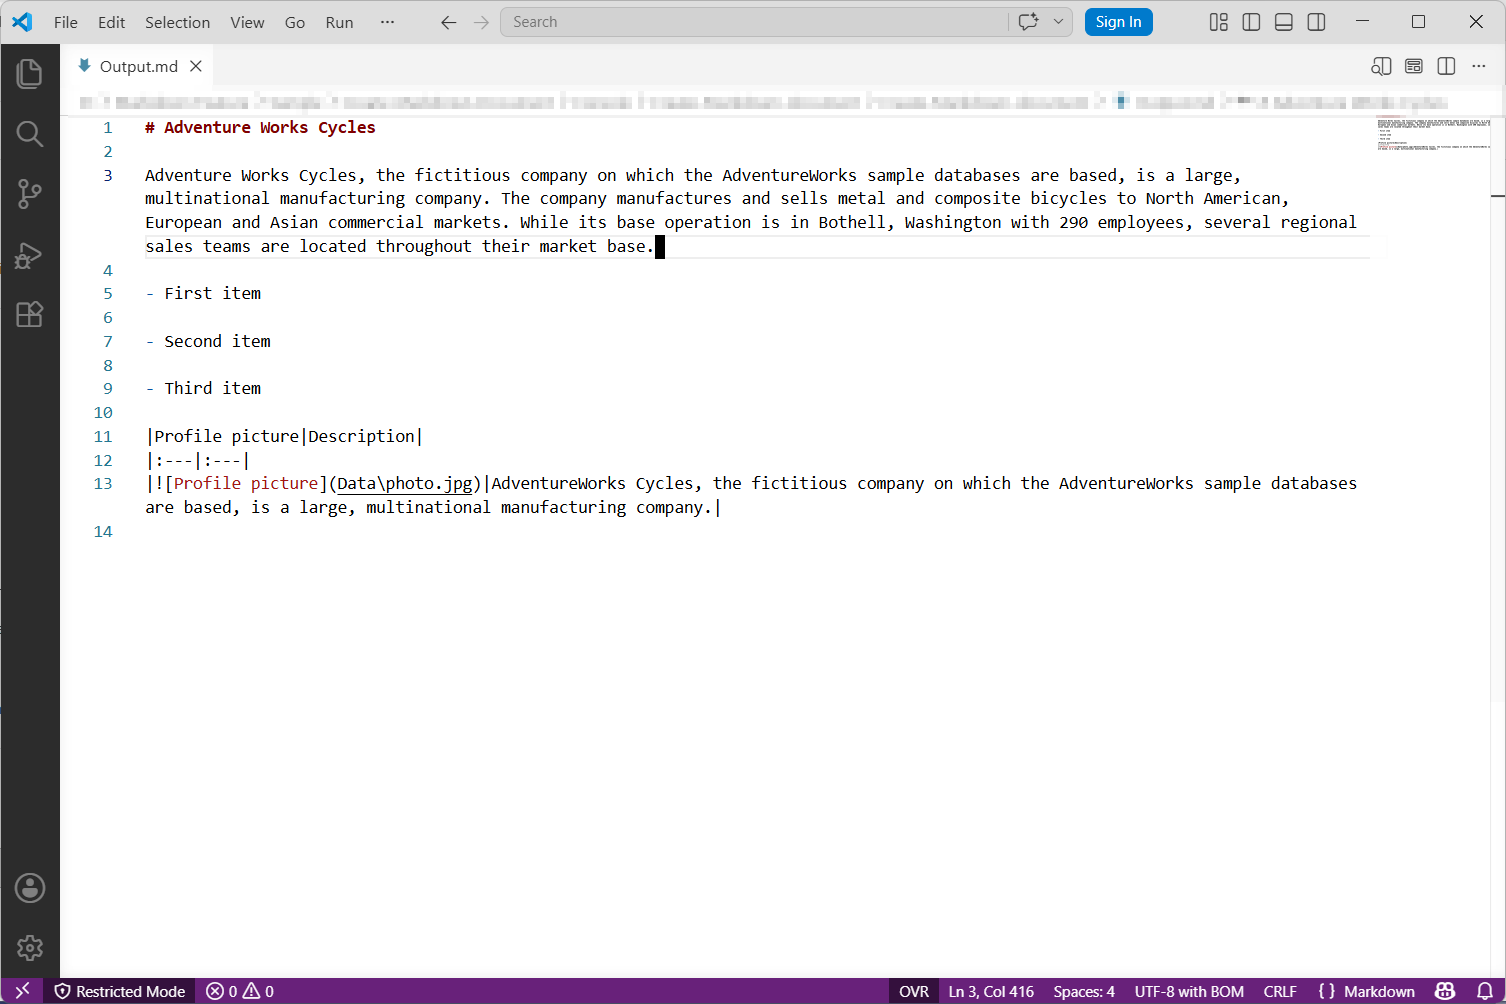
    mdHeadingTextRange.Text = "Adventure Works Cycles";
    // Adds a paragraph to the Markdown document.
    MdParagraph mdParagraph = markdownDocument.AddParagraph();
    MdTextRange mdTextRange = mdParagraph.AddTextRange();
    mdTextRange.Text = "Adventure Works Cycles, the fictitious company on which the AdventureWorks sample databases are based, is a large, multinational manufacturing company. The company manufactures and sells metal and composite bicycles to North American, European and Asian commercial markets. While its base operation is in Bothell, Washington with 290 employees, several regional sales teams are located throughout their market base.";
    // Adds the first list item.
    MdParagraph item1 = markdownDocument.AddParagraph();
    item1.ListFormat = new MdListFormat();
    item1.ListFormat.IsNumbered = false;
    item1.ListFormat.ListLevel = 0;
    item1.ListFormat.ListValue = "- ";
    item1.AddTextRange().Text = "First item";
    // Adds the second list item.
    MdParagraph item2 = markdownDocument.AddParagraph();
    item2.ListFormat = new MdListFormat();
    item2.ListFormat.IsNumbered = false;
    item2.ListFormat.ListLevel = 0;
    item2.ListFormat.ListValue = "- ";
    item2.AddTextRange().Text = "Second item";
    // Adds the third list item.
    MdParagraph item3 = markdownDocument.AddParagraph();
    item3.ListFormat = new MdListFormat();
    item3.ListFormat.IsNumbered = false;
    item3.ListFormat.ListLevel = 0;
    item3.ListFormat.ListValue = "- ";
    item3.AddTextRange().Text = "Third item";
    // Adds a table to the Markdown document.
    MdTable table = markdownDocument.AddTable();
    table.ColumnAlignments.Add(MdColumnAlignment.Left);
    table.ColumnAlignments.Add(MdColumnAlignment.Left);
    // Adds the header row.
    MdTableRow headerRow = table.AddTableRow();
    MdTableCell header1 = headerRow.AddTableCell();
    header1.Items.Add(new MdTextRange { Text = "Profile picture" });
    MdTableCell header2 = headerRow.AddTableCell();
    header2.Items.Add(new MdTextRange { Text = "Description" });
    // Adds a data row.
    MdTableRow dataRow = table.AddTableRow();
    MdTableCell cell1 = dataRow.AddTableCell();
    MdPicture picture = new MdPicture();
    picture.Url = "wwwroot\\Data\\photo.jpg";
    picture.AltText = "Profile picture";
    cell1.Items.Add(picture);
    MdTableCell cell2 = dataRow.AddTableCell();
    cell2.Items.Add(new MdTextRange { Text = "AdventureWorks Cycles, the fictitious company on which the AdventureWorks sample databases are based, is a large, multinational manufacturing company." });
    // Saves the Markdown document to MemoryStream
    MemoryStream stream = new MemoryStream();
    markdownDocument.Save(stream);
    stream.Position = 0;
    // Disposes the document.
    markdownDocument.Dispose();
    //Download Markdown document in the browser.
    return File(stream, "text/markdown", "Sample.md");
}
Step 9: Build and run the project locally (F5) to verify the Create Markdown Document button generates and downloads Sample.md before publishing.
Steps to publish to Azure App Service on Linux
An active Azure subscription, a resource group, and an App Service plan are required. You can create them during publishing if you have the necessary permissions.
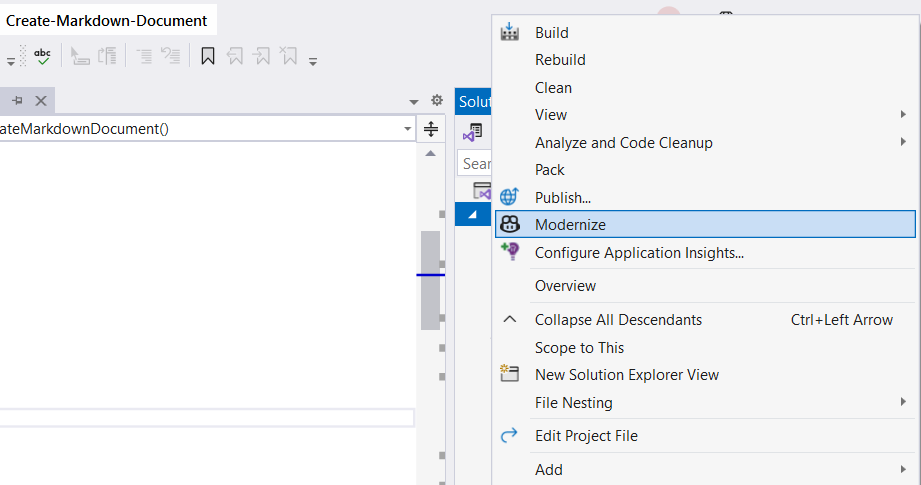
Step 1: Right-click the project and select the Publish option.
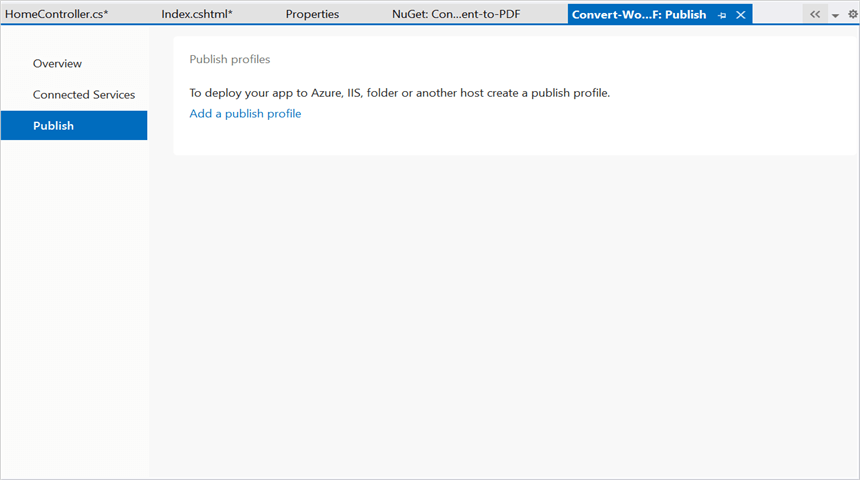
Step 2: Click the Add a Publish Profile button.
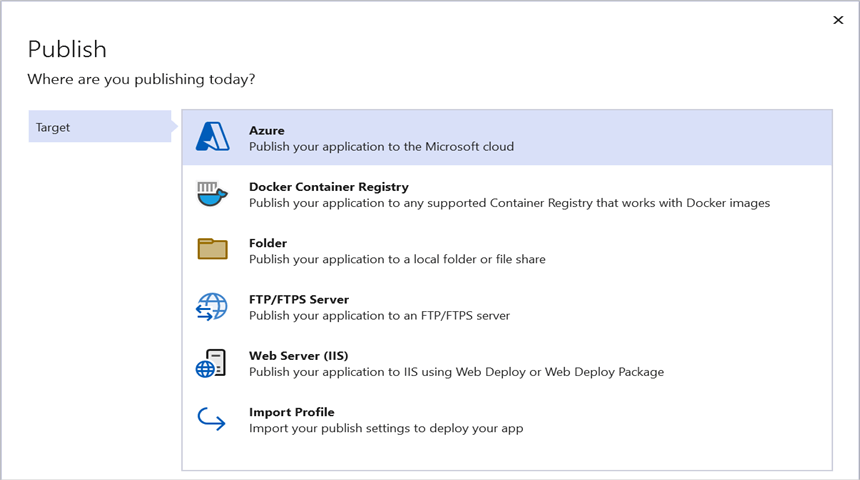
Step 3: Select the publish target as Azure.
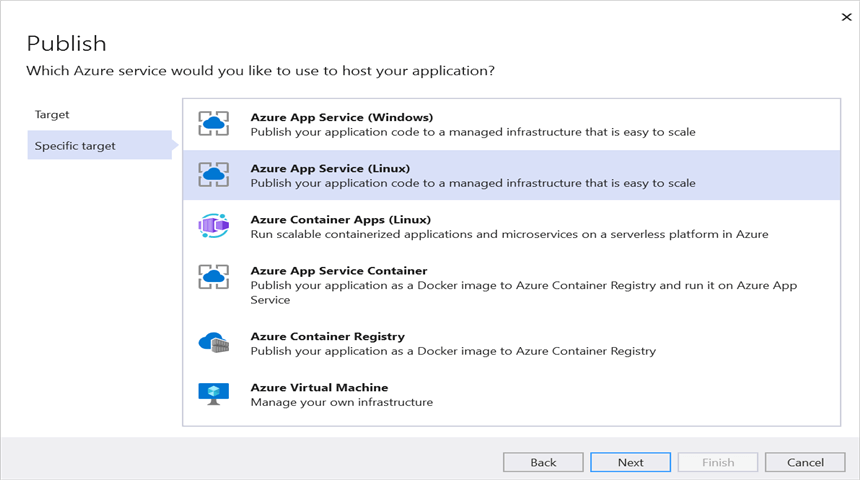
Step 4: Select the Specific target as Azure App Service (Linux).
Step 5: To create a new App Service, click the Create new option.
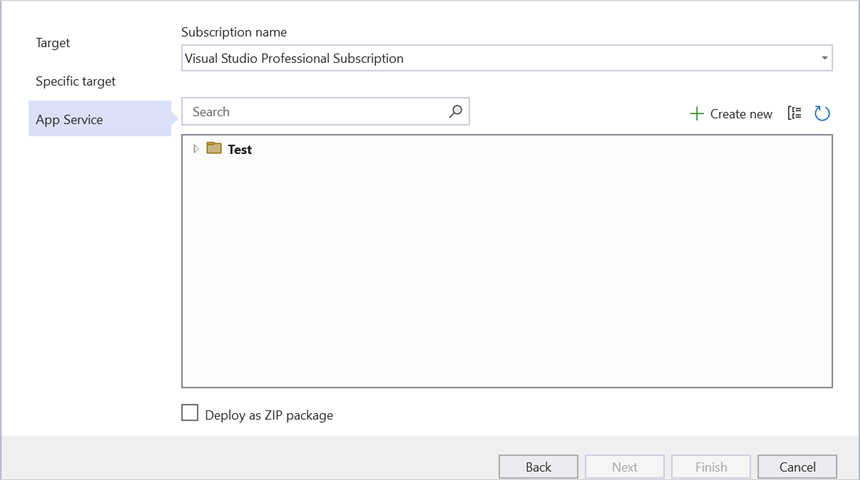
Step 6: Click the Create button to proceed with App Service creation.
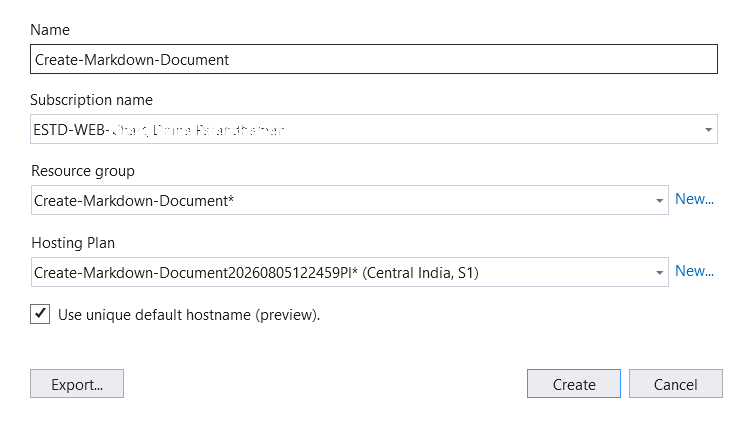
Step 7: Click the Finish button to finalize the App Service creation.
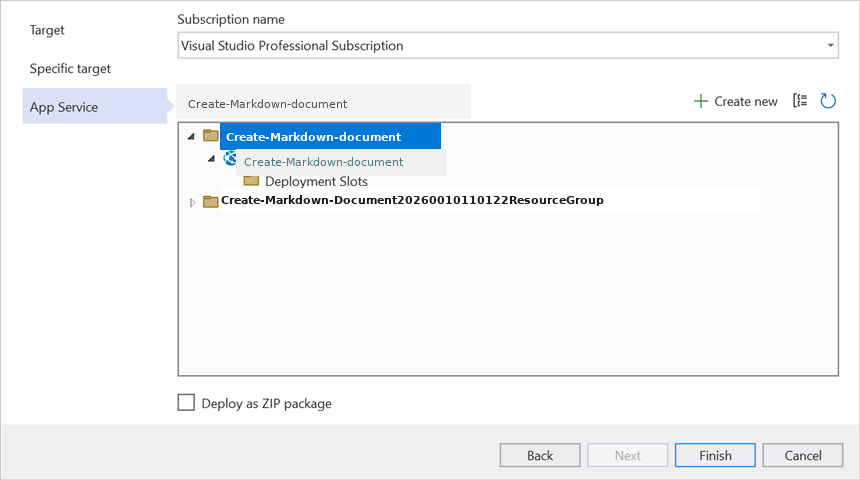
Step 8: Click the Close button.
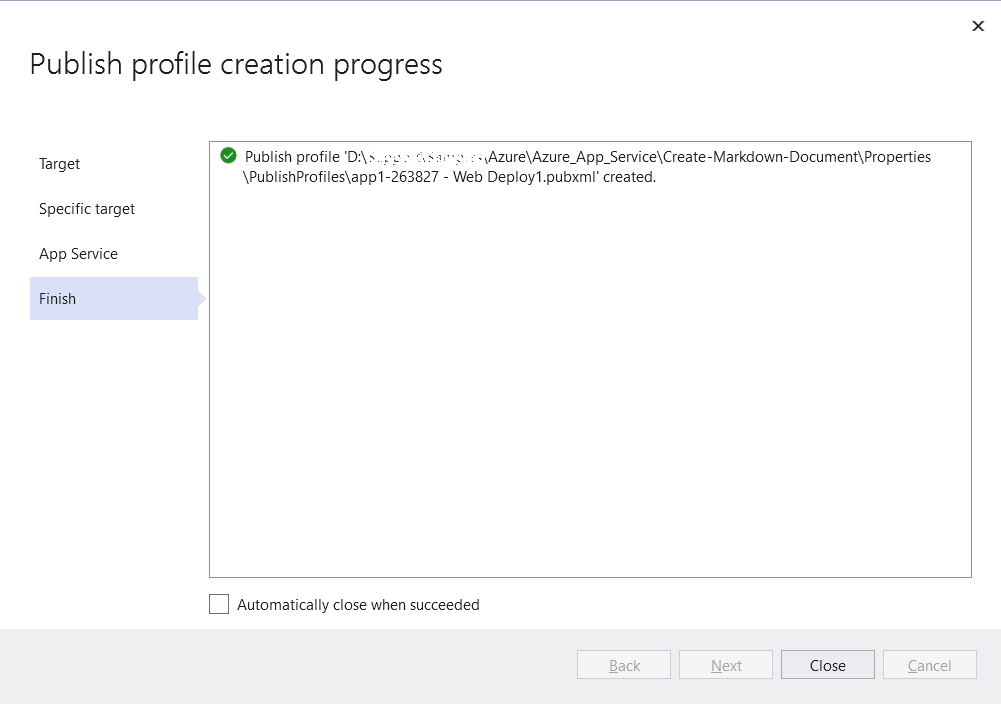
Step 9: Click the Publish button.
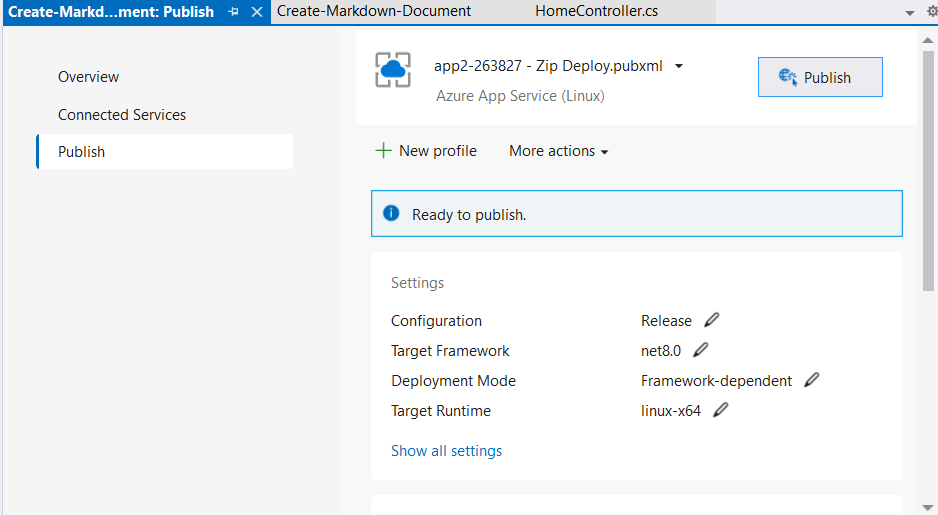
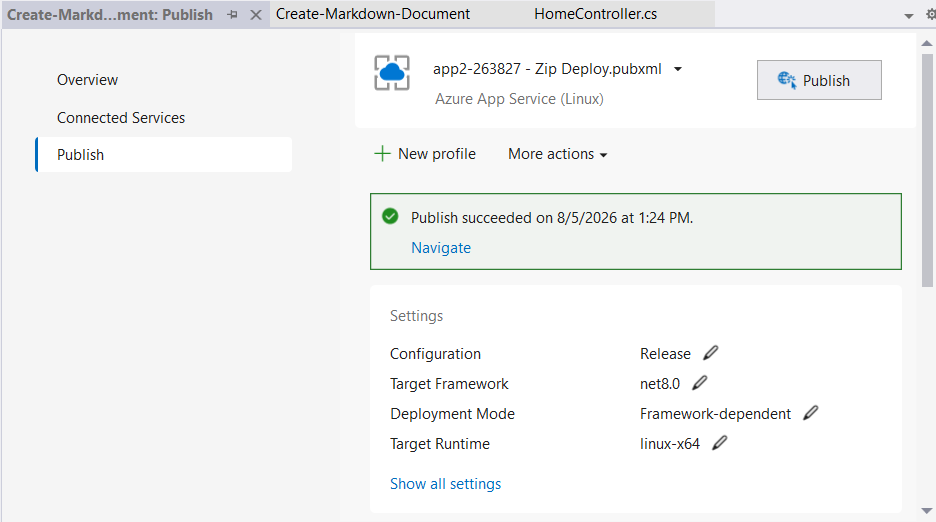
Step 10: Publishing has succeeded.
Step 11: The published webpage will open in a browser.
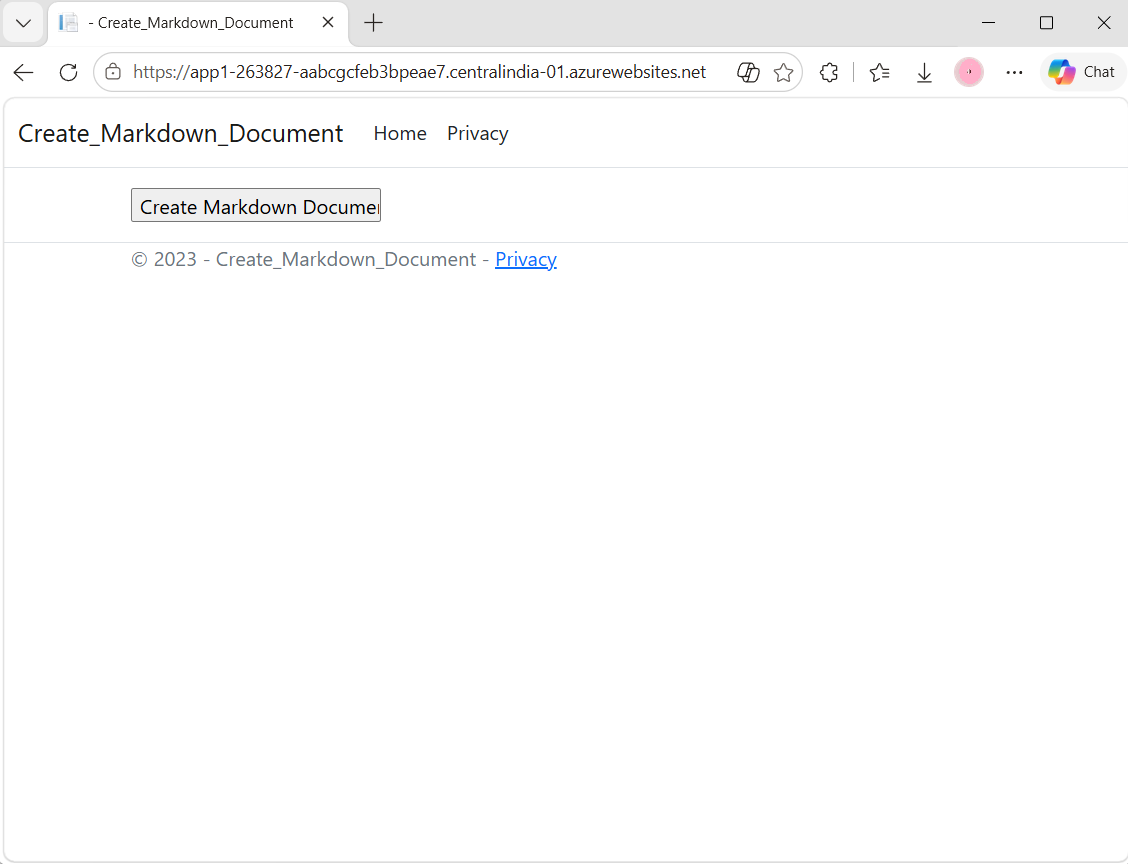
Step 12: Click the Create Markdown Document button to create a Markdown document. You will get the output Markdown document as follows:
You can download a complete working sample from GitHub.
The code sample references an image file (
photo.jpg). Download this asset from the GitHub sample Assets folder and place it in the application’swwwroot/Datafolder so theMdPicture.Urlvalue ("wwwroot/Data/photo.jpg") resolves correctly at runtime.
Looking for the full .NET Markdown Library overview, features, pricing, and documentation? Visit the .NET Markdown Library page.