Loading and Saving Files in Azure Windows
14 Aug 20268 minutes to read
.NET Excel Library for ASP.NET Core platform can be used to create, read, and edit Excel files in Azure App Service on Windows.
Prerequisites
- An active Azure subscription with permission to create App Services.
- Visual Studio 2022 (17.0 or later) with the ASP.NET and web development workload installed.
- Install the Syncfusion.XlsIO.Net.Core NuGet package in your project.
- Register your Syncfusion® license key in your project. Refer to the licensing overview for details.
- A sample input file (for example,
Data/InputTemplate.xlsx) added to the project and configured with Build Action: Content and Copy to Output Directory: Copy if newer so the file is deployed to Azure.
Steps to Load and Save an Excel document in Azure App Service on Windows
The steps below illustrate how to load and save a simple Invoice-formatted Excel document in Azure App Service on Windows.
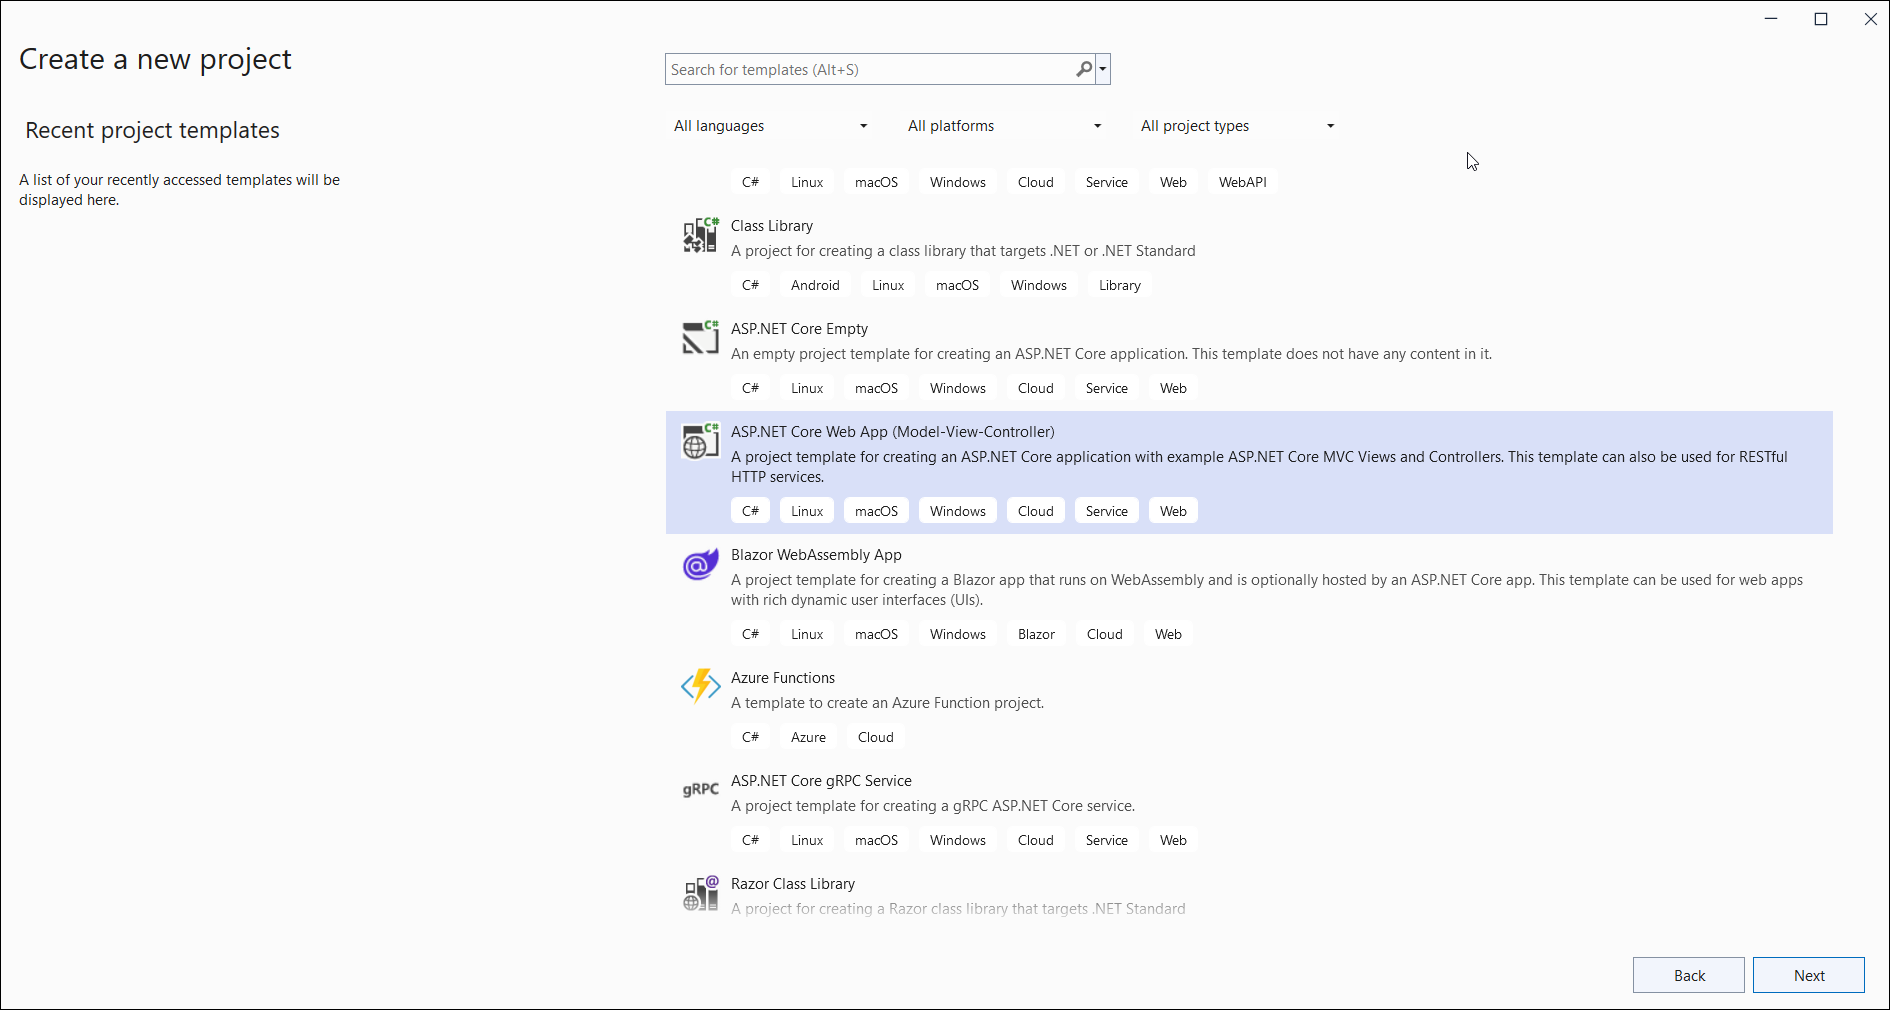
Step 1: Create a new ASP.NET Core Web Application (Model-View-Controller).
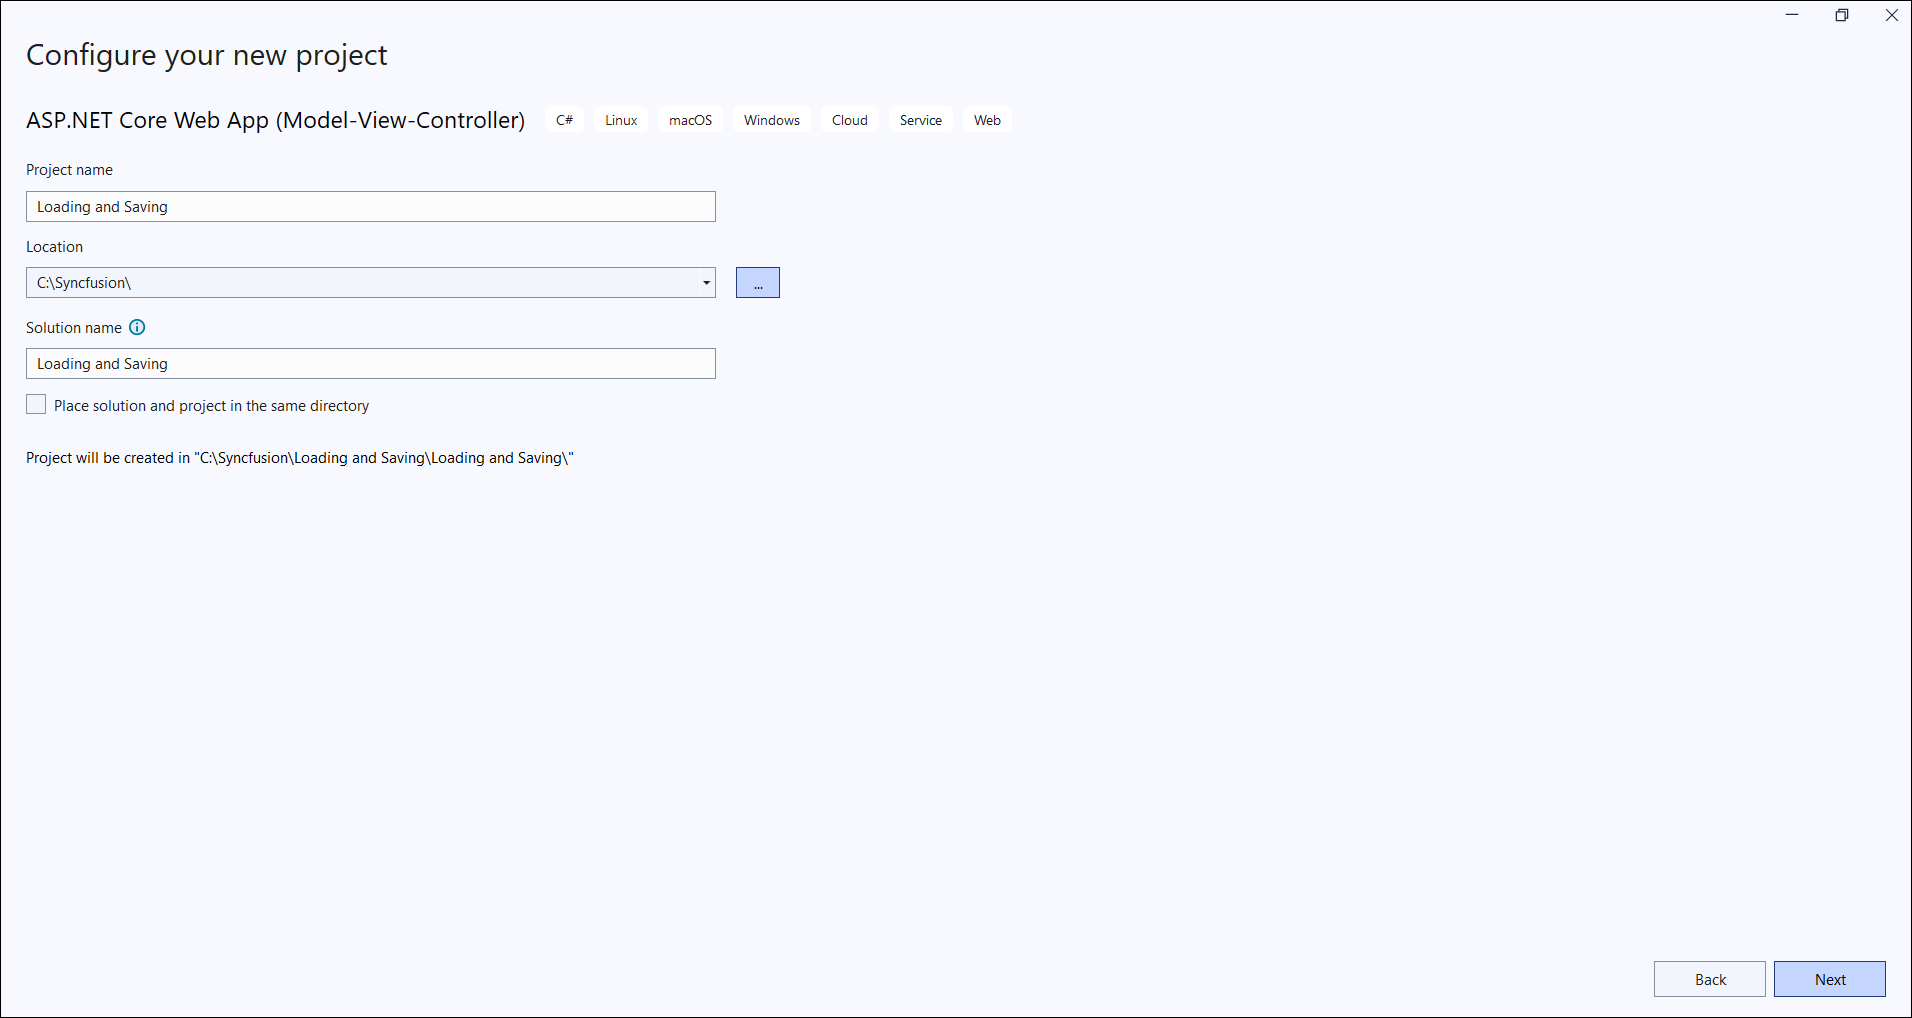
Step 2: Name the project.
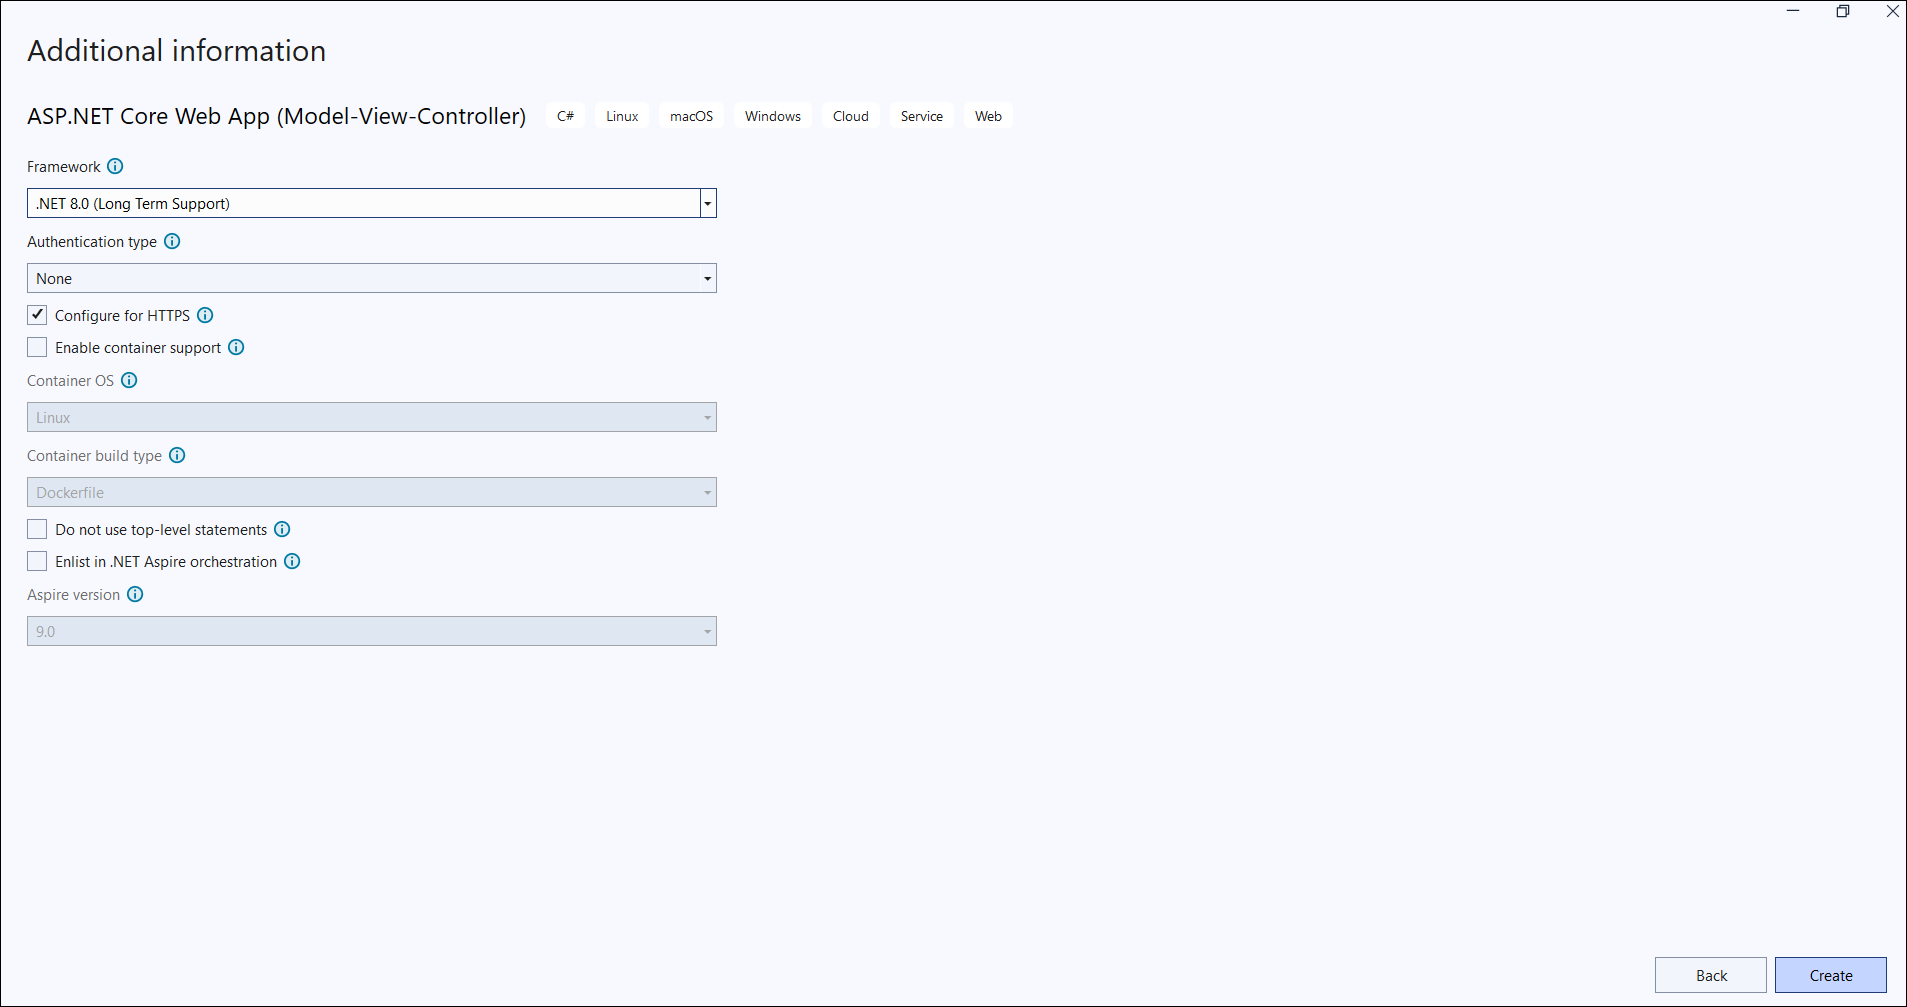
Step 3: Select the framework and click Create button.
Step 4: Install the Syncfusion.XlsIO.Net.Core NuGet package as a reference to your ASP.NET Core application from NuGet.org.
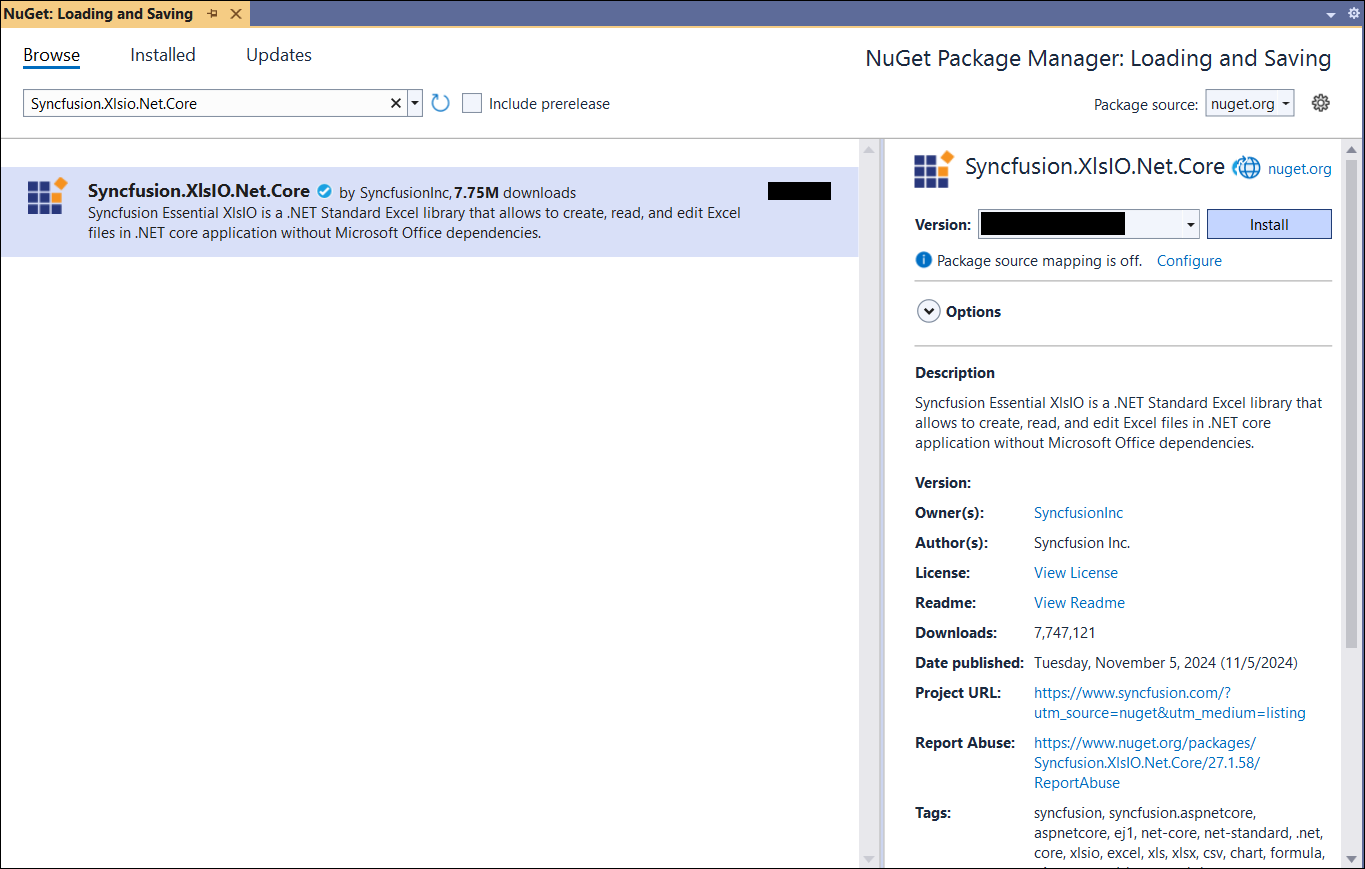
Starting with v16.2.0.x, if you reference Syncfusion® assemblies from trial setup or from the NuGet feed, you also have to add the “Syncfusion.Licensing” assembly reference and include a license key in your projects. Please refer to this link to know about registering the Syncfusion® license key in your applications to use our components.
Step 5: Include the following namespaces in HomeController.cs.
using Syncfusion.XlsIO;Imports Syncfusion.XlsIOStep 6: Add a new button in the Index.cshtml as shown below.
@{
    Html.BeginForm("LoadingandSaving", "Home", FormMethod.Get);
    {
        <div>
            <br>
            <input type="submit" value="Loading and Saving Document" style="width:230px;height:27px" />
        </div>
    }
    Html.EndForm();
}@Code
Html.BeginForm("LoadingandSaving", "Home", FormMethod.Get)
End Code
<div>
<br />
<input type="submit" value="Loading and Saving Document" style="width:230px;height:27px" />
</div>
@Code
Html.EndForm()
End CodeStep 7: Include the following code snippet in HomeController.cs to load and save an Excel file and download it.
public ActionResult LoadingandSaving()
{
    // Create an instance of ExcelEngine
    using (ExcelEngine excelEngine = new ExcelEngine())
    {
        IApplication application = excelEngine.Excel;
        application.DefaultVersion = ExcelVersion.Xlsx;

        // Load an existing Excel document
        IWorkbook workbook = application.Workbooks.Open("Data/InputTemplate.xlsx");

        // Access first worksheet from the workbook
        IWorksheet worksheet = workbook.Worksheets[0];

        // Set text in cell A3
        worksheet.Range["A3"].Text = "Hello World";

        // Save the Excel to a MemoryStream
        using (MemoryStream outputStream = new MemoryStream())
        {
            workbook.SaveAs(outputStream);
            outputStream.Position = 0;

            // Download the Excel document in the browser
            return File(outputStream, "application/msexcel", "Output.xlsx");
        }
    }
}
public ActionResult LoadingandSaving()
{
//Create an instance of ExcelEngine
using (ExcelEngine excelEngine = new ExcelEngine())
{
IApplication application = excelEngine.Excel;
application.DefaultVersion = ExcelVersion.Xlsx;
//Load an existing Excel document
IWorkbook workbook = application.Workbooks.Open("Data/InputTemplate.xlsx");
//Access first worksheet from the workbook.
IWorksheet worksheet = workbook.Worksheets[0];
//Set Text in cell A3.
worksheet.Range["A3"].Text = "Hello World";
//Save the Excel to MemoryStream
MemoryStream outputStream = new MemoryStream();
workbook.SaveAs(outputStream);
//Set the position
outputStream.Position = 0;
//Download the Excel document in the browser.
return File(outputStream, "application/msexcel", "Output.xlsx");
}
}Public Function LoadingandSaving() As ActionResult
' Create an instance of ExcelEngine
Using excelEngine As New ExcelEngine()
Dim application As IApplication = excelEngine.Excel
application.DefaultVersion = ExcelVersion.Xlsx
' Load an existing Excel document
Dim inputStream As New FileStream(Server.MapPath("~/Data/InputTemplate.xlsx"), FileMode.Open, FileAccess.Read)
Dim workbook As IWorkbook = application.Workbooks.Open(inputStream)
' Access first worksheet
Dim worksheet As IWorksheet = workbook.Worksheets(0)
' Set text in cell A3
worksheet.Range("A3").Text = "Hello World"
' Save to a memory stream
Using outputStream As New MemoryStream()
workbook.SaveAs(outputStream)
outputStream.Position = 0
' Download the Excel document
Return File(outputStream, "application/msexcel", "Output.xlsx")
End Using
End Using
End FunctionSteps to publish as Azure App Service on Windows
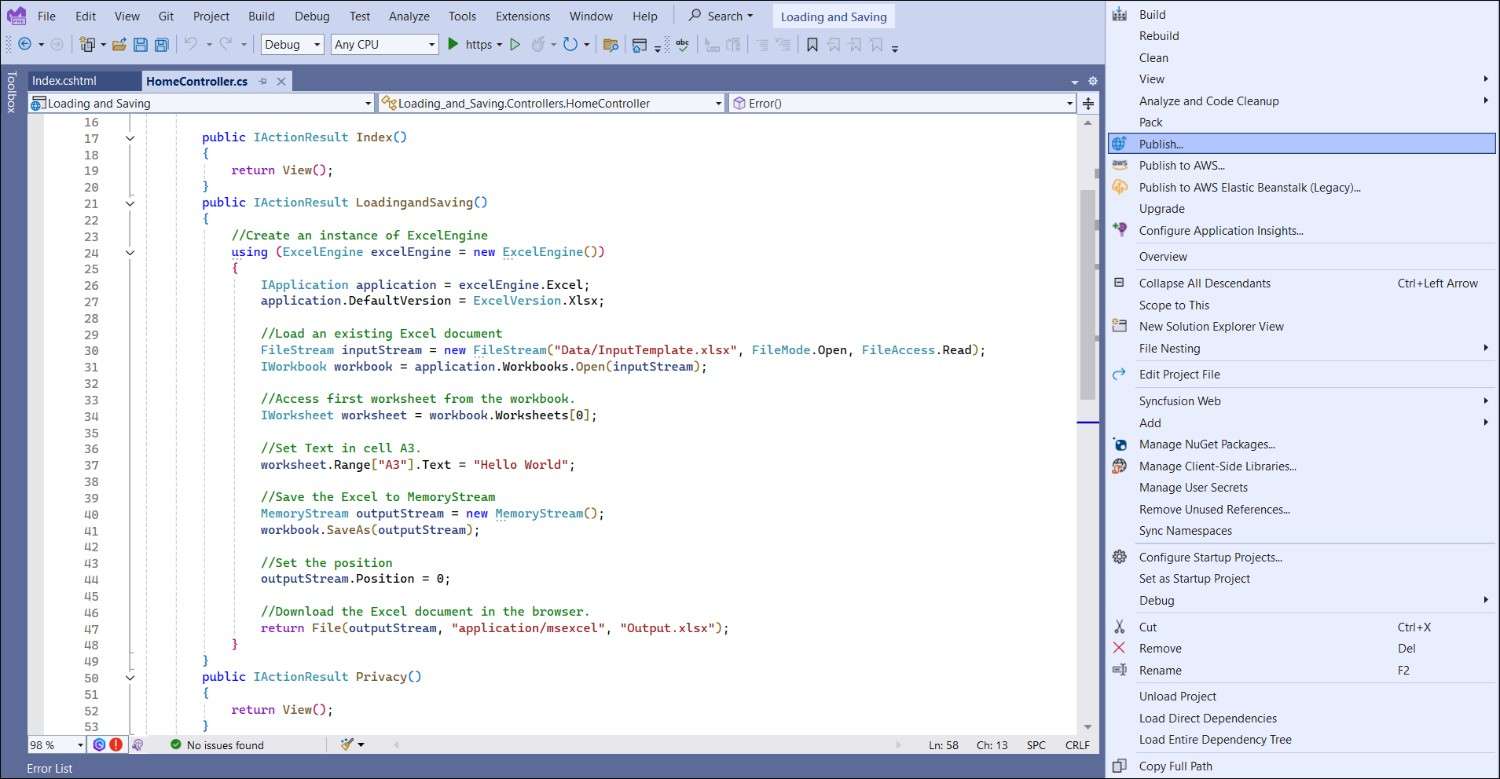
Step 1: Right-click the project and select Publish option.
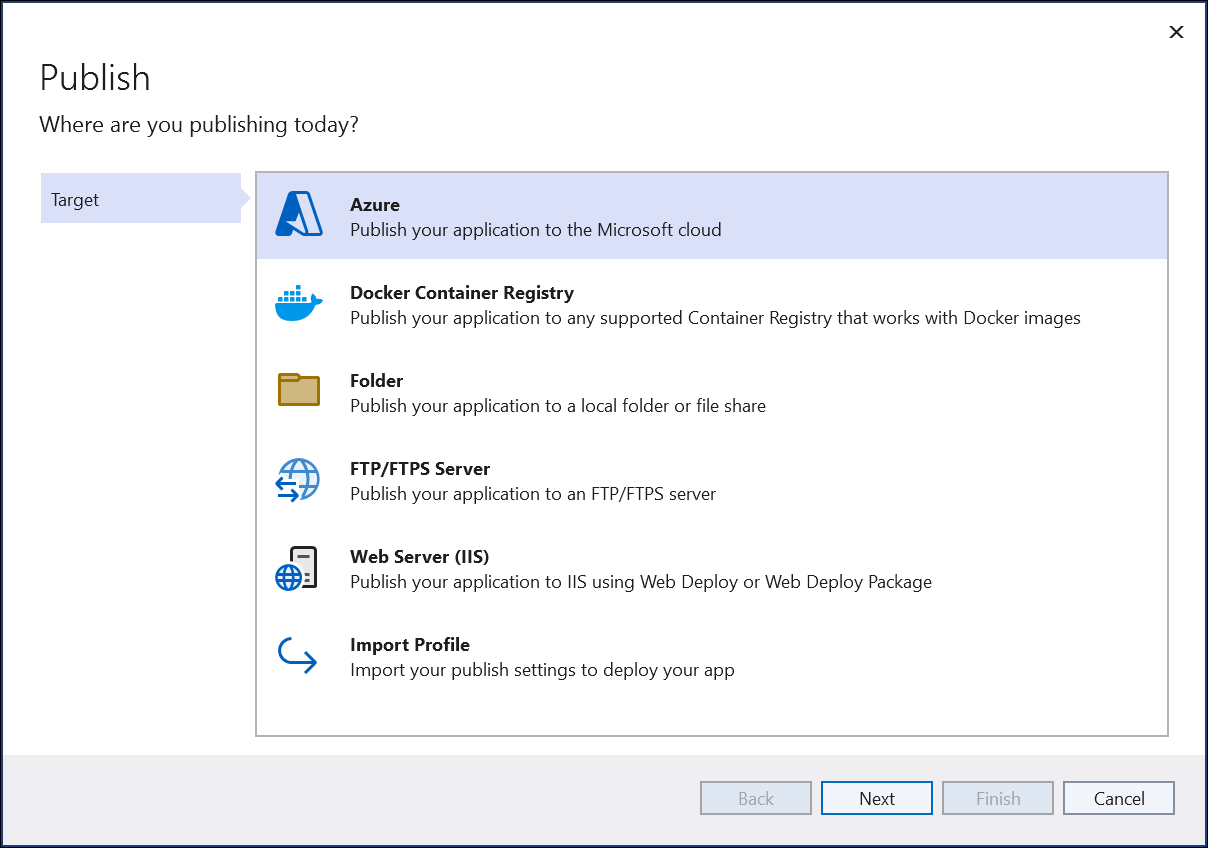
Step 2: Select the publish target as Azure.
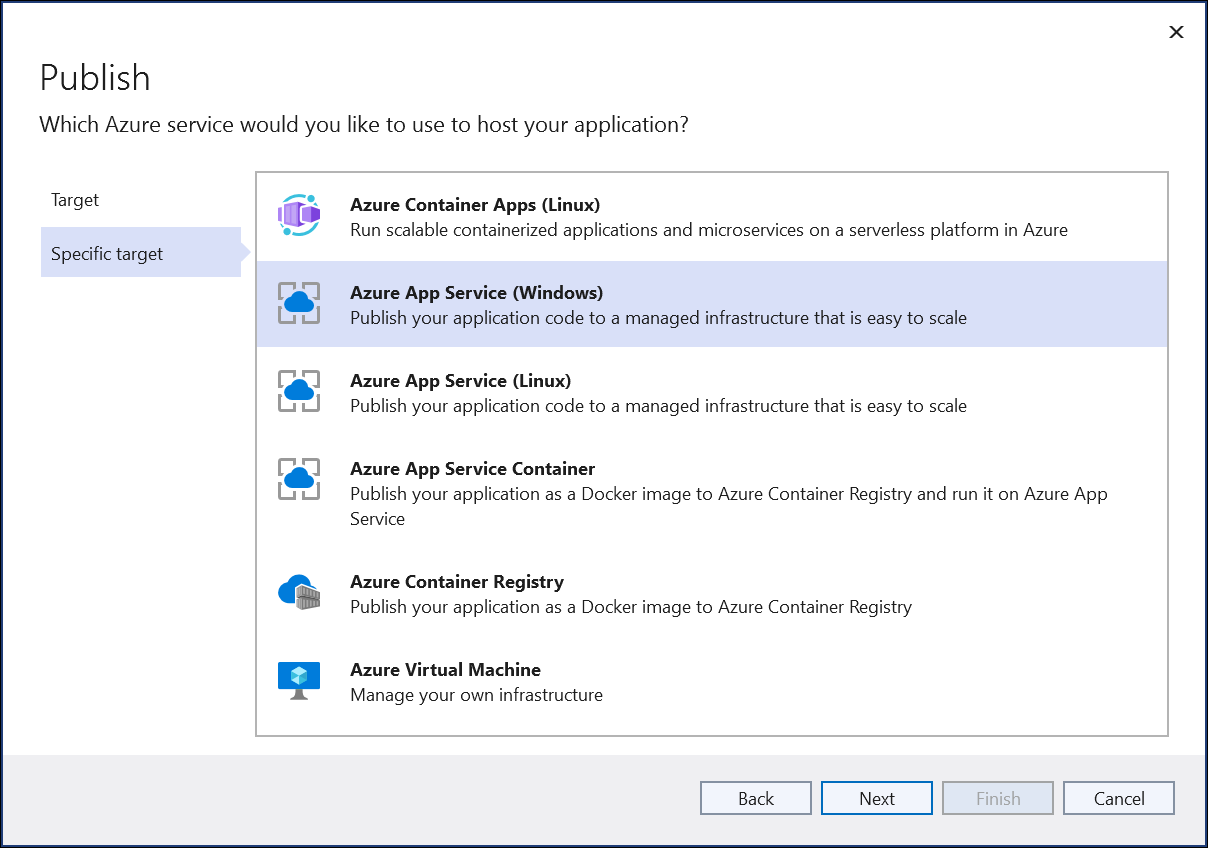
Step 3: Select the Specific target as Azure App Service (Windows).
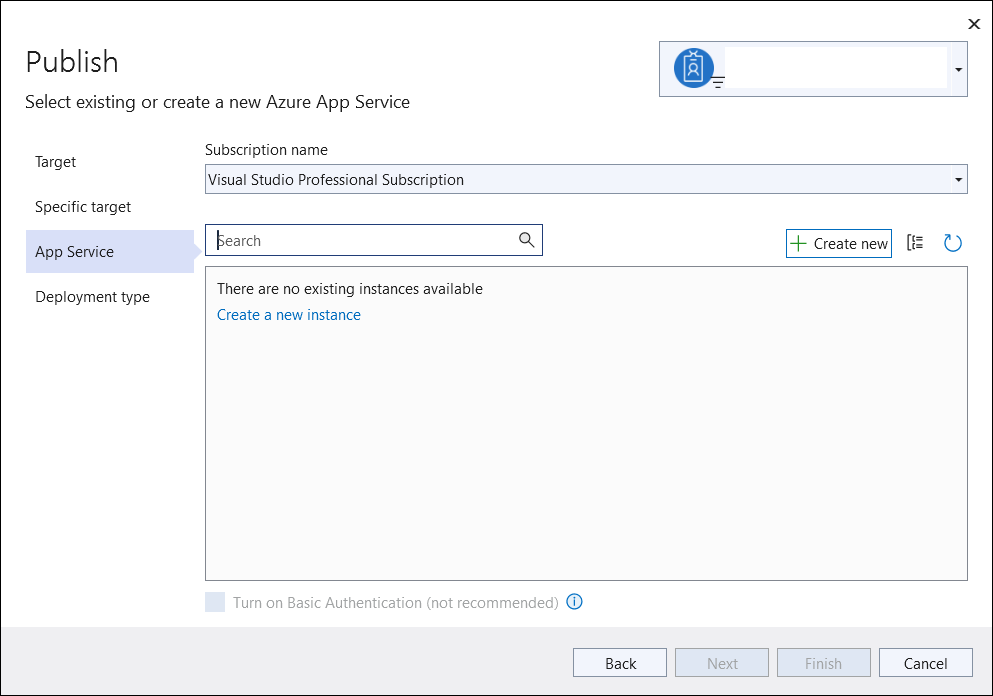
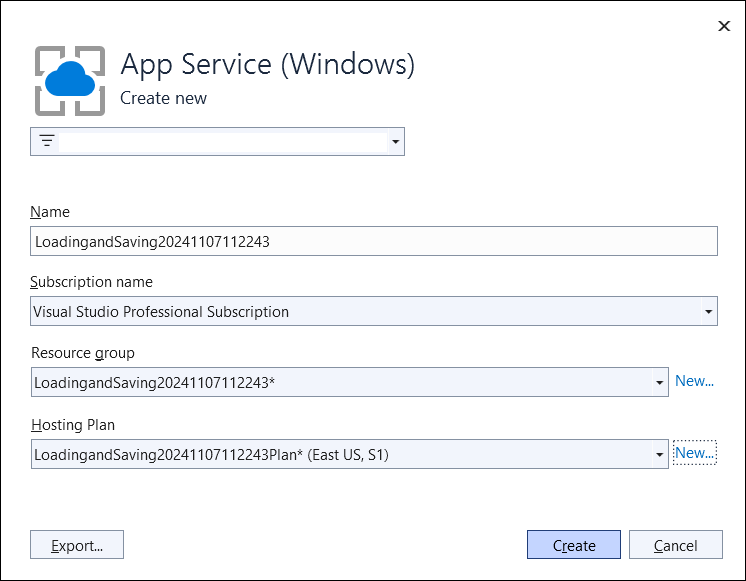
Step 4: To create a new app service, click Create new option.
Step 5: Click the Create button to proceed with App Service creation.
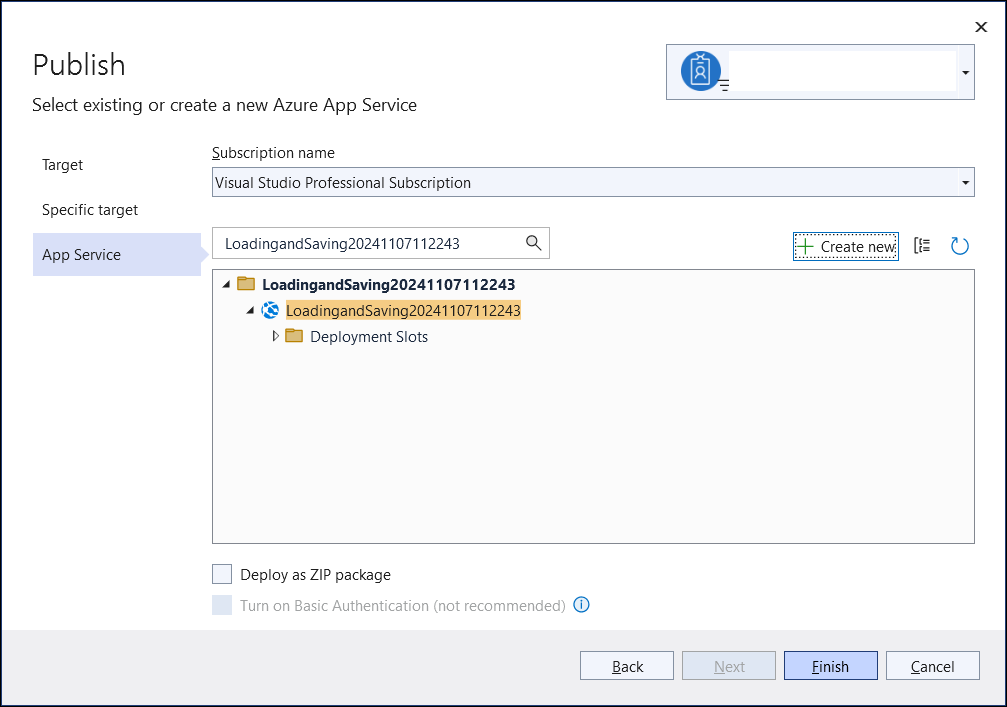
Step 6: Click the Finish button to finalize the App Service creation.
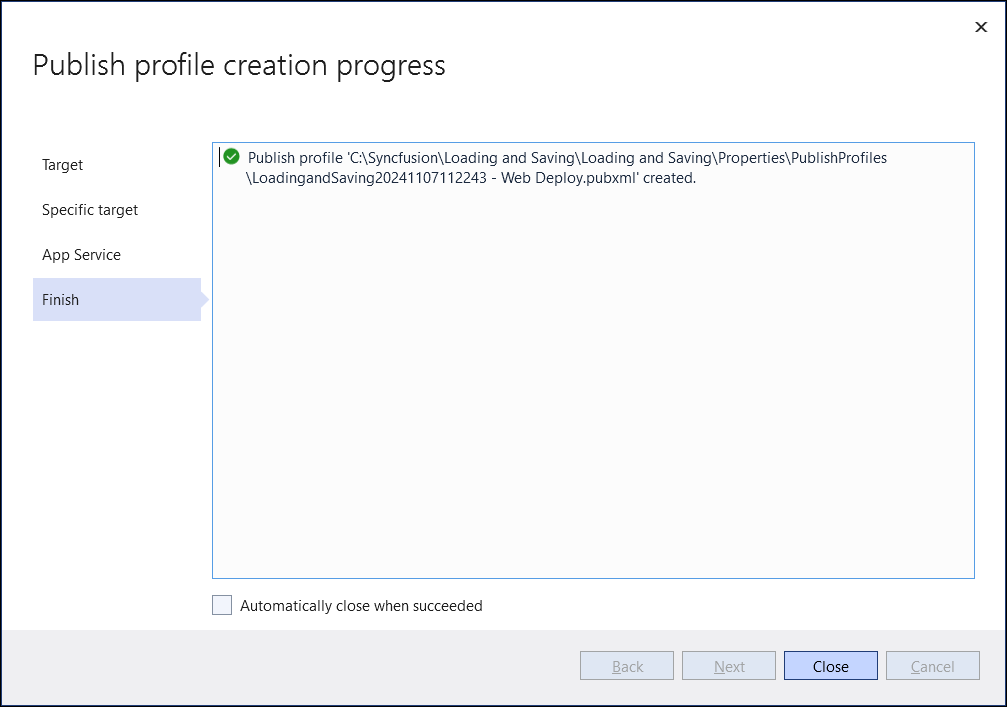
Step 7: Click Close button.
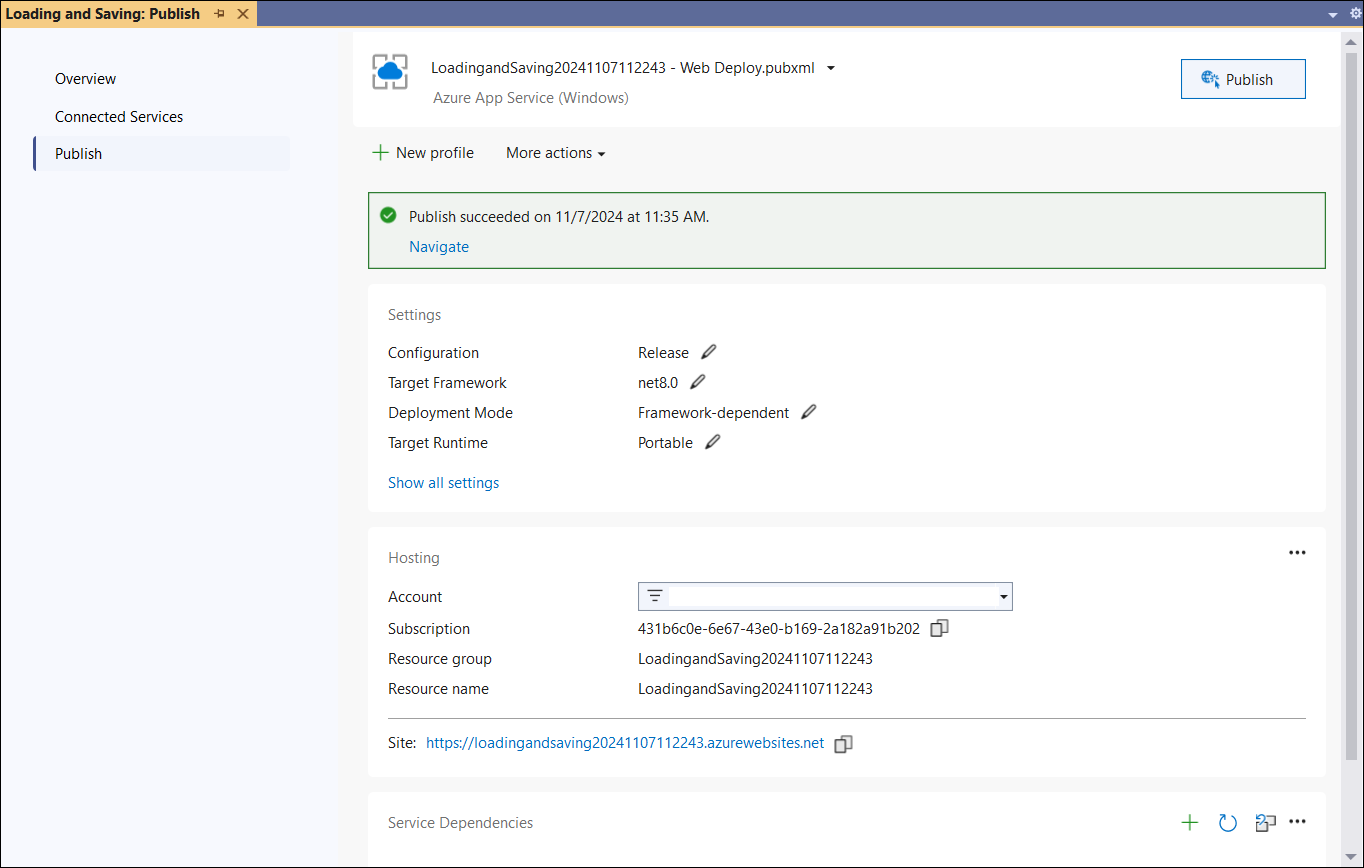
Step 8: Click the Publish button.
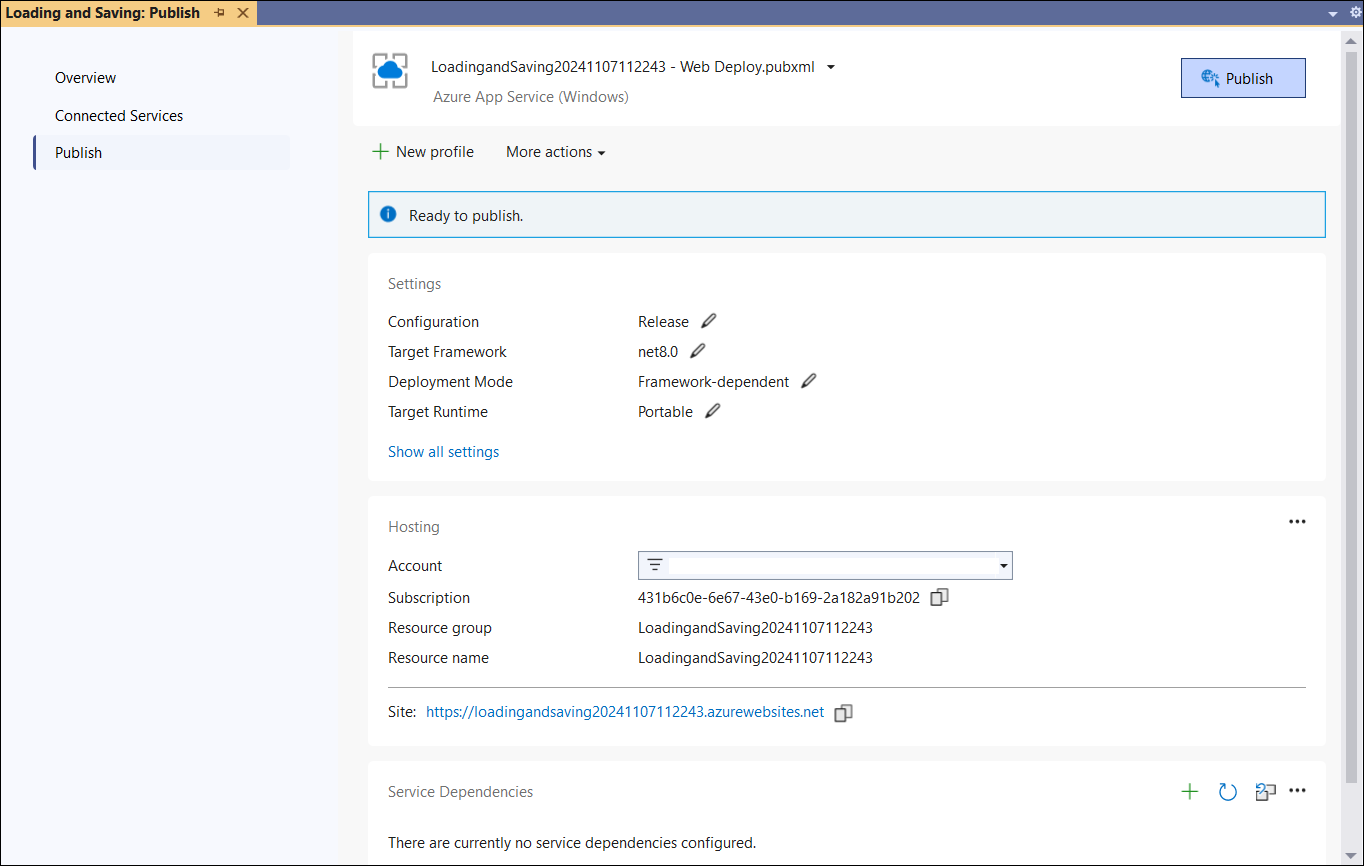
Step 9: The publish has succeeded.
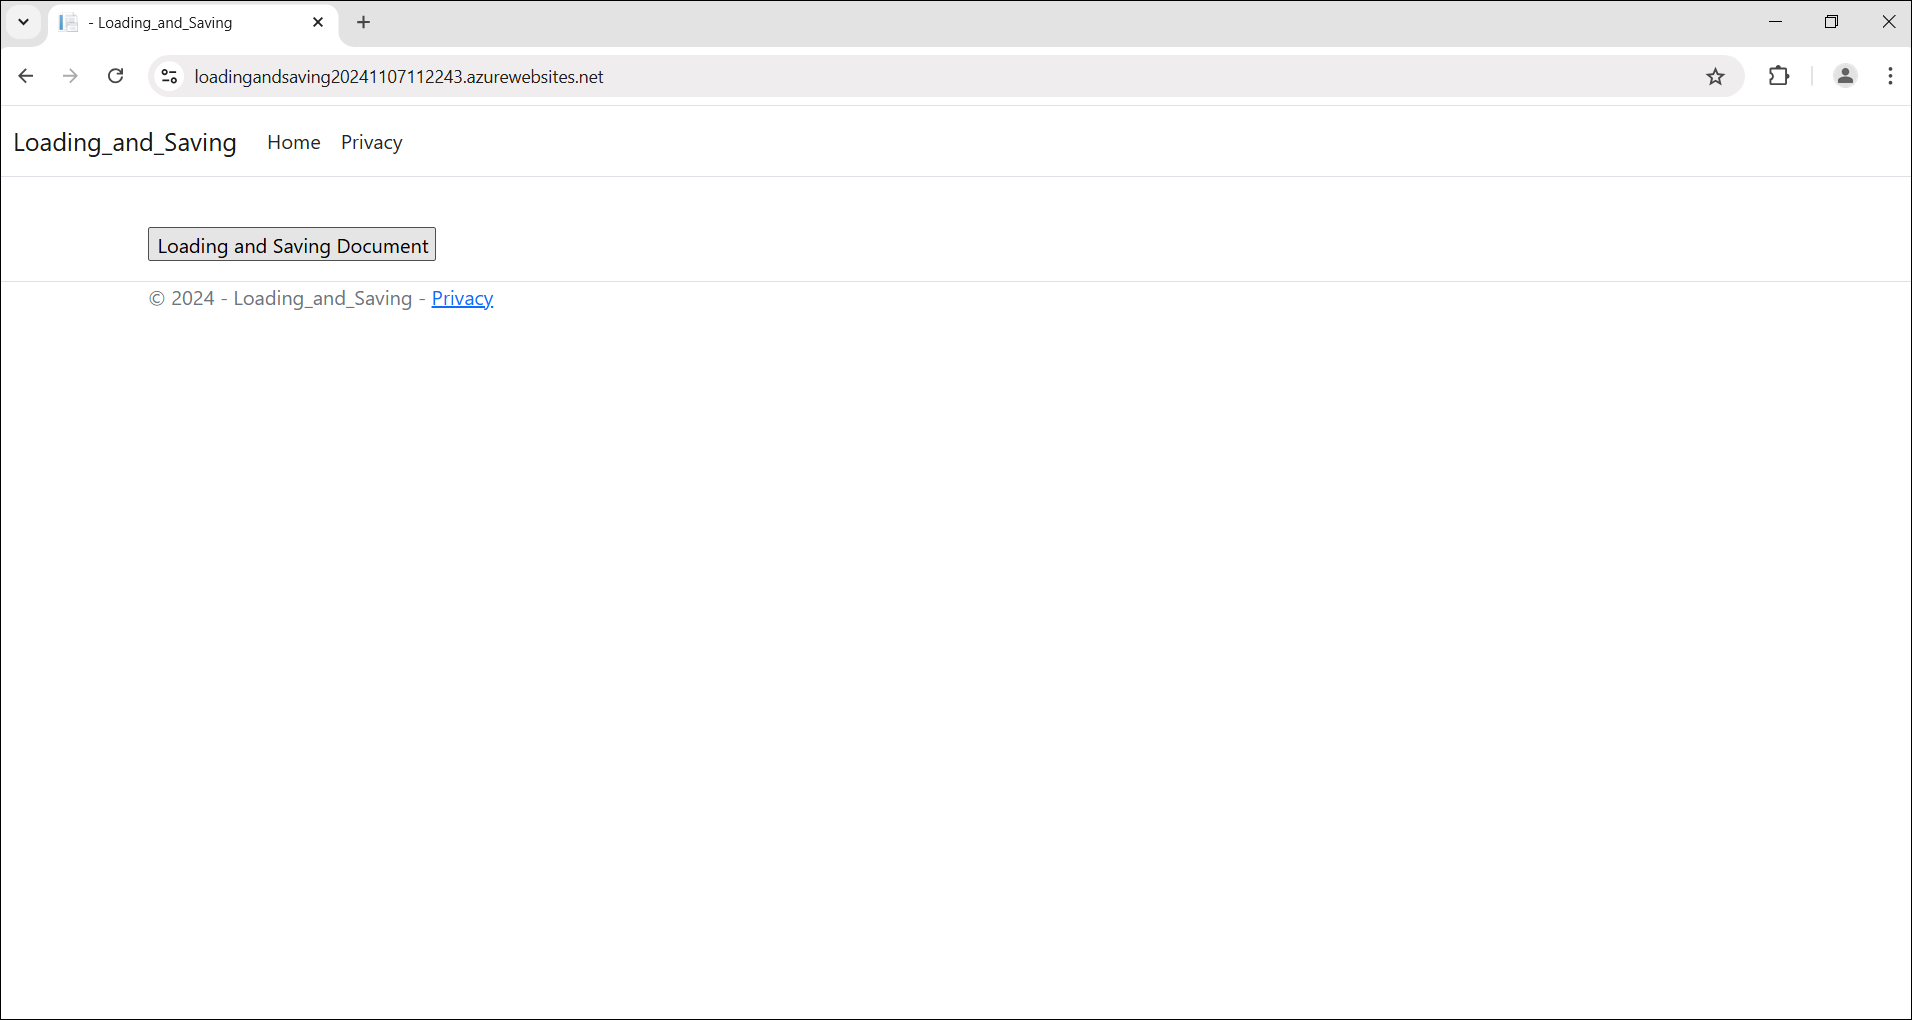
Step 10: The published web page opens in the browser.
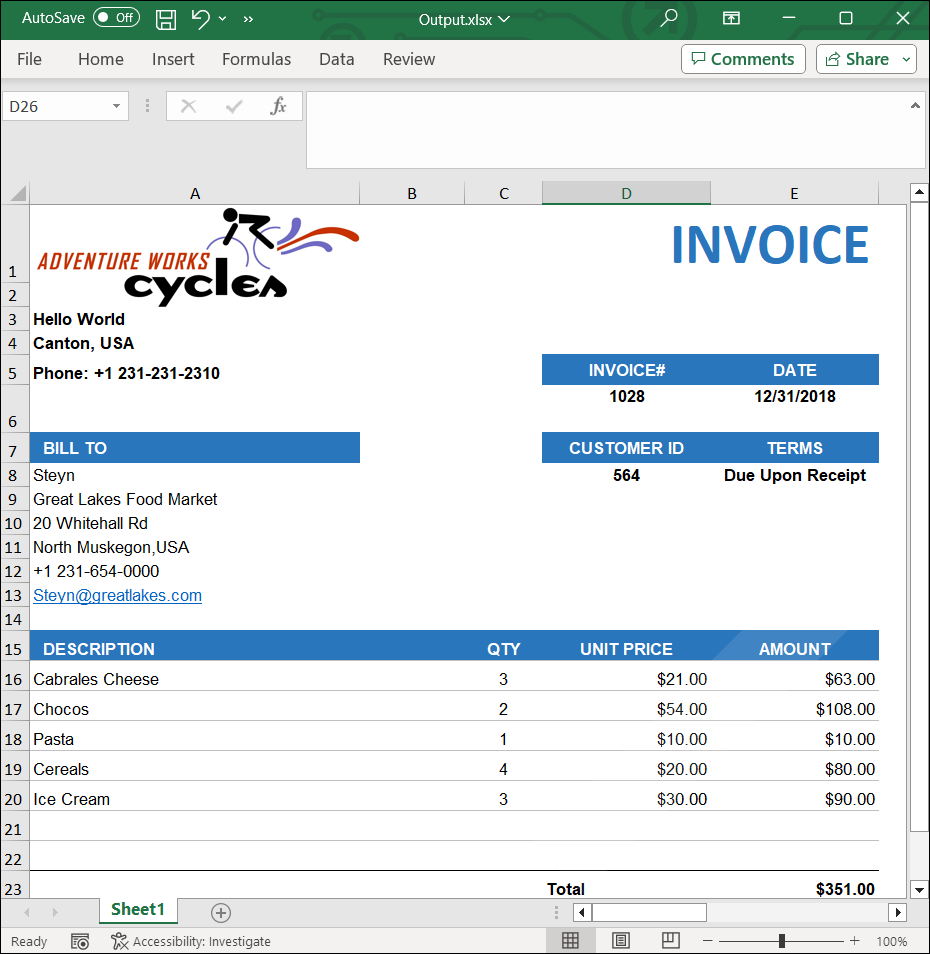
Step 11: Click Loading and Saving Document to load and save a simple Excel document. You will get the output Excel document as follows.
A complete working example of how to load and save an Excel document in Azure App Service on Windows in C# is available on the SyncfusionExamples/XlsIO-Examples GitHub page.
Click here to explore the rich set of Syncfusion® Excel library (XlsIO) features.
An online sample link to create an Excel document in ASP.NET Core is also available.