Excel to Image Conversion in Windows Forms using Excel Library
16 Aug 20265 minutes to read
Syncfusion® XlsIO is a .NET Excel Library used to create, read, edit, and convert Excel documents programmatically without Microsoft Excel or interop dependencies. Using this library, you can convert an Excel document to Image in Windows Forms.
Steps to convert an Excel document to Image in Windows Forms
Step 1: Create a new Windows Forms application project.
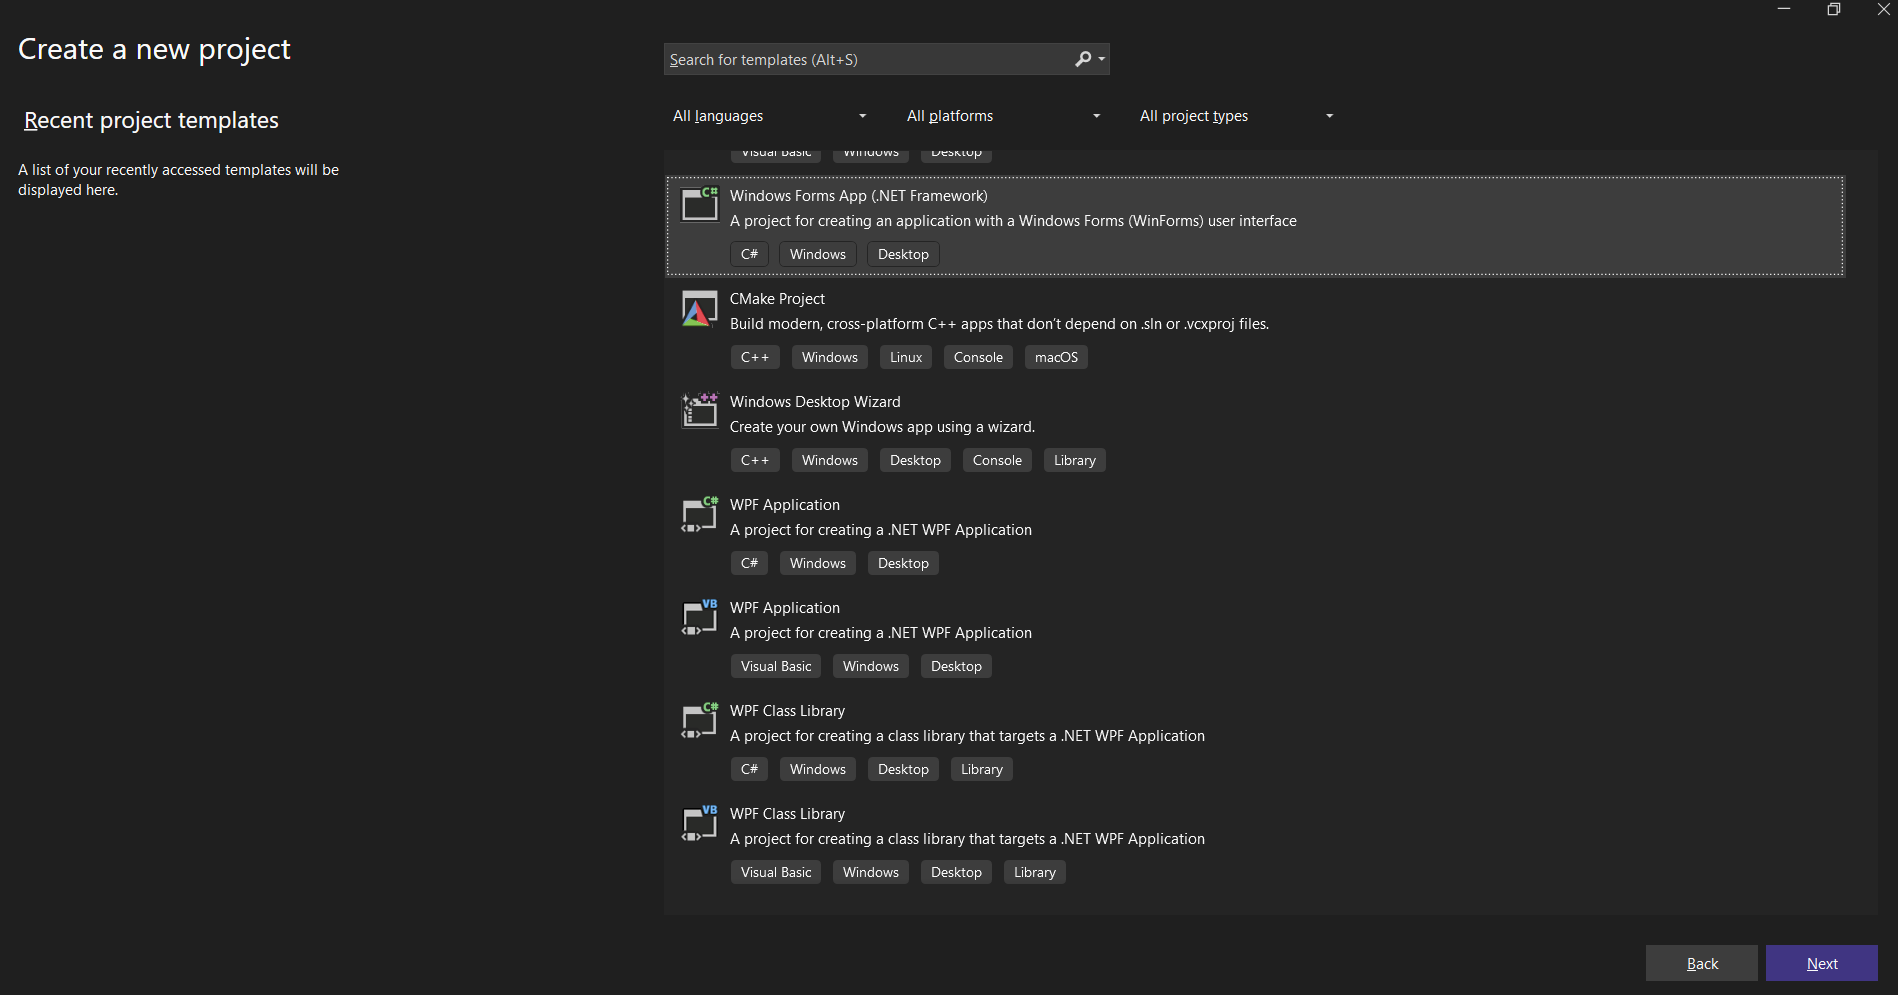
Step 2: Name the project, choose the framework and click Create button.

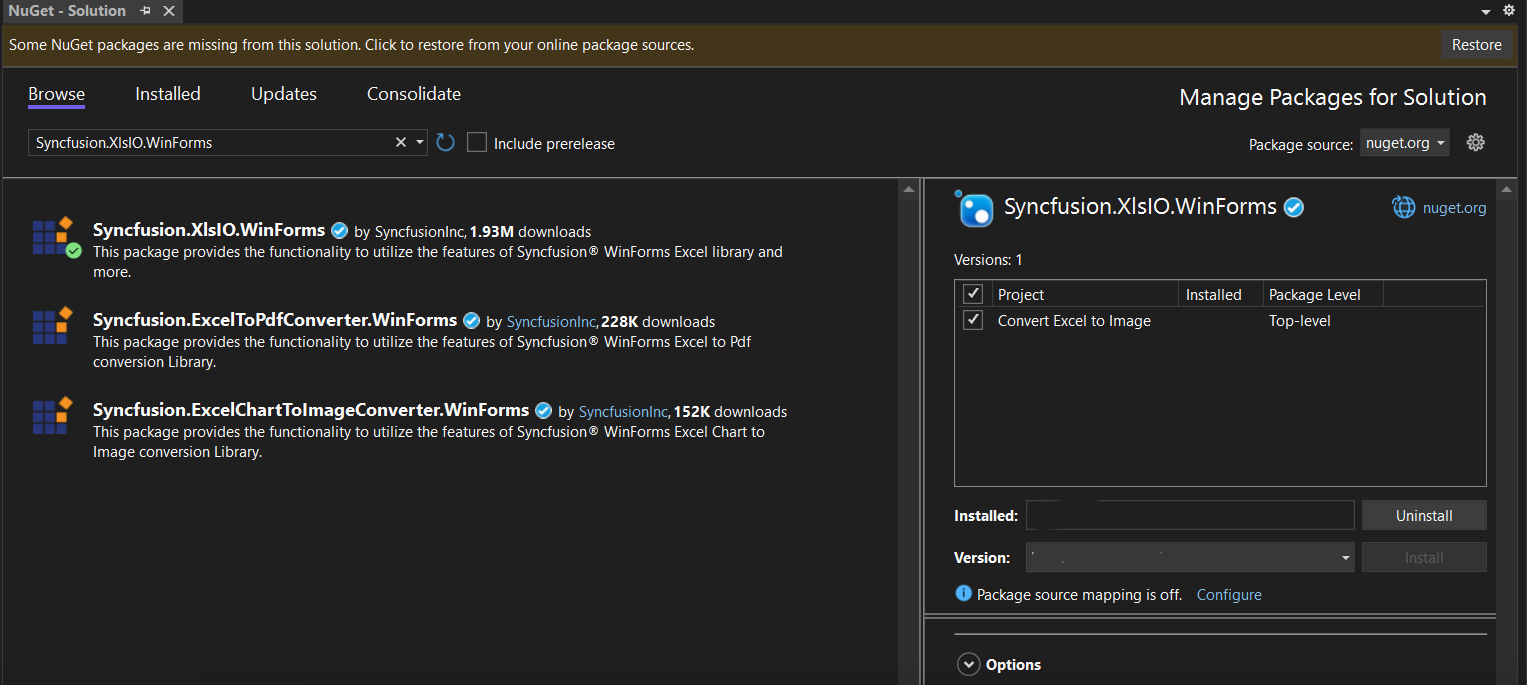
Step 3: Install the Syncfusion.XlsIO.WinForms NuGet package as a reference to your Windows Forms application from NuGet.org.
Starting with v16.2.0.x, if you reference Syncfusion® assemblies from trial setup or from the NuGet feed, you also have to add “Syncfusion.Licensing” assembly reference and include a license key in your projects. Please refer to this link to know about registering Syncfusion® license key in your application to use our components.
Step 4: Include the following namespaces in the Form1.cs file.
using Syncfusion.XlsIO;Step 5: Add a new button in Form1.Designer.cs.
private Button btnConvert;
private Label label;

private void InitializeComponent()
{
    this.label = new System.Windows.Forms.Label();
    this.btnConvert = new System.Windows.Forms.Button();
    this.SuspendLayout();
    //
    // label
    //
    this.label.Location = new System.Drawing.Point(0, 40);
    this.label.Name = "label";
    this.label.Size = new System.Drawing.Size(426, 35);
    this.label.TabIndex = 0;
    this.label.Text = "Click the button to Convert Excel document to Image generated by Essential XlsIO";
    this.label.TextAlign = System.Drawing.ContentAlignment.MiddleCenter;
    //
    // btnConvert
    //
    this.btnConvert.Location = new System.Drawing.Point(90, 110);
    this.btnConvert.Name = "btnConvert";
    this.btnConvert.Size = new System.Drawing.Size(223, 36);
    this.btnConvert.TabIndex = 1;
    this.btnConvert.Text = "Convert Excel to Image";
    this.btnConvert.Click += new System.EventHandler(this.btnConvert_Click);
    //
    // Form1
    //
    this.ClientSize = new System.Drawing.Size(450, 150);
    this.Controls.Add(this.label);
    this.Controls.Add(this.btnConvert);
    this.Name = "Form1";
    this.Text = "Convert Excel document to Image";
    this.ResumeLayout(false);
}
Step 6: In Form1.cs, add the following event handler stub for the button click.
private void btnConvert_Click(object sender, EventArgs e)
{
}
Step 7: Add the following code inside btnConvert_Click to convert an Excel document to image.
The
ConvertToImagemethod signature isConvertToImage(int firstRow, int firstColumn, int lastRow, int lastColumn). Ensure thatSample.xlsxis present in the project output directory (set Copy to Output Directory to Copy if newer in the file properties), and that a valid Syncfusion license key is registered; otherwise an exception is thrown at runtime. The output JPEG is written to the application’s working directory. Supported image formats include JPEG, PNG, BMP, GIF, and TIFF (use the corresponding value fromSystem.Drawing.Imaging.ImageFormat).
using (ExcelEngine excelEngine = new ExcelEngine())
{
    IApplication application = excelEngine.Excel;
    application.DefaultVersion = ExcelVersion.Xlsx;
    IWorkbook workbook = application.Workbooks.Open("Sample.xlsx");
    IWorksheet worksheet = workbook.Worksheets[0];

    //Convert the Excel to Image
    Image image = worksheet.ConvertToImage(1, 1, 20, 4);

    //Save the image as jpeg
    image.Save("Sample.Jpeg", ImageFormat.Jpeg);
}
You can download a complete working sample from GitHub.
By executing the program, you will get the image as follows.
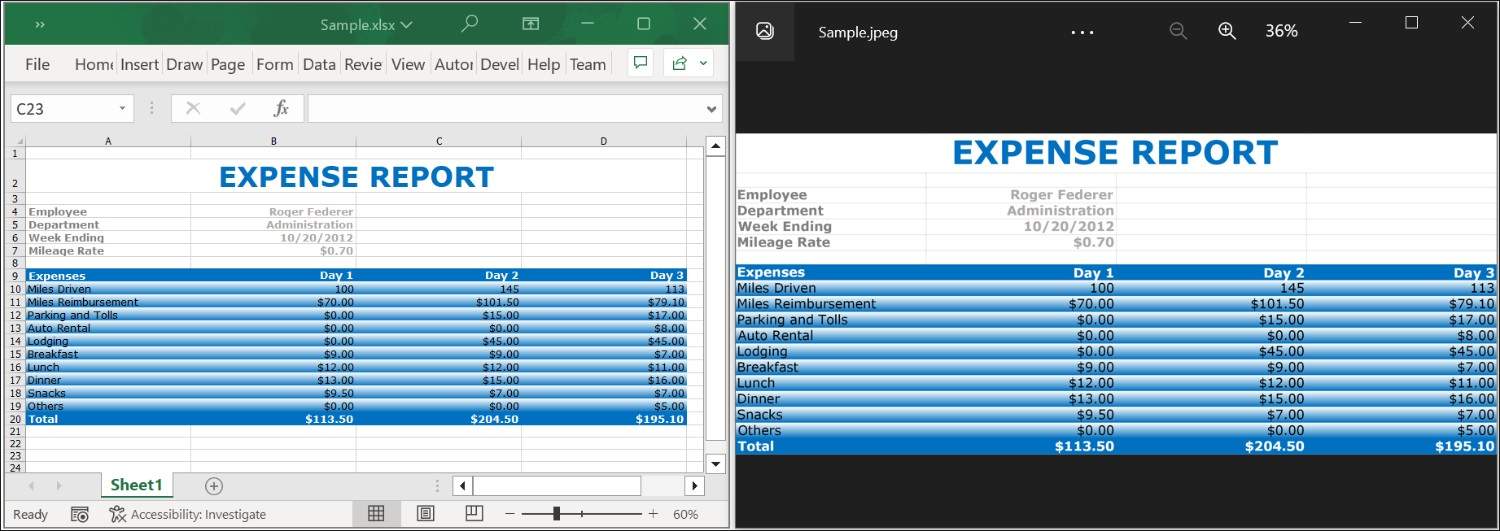
Click here to explore the rich set of Syncfusion® Excel library (XlsIO) features.
An online sample link to convert an Excel document to Image in ASP.NET Core.