Getting Started with Azure OCR Processor
14 Aug 202610 minutes to read
The .NET OCR library is used to extract text from scanned PDFs and images in Azure with the help of Google’s Tesseract Optical Character Recognition engine.
Prerequisites
Version Compatibility
- Syncfusion.PDF.OCR.Net.Core supports .NET 8.0 and later versions.
Supported Inputs
The OCR processor supports the following input formats:
- Single-page and multi-page PDF documents
- Scanned images in common formats (JPEG, PNG, TIFF)
- Recommended DPI: 200 DPI or higher for optimal OCR accuracy
Required Software
- .NET 8 SDK or later
- Azure subscription with Azure App Service or Azure Functions
Register the License Key
Starting with v16.2.0.x, if you reference Syncfusion® assemblies from trial setup or from the NuGet feed, you must add the Syncfusion.Licensing assembly reference and register a license key in your application. For more information, see the licensing documentation.
Include the following code in the Program.cs file to register the license key:
using Syncfusion.Licensing;

// Register Syncfusion license at application startup
SyncfusionLicenseProvider.RegisterLicense("YOUR LICENSE KEY");
- Beginning from version 21.1.x, the TesseractBinaries and Tesseract language data folders are now included by default; you no longer have to set these paths explicitly.
- The current NuGet package includes Tesseract 5.0, which provides support for 100+ languages.
Azure App Service Windows
Steps to perform OCR on an entire PDF document in Azure App Service
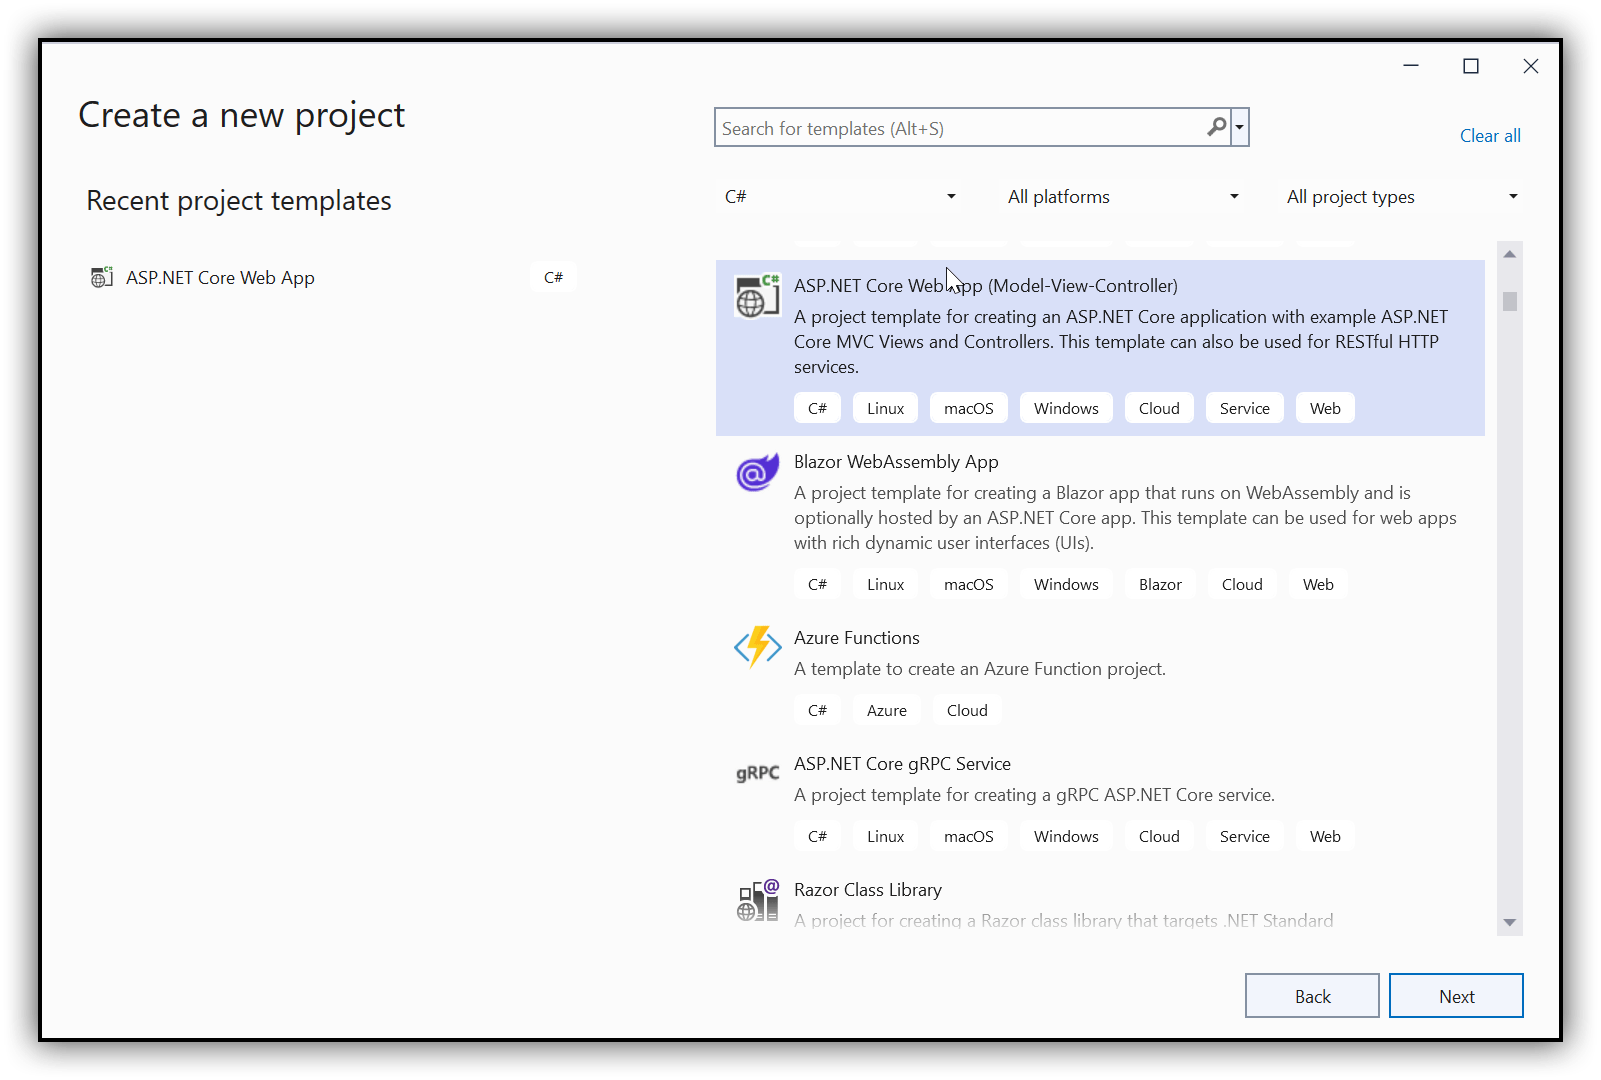
Step 1: Create a new ASP.NET Core MVC application targeting .NET 8 or later:
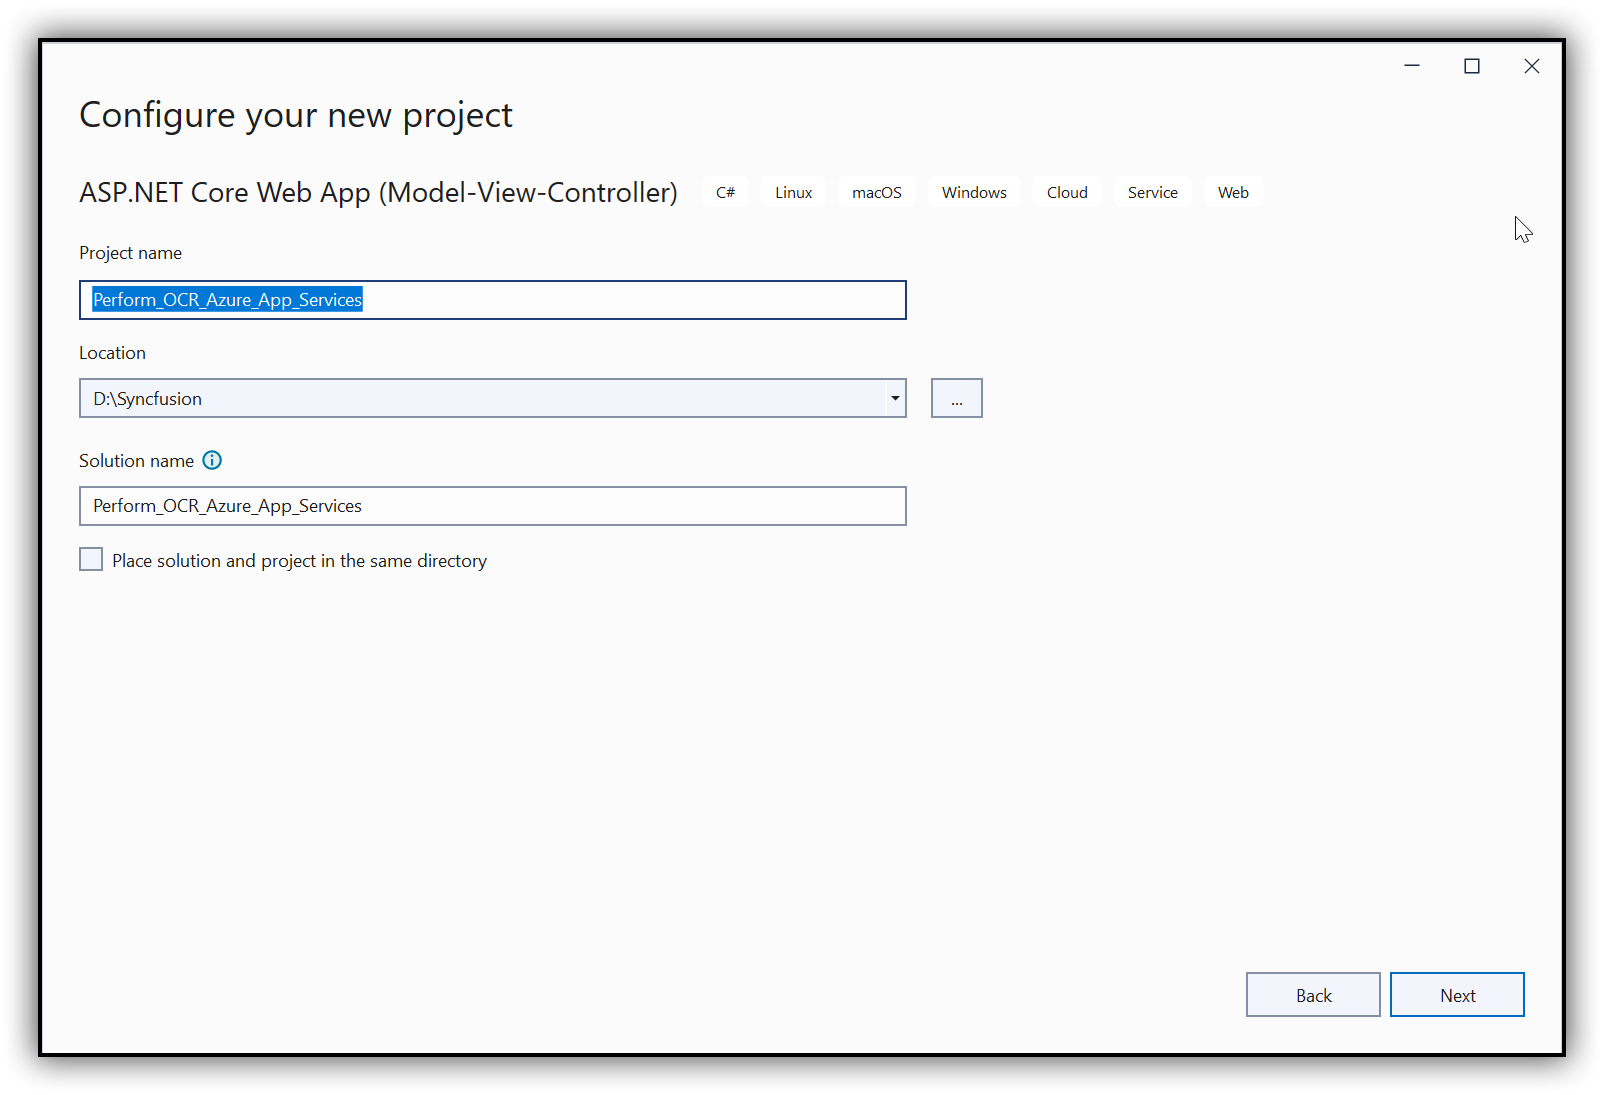
Step 2: In the configuration window, name your project and click Next:
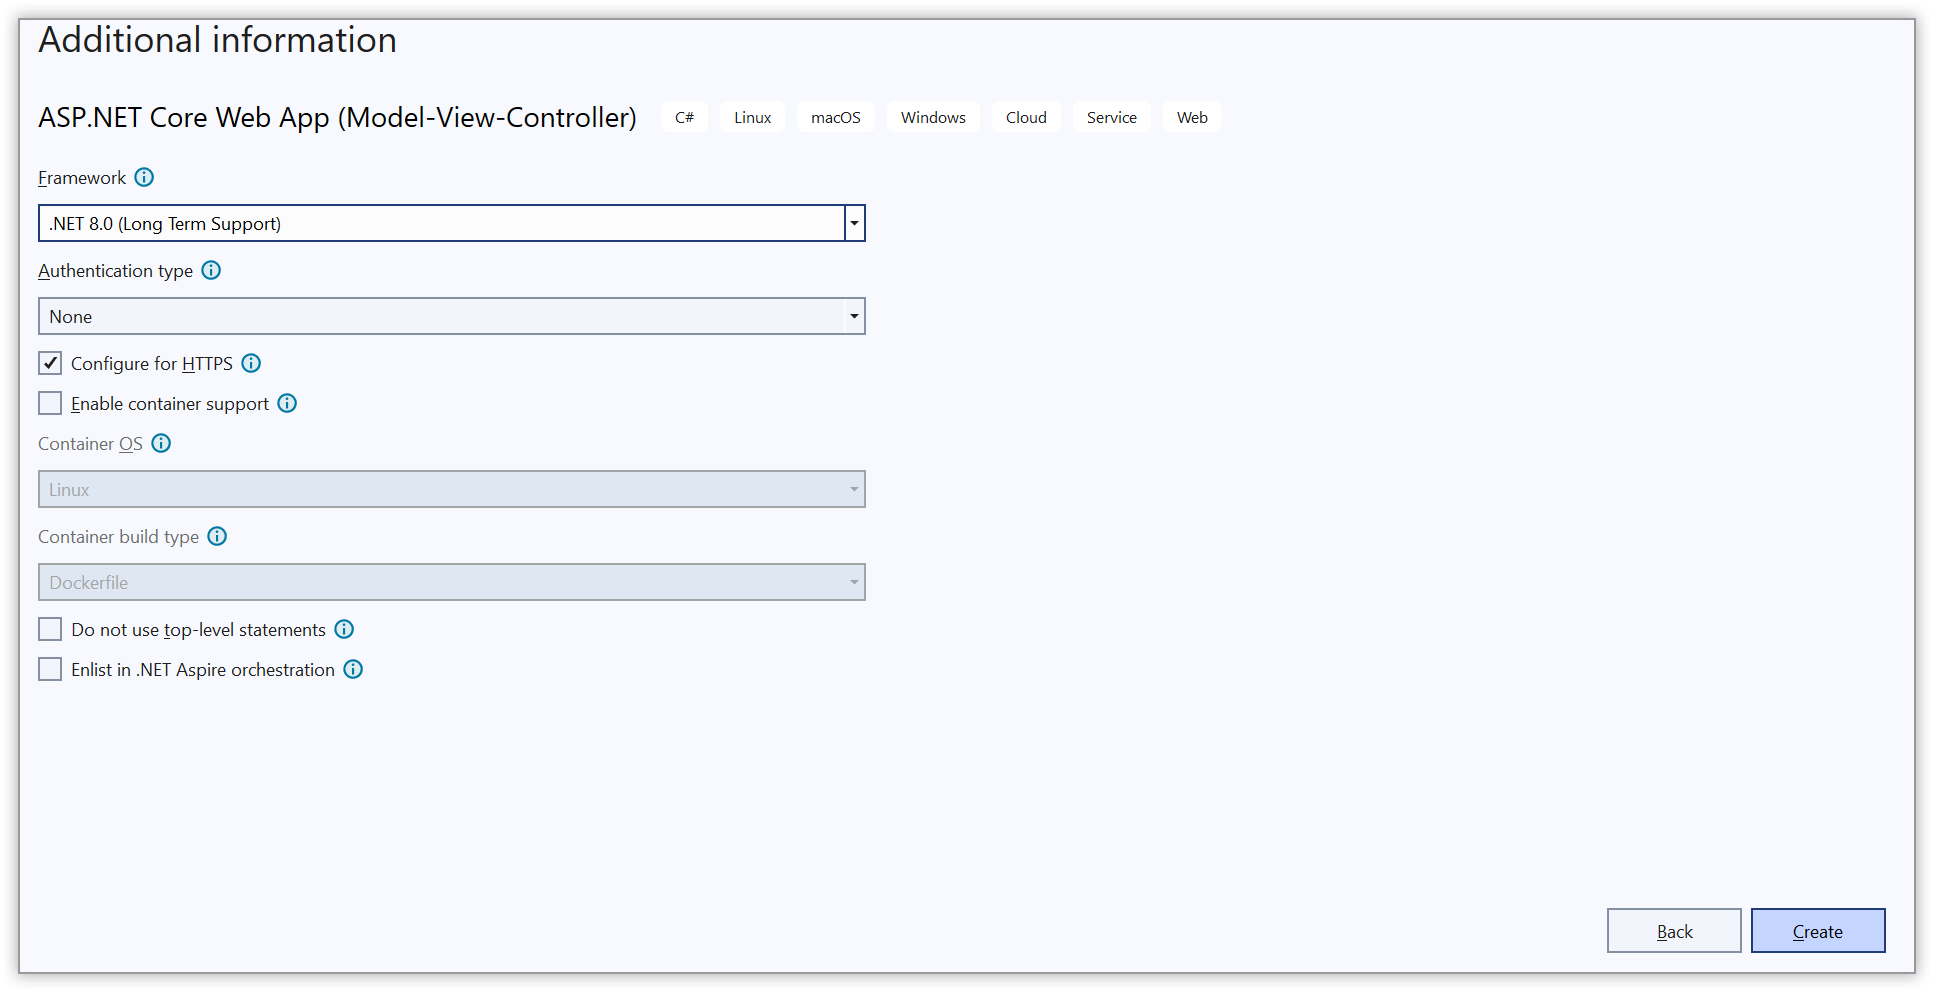
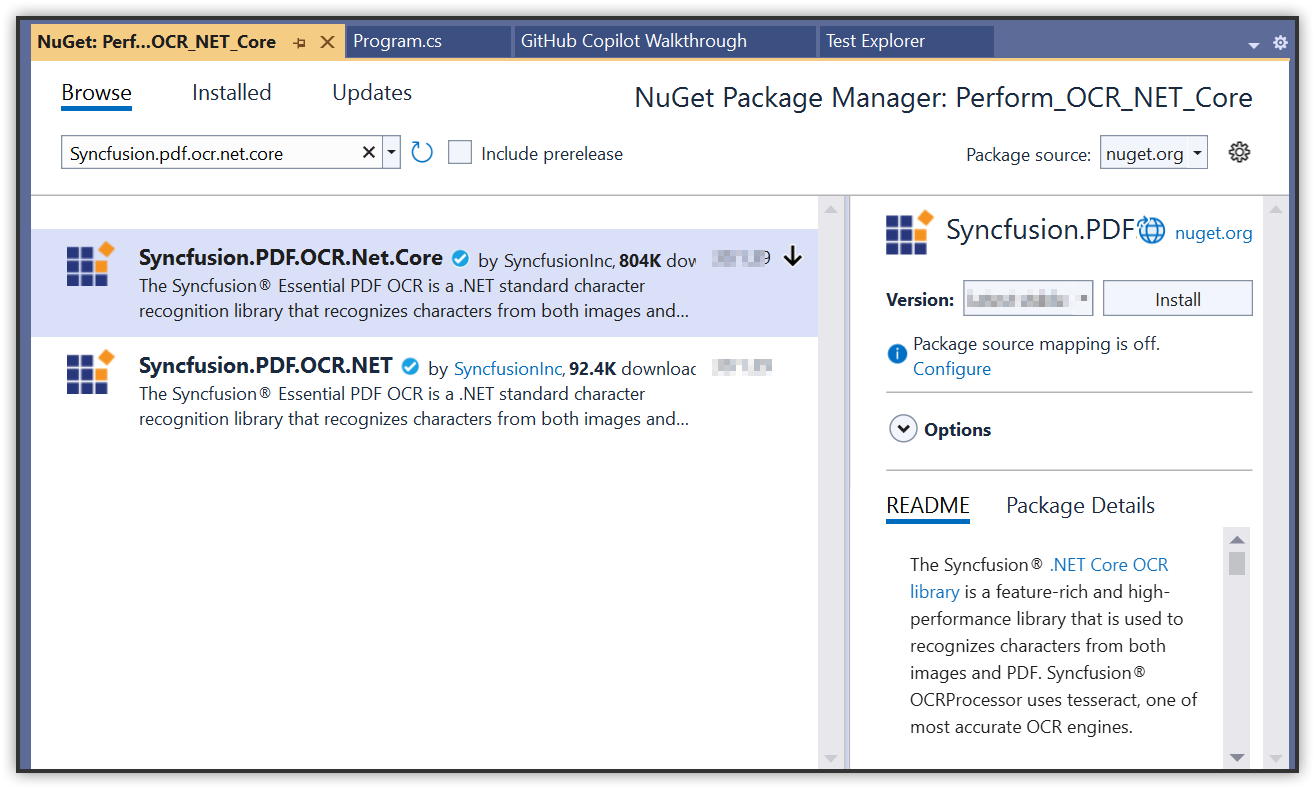
Step 3: Install the Syncfusion.PDF.OCR.Net.Core NuGet package into your ASP.NET Core application from nuget.org:
Step 4: Add a new button in Index.cshtml to trigger the OCR process:
@{
    Html.BeginForm("PerformOCR", "Home", FormMethod.Get);
    {
        <br />
        <div>
            <input type="submit" value="Perform OCR" style="width:150px;height:27px" />
        </div>
    }
    Html.EndForm();
}
Step 5: Include the following namespaces in HomeController.cs:
using Syncfusion.OCRProcessor;
using Syncfusion.Pdf.Parsing;
using Microsoft.AspNetCore.Hosting;
Step 6: Add the code sample to perform OCR on the entire PDF document using the PerformOCR method of the OCRProcessor class:
public IActionResult PerformOCR()
{
    // Initialize the OCR processor
    OCRProcessor processor = new OCRProcessor();
    // Load a PDF document
    PdfLoadedDocument lDoc = new PdfLoadedDocument("Input.pdf");
    // Set OCR language
    processor.Settings.Language = Languages.English;
    // Set Tesseract version (5.0 is bundled with v21.1.x+)
    processor.Settings.TesseractVersion = TesseractVersion.Version5_0;
    // Perform OCR on the document
    string ocr = processor.PerformOCR(lDoc);
    // Save the processed document
    MemoryStream stream = new MemoryStream();
    lDoc.Save(stream);
    return File(stream.ToArray(), System.Net.Mime.MediaTypeNames.Application.Pdf, "OCR_Azure.pdf");
}
Step 7: Test the OCR creation on your local machine.
Steps to publish to Azure App Service
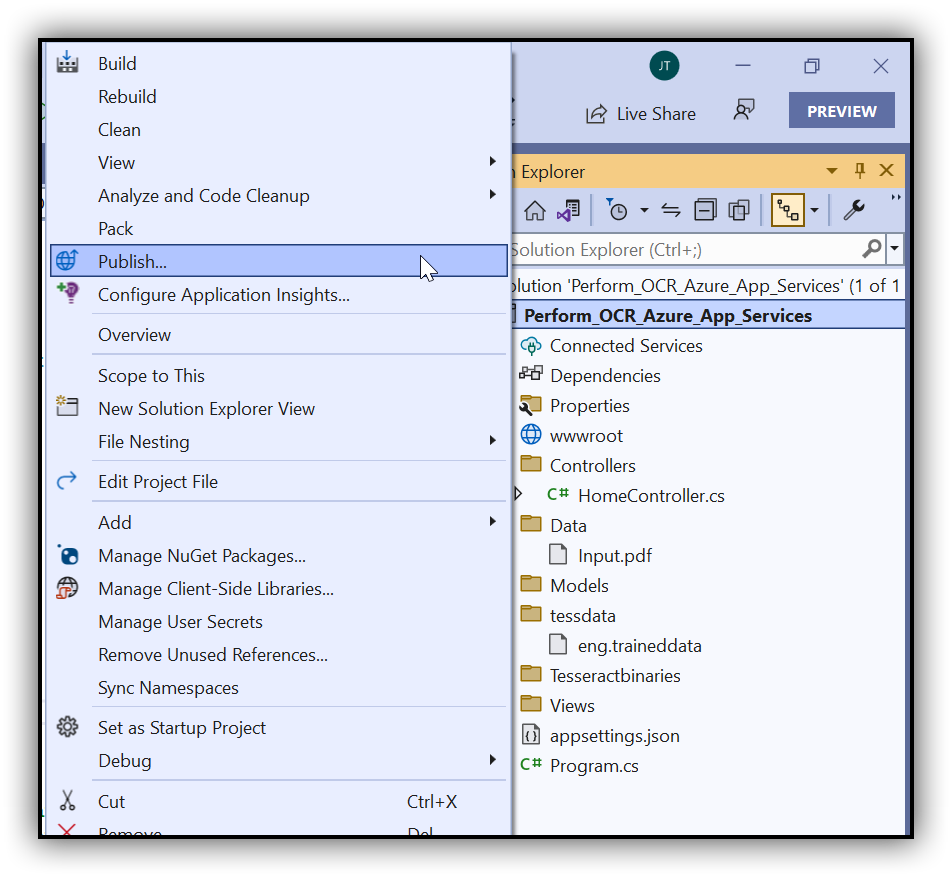
Step 1: Right-click the project and click Publish:
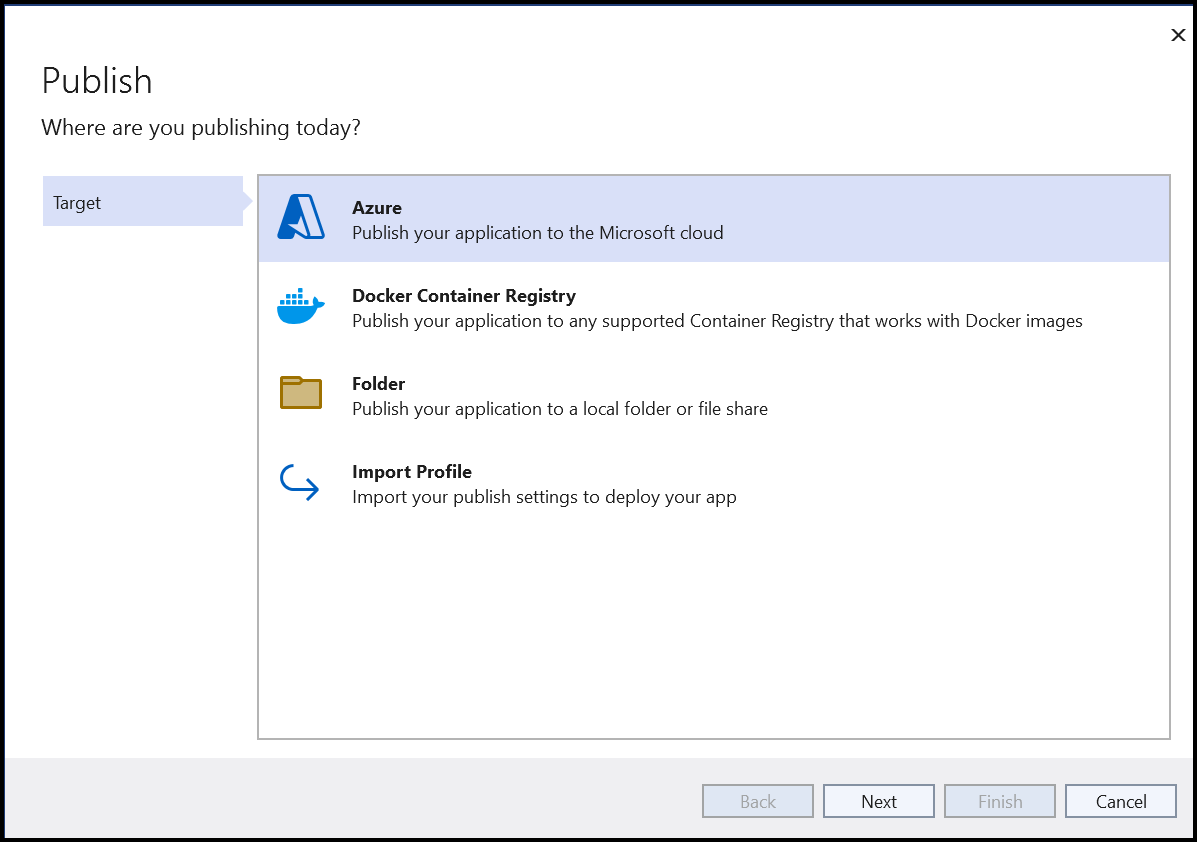
Step 2: Create a new profile in the publish target window:
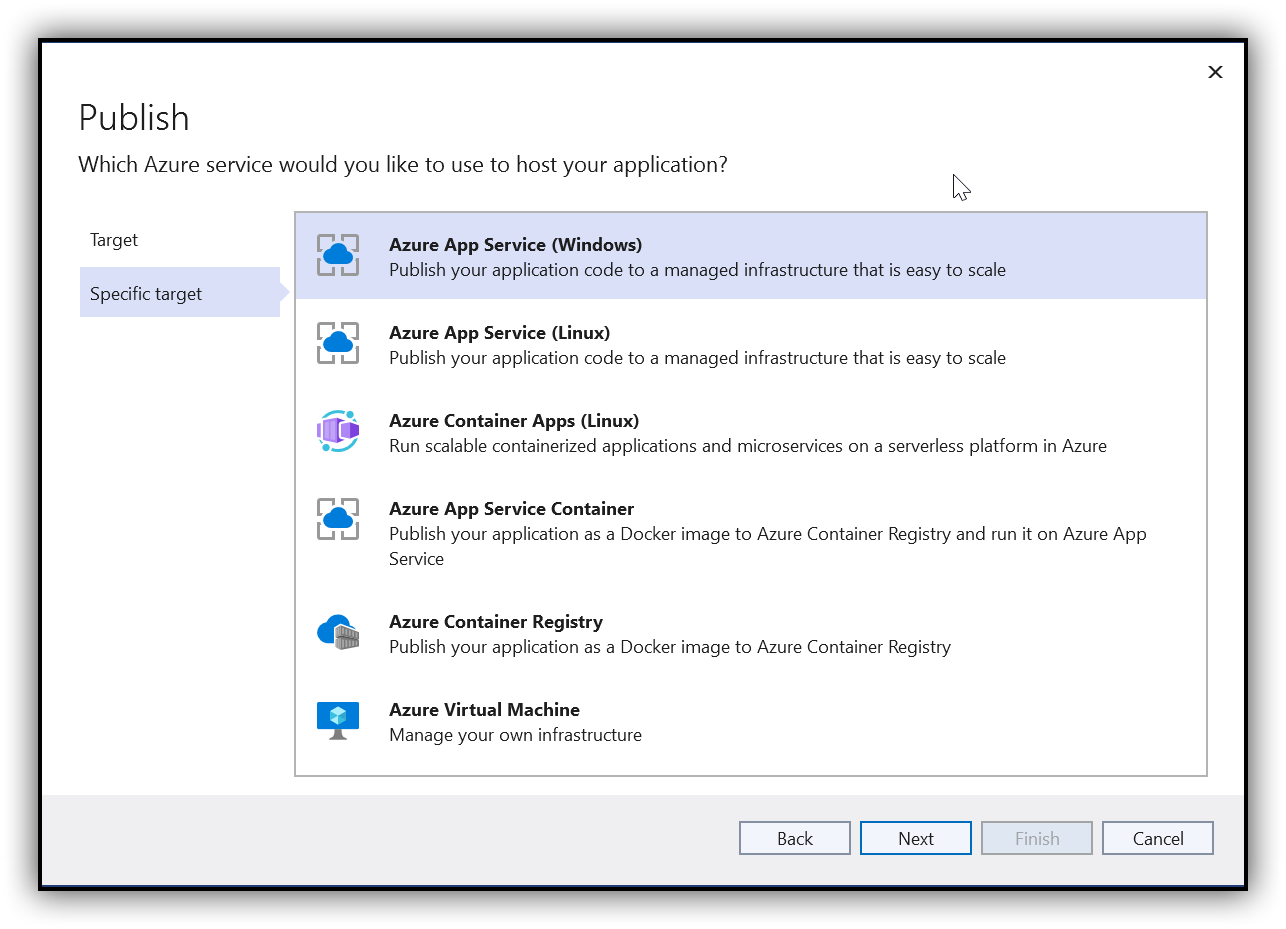
Step 3: Select the specific target as Azure App Service (Windows):
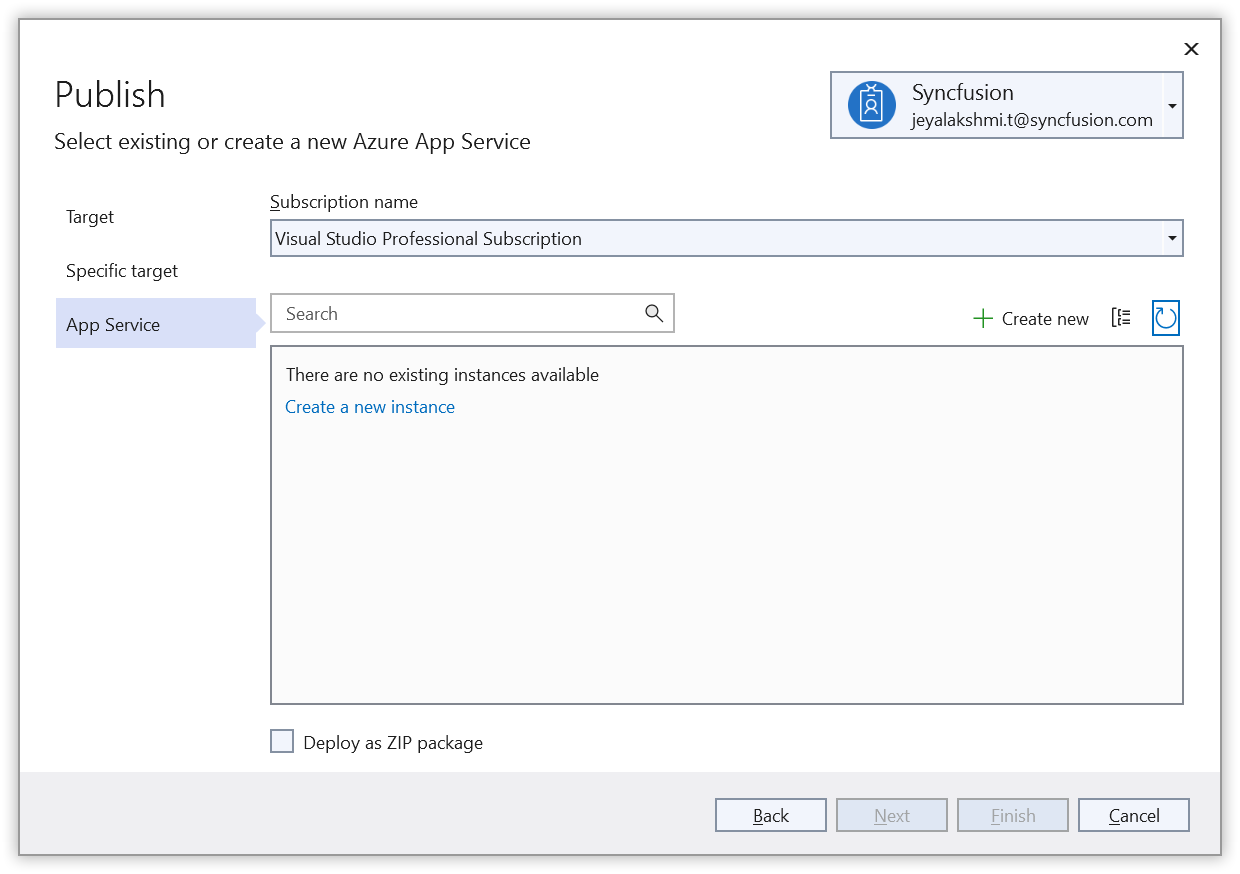
Step 4: To create a new App Service, click Create new:
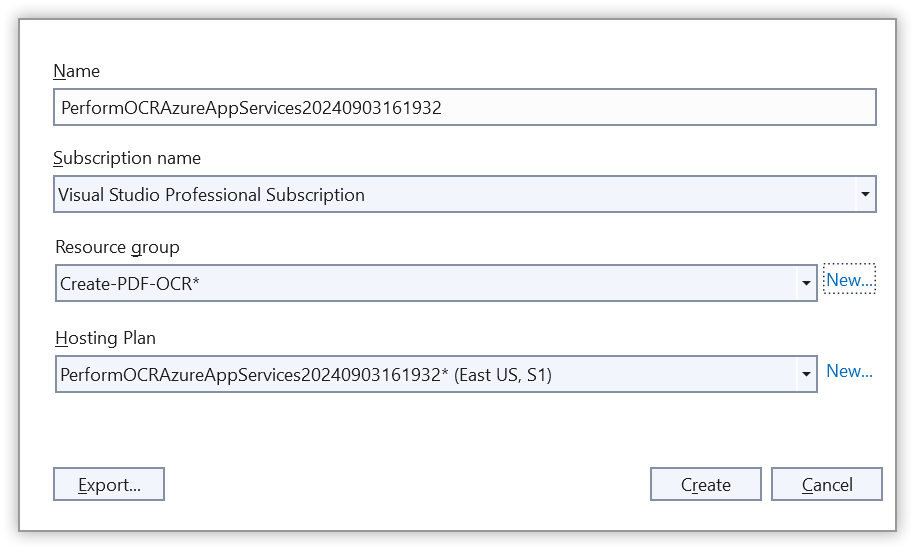
Step 5: Click the Create button to proceed with App Service creation:
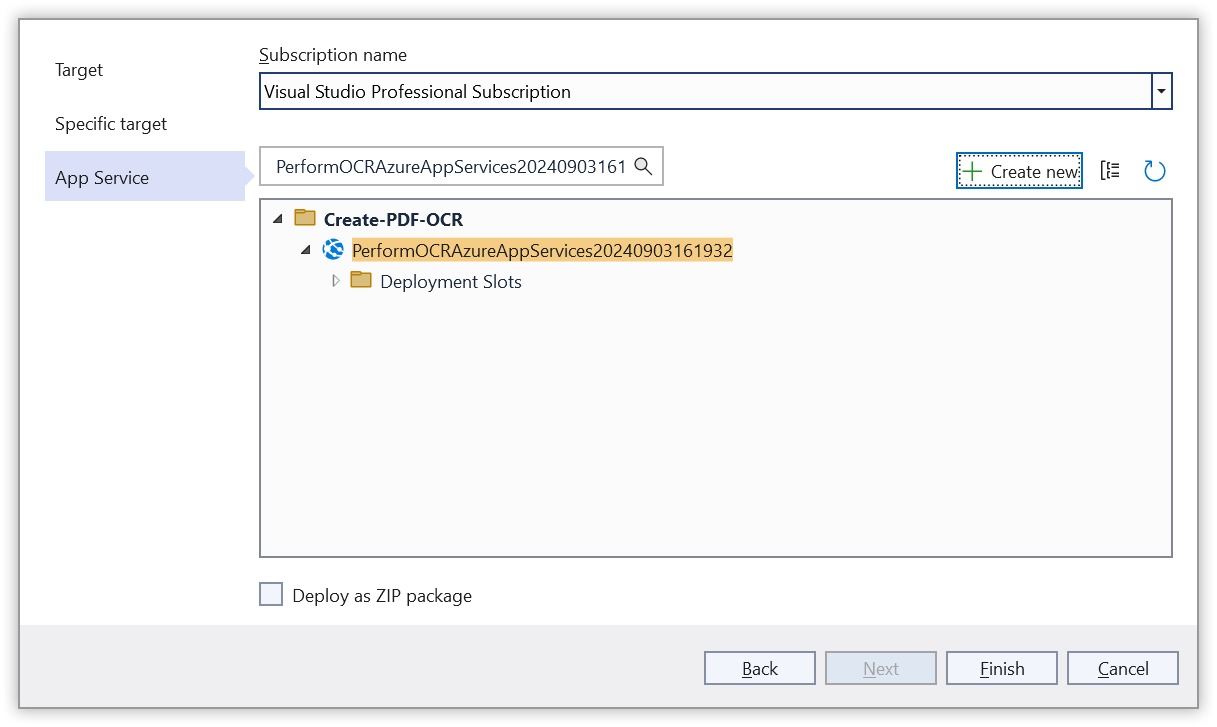
Step 6: Click the Finish button to finalize the App Service creation:
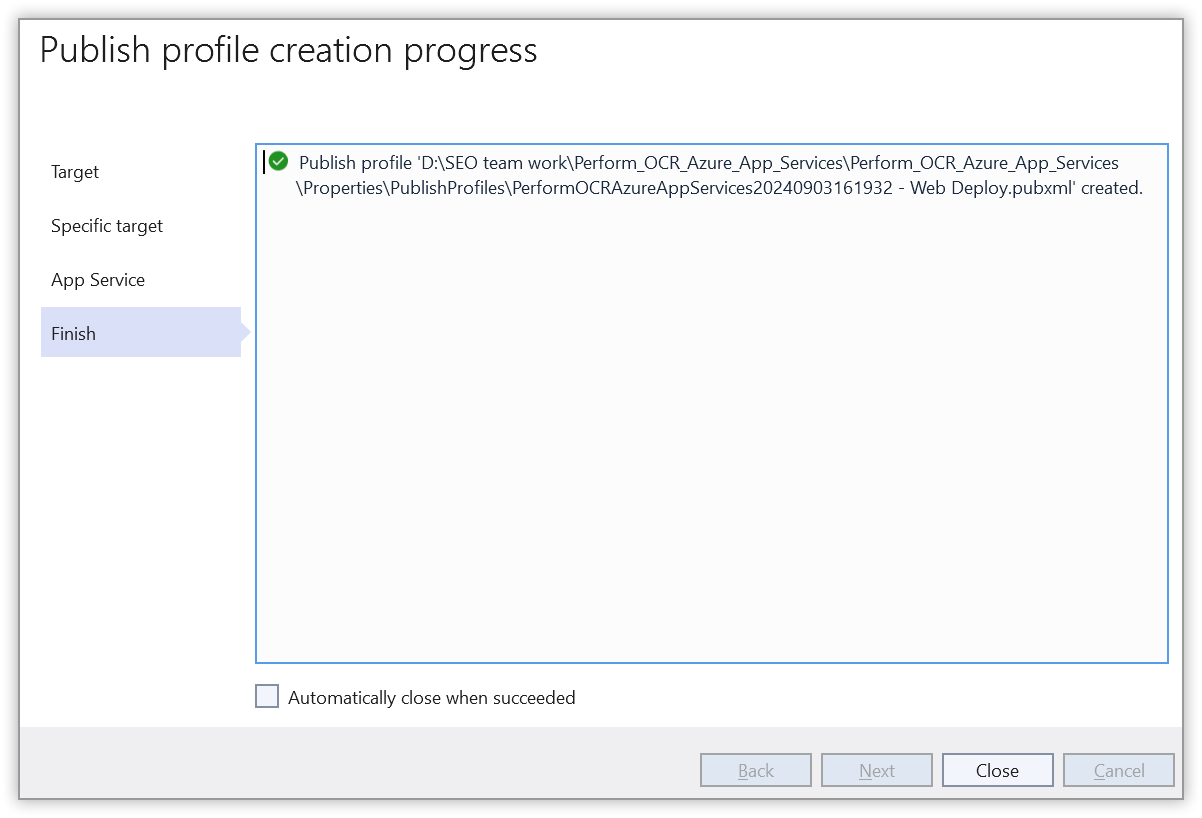
Step 7: Click the Close button:
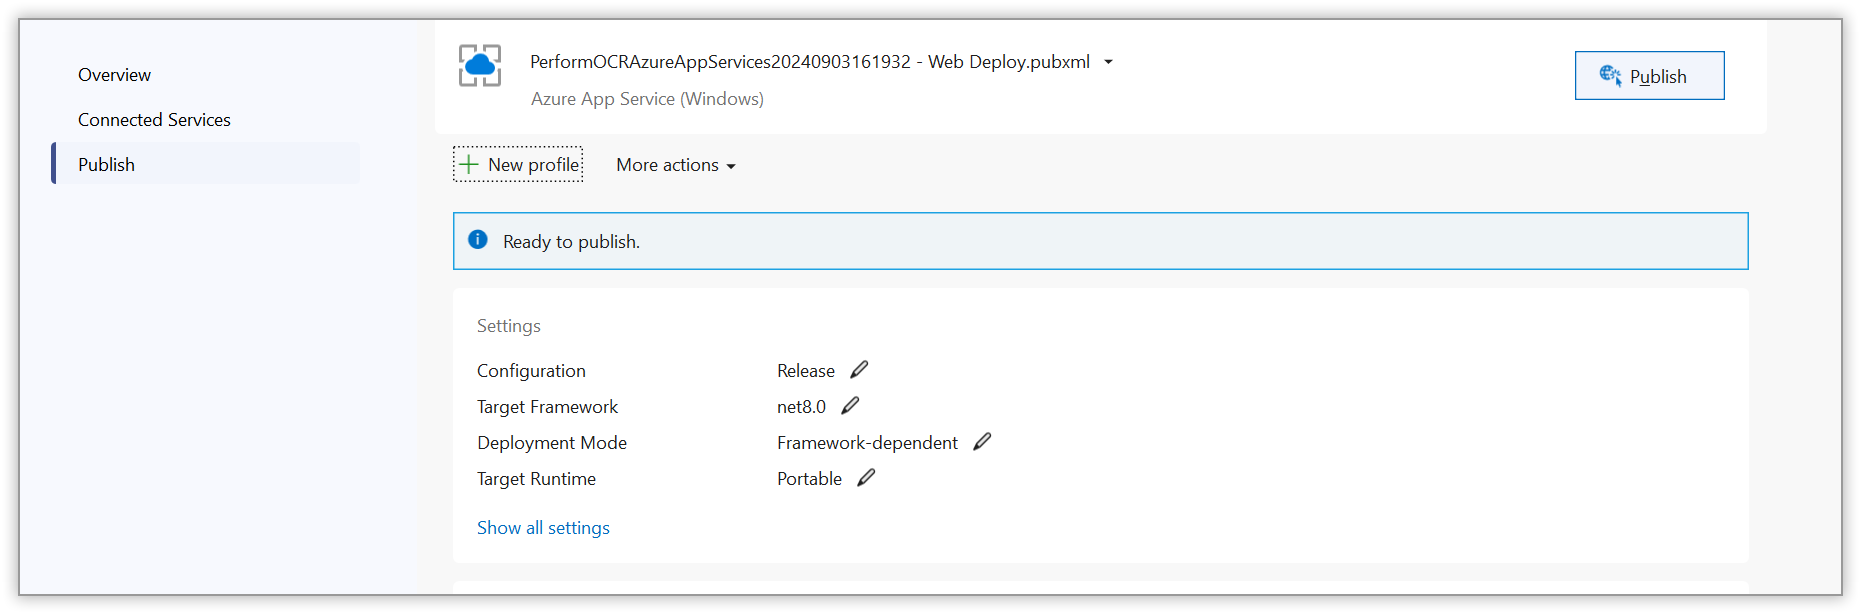
Step 8: Click the Publish button:
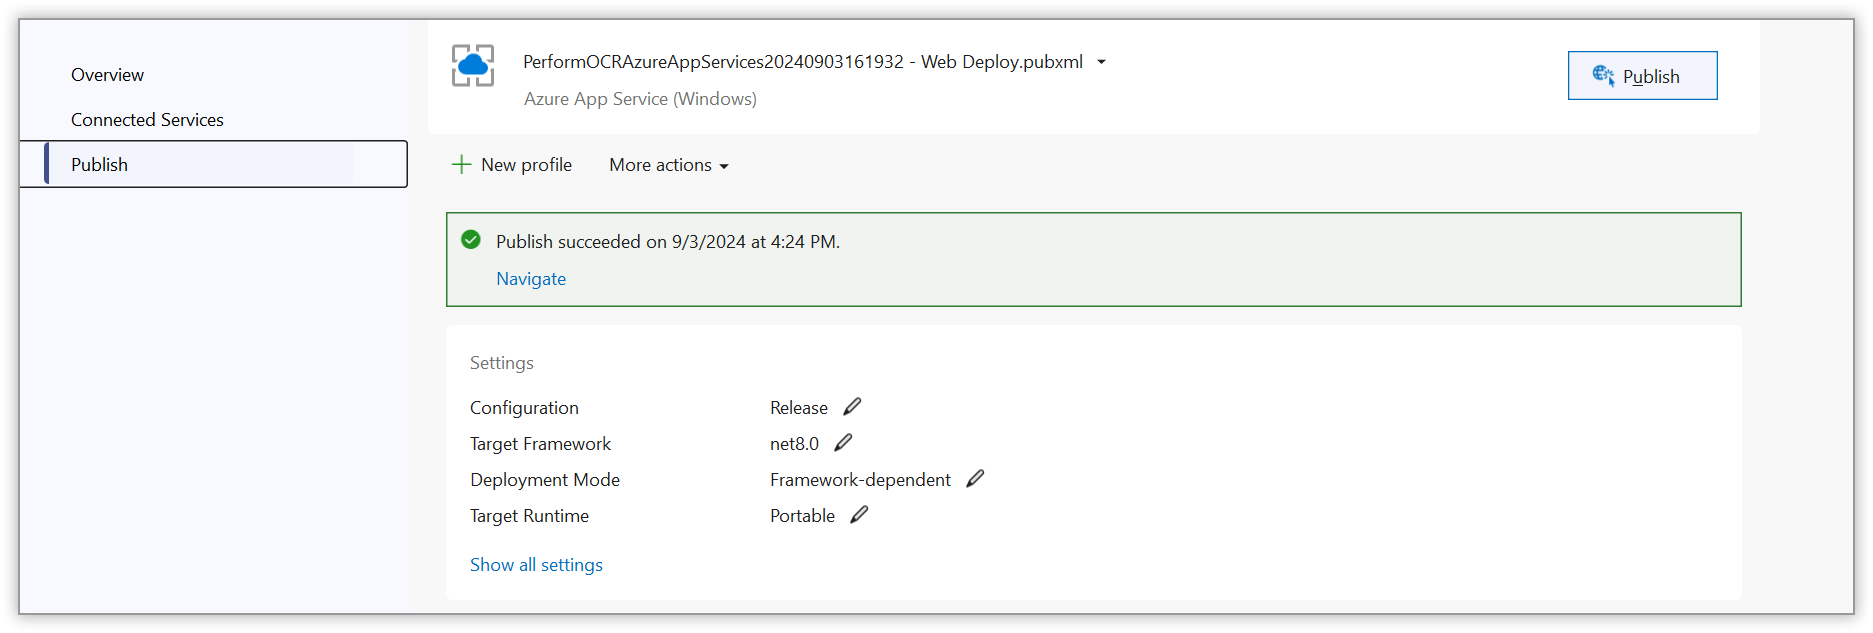
Step 9: The publish operation has been completed successfully:
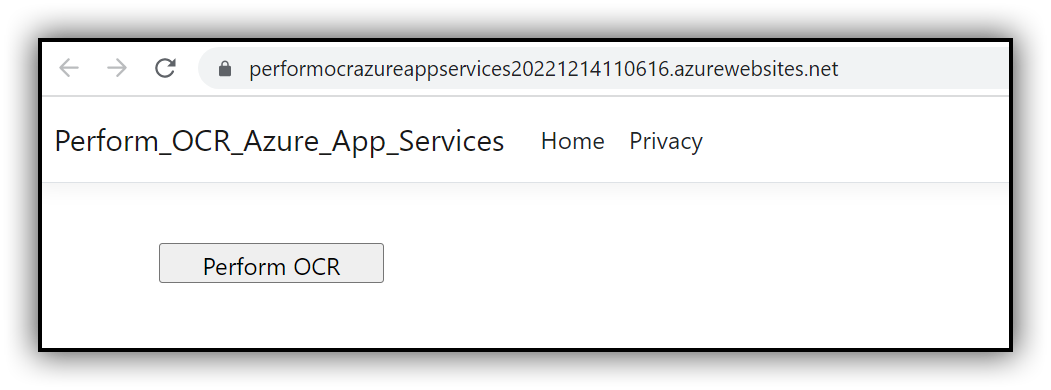
The published webpage will open in the browser. Click the Perform OCR button to perform OCR on a PDF document:
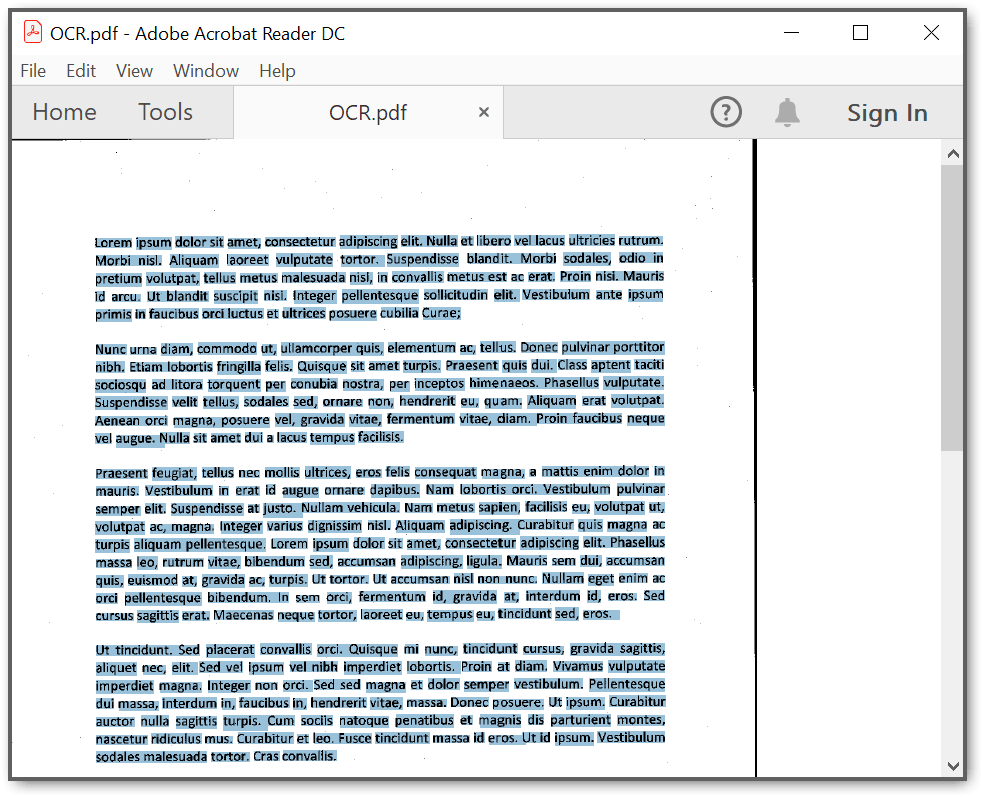
A complete working sample for performing OCR on a PDF document in Azure App Service on Windows can be downloaded from GitHub.
Azure Functions
Steps to perform OCR on an entire PDF document in Azure Functions
Step 1: Create the Azure Function project:
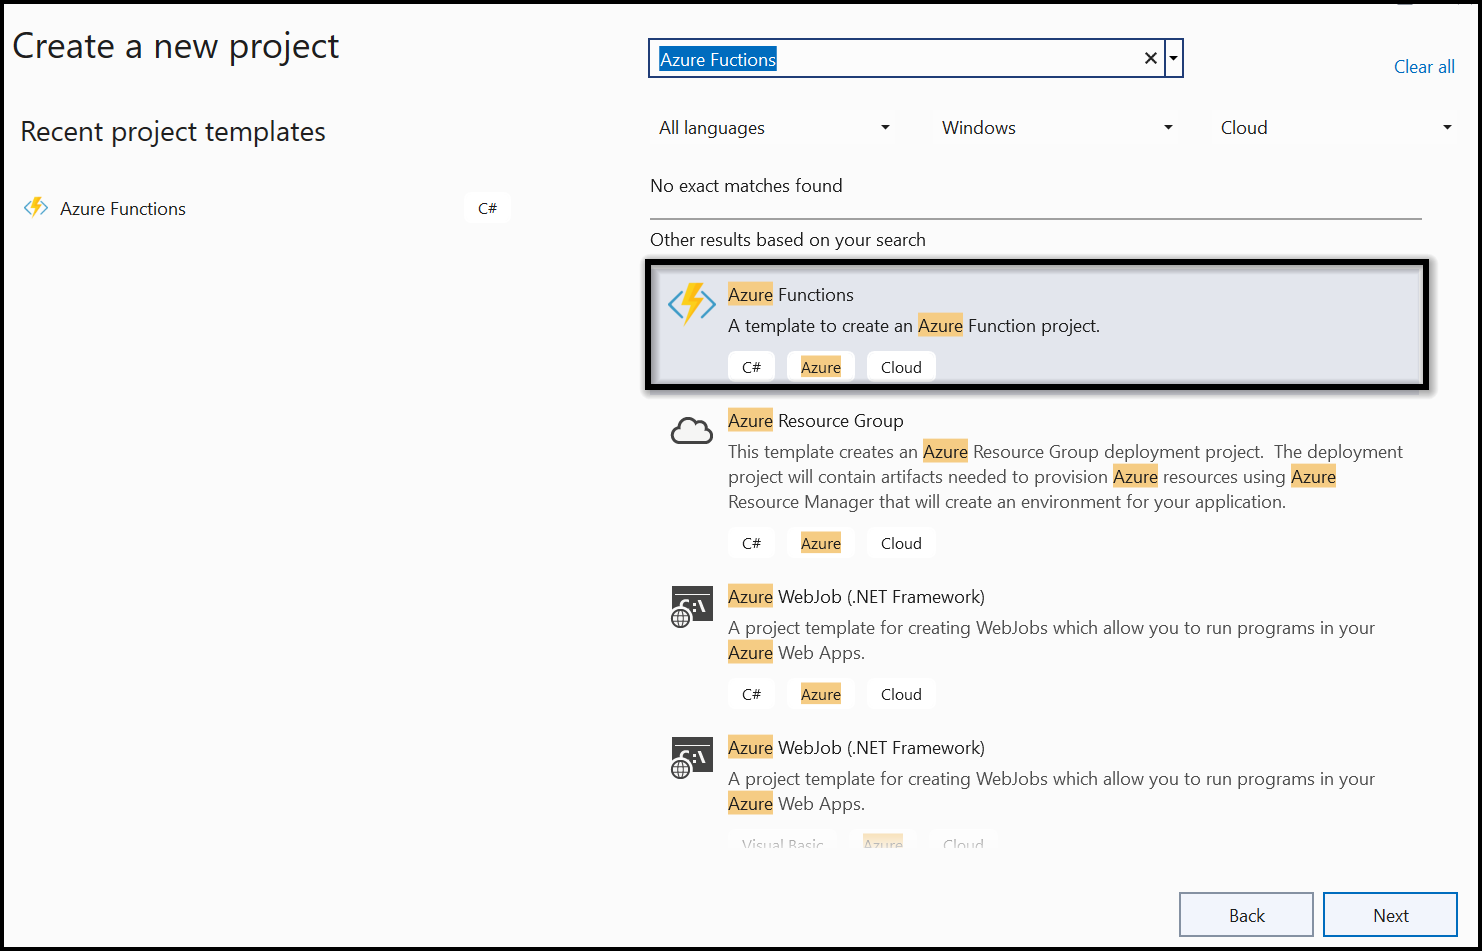
Step 2: Select Azure Functions as the framework and configure HTTP trigger:
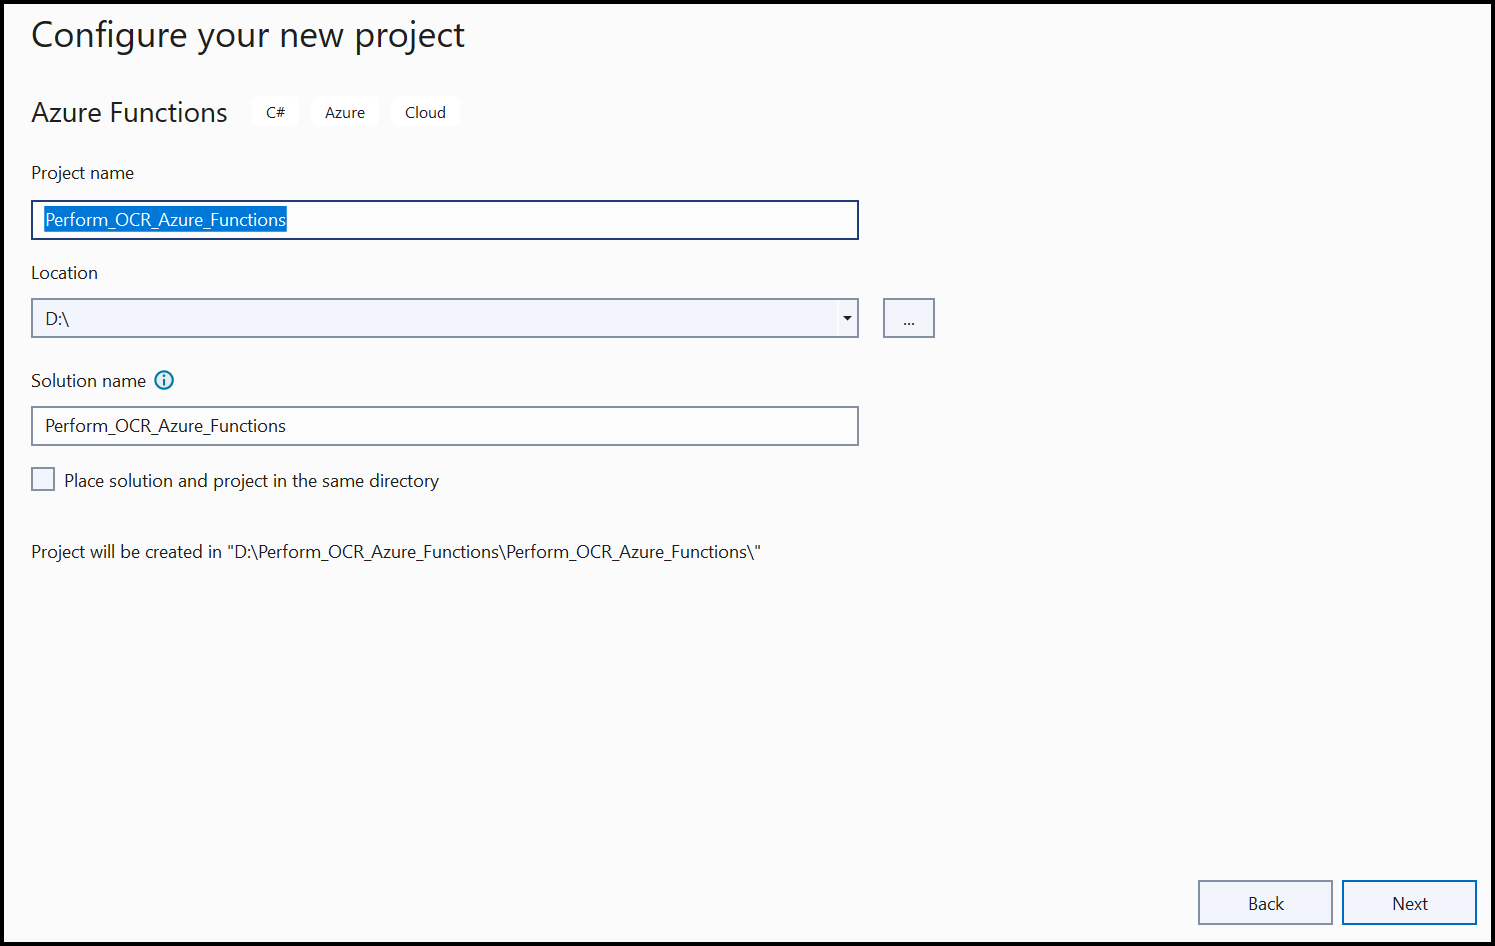
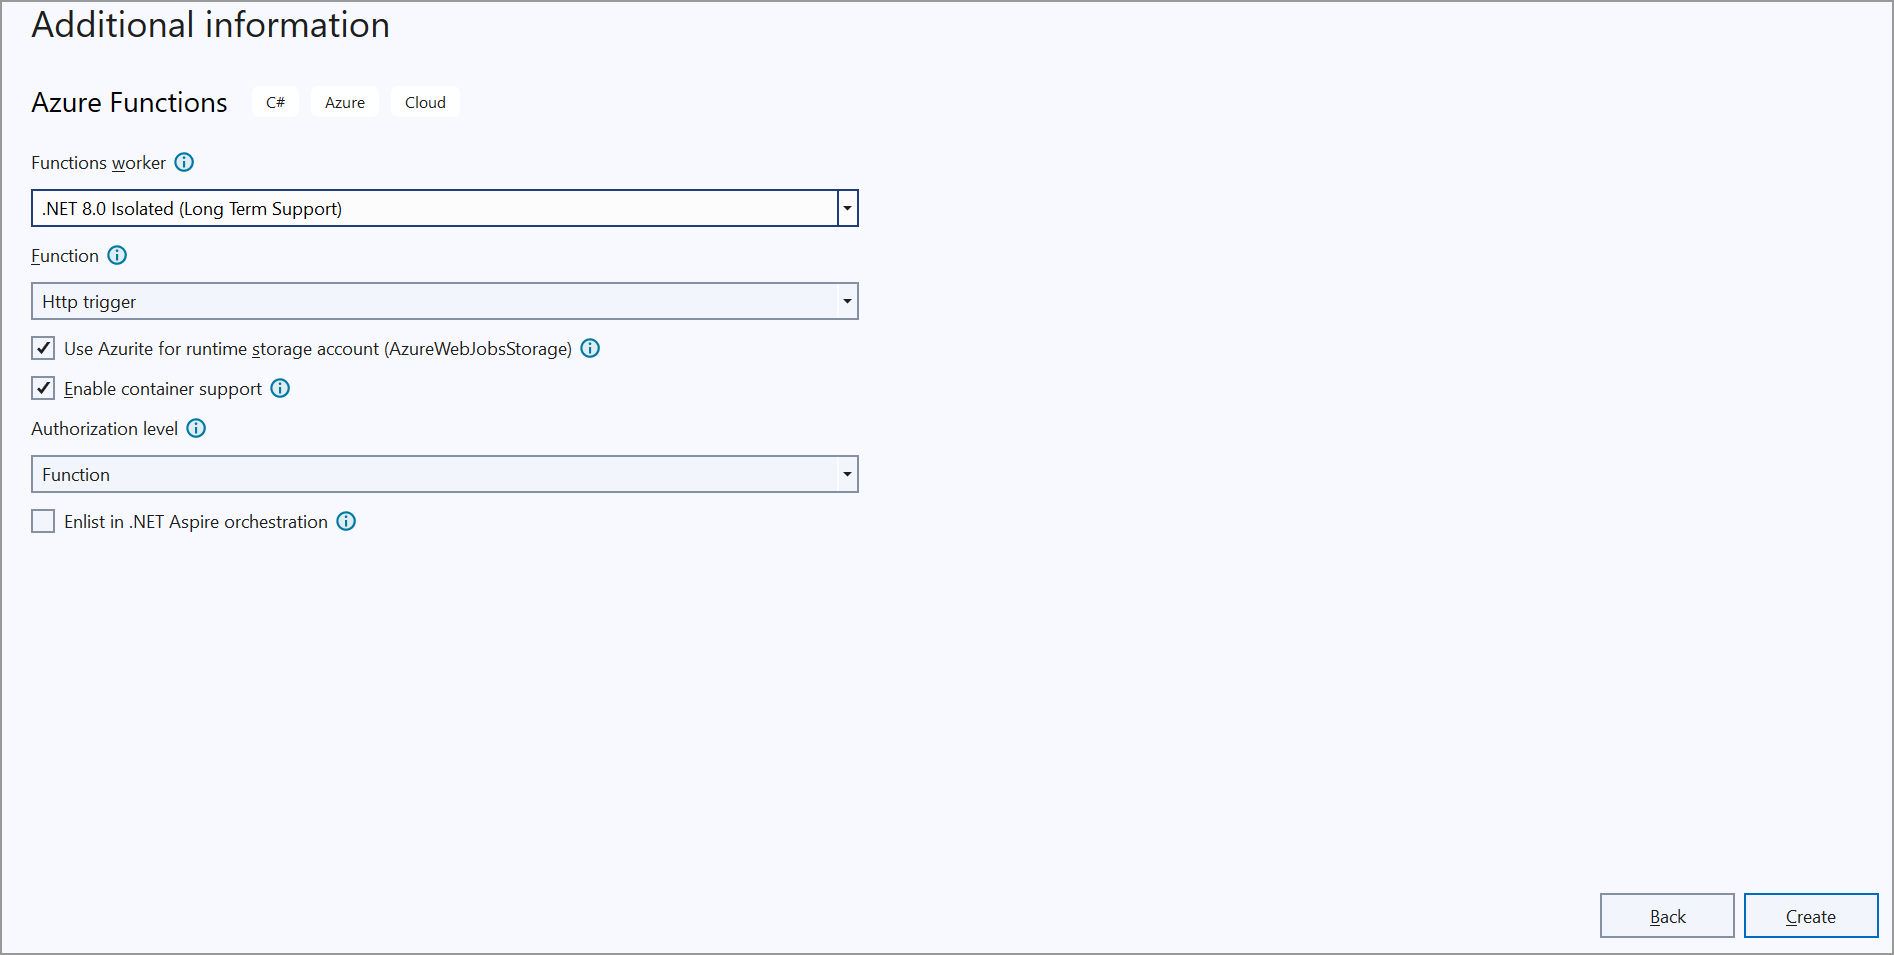
Step 3: Install the Syncfusion.PDF.OCR.Net.Core NuGet package into your Azure Functions project from nuget.org:
Step 4: Copy the tessdata folder from bin > Debug > net6.0 > runtimes and paste it into the folder containing your project file:
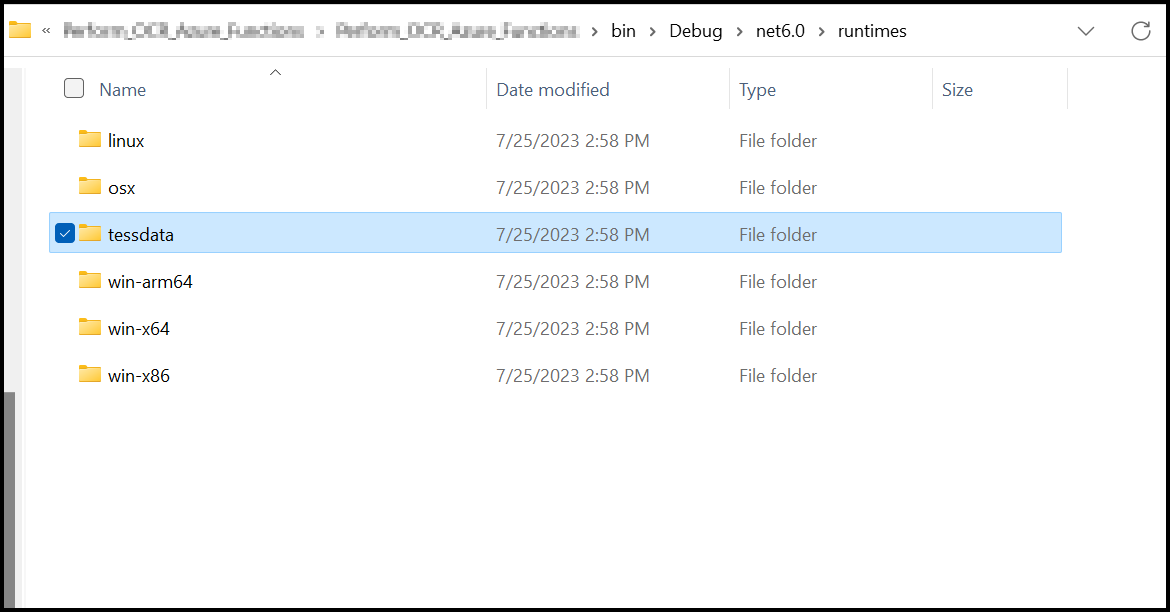
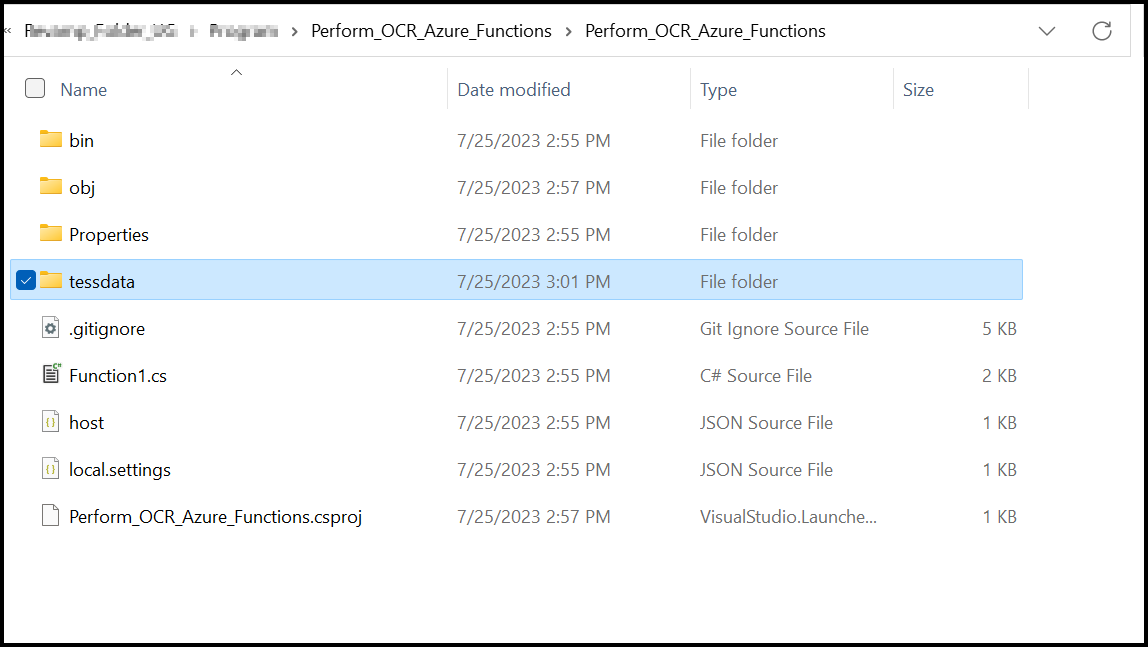
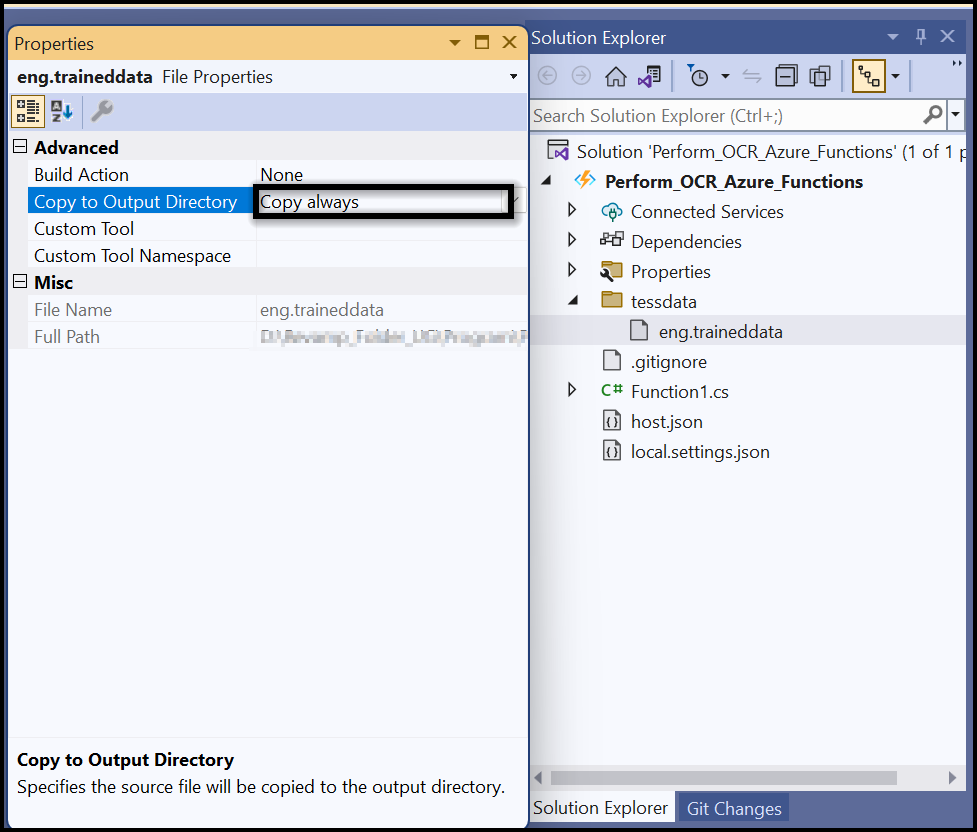
Step 5: Set the tessdata folder to Copy Always in the output directory:
Step 6: Include the following namespaces in Function1.cs to perform OCR on a PDF document:
using System;
using System.IO;
using System.Threading.Tasks;
using Syncfusion.OCRProcessor;
using Syncfusion.Pdf.Graphics;
using Syncfusion.Pdf;
using System.Net.Http;
using Syncfusion.Pdf.Parsing;
using System.Net.Http.Headers;
using System.Net;
using Microsoft.Azure.WebJobs.Host;
using Microsoft.Azure.WebJobs;
using Microsoft.Azure.WebJobs.Extensions.Http;
Step 7: Add the following code sample in the Function1 class to perform OCR on a PDF document using the PerformOCR method of the OCRProcessor class:
[FunctionName("Function1")]
public static async Task<HttpResponseMessage> Run([HttpTrigger(AuthorizationLevel.Function, "get", "post", Route = null)] HttpRequestMessage req, TraceWriter log, ExecutionContext executionContext)
{
    MemoryStream ms = new MemoryStream();
    try
    {
        // Initialize the OCR processor
        OCRProcessor processor = new OCRProcessor();
        FileStream stream = new FileStream(Path.Combine(executionContext.FunctionAppDirectory, "Data", "Input.pdf"), FileMode.Open);
        // Load a PDF document
        PdfLoadedDocument lDoc = new PdfLoadedDocument(stream);
        // Set OCR language
        processor.Settings.Language = Languages.English;
        // Set Tesseract version (5.0 is bundled with v21.1.x+)
        processor.Settings.TesseractVersion = TesseractVersion.Version5_0;
        // Perform OCR on the document with tessdata path
        string ocr = processor.PerformOCR(lDoc, Path.Combine(executionContext.FunctionAppDirectory, "tessdata"));
        // Save the processed PDF document
        lDoc.Save(ms);
        ms.Position = 0;
    }
    catch (Exception ex)
    {
        // Create an error document with exception details
        PdfDocument document = new PdfDocument();
        PdfPage page = document.Pages.Add();
        // Create PDF graphics for the page
        PdfGraphics graphics = page.Graphics;
        // Set the standard font
        PdfFont font = new PdfStandardFont(PdfFontFamily.Helvetica, 6);
        // Draw the error message
        graphics.DrawString(ex.ToString(), font, PdfBrushes.Black, new Syncfusion.Drawing.PointF(0, 0));
        ms = new MemoryStream();
        // Save the error document
        document.Save(ms);
    }
    HttpResponseMessage response = new HttpResponseMessage(HttpStatusCode.OK);
    response.Content = new ByteArrayContent(ms.ToArray());
    response.Content.Headers.ContentDisposition = new ContentDispositionHeaderValue("attachment")
    {
        FileName = "Output.pdf"
    };
    response.Content.Headers.ContentType = new System.Net.Http.Headers.MediaTypeHeaderValue("application/pdf");
    return response;
}
Step 8: Test the OCR creation on your local machine.
Steps to publish to Azure Functions
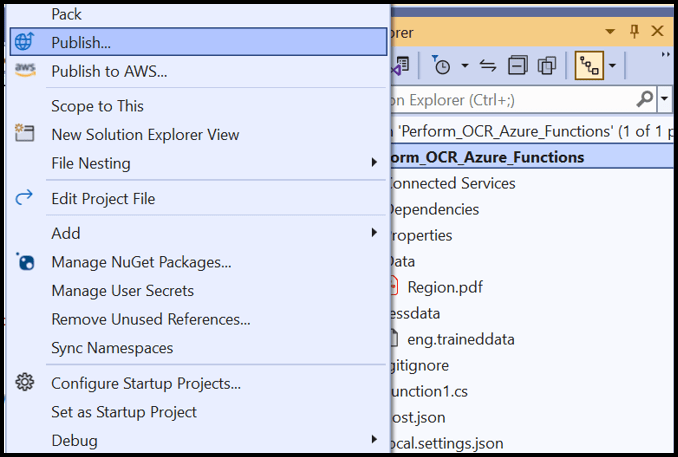
Step 1: Right-click the project and click Publish. Create a new profile in the Publish window to create the Azure Function App with a consumption plan:
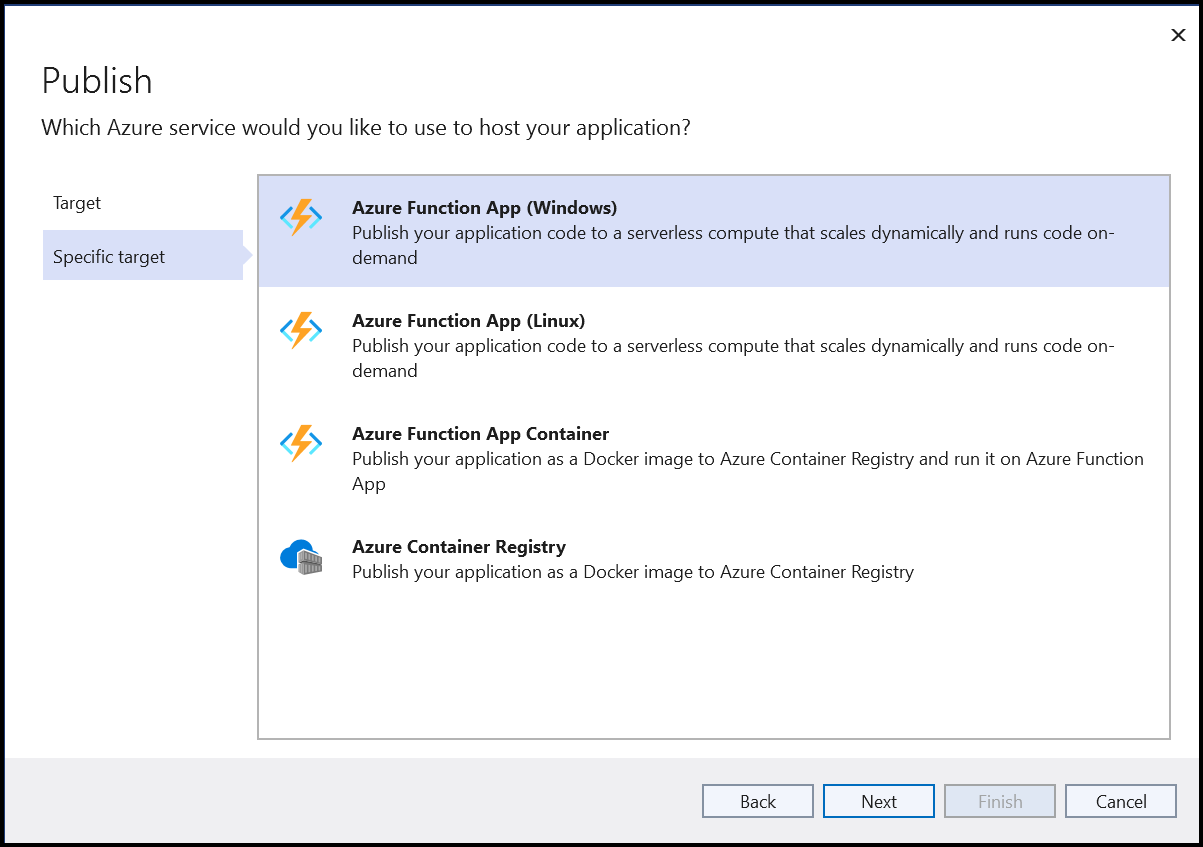
Step 2: To create a new Function App, click Create new:
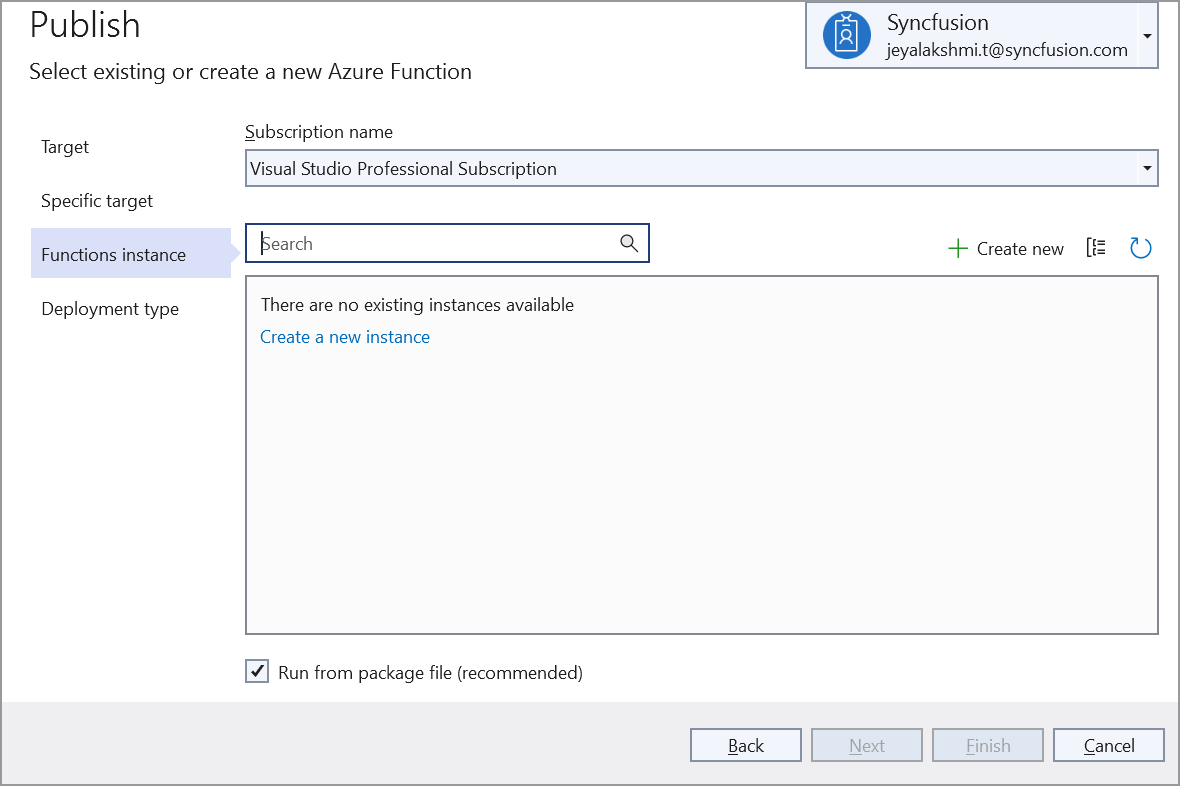
Step 3: Click the Create button to proceed with Function App creation:
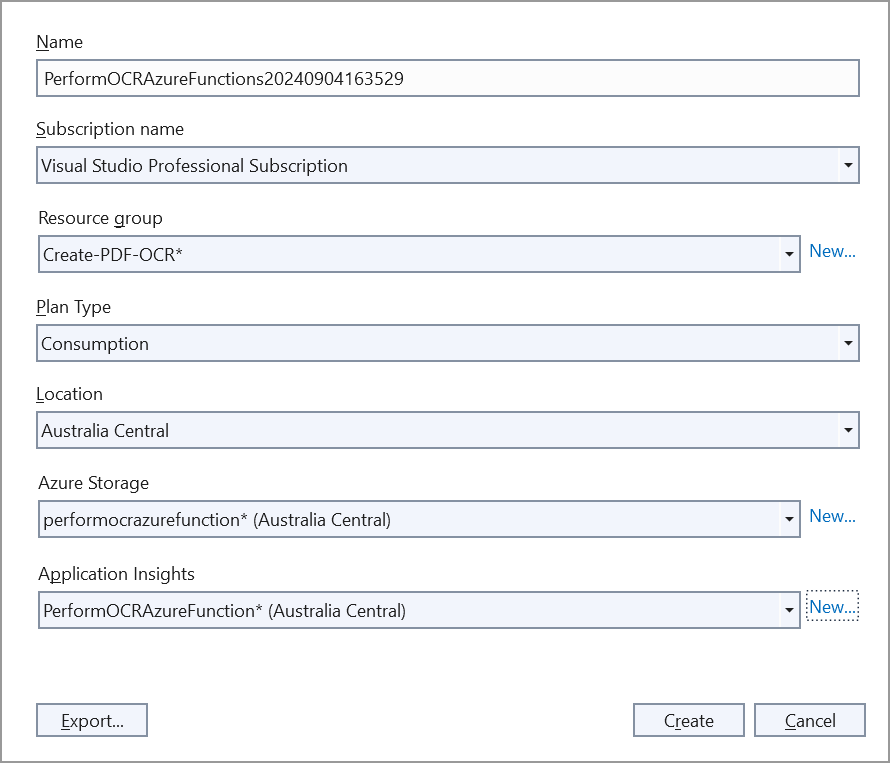
Step 4: Click the Finish button to finalize the Function App creation:
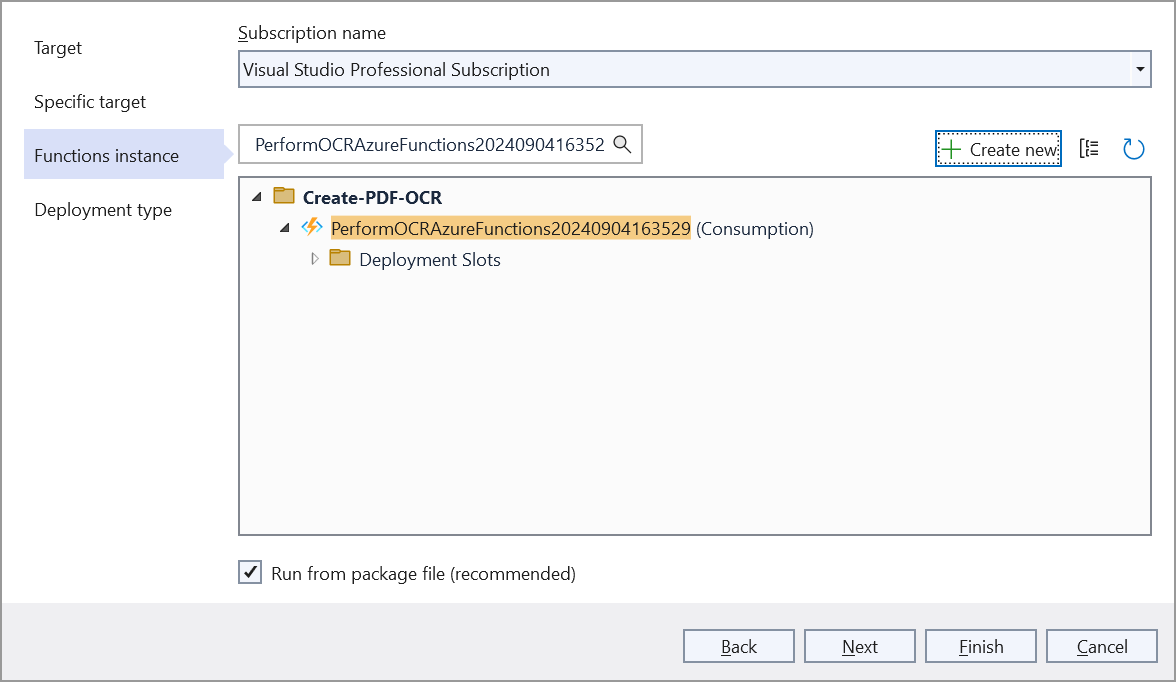
Step 5: Select the deployment type:
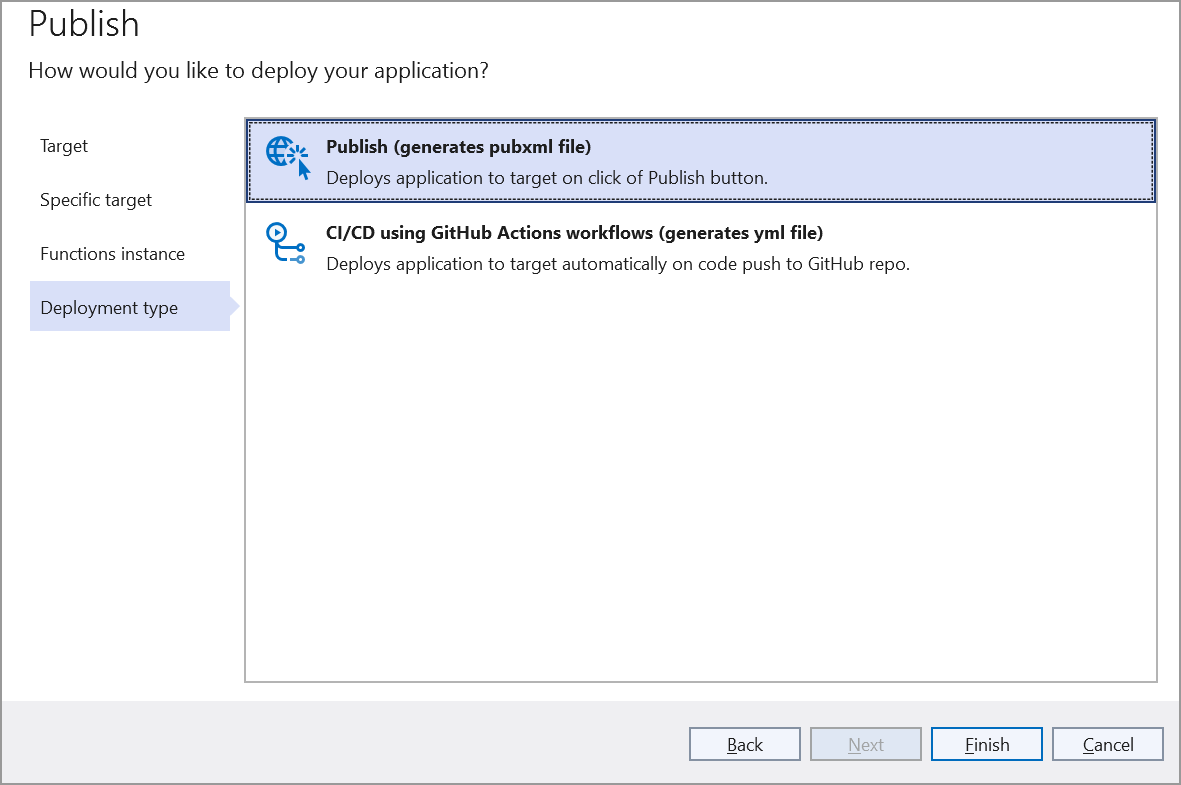
Step 6: Click the Close button:
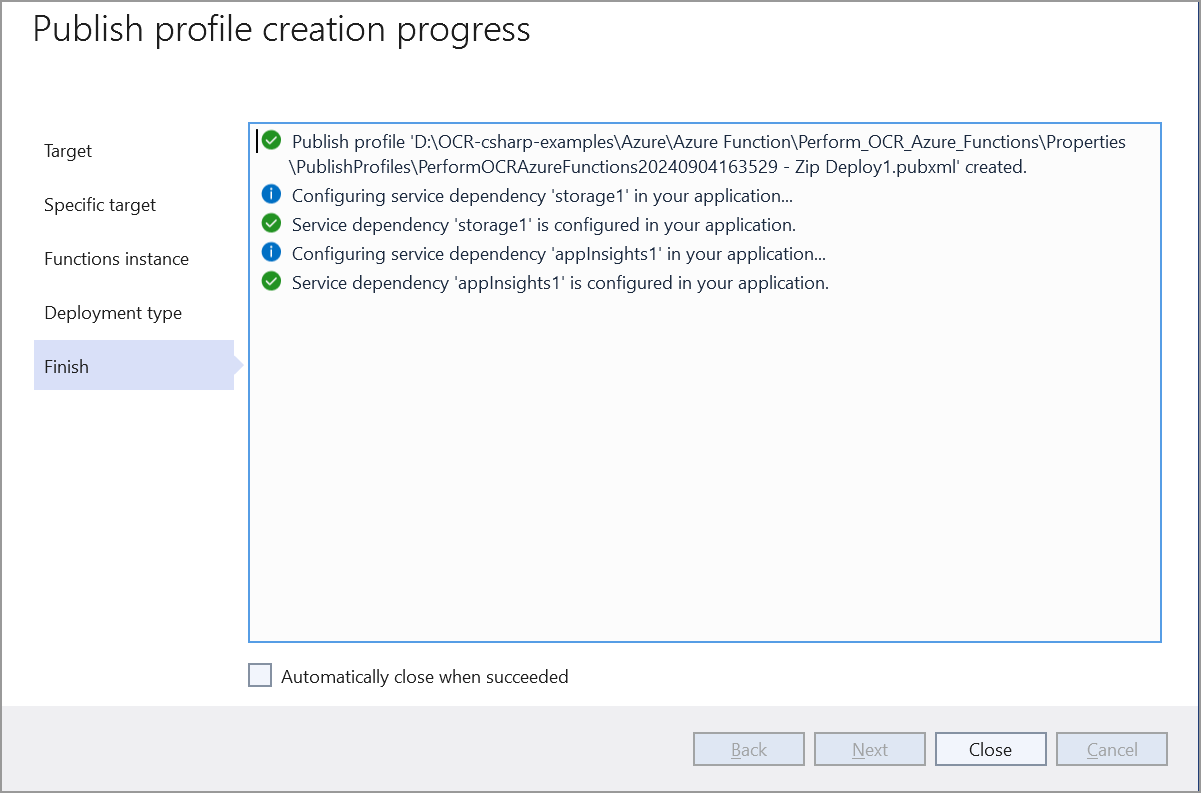
Step 7: Click the Publish button:
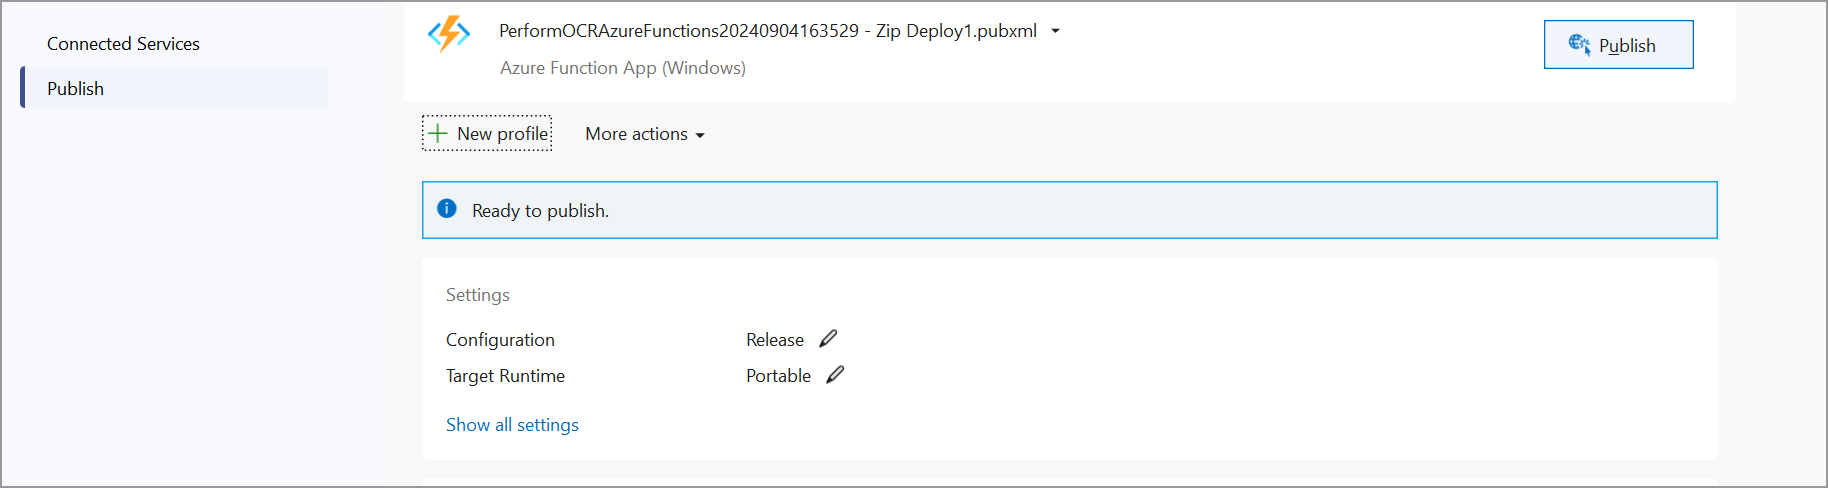
Step 8: The publish operation has been completed successfully:
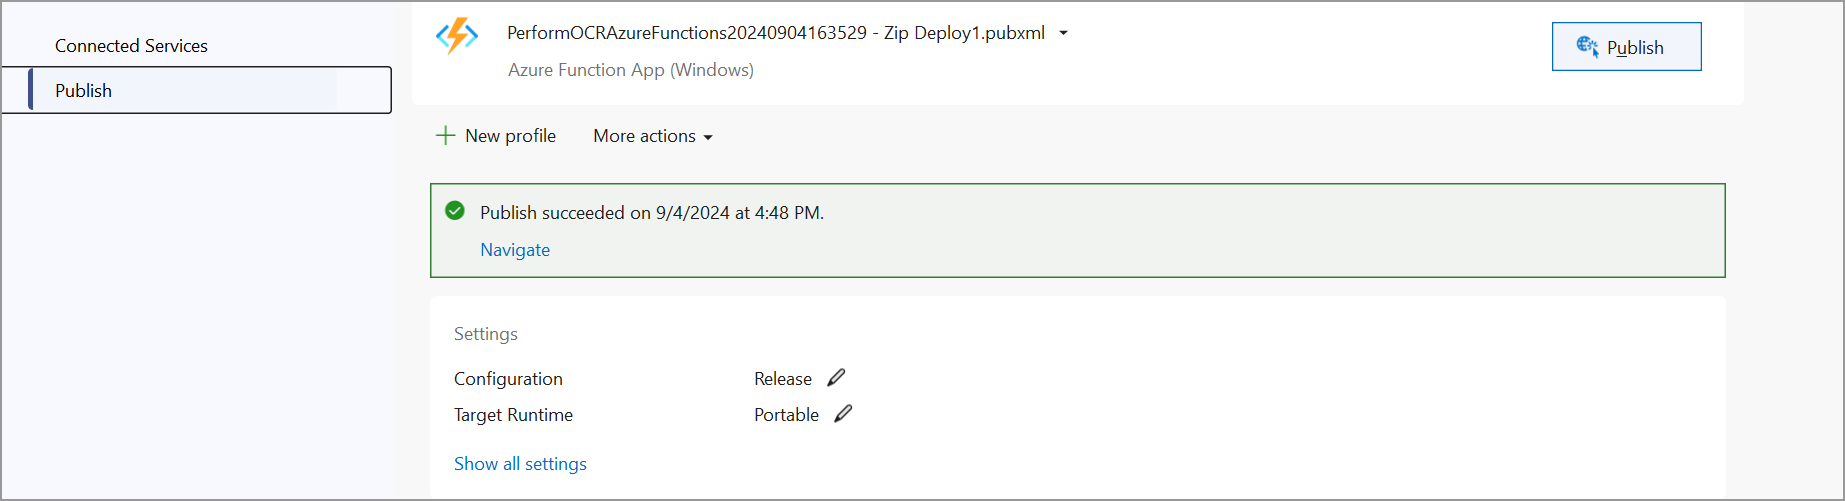
Step 9: Go to the Azure portal and select Function Apps. After the service is running, click Get function URL > Copy. Include the URL as a query string and paste it into a new browser tab. You will obtain a PDF document as follows:
A complete working sample can be downloaded from GitHub.
Click here to explore the rich set of Syncfusion® PDF library features.