Getting Started with Amazon Linux EC2 OCR Processor
14 Aug 20266 minutes to read
The .NET OCR library is used to extract text from scanned PDFs and images in Linux applications with the help of Google’s Tesseract Optical Character Recognition engine.
This guide provides a detailed, step-by-step process for installing Tesseract OCR and its essential dependencies directly on an Amazon Linux 2023 (AL2023) EC2 instance. This approach allows you to deploy .NET applications that utilize OCR functionalities, such as those relying on Syncfusion PDF Processing with Tesseract, without the need for Docker containers.
Prerequisites
Version Compatibility
- Syncfusion.PDF.OCR.Net.Core supports .NET 8.0 and later versions.
Supported Inputs
The OCR processor supports the following input formats:
- Single-page and multi-page PDF documents
- Scanned images in common formats (JPEG, PNG, TIFF)
- Recommended DPI: 200 DPI or higher for optimal OCR
Required Software
-
- .NET 8 SDK or later
- Amazon Linux Version: An active Amazon Linux 2023 (AL2023) EC2 instance
- Access: SSH access to your EC2 instance
Register the License Key
Starting with v16.2.0.x, if you reference Syncfusion® assemblies from trial setup or from the NuGet feed, you must add the Syncfusion.Licensing assembly reference and register a license key in your application. For more information, see the licensing documentation.
Include the following code in the Program.cs file to register the license key:
using Syncfusion.Licensing;

protected void Application_Start()
{
    // Register the Syncfusion license
    SyncfusionLicenseProvider.RegisterLicense("YOUR LICENSE KEY");
}
- Beginning from version 21.1.x, the TesseractBinaries and Tesseract language data folders are now included by default; you no longer have to set these paths explicitly.
- The current NuGet package includes Tesseract 5.0, which provides support for 100+ languages.
Installation steps for .NET 8 and Tesseract OCR on Amazon Linux 2023 EC2
Execute the following commands sequentially in your EC2 instance’s terminal. It is recommended to run these commands from the /home/ec2-user directory unless specified otherwise.
Step 1: Update System Packages — It’s crucial to start by ensuring all existing packages on your EC2 instance are up to date:
sudo yum update -yStep 2: Add Microsoft Package Repository — To install the .NET SDK, you need to add the Microsoft package repository for Fedora 39, which AL2023 is based on:
sudo curl -o /etc/yum.repos.d/packages-microsoft-com-prod.repo https://packages.microsoft.com/config/fedora/39/prod.repoStep 3: Install .NET SDK — Install the .NET 8.0 SDK using yum. This is essential for building and running your .NET application:
sudo yum install -y dotnet-sdk-8.0Step 4: Verify .NET SDK Installation — Confirm that the .NET SDK has been installed correctly by checking its version:
sudo dotnet --versionYou should see output similar to 8.0.x (where x is the patch version).
Step 5: Install libgdiplus Package — libgdiplus is a Mono implementation of the GDI+ API, often required by .NET applications for image processing functionalities. Run these commands completely in a single block from the /home/ec2-user directory:
sudo yum groupinstall "Development Tools" -y
sudo yum install autoconf automake libtool gettext libjpeg-turbo-devel libpng-devel giflib-devel freetype-devel -y

git clone https://github.com/mono/libgdiplus.git
cd libgdiplus
./autogen.sh
make
sudo make install
Step 6: Install leptonica Package — Leptonica is a software library that forms a core dependency for Tesseract OCR, providing image processing and analysis tools. Run these commands completely in a single block from the /home/ec2-user directory:
sudo yum groupinstall "Development Tools" -y
sudo yum install libjpeg-devel libpng-devel libtiff-devel zlib-devel -y
wget http://www.leptonica.org/source/leptonica-1.82.0.tar.gz
tar -xzf leptonica-1.82.0.tar.gz
cd leptonica-1.82.0
./configure
make
sudo make install
sudo ldconfig
Step 7: Install libpng Package — libpng is the official PNG reference library, critical for handling PNG image formats often used in OCR processes. Although libpng-devel was installed, building from source ensures the correct version/setup:
sudo yum groupinstall "Development Tools" -y
sudo yum install gcc make wget tar -y

cd /tmp # Temporarily move to /tmp for build
wget https://download.sourceforge.net/libpng/libpng-1.6.40.tar.gz
tar -xzf libpng-1.6.40.tar.gz
cd libpng-1.6.40
./configure
make
sudo make install
Step 8: Create Symbolic Link for libdl — The .NET runtime often expects libdl.so to be directly accessible from its shared library path. You need to create a symbolic link from its actual location to the .NET runtime directory:
First, find the path of your installed .NET runtime version:
dotnet --list-runtimesThe output will be similar to this (note the version number might differ slightly):
Microsoft.AspNetCore.App 8.0.x [/usr/lib64/dotnet/shared/Microsoft.AspNetCore.App]
Microsoft.NETCore.App 8.0.x [/usr/lib64/dotnet/shared/Microsoft.NETCore.App]
Now, create the symbolic link. Replace 8.0.17 with the exact version number from your dotnet --list- output for Microsoft.NETCore.App:
sudo ln -s /usr/lib64/libdl.so.2 /usr/lib64/dotnet/shared/Microsoft.NETCore.App/8.0.17/libdl.soStep 9: Create Symbolic Link for libpng16 — Create a symbolic link for the libpng16 package to ensure it’s accessible in common library paths:
sudo ln -s /usr/local/lib/libpng16.so.16 /lib64/libpng16.so.16Step 10: Create Symbolic Link for liblept — Similarly, create a symbolic link for the liblept package (Leptonica library):
sudo ln -s /usr/local/lib/liblept.so.5 /lib64/liblept.so.5Step 11: Implement the Project Code — To set up your project’s OCR functionality, consult the comprehensive guide on Perform OCR in Linux.
Step 12: Set Permissions for Tesseract Binaries — Navigate to your application’s Tesseract binaries directory and set read, write, and execute permissions. This is crucial for the OCR process to function correctly. Note: You need to change bin/Debug/net8.0/runtimes/linux/native to the actual path where your Syncfusion Tesseract binaries (e.g., libSyncfusionTesseract.so, liblept1753.so) are located within your published application:
sudo chmod 777 libSyncfusionTesseract.so
sudo chmod 777 liblept1753.so
Step 13: Build and Run Your .NET Application — Finally, build and publish your .NET application, and then run it:
sudo dotnet build
sudo dotnet publish -c Release -o ./publish
cd publish
sudo dotnet PdfProcessingApi.dll --urls "http://0.0.0.0:5000"
Remember to replace PdfProcessingApi.dll with the actual name of your application’s entry-point DLL.
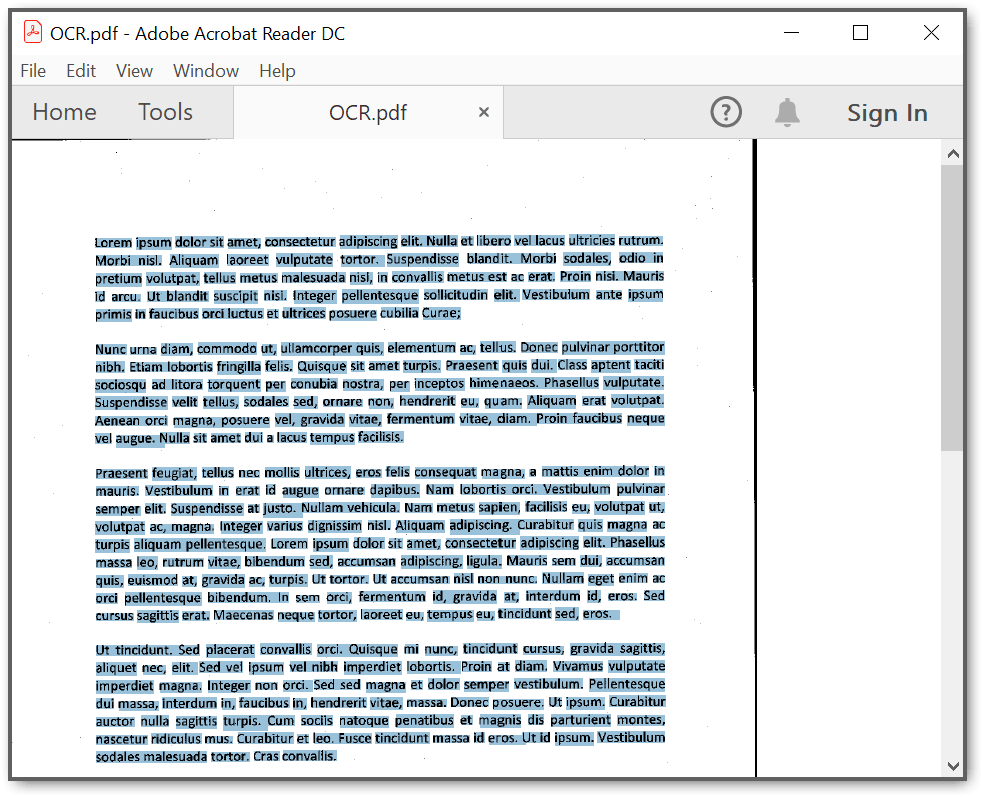
By executing the program, you will obtain a PDF document with extracted text as follows. The output will be saved in parallel to the Program.cs file:
A complete working sample can be downloaded from GitHub.