Kerberos Authentication for Data Integration Platform
- Kerberos is a network authentication protocol. It is designed to provide strong authentication for client/server applications by using secret-key cryptography. A free implementation of this protocol is available from the Massachusetts Institute of Technology. Kerberos is available in many commercial products as well.
- Reference Link: https://msdn.microsoft.com/en-us/library/bb742516.aspx
- Follow below steps to configuring Kerberos and SSL for Data Integration Platform.
Step 1: Windows Server 2012 Installation
- Install Windows Server 2012 OS to setup the Active Directory and to manage user accounts.
- Configure Domain for Active Directory setup.
- To setup the domain in the Windows Server refer Setting Up Domain Controller Functionality.
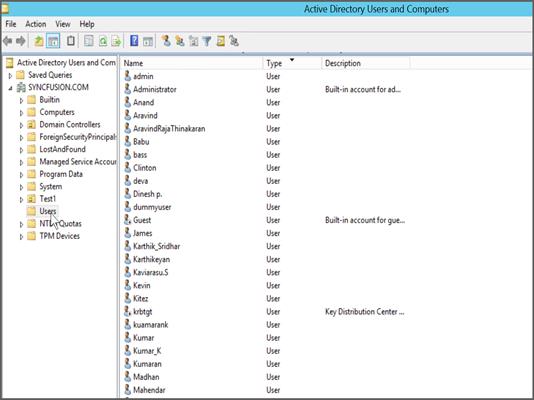
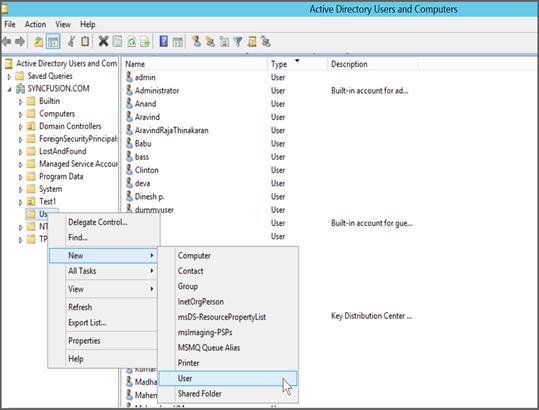
Step 2: User Management
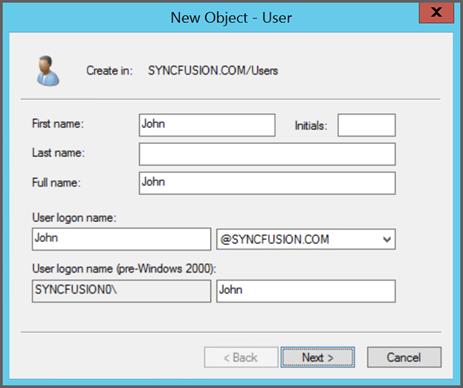
- To create a user in AD, go to Control panel -> Administrative tools -> Active Directory Users and Computers
- Right click
Users -> New -> Userthen enter user name in logon and first name then click next.
- In the next dialog box, enter the password and make sure you have selected
Password never expirescheck box as below.
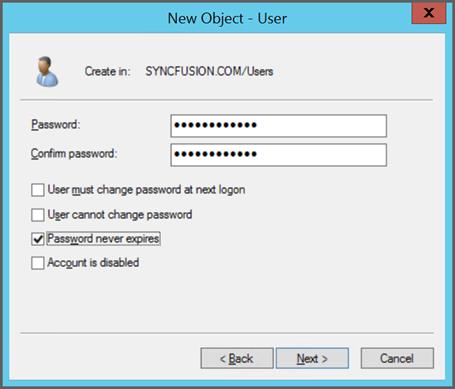
- Finally click
Next -> Finish. New user account will be created successfully.
Step 3: Kerberos configuration file (krb5.ini)
- In Kerberos, krb5.ini is a configuration file where we can define the REALM and KDC for Kerberos communication with AD internally.
- Create krb5.ini file like below and save it in “C:\Windows\krb5.ini”.
Syntax:
[libdefaults]
default_realm = DOMAIN

[realms]
DOMAIN = {
kdc = ad_hostname
admin_server = ad_hostname
default_domain = ad_hostname
}

[dns_domain_realm]
.ad_hostname = DOMAIN
ad_hostname = DOMAIN
- Replace your Windows Server domain name for “DOMAIN” and it should be in upper case.
- Replace your Windows Server hostname for “ad_hostname” and it should be in lower case.
Example:
[libdefaults]
default_realm = SYNCFUSION.COM

[realms]
SYNCFUSION.COM = {
kdc = syncdeskn2527.syncfusion.com
admin_server = syncdeskn2527.syncfusion.com
default_domain = syncdeskn2527.syncfusion.com
}

[dns_domain_realm]
.syncdeskn2527.syncfusion.com = SYNCFUSION.COM
syncdeskn2527.syncfusion.com = SYNCFUSION.COM
Step 4: Key tab file generation
Service principal is used by DIP to communicate with Kerberos Key Distribution Center (KDC). Keytab file contains service principal and encrypted keys used to authenticate with Kerberos. You need to create keytab file for user in AD machine. Use the below command to generate keytab file. This command will convert the user into service principal and generates a keytab file with encrypted keys.
Syntax:
ktpass -princ <user/host@domain> -mapuser <user@domain> -ptype KRB5_NT_PRINCIPAL -pass <password> -crypto ALL -out <file_name.keytab>
Example:
ktpass -princ John/syncdeskn2527.syncfusion.com@SYNCFUSION.COM -mapuser John@SYNCFUSION.COM -ptype KRB5_NT_PRINCIPAL -pass user_password -crypto ALL -out "C:\Syncfusion\dataintegration.keytab"
Once keytab file generated, move the keytab file to C:\Syncfusion\DataIntegration{version}\SDK\NIFI\conf directory of DIP installed machine.
Step 5: SSL Configuration
Keystore and Truststore are used to enable SSL. Follow below steps to generate keystore.jks and truststore.jks file to configure SSL for Data Integration Platform.
Java Environment
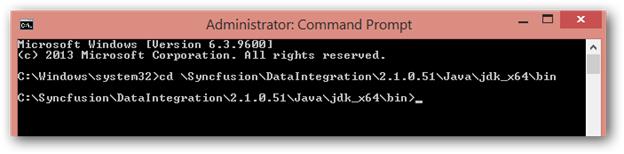
Make sure you have set JAVA_HOME in environmental variable and JAVA bin to environment path. Otherwise change directory to C:\Syncfusion\DataIntegration\{version}\java\bin.
Open cmd.exe with administrator privilege and change directory to java bin.
Step 1: Generate a key store
Execute keystore generate command in command prompt.
Syntax:
keytool -genkey -alias <alias_name> -keyalg RSA -keystore <keystore_file_path.jks> -dname "CN=<DIP_hostname>" -storepass <keystore_password> -keypass <keypass_password> -storetype JKS -keysize 1024 -validity 3650
|
Property Name |
Description |
| <alias name> | Alias name can be given any thing and should be specified by user. |
| <keystore_file_path.jks> | The path should be specified within "" to where keystore.jks file to be generated. |
| <DIP_hostname> | Host name of DIP installed machine. |
| <keystore_password> | Password should be specified by user. |
| <keypass_password> | Password should be specified by user. It may not be same as <keystore_password> |
Example:
keytool -genkey -alias dipsecurity -keyalg RSA -keystore "C:\Syncfusion\keystore.jks" -dname "CN=syncdeskn2527.syncfusion.com" -storepass findit@1234 -keypass findit@1234 -storetype JKS -keysize 1024 -validity 3650
Step 2: Export Certificate
Export the certificate from the keystore file.
Syntax:
keytool -export -alias <alias_name> -keystore <keystore_file_path.jks> -rfc -file <certificate_file_path.cer> -storepass <keystore_password>
|
Property Name |
Description |
| <alias name> | Alias name should be same as mentioned in previous step. |
| <keystore_file_path.jks> | Path of the keystore file must specified within "" to where keystore.jks file was generated in previous step. |
| <Certificate_file_path.cer> | Path of the certificate file must specified within "" to where certificate file to be generated. |
| <keystore_password> | Password should be specified by user. |
Example:
keytool -export -alias dipsecurity -keystore "C:\Syncfusion\keystore.jks" -rfc -file "C:\Syncfusion\certificate.cer" -storepass findit@1234
Step 3: Import certificate to truststore
Import certificate to truststore using below command.
Syntax:
keytool -import -alias <alias_name> -file <certificate.cert_path> -keystore <trustStore_path> -storepass <password>
|
Property Name |
Description |
| <alias name> | Alias name should be same as mentioned in previous step. |
| <certificate_file_path.cer> | Path of the certificate file must specified within "" to where certificate was generated in previous step. |
|
<trustStore_path> |
Path of the truststore file must specified within "" to where truststore file can be generated. |
| <keystore_password> | Password should be specified by user. |
Example:
keytool -import -alias dipsecurity -file "C:\Syncfusion\certificate.cer" -keystore "C:\Syncfusion\truststore.jks" -storepass findit@1234 –noprompt
Step 4: Move files to DIP conf directory
Once keystore.jks and truststore.jks file created, move the files to C:\Syncfusion\DataIntegration{version}\SDK\NIFI\conf directory of DIP installed location.
Step 6: Changes in nifi properties file
- Change
nifi.propertiesfile underC:\Syncfusion\DataIntegration\{version}\SDK\NIFI\conf - Set keystore.jks and truststore.jks file location and their password
- Set
nifi.security.user.login.identity.providerproperty tokerberos-provider
SSL Properties
nifi.security.keystore=./conf/keystore.jks
nifi.security.keystoreType=jks
nifi.security.keystorePasswd=findit@1234
nifi.security.keyPasswd=findit@1234
nifi.security.truststore=./conf/truststore.jks
nifi.security.truststoreType=jks
nifi.security.truststorePasswd=findit@1234
nifi.security.needClientAuth=
nifi.security.user.authorizer=file-provider
nifi.security.user.login.identity.provider=kerberos-provider
nifi.security.ocsp.responder.url=
nifi.security.ocsp.responder.certificate=
- Next you need to configure Kerberos properties. Set keytab location and its principal name.
Kerberos Properties
# kerberos #
nifi.kerberos.krb5.file=C:\Windows\krb5.ini
# kerberos service principal #
nifi.kerberos.service.principal=John/syncdeskn2527.syncfusion.com@SYNCFUSION.COM
nifi.kerberos.service.keytab.location=.conf\dataintegration.keytab
# kerberos spnego principal #
nifi.kerberos.spnego.principal=
nifi.kerberos.spnego.keytab.location=
nifi.kerberos.spnego.authentication.expiration=12 hours
- Enable https connection by specifying hostname of the machine where DIP installed and port number as 60017.
- Remove the hostname and port number from http connection if set already.
Web Properties
# web properties #
nifi.web.war.directory=./lib
nifi.web.http.host=
nifi.web.http.port=
nifi.web.http.network.interface.default=
nifi.web.https.host=syncdeskn2527.syncfusion.com
nifi.web.https.port=60017
nifi.web.https.network.interface.default=
nifi.web.jetty.working.directory=./work/jetty
nifi.web.jetty.threads=200
- Modify site to site properties as below
Site to Site Properties
# Site to Site properties
nifi.remote.input.host=syncdeskn2527.syncfusion.com
nifi.remote.input.secure=true
nifi.remote.input.socket.port=10447
nifi.remote.input.http.enabled=true
nifi.remote.input.http.transaction.ttl=30 sec
Step 7: Changes in authorizers.xml
- You need to set admin user account for Data Integration Platform. Edit authorizers.xml under C:\Syncfusion\DataIntegration{version}\SDK\NIFI\conf location.
- You can create a new user account in Active Directory for DIP administrator.
- Add Active Directory new user account
user@domainfor the propertyInitial Admin Identityinauthorizers.xmlfile.DataAdmin@SYCNFUSION.COMadded as admin account in the below example.
authorizers.xml
<authorizer>
<identifier>file-provider</identifier>
<class>org.apache.nifi.authorization.FileAuthorizer</class>
<property name="Authorizations File">./conf/authorizations.xml</property>
<property name="Users File">./conf/users.xml</property>
<property name="Initial Admin Identity">DataAdmin@SYCNFUSION.COM</property>
<property name="Legacy Authorized Users File"></property>
<!-- Provide the identity (typically a DN) of each node when clustered, see above description of Node Identity.
    <property name="Node Identity 1"></property>
    <property name="Node Identity 2"></property>
    -->
</authorizer>
Step 8: Changes in login-identity-provider.xml
- Set your AD domain name in login-identity-provider.xml file under C:\Syncfusion\DataIntegration{version}\SDK\NIFI\conf location.
-
SYNCFUSION.COMwas added as DOMAIN in below example.
login-identity-provider.xml
<!-- To enable the kerberos-provider remove 2 lines. This is 1 of 2. -->
<provider>
<identifier>kerberos-provider</identifier>
<class>org.apache.nifi.kerberos.KerberosProvider</class>
<property name="Default Realm">SYNCFUSION.COM</property>
<property name="Authentication Expiration">12 hours</property>
</provider>
<!-- To enable the kerberos-provider remove 2 lines. This is 2 of 2. -->
Step 9: Start the Data Integration service
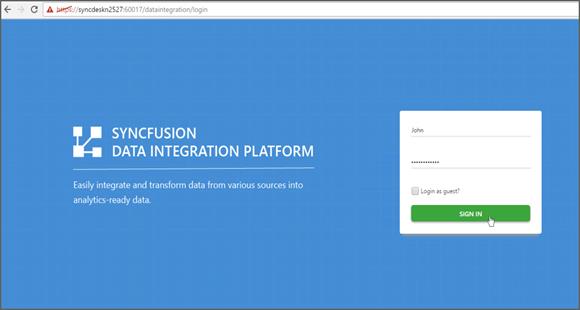
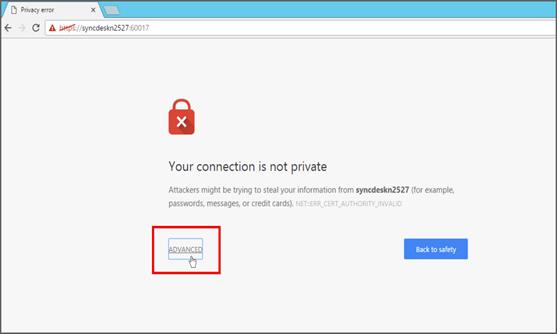
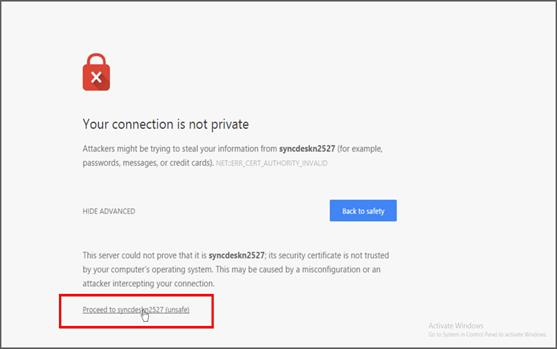
- Start the Data integration service and open the URL in browser https://dip-host:60017/dataintegration.
- Note: If using self-signed certificate for SSL configuration, you will be required to add exception in your browser or to proceed with caution option in accordance with your browser.
- Now it will show login page, enter your username and password for admin account at first time. Once logged in with admin account, you can add more users in DIP and add privileges for them.